Table of Contents

Related Manuals for Miele T 8860 WP


Summary of Contents for Miele T 8860 WP
-
Page 1: Operating Instructions
Operating instructions for heat pump tumble dryer T 8860 WP Edition 111 en - GB To avoid the risk of accidents or damage to the appliance it is essential to read these instructions before it is installed and used for the first time. -
Page 2: Caring For The Environment
Caring for the environment Disposal of the packing Energy saving tips material To avoid unnecessarily long drying times and high consumption of energy: The transport and protective packing has been selected from materials which – Make sure that your laundry is are environmentally friendly for disposal thoroughly spun before drying. -
Page 3: Table Of Contents
Contents Caring for the environment ......... . 2 Warning and Safety instructions . - Page 4 Contents Cleaning the surfaces of the fluff filters ....... . . 27 Cleaning them whilst dry .
- Page 5 Contents External condensed water outlet ........44 Arranging the drain hose .
-
Page 6: Warning And Safety Instructions
Any other usage is not supported by the manufacturer and could be dangerous. Miele cannot be held liable for damage resulting from incorrect or improper use or operation. - Page 7 Warning and Safety instructions The tumble dryer can only be used by people with reduced physical, sensory or mental capabilities, or lack of experience or knowledge, if they are are supervised whilst using it or have been shown how to use it in a safe way and understand the hazards involved.
- Page 8 (e.g. danger of overheating). If the electrical connection cable is faulty it must only be replaced by a Miele approved service technician to protect the user from danger. Unauthorised repairs could result in unforeseen dangers for the user, for which Miele cannot accept liability.
- Page 9 The tumble dryer must not be used in a non-stationary location (e.g. on a ship). Do not make any alterations to the tumble dryer, unless authorised to do so by Miele. Heat pump technology and refrigerant: The heat pump in this tumble dyer uses a refrigerant which is...
- Page 10 Warning and Safety instructions Correct use To prevent the risk of fire, the following textiles must not be dried in this appliance: – items which have not been washed. – items, such as workwear, which have not been thoroughly cleaned and which are still soiled with grease, oil or other deposits (such as cosmetics, lotions etc).
- Page 11 Warning and Safety instructions To prevent the risk of fire, the following must not be tumble dried: – items which have been cleaned using chemicals (e.g. professional dry-cleaning agents). – fabrics which contain a large proportion of rubber, foam rubber or rubber-like materials.
- Page 12 Warning and Safety instructions The tumble dryer must not be used: – without the fluff filters in place or if the fluff filters are damaged in any way. – without the fine filters in place of if the fine filters are damaged in any way.
- Page 13 Warning and Safety instructions Accessories Only use genuine Miele original spare parts and accessories with this tumble dryer. If non-Miele parts are used, guarantee, performance and product liability claims may be invalidated. Miele cannot be held liable for damage caused by...
-
Page 14: Operating The Tumble Dryer
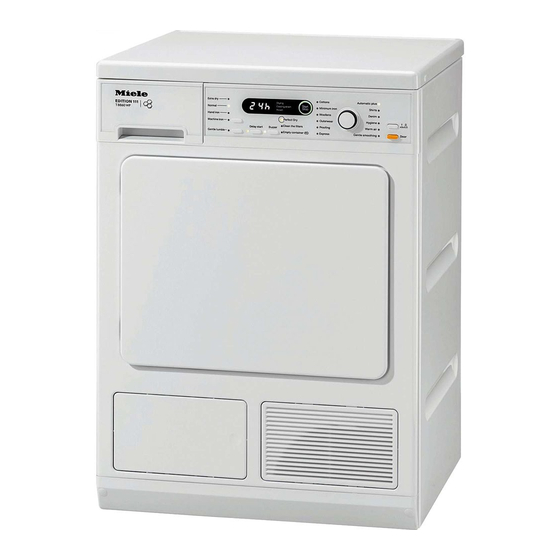
Operating the tumble dryer Control panel a Gentle tumble button g Check lights Delicate fabrics are dried using See "Problem solving guide" and reduced mechanical action. "After sales service" for a description of these. b Drying level button h Start/Stop button with indicator lights to show the drying level selected for sensor For starting or cancelling a... -
Page 15: Estimated Time Remaining
Operating the tumble dryer The display shows: Woollens, Proofing, Warm air, Gentle smoothing. – Programme duration – Programme stage Estimated time remaining Drying The estimated duration (time remaining) Cooling down will appear in the display. Finish The following factors all affect the –... -
Page 16: Notes On Laundry Care
Notes on laundry care Garment care label symbols – Pure linen should only be machine dried if specified as suitable by the Drying manufacturer on the garment care q/r Normal/low temperature label, as the surface of the fabric may otherwise become rough. Drying is carried out at a low temperature in every –... -
Page 17: How To Dry Correctly
How to dry correctly C Load the tumble dryer Brief instructions The headings numbered (A, B, C ...) ^ Press the Door button to open the show the operating sequence and can door. be used as a brief guide to using your ^ Load the laundry loosely into the dryer. - Page 18 How to dry correctly D Select a programme the drying level for the Hygiene programme cannot be changed. Note You can extend the range of the drying levels for some programmes (see "Programmable functions"). Gentle smoothing, Woollens, Proofing programmes – These programmes cannot be ^ Select the programme you want.
- Page 19 How to dry correctly F Start the programme will go out and the Start/Stop button will flash slowly. See also "Programmable The Start/Stop button will flash when a functions". programme is being selected. The ^ Press the Door button. flashing indicates that a programme can be started.
-
Page 20: Extra Options / Delay Start
Extra options / Delay start Extra options – If you keep the Delay start button pressed in, the time will continue to The relevant indicator light will come on increase up to 24^. when the option is selected. To begin delay start Gentle tumble ^ Press the Start/Stop button. -
Page 21: Programme Chart
Programme chart Extra options Gentle tumble This option can be selected with Cottons, Minimum iron, Shirts, Denim, Warm the following programmes: Buzzer This option can be selected with all programmes. Programmes Cottons Max. load 8 kg* Extra dry, Normal** Use for Single and multi-layered cotton fabric such as towelling, T-shirts, underwear, flannelette bed linen and baby clothes Notes... - Page 22 Programme chart Woollens Max. load 2 kg* Use for Woollen and woollen mix fabric Notes – This programme only fluffs up woollen garments. They are not dried completely. – Remove garments as soon as the programme has finished and leave to finish drying at room temperature. Outerwear Max.
- Page 23 Programme chart Hygiene Max. load 3.5 kg* Use for Cottons and linen fabric which is in direct contact with the skin, e.g. underwear, baby clothes, bed linen, towelling. Note The temperature is held constant for a longer period of time (longer temperature holding time) to deactivate micro-organisms, e.g.
-
Page 24: Changing The Programme Sequence
Changing the programme sequence Altering Delay start You cannot change to another programme once a programme has ^ See "Delay start". started (this prevents unintentional alterations). Adding or removing laundry You will need to cancel the current after a programme has started programme before you can select a ^ Press the Door button. -
Page 25: Cleaning And Care
Cleaning and care Emptying the condensed water container The condensed water will be collected in the condensed water container. Empty the condensed water container after every drying programme. If the maximum level of the condensed water container is reached – the programme will be cancelled. ^ Empty the container. -
Page 26: Make Sure You Clean All The Filters At The Correct Intervals
Cleaning and care Make sure you clean all the When to clean the surfaces of the fluff filters filters at the correct intervals Clean the surfaces of the fluff filters This tumble dryer has a multi-stage after each drying programme. filter system, consisting of the fluff filters and a fine filter. -
Page 27: Cleaning The Surfaces Of The Fluff Filters
Cleaning and care Cleaning the surfaces of the fluff filters When to clean Clean the surfaces of the fluff filters in the door and the door opening after each drying programme. Cleaning them whilst dry Note: You can also use a vacuum cleaner to remove the fluff. -
Page 28: Cleaning With Water
Cleaning and care Cleaning with water Replacing the filters If there is a great deal of compacted Do not replace the filters if they fluff on any of the filters, they can be are damp or wet. Damp or wet filters removed and cleaned under hot could cause operational faults. -
Page 29: Fine Filter
Cleaning and care Fine filter When to clean Only clean the fine filter when the Clean filter indicator light comes on. To switch off the Clean filter indicator light: ^ Remove, clean and replace the fine filter with the tumble dryer switched ^ Pull the filter out by the handle. -
Page 30: Cleaning The Cover For The Fine Filter
Cleaning and care Cleaning the cover for the fine filter Cleaning the heat exchanger Danger of injury. Do not touch the cooling fins. You could cut yourself. Prevent damage. Carefully pass the vacuum cleaner brush over the surface, without applying any pressure. Otherwise the cooling fins or the struts in front of them could become damaged. -
Page 31: Replacing
Cleaning and care Replacing The filter must be fitted correctly and the access flap closed to ensure that water cannot leak from the condenser system and to ensure that the dryer functions efficiently. Cleaning the tumble dryer Disconnect the dryer from the mains electricity supply. -
Page 32: Problem Solving Guide
Problem solving guide With the help of the following notes, minor faults in the performance of the appliance, some of which may result from incorrect operation, can be put right without contacting the Service Department. However, please note: Repair work to electrical appliances should only be carried out by a suitably qualified person in strict accordance with current local and national safety regulations. - Page 33 Cooling again. down or Finish may If this problem happens also flash in the again, there is a fault. Contact display. Miele Service. The Start/Stop The dryer is in Standby See "Setting standby" in indicator light is mode. "Programmable functions"...
-
Page 34: An Unsatisfactory Drying Result
Problem solving guide An unsatisfactory drying result Problem Possible cause Remedy The load consisted of – Finish drying using the The laundry is not sufficiently dry. different fabrics. Warm air programme. – Select a different programme next time. Note: You can alter the See "Programmable residual moisture level for functions". -
Page 35: Other Problems
Problem solving guide Other problems Problem Possible cause Remedy * The drying Ventilation to and from the Open a door or window while the process goes dryer may be insufficient, dryer is in operation for increased on too long or e.g. - Page 36 – Has the fuse or circuit breaker tripped? – If you cannot remedy the problem, then there could be a fault. Contact Miele Service. Power cut. When power is restored, any programme which was running will restart automatically. The interior drum The lighting switches off –...
-
Page 37: Cleaning The Cooling Fins (Bottom Right Grille)
Problem solving guide Cleaning the cooling fins To prevent damaging the (bottom right grille) cooling fins, only pass the vacuum cleaner brush over them lightly, In general, the cooling fins do without applying any pressure. not need cleaning. They should only be cleaned if the drying process is taking an exceptionally long time due to a very high level of dust or... -
Page 38: Changing The Lamp
^ Apply a little pressure and whilst doing so turn your wrist in the direction of the arrow to open the cover. The cover will open downwards. The temperature resistant lamp should only be ordered from your Miele Dealer or the Miele Spare Parts Department. -
Page 39: After Sales Service
Optional accessories Optional accessories for this dryer are available from your Miele Dealer, the Miele Spare Parts Department or via the internet at www.miele-shop.com. Please note that telephone calls may be monitored and recorded for N.B. -
Page 40: Installation
Installation Front view a Mains connection cable f Four height adjustable screw feet b Control panel g Cool air intake grille (do not obstruct with a laundry basket or other c Condensed water container (empty objects) after every drying programme) h External drainage of condensed d Door water hose (see "External condensed... -
Page 41: Rear View
Installation Rear view If transporting the dryer at an angle, only tip it towards its left side. a Protruding lid for holding when moving the dryer (see arrows) b Mains connection cable c Hose for external drainage of condensed water d Accessories for connection to a sink drain outlet Transporting the dryer... -
Page 42: Installation Site
N.B. When built under, drying times may be longer. With niche heights of: – 830-840 mm, longer screw feet* are required. – 870-885 / 915-930 mm, one or two raising kits* are required. * Miele accessory available to order... -
Page 43: Levelling The Appliance
The appropriate "WTV" stacking kit* to match your dryer is required. * Miele accessory available to order Stacking kits must only be installed by a suitably qualified fitter. ^ The screw feet can be adjusted to compensate for any unevenness in the floor. -
Page 44: External Condensed Water Outlet
Installation ^ There will be a small amount of External condensed water residual water in the drain hose. outlet Have a container ready to collect this. General notes When drying is in progress, condensed water is pumped into the condensed water container through the drain hose at the back of the dryer. -
Page 45: External Drainage Via A Sink Or Gully
Installation External drainage via a sink or gully Example: Connection to a sink drain outlet ^ See "Front view" illustration. The drain hose with non-return valve If you want to drain the water off fitted can be connected directly to a into a sink you will need to secure suitable sink drain outlet. - Page 46 Installation ^ Fit adapter 1 to the sink drain outlet using nut 2. If this nut has a flat disc in it you should take the disc out first. ^ Attach the end of hose 4 to adapter ^ Use a screwdriver to tighten hose clip 3 up close to the nut.
-
Page 47: Electrical Connection
Electrical connection Electrical connection U.K. Non-rewireable plugs BS 1363 All electrical work should be carried out The fuse cover must be refitted when by a suitably qualified and competent changing the fuse, and if the fuse cover person, in strict accordance with is lost, the plug must not be used until a current national and local safety suitable replacement is obtained. -
Page 48: Consumption Data
Consumption data Load Final spin speed Residual Energy Duration in a domestic washing moisture machine Minutes Cottons Normal 1000 2.10 Cottons Normal 1200 1.90 1400 1.80 1600 1.60 1800 1.55 Cottons Normal + Gentle tumble 1000 2.15 Cottons Hand iron rr 1000 1.55 Cottons Hand iron rr... -
Page 49: Technical Data
Technical data Height 850 mm Width 595 mm Depth 596 mm Depth with door open 1071 mm Height for building under 820 mm Width for building under 600 mm Depth for building under 600 mm Suitable for pushing under a worktop Suitable for stacking Weight... - Page 50 Electronic system lock Programmable functions for altering default settings...
-
Page 51: Electronic System Lock
Electronic system lock D Now slowly turn the programme The system lock prevents the dryer selector six positions stage by stage being used without your knowledge. in an anti-clockwise direction. Each of the six programme indicator It can be activated if wished. lights must come on one after the other. -
Page 52: Programming Functions
Programmable functions Altering the residual moisture A number to show which option is level in the Cottons selected will appear in the display programme alternating with the letter P. The tumble dryer is designed to dry 0 Increased residual moisture. effectively using as little energy as Laundry damper. -
Page 53: Altering The Residual Moisture Level In The Minimum Iron Programme
Programmable functions Altering the residual moisture A number to show which option is level in the Minimum iron selected will appear in the display programme alternating with the letter P. The tumble dryer is designed to dry 0 Increased residual moisture. effectively using as little energy as Laundry damper. -
Page 54: Anti-Crease
Programmable functions Anti-crease A number to show which option is Anti-crease helps prevent creasing, if selected will appear in the display alternating with the letter P. laundry is not normally removed im- mediately after the end of a 0 Anti-crease off programme. -
Page 55: Altering The Volume Of The Buzzer
Programmable functions Altering the volume of the A number to show which option is buzzer selected will appear in the display alternating with the letter P. The buzzer has two volumes. 0 Normal buzzer Follow steps (A,B,C ...) to (factory default setting) programme and store in memory. -
Page 56: Altering The Residual Moisture Level In The Automatic Plus Programme
Programmable functions Altering the residual moisture A number to show which option is level in the Automatic plus selected will appear in the display programme alternating with the letter P. The tumble dryer is designed to dry 0 Increased residual moisture. effectively using as little energy as Laundry damper. -
Page 57: Standby
Programmable functions Standby Factory default setting: Not in current programme To save energy, the display and the As described under "On" above. programme sequence/check lights However, the display and programme go out after 10 minutes and the sequence/check lights will stay on after Start/Stop button starts flashing the programme has started and remain slowly. -
Page 58: Programmable Functions
Programmable functions Before you begin, ensure that: A number to show which option is – The tumble dryer is switched off. selected will appear in the display alternating with the letter P. – The door is closed. A Press the Start/Stop button and keep 0 On it pressed in whilst carrying out steps I Not in current programme... -
Page 59: Memory Function
Programmable functions Memory function A number to show which option is The electronics will memorise any selected will appear in the display alternating with the letter P. extra options selected for a programme. The duration selected 0 Memory deactivated for the Warm air or Cool air timed (factory default setting) drying programmes will also be stored in memory. -
Page 60: Keypad Tone
Programmable functions Keypad tone A number to show which option is An audible tone sounds each time a selected will appear in the display alternating with the letter P. button is pressed. 0 Keypad tone deactivated Follow steps (A,B,C ...) to programme and store in memory. -
Page 61: Adjusting The Dryer's Electronics For Very Soft Water
Programmable functions Adjusting the dryer's – The Gentle tumble indicator light will flash on and off slowly once and then electronics for very soft water on and off quickly twice. In some areas of the UK, water is A number to show which option is extremely soft which can affect the selected will appear in the display sensitivity of the control electronics. -
Page 62: Extending The Range Of The Drying Levels
Programmable functions Extending the range of the A number to show which option is drying levels selected will appear in the display alternating with the letter P. You can extend the range of the drying levels for many of the 0 Factory default setting programmes: I Drying level range extended... - Page 64 Alteration rights reserved/2712 M.-Nr. 09 379 050 / 00...
Need help?
Do you have a question about the T 8860 WP and is the answer not in the manual?
Questions and answers