Advertisement
Advertisement
Table of Contents
Troubleshooting

Related Manuals for Olin HVBT-3600S


Summary of Contents for Olin HVBT-3600S
-
Page 2: Table Of Contents
Contents Notice Before Using HD Receiver Installation 10-11 Basic Operation 12-19 Program Guide 20-22 Navigating Menu 23-29 Troubleshooting Troubleshooting Guide Copyrighs - 1 -... -
Page 3: Notice
Notice Thank you for purchasing HD Receiver. Please read this user manual carefully, to be able to safely install, use and maintain the HD Receiver at maximum performance. Keep this user manual next to your HD Receiver for future reference. Throughout the whole manual, Note mark indicates additional information to the user to make the user aware of possible problems and information of any importance to help the user to understand, to use and to maintain the... - Page 4 Notice MAINS SUPPLY DC 1 2V /1.0A Operate this product only from the type of power supply indicated on the marking label. If you are not sure of the type of power supplied to your home, please consult your local power company. Disconnect the product from the mains before you start any maintenance or installation procedures.
- Page 5 Notice EARTHING The aerial cable must be buried in the ground. The buried cable of the system must comply with SABS 061. LOCATION z Place the product indoors to avoid exposing it to lightening, rain or sun. z Do not place it near a radiator or heat register. z Make sure it has more than 10 cm clearance from any appliances susceptible to electromagnetic influences, such as a TV or a VCR.
- Page 6 Notice Warning 1. Follow these directions in order not to damage the power cord or plug. Do not modify or process the power cord or plug arbitrarily. Do not bend or twist the power cord too much. Make sure to disconnect the power cord with the plug held. Keep heating appliances as far as possible from the power cord in order to prevent the cover vinyl from melting.
-
Page 7: Before Using Hd Receiver
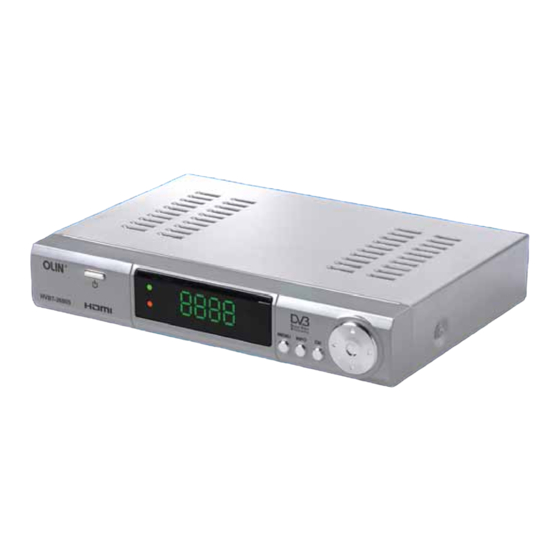
1.2 AAA Batteries × 1 pair 1.3 User Manual × 1 pc 1.4 Remote Control Unit × 1 pc 1.5 Warranty Card × 1 pc 1.6 Power Adapter × 1 pc 1.7 Quick Install Guide x 1 pc HVBT-3600S - 6 -... - Page 8 Before Using HD Receiver 2. Front 2.1 STANDBY button Switches between Power ON and Standby modes. 2.2 POWER ON / STANDBY Indicator Green light means POWER ON, Orange means Signal and Red means STANDBY. LED display will show current channel number and screen resolution. 2.3 Channel buttons Change channel...
- Page 9 Before Using HD Receiver 3. Rear Panel 3.1 ANTENNA INPUT Connect the aerial cable to antenna Input jack on the HD Receiver. 3.2 LOOP OUT Loop out TV signal from antenna to your TV’s antenna input. 3.3 VIDEO Video signal output connects to TV or VCR using the RCA cable (Y). 3.4 AUDIO L/R Audio output connects to TV or VCR using the RCA cable (R&W).
-
Page 10: Remote Control
4. Remote Control Standby mode Mute Resolution Aspect Ratio Chan+/- in Volume +/- channel list Back to previous channel Confirm and arrow bottons Access Menu Exit OSD on screen Favorite list Numerical Buttons Subtitle on/off Teletext HVBT-3600S - 9 -... -
Page 11: Installation
Installation Antenna/TV/VCR Connection The HD Receiver provides various connections to TV, VCR, or other device. You may use one or more of the following connections. 1.1 Using Component Cable Connect antenna to ANTENNA INPUT on the HD Receiver using an RF aerial cable. - Page 12 Installation Digital Amplifier Connection Connect Optical on the HD Receiver to Optical INPUT on the amplifier using an optical cable. Powering on Connect power adaptor cable to the +12V power input socket at the rear panel of the HD Receiver and plug the AC plug to a wall power point. - 11 -...
-
Page 13: Basic Operation
Basic Operation You can find in this section the basic operation for watching programs. You can define a channel as Favorite/Blocked/Skipped. You can also quickly adjust OSD settings using shortcut buttons on the remote control. Change channel You can change a channel in various ways: 1. - Page 14 Basic Operation SUBTITLE Setting You can choose to show subtitle on the screen if the current program is broadcasted with Closed Caption (with shown in the information bar). 1. Press SUBTITLE( )button to show SUBTITLE setting Menu. 2. Press Left/Right( )button to select ON or OFF.
- Page 15 Basic Operation OPTION Setting Set current service as Favorite, Lock or Skip. 1. Press OPT ( ) button to OPTION Setting Menu. 2. Press Up/Down ( button to highlight option and press OK( ) button to select or de-select. 3. Press MENU( )button or EXIT( )button to close...
- Page 16 Basic Operation Service Information Window Display the current service information, such as: Service Name, Service Type, Channel Number, Signal Level, Signal Quality, Event name, Event content, Event duration, System Time and Date, etc. 1. Press INFO ( ) button to pop up Service Information window. 2.
- Page 17 Basic Operation The current service supports TELETEXT The current service supports Closed Caption The audio format of current service is DOLBY DIGITAL (AC3) The current service Audio stream is MPEG-1 coded The current service Audio stream is MEPG-2 coded The Video Aspect Ratio of current service is 16:9 The Video Aspect Ratio of current service is 4:3 The Video quality of current service is High Definition The Video quality of current service is Standard Definition...
- Page 18 Basic Operation The Video resolution of current service is 1920x1080 or 1440x1080 interlaced The current content rating is P, suitable for the audience over 5 years old The current content rating is C, suitable for the audience over 7 years old The current content rating is G, suitable for the audience over 9 years old The current content rating is PG, suitable for the audience over...
- Page 19 Basic Operation NOTE: If the current service does not provide content description, only program title and time will be displayed. TELETEXT Available only if icon is shown in the information window. Press TTX( ) button to show TELETEXT on the screen, press MENU( button, EXIT( ) button to close the TELETEXT function.
- Page 20 Basic Operation SERVICE LIST 1. Press OK ( ) button to pop up the SERVICE LIST. 2. Press Up/Down ( button to move to the service you want, press ) button to select. 3. Press MENU ( ) button or EXIT( )button to close the SERVICE LIST.
-
Page 21: Program Guide
Program Guide Program Guide shows the information of scheduled programs provided by the broadcaster. You will be able to view details and set reminders for your desired programs. Searching Program information Press EPG button to enter Program Guide window. Scheduled program list will be loaded automatically. - Page 22 Program Guide Press GREEN button to view by date, press YELLOW button to view by genre. Press button to change the date in Date Mode or change the type content Genre Mode. Press ▲/▼ button to move to your desired program, press INFO button to view the detailed information.
- Page 23 Program Guide Press BLUE button to enter Schedule list menu, press ▲/▼ button to highlight your pre-set reminder program, press RED button to delete. If the reserved programs are on the same date and same time, System will prompt you to select from a program list when the reserved time is due.
-
Page 24: Navigating Menu
Navigating Menu Navigating Menu contains: Service Manager, Service Search, Parental Lock, Timer and System Setting. Service Edit Press MENU button to Main Menu. Select Service Manager, press OK button to enter Edit Service Menu. Press ▲/▼ button to move to your desired service Press OK button to select the service. - Page 25 Navigating Menu Service Searching Press MENU button to pop Main Menu, Select “Search”, press OK button to enter Search Menu. Channel List on the left part shows the frequency and channel number, Service List on the top right part and Signal Indicator at bottom right corner.
- Page 26 Navigating Menu Parental Control Press MENU button to pop up Main Menu, select “Parental Control”, press OK button input correct password to enter Parental Control Menu. When “Change PIN Code” is highlighted, press OK button to change Password. 3. When “Parental Guidance”...
- Page 27 Navigating Menu Time Setting Press MENU button to pop up Main Menu, select “Timer”, press button enter Timer Menu. When “Power On” is highlighted press button to enable or disable “Power On Timer”, press OK button to pop up Power on setup menu.
- Page 28 Navigating Menu When “Time Zone” is highlighted, press OK button to pop up Zone list, select your state and press OK button to confirm. SYSTEM Setting Press MENU button to pop up Main Menu, select “System Setting” , and press OK button to enter SYSTEM Setting Menu.
- Page 29 Navigating Menu Press ▲/▼ to move cursor your desired item, press OK button to pop up the settings submenu, press ▲/▼ to select your desired value, then press OK button to confirm. When “System Information” highlighted, press OK button to display the Hardware Firmware information...
- Page 30 Navigating Menu When “Default Setting” is highlighted, press OK button and input the correct password restore Default Settings of this system. NOTE: Don’t switch off the Power Supply when you restore the Default Setting. If restored to factory default setting all data and channels will be lost.
-
Page 31: Troubleshooting
Troubleshooting „ If the screen displays a notice “Services Full”, it means that the internal memory storing services information is FULL. Please delete unwanted existing service programs to free the memory for the new ones. „ If the screen displays a notice “Service Change”, this means... -
Page 32: Troubleshooting Guide
Troubleshooting guide Symptom Remedy Nothing lights your Check that the mains power cord is correctly connected. receiver’s front panel. Disconnect this cord, and then reconnect it to ensure it is in place. Check that power is available at the wall socket. Your remote control fails to Make sure your receiver is in the operate mode. -
Page 33: Copyrighs
Copyrighs This manual contains information protected by copyright law. No part of this document may be used or reproduced in any form or by any means, or stored in a database/retrieval system without prior written permission from us. The information of this manual is based on the current version of the product. We reserve the right to alter the content without prior notice.
Need help?
Do you have a question about the HVBT-3600S and is the answer not in the manual?
Questions and answers