Table of Contents
Advertisement
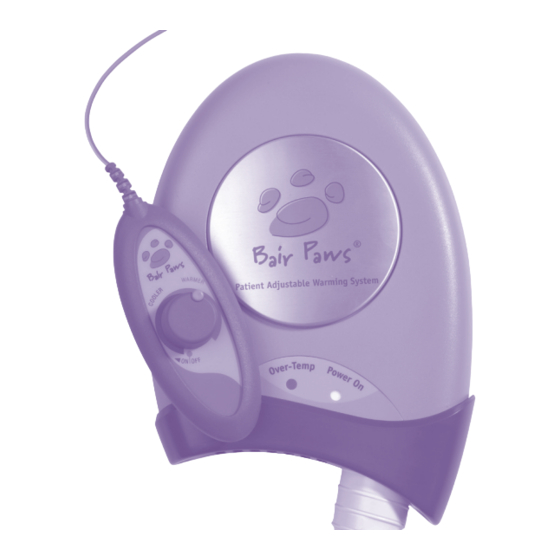
Bair Paws
Model 850
Warming Unit
Service
Manual
Warning: Electrical Shock Hazard. There are electrically live parts
within the warming unit when it is connected to a power source, even
when the hand-held temperature controller is in the OFF position.
Biomedical Engineering Department
®
Please forward to
Advertisement
Table of Contents

Related Manuals for Bair Paws 850

Summary of Contents for Bair Paws 850
- Page 1 Bair Paws ® Model 850 Warming Unit Service Manual Warning: Electrical Shock Hazard. There are electrically live parts within the warming unit when it is connected to a power source, even when the hand-held temperature controller is in the OFF position.
-
Page 2: Table Of Contents
Table of Contents Introduction to the Bair Paws® Patient Adjustable Warming System ........1 Important Information about the Bair Paws Model 850 Warming Unit ......2 Indications/Intended Use ..................2 Contraindication .....................2 Warnings ........................2 Precautions ......................3 Proper Use and Maintenance ..................3 Read Before Servicing Unit ..................3 Safety Inspection .....................3... -
Page 3: Introduction To The Bair Paws® Patient Adjustable Warming System
850 can provide comfort warming. This manual includes service procedures and unit specifications for the Model 850 warming unit. Please refer to the Instructions for Use included with the Bair Paws warming gown for more information about the gown. Bair Paws Model 850 Warming Unit... -
Page 4: Important Information About The Bair Paws Model 850 Warming Unit
Important Information about the Bair Paws Model 850 Warming Unit Indications/Intended Use The Model 850 warming unit is indicated for patient warming. This warming unit has been designed for use with the Bair Paws warming gowns in all preoperative and postoperative settings. Contraindication Do not apply heat to lower extremities during aortic cross-clamping. -
Page 5: Precautions
Precautions • Do not initiate patient warming unless the Model 850 warming unit is safely placed on a hard surface or securely mounted. Otherwise, injury may result. • The Model 850 warming unit meets the international electronic interference requirements of EN 60601-1-2 and EN 55011. -
Page 6: Preparing The Bair Paws Model 850 Warming Unit For Use
Preparing the Bair Paws Model 850 Warming Unit for Use Before using the warming unit, make sure that it is safely placed on a flat, hard surface such as a table, or securely mounted on a wall, IV pole, or bedrail. -
Page 7: Mounting The Warming Unit To The Wall-Mount
Mounting the Warming Unit to the Wall-mount Slide the V-shaped bracket on the back of the warming unit into the groove of the wall-mount bracket. Tighten the 2 setscrews located on either side of the wall-mount bracket using a three-inch-long (or longer) small Phillips screwdriver to lock the unit in place (see Figure 2). -
Page 8: Mounting The Warming Unit On An Iv Pole
Mounting the Warming Unit on an IV Pole To prevent tipping, mount the Model 850 warming unit on an IV pole at a height that aution ensures stability. We recommend mounting the warming unit no higher than 44 in. (112 cm) from the floor on an IV pole with a minimum wheelbase radius of 14 in. -
Page 9: Mounting The Warming Unit On A Bedrail
Mounting the Warming Unit on a Bedrail Note: The wall-mount bracket is shipped attached to the rail-mount. Slide the V-shaped bracket on the back of the warming unit into the groove of the rail-mount bracket. Tighten the setscrews (see Figure 2). Hang the rail-mount on the bedrail. -
Page 10: Mounting The Warming Unit With A Rail-Mount To The Wall
Hook the warming unit with the attached rail-mount to the rail-to-wall bracket as depicted in Figure 5. For use only with the Model 850 warming unit. reCaution A minimum of two wall anchors must be used to secure the rail-to-wall bracket to the wall. -
Page 11: Using The Temperature Controller Holder
Using the Temperature Controller Holder The controller holder helps to prevent cord clutter around the patient or accidental damage to the controller. Press the holder onto the warming unit hose so it is within the patient’s reach (see Figure 6). Slide the temperature controller into the holder. -
Page 12: Service Procedures
Arizant Healthcare Inc. assumes no responsibility for the reliability, safety, or performance of the Model 850 warming unit if calibration tests or adjustments are made in any manner other than those described here. Improper measurement or adjustment of the normal operating temperature for the Model 850 unit could result in patient exposure to temperatures outside of the indicated range and may lead to patient injury. -
Page 13: Testing The Over-Temperature (Ot) Circuit
Method Turn the warming unit “ON” and set the controller to its maximum (warmest) setting. Press the clip buttons on the hose end and insert the hose end into the temperature test kit. Allow the system to warm 10 minutes before starting the calibration. Extend the hose straight to its full length. -
Page 14: Replacing The Filter
Pressing the OT test button places the heater in a full-on, unregulated condition; therefore, the unit may become slightly warm to the touch. Bair Paws Model 850 Warming Unit Service Manual ®... -
Page 15: Replacing The Temperature Controller And/Or Hose
Replacing the Temperature Controller and/or Hose Tools/Equipment Needed • Medium Phillips screwdriver • Needle-nose pliers Method Disconnect the warming unit from the power source. Remove the two screws that attach the case bottom (dark purple) to the warming unit. Slide the case bottom down the hose to expose the hose connection point. Remove the two screws that fasten the hose to the warming unit: 1 on front and 1 on the back of the warming unit. -
Page 16: Replacing The Power Cord
(see Figure 12). Figure 12. Power connector. Remove 4 screws on the motor assembly and lift away from the warming unit enclosure. Pull out the old power cord. Bair Paws Model 850 Warming Unit Service Manual ®... -
Page 17: Reassembling The Warming Unit
Route the new power cord through the enclosure hole and around the case as shown. Make sure the cord is held firmly by the notches in the case. Thread the crimped black and white wires through the case opening as shown in Figure 13. Figure 13. -
Page 18: Cleaning The Warming Unit
WINDEX is a registered trademark of S.C. Johnson & Son, Inc. ENVIROCIDE is a registered trademark of Metrex Research Corporation ALCONOX is a registered trademark of Alconox, inc. Bair Paws Model 850 Warming Unit Service Manual ®... -
Page 19: Technical Support And Customer Service
952-947-1200 952-947-1400 When You Call for Technical Support Please be ready to give the Technical Support Representative the serial number of your Bair Paws warming unit. The serial number is located on the back of the unit. Repair and Exchange Call Arizant Healthcare customer service if your Model 850 warming unit requires service. -
Page 20: Bair Paws Warming Unit Limited Warranty
Mounting brackets 1 year This limited warranty applies only to User and is valid only for the use of Units with Bair Paws gowns. The use of any gowns or other products not manufactured or approved by Company for use with Units invalidates this limited warranty. Use of Units in a manner not specified in the instructions for use invalidates this limited warranty. -
Page 21: Specifications
Specifications Physical Characteristics dimensions of warming unit 11 in. high x 2.5 in. deep x 7.7 in. wide 27.9 cm high x 6.4 cm deep x 19.6 cm wide dimensions of temperature controller 2.5 in. wide x 5.8 in. long 6.4 cm wide x 14.7 cm long weight of warming unit 6.3 lb;... - Page 22 285W Resistive power cord 15-foot, SJT, 3 cond., 10A device ratings 110-120 VAC, 60 Hz, 3.0 A fuses 3.0 A temperature controller cord 32” from hose collar, 4 cond., Max. voltage: 5V Bair Paws Model 850 Warming Unit Service Manual ®...
-
Page 23: Maintenance Log
Maintenance Log Date Maintenance Action Performed Arizant Healthcare Inc. - Page 24 Maintenance Log Date Maintenance Action Performed Bair Paws Model 850 Warming Unit Service Manual ®...
-
Page 25: Definition Of Symbols
Definition of Symbols The following symbols may appear on the product, on the exterior packaging, or in the product labeling. ON/STANDBY Temperature control Equipotentiality plug (ground) Fuse Attention, consult accompanying documents Dangerous voltage Type BF Equipment (patient applied) Voltage, alternating current (AC) Protective earth ground Ground Class II Equipment... - Page 26 Bair Hugger, Bair Paws, Arizant, Arizant Healthcare, bright ideas that work, and the Bair Paws and Arizant logos are trademarks of Arizant Healthcare Inc., registered or pending in the U.S. Patent & Trademark Office and in other countries. U.S. Patent 7,226,454; 6,876,884; D485,338. Other patents pending.
Need help?
Do you have a question about the 850 and is the answer not in the manual?
Questions and answers