Table of Contents
Advertisement
Quick Links
Please read this manual carefully before setting-up and using your unit
Supplied By
The electronic version of this document is the controlled copy. Therefore all
printed versions of this document are uncontrolled.
For the latest manual revision always visit "www.tritech.co.uk"
Issue 1
TIL – Eng – Spec – 080
SeaHub OM
Advertisement
Table of Contents

Subscribe to Our Youtube Channel
Related Manuals for Tritech SeaHub

Summary of Contents for Tritech SeaHub
- Page 1 Supplied By The electronic version of this document is the controlled copy. Therefore all printed versions of this document are uncontrolled. For the latest manual revision always visit “www.tritech.co.uk” Issue 1 TIL – Eng – Spec – 080 SeaHub OM...
- Page 2 COPYRIGHT © Tritech International Ltd The copyright in this document is the property of Tritech International Limited. The document is supplied by Tritech International Limited on the understanding that it may not be copied, used, or disclosed to others except as authorised in writing by Tritech International Limited.
-
Page 3: Table Of Contents
4.6. Device Connection, Wiring & Installation ................26 4.6.1. Connecting a Tritech Micron DST Sonar (or Echosounder) ........26 4.6.2. Connecting a Tritech SeaKing, SeaKing DST, SeaPrinceDST, Bathy, Roll Sensor or SideScan Sonar ........................29 4.6.3. Connecting other Serial Devices ................. 32 4.6.4. -
Page 4: Notices
• Intel and Pentium is a trademark of the Intel Corporation Tritech International Limited reserved the right to change, modify and update designs and specifications as part of their ongoing product development programme. Whilst every effort is taken to keep all the information contained in this document up to date, information in this document is subject to change without notice and does not represent a commitment on the part of Tritech International or System Technologies. -
Page 5: Handling Of Electrostatic Sensitive Devices
Operator Manual SeaHub 2.2. Handling of Electrostatic Sensitive Devices ATTENTION Observe Precautions For Handling Electrostatic Sensitive Devices Caution: Certain semiconductor devices used in the equipment are liable to damage due to static voltages. Observe the following precautions when handling these devices in their unterminated state, or sub- units containing these devices: •... -
Page 6: Warranty Policy
SeaHub 2.3. Warranty Policy Tritech International Limited herein after referred to as TIL TIL warrants that at the time of shipment all products shall be free from defects in material and workmanship and suitable for the purpose specified in the product literature. -
Page 7: Statutory Compliances
The owner of the appliance should either return it and its associated leads & accessories, if appropriate, to Tritech International Limited with a certificate of decontamination (we reserve the right to protect our staff from the effects of any contamination) or sent to an appropriate treatment or recycling agency. -
Page 8: Safety Statements
• Do not undertake maintenance of the unit, outside the scope of that defined within this manual, unless instructed to do so by Tritech International Ltd technical support. • Do not insert extraneous object (metal or other alien substance) into the unit or any of its connector apertures. -
Page 9: Technical Support & Software Upgrades
The name of the organisation which purchased this system is held on record at Tritech International Ltd. Details of new software and hardware packages will be announced at regular intervals. Depending on the module, free upgrades will be offered in keeping with our policy of maintaining the highest levels of customer support. -
Page 10: Before Using
Read the following sections carefully to learn what parts are included, gain an understanding of the product, its configurations and setup & installation procedures. 3.1. Package Contents Upon delivery your SeaHub package contains the following items… • A “SeaHub Surface Interface” module • A mains power cord •... -
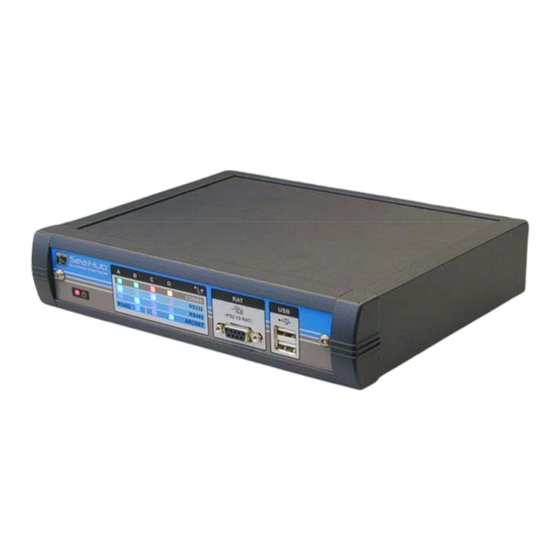
Page 11: General Overview
SeaHub 3.2. General Overview The “SeaHub Surface Interface Module” is designed to be a portable and universal interface box providing a single module solution for interfacing the range of Tritech’s sub-surface products (sonars, acoustic modems and other undersea sensors) into a PC computer or Laptop. - Page 12 Operator Manual SeaHub The internal design of the SeaHub can be summarised by the figure below… PC USB Interface USB Hub Controller RAT Interface Dual USB Over Current (PS2 to USB & Interface Protection RS485) 2 External Microprocessor RAT Port...
-
Page 13: Front Panel
DC Power Outlet – 3 × 4mm “Banana” Sockets 15-Way D-Type (Female) “AIF” Connector USB “Type-B” Interface to Host Computer 3.5. Underside Label The underside label of the SeaHub unit is intended to provide a quick reference for connector wiring, fuses and general handling procedure. However,... -
Page 14: Operation
USB cable provided. The SeaHub should be connected to a High-Speed (480Mbps) USB 2.0 port to achieve maximum performance. 3) Connect the power supply to the SeaHub, and power up – this may be either using an AC mains power supply, and the power cord provided, or a DC supply and the 2.1mm plug. - Page 15 Operator Manual SeaHub 1) On the first connection of a SeaHub to a PC System, the plug-and-play system should start the automatic detection and setup of the hardware. If this fails to happen, manually start the process by selecting “Add New Hardware” from the Windows...
- Page 16 Operator Manual SeaHub 5) Windows may display a “speech” bubble showing the new hardware has been detected and installed. Click the “X” in the bubble to acknowledge it. 6) The plug-and-play system should now identify that the Serial ports now need installing, for each USB-to- Serial converter identified by the pervious part of the installation.
-
Page 17: Identifying Seahub Serial Ports
Having completed the driver installation procedure, the PC should have installed six “Virtual Communication Ports” (VCPs) that map to Windows serial communication (COM) ports. These ports will be removed when the SeaHub is disconnected or powered down, and reappear next time the SeaHub is connected. - Page 18 There should be six entries titled “USB Serial Port (COMx)” in this list, each representing a serial port within the SeaHub module. In the example shown here, these are numbered from 9 to 14. Make a note of these numbers, as the Seanet software will need to be configured with them.
-
Page 19: Seahub Serial Port Functions
SeaHub 4.2.3. SeaHub Serial Port Functions The SeaHub module will always install six serial ports when connected correctly to the PC. As mentioned earlier, the operating system will allocate COM port numbers to these ports, and depending on the system setup these numbers may vary. -
Page 20: Seanet Software Installation And Configuration
Operator Manual SeaHub 4.3. Seanet Software Installation and Configuration 4.3.1. Seanet Software Installation 1) Insert the “Seanet Pro” Installation CD into the PC CD-ROM drive and run the “SerialSetup.exe” program. Note: If the CD autoruns then select the “RS-232 Installation” type from the menu page. -
Page 21: Configuring Seanet With Seahub Com Ports
SeaHub functions to be accessed*. * When a SeaHub is connected this is now automatic: The Channel Setup will scan the PC USB ports for a connected SeaHub. If a SeaHub is found and not yet enabled, the user will be prompted whether to automatically add and configure an “Aif”... -
Page 22: Selecting Seahub Port Hardware Modes
Note 2: Only 3-wire RS232 is supported (RX, TX and Ground). Do not use data-flow control protocols on these ports This table is also summarised on the front label of the SeaHub module. Status indicators will show the current operating configuration when the unit is powered up. These are discussed in section 4.5. - Page 23 15) Click “OK” to accept changes, or “Cancel” to abort. Changes will only be applied when “OK” is clicked – not in real-time as the controls are adjusted. Once “OK” is selected, the SeaHub will be reconfigured, and will reboot. Please allow several seconds for this to occur.
-
Page 24: Software & Driver Un-Installation
Operator Manual SeaHub 4.4. Software & Driver Un-installation At times it may be desirable to remove Seanet software and the SeaHub serial drivers from the PC. Follow the procedure below to achieve this. 1) Open the windows “Control Panel”, and select “Add/Remove Programs”... -
Page 25: Status & Mode Indicators
SeaHub 4.5. Status & Mode Indicators Operational status of the SeaHub unit is provided by an array of LED’s mounted on the front panel on the unit. In addition to the main power/status indicator This panel is divided into two sections…... -
Page 26: Device Connection, Wiring & Installation
Micron DST Sonar. • If connecting a Micron DST Echosounder, pin-5 returns an analogue “echo range” signal, ranging from 0V to 5V. This should not be connected to the SeaHub. Connection in error will not damage either unit. Issue 1 TIL –... - Page 27 Port A or B connection of the serial Micron. i.e. In previous example (see Section 4.2.2), the SeaHub was installed with 6 x Serial Ports from For the Micron connection, set the COM COM 9 to 14.
- Page 28 For Micron DST Sonars, this table summarises one-to-one wiring between the Sonar connector and the SeaHub port C or D. However this does not apply to the Micron DST Echosounder. To enable Port C or D for a serial Micron connection…...
-
Page 29: Connecting A Tritech Seaking, Seaking Dst, Seaprincedst, Bathy, Roll Sensor Or Sidescan Sonar
• If the connected Sonar also has software configurable hardware modes (RS232, RS485 or ArcNet), the SeaHub must be configured with the same hardware mode for communication to work. • The Sonar should be connected via its “Main” communication port to the SeaHub. - Page 30 Sonar. i.e. In previous example (see Section 4.2.2), the For the serial Sonar connection, set the SeaHub was installed with 6 x Serial Ports from COM Port of the 2 “Aif” device to be; COM 9 to 14.
- Page 31 Serial Sonar i.e. In previous example (see Section 4.2.2), the connection (see previous few pages) a 2 SeaHub was installed with 6 x Serial Ports from “Aif” port does not need to be added. COM 9 to 14.
-
Page 32: Connecting Other Serial Devices
SeaHub 4.6.3. Connecting other Serial Devices The four serial ports on the SeaHub may be used as standard windows “COM” ports, and have any serial device connected. When used in RS232 mode, Ports “A” and “B” are wired with a standard 9-Way “DTE” pin out (Data Terminal Equipment). -
Page 33: Arcnet Line Termination
For twisted pair cables that are greater than 100 metres in length, two termination resistors should be installed, one at either end of the cable. At the surface SeaHub module, a 270Ω resistor should be fitted. At the subsea end of the cable, a 39Ω resistor should be fitted – if there is more than one Sensor connected then this resistor should be fitted at the junction / splice point of the cable. -
Page 34: Power Supplies
For further help please contact Tritech Technical Support. NOTE 5.1. Power Inputs For convenience of installation, the SeaHub module may be powered from either a “universal mains” AC power-supply, or a DC power input over the +12 to +36V range, allowing operation from batteries or bench-power-supplies Observe the following warnings and observations before powering up the product…... -
Page 35: Choosing A Dc Source
100mA, then an extra 2.5W per peripheral should be added. • If a RAT is connected, then an additional 3W should be added. For example, a SeaHub module is to be powered from a 28V DC source, connected to… • A Tritech RAT (3W) •... -
Page 36: Power Outputs
Operator Manual SeaHub 5.3. Power Outputs For powering external devices, the SeaHub module provides regulated power supplies from… • The two communication ports “C” and “D” on the rear of the unit. (labelled in section 3.4, page 13) • The 4mm “DC Power Output” sockets on the rear of the unit. -
Page 37: Communication Signal Grounding
Operator Manual SeaHub 5.3.1. Communication Signal Grounding All RS232, RS485, RS422 and ArcNet signals on Ports “A”, “B”, “C” & “D” and the “AIF (ARCNET)” connector, are referenced to the communication power supply (“COMM”) ground, which is available on the following connectors…... -
Page 38: Power Output Types
The “EXT” power supply is intended for powering external medium power devices (>1W load) that require a regulated +12V or +5V level. The “EXT” voltage is selected by internal jumpers within the SeaHub unit (section 7.2). The positive voltage may be selected from…... -
Page 39: Data Interfaces
The interface is compliant with the USB 2.0 “Hi-Speed” (480Mbps) specification and requires only a 100mA USB port. The SeaHub unit is supplied with a 2m long Type-A to Type-B USB2.0 compatible cable – the end of the cable contains LED illumination to help diagnose correct connection. -
Page 40: Communication (Sonar/Sensor/Serial) Ports
Operator Manual SeaHub 6.3. Communication (Sonar/Sensor/Serial) Ports This section covers the specification, and pin-out specifics of each of the four communication ports on the rear of the unit. Serial (RS232, RS422 or RS485) or ArcNet connections to external sensors, such as Sonars, Acoustic Modems, Navigation Systems, GPS’s, environmental sensors etc. -
Page 41: Port B (Rs232 , Rs485 & Rs422)
Operator Manual SeaHub 6.3.2. Port B (RS232 , RS485 & RS422) 9-Way D-Type Male connector, capable of supporting the following modes (under software selection)… • RS232 3-Wire (RX, TX, GND) • RS485 Half Duplex • RS422 Full Duplex All signals are fully isolated and voltage transient with respect to the communications power supply. -
Page 42: Port C & Port D (Rs232, Rs485 & Arcnet)
Operator Manual SeaHub 6.3.3. Port C & Port D (RS232, RS485 & ArcNet) 6-Way Female DIN connector, capable of supporting the following modes (under software selection)… • RS232 3-Wire (RX, TX, GND) • RS485 Half Duplex • ArcNet LAN All signals are fully isolated and voltage transient with respect to the communications power supply. -
Page 43: Aif (Arcnet) Connector
Connector face view Notes: 1) RAT RS485 and PS2 data signals are not isolated, and are with respect to the SeaHub’s internal power supplies “+5V” and “GROUND”. 2) An internal 150Ω termination resistor is fitted across the RS485 input signals (pins 3 and 4) Issue 1 TIL –... -
Page 44: Rat Connection
6.5.1. RAT Connection To connect a RAT terminal through the SeaHub requires the S0756 RAT Extension cable connection between the RAT and the “PS2 V2-RAT” port on the front of the SeaHub (Cable supplied with the RAT). 6.5.2. RAT Configuration For the RAT pointer device to function correctly through the module it needs to be a “V2”... -
Page 45: Hardware Configuration & Maintenance
The procedures described in the following sections are intended for advanced users only. NOTE If in doubt, or for further help please contact Tritech Technical Support. Before carrying out ANY of the following procedures, please read section 2.2 and section 2.5. -
Page 46: Opening The Seahub Housing
Operator Manual SeaHub 7.1. Opening the SeaHub housing This procedure describes how to open the SeaHub units housing, for maintenance and hardware configuration procedures. Before attempting this procedure ensure that the unit is disconnected from the AC and DC power source, and all other devices be disconnected from it. -
Page 47: Resetting The Software Default Settings
NB: Switch 2 will already be in the “ON” position, and should not be changed. 4) Close the SeaHub housing, and apply power for about 10 seconds. The switch settings are only read when the SeaHub unit powers up. 5) Disconnect from the power, re-open the housing, and set switch 1 back to the off position. If this is not done, the unit will not be able to store any new settings. -
Page 48: Selecting The Dc "Power Out" Supply Voltage & Ground
5) Use a pair of tweezers or long-nosed pliers to move the jumpers around on the pin-headers. 6) When done, fully close up the SeaHub unit, reversing the steps described in section 7.1. 7) Power up the unit, and verify, using a voltmeter, the correct output voltage is being presented before connecting any further devices. - Page 49 Operator Manual SeaHub Jumper Settings Output Description Power Limit Main Power Output, fully Not to exceed +28V isolated from communication the greater of NOTE1 signals all other signals 50W of 2A NOTE2 PWR GND Main Power Output, fully Not to exceed...
- Page 50 Operator Manual SeaHub Output Description Jumper Settings Power Limit 5V Output, isolated from Not to exceed communication signals only 10W (2A) PWR GND + Not to exceed 5V Output, with no isolation 10W (2A) PWR GND + GND + COMMS GND...
-
Page 51: Checking & Replacing Fuses
DANGER! 7.4.1. Checking/replacing the AC “Mains” fuse • Use this section only if the SeaHub front panel lights do not illuminate when the unit is powered • If the SeaHub unit is running from a DC-only source, skip this section. -
Page 52: Checking/Replacing The Dc Main Output Power (+28V Supply) Fuse
(the body of the fuse is glass!), and replace with a “2A 250V 20×5mm Quick-Acting (F)” fuse 15) When done, fully close up the SeaHub unit, reversing the steps described in section 7.1. Issue 1 TIL –... -
Page 53: Checking/Replacing The Dc Ext Output Power (+12V & +5V Supply) Fuses
(5V for USB peripherals is protected by over-current limiting circuitry to prevent damage) – review you power setup, requirements and jumper settings. However, it is recommend to contact Tritech Technical Support for further assistance. -
Page 54: Making Pin 5 Link Between Ports C-D For Arcnet Dual Profiler
C & D. For this, the DIN Sockets of Ports C & D must first be configured for ArcNet Comms Mode (refer to Section 4.3.3 on Page 22). The SeaHub has internal jumpers (‘J19’ for Port C, ‘J22’ for Port D) which are used to configure the operational mode of Pin 5 on the DIN Sockets. -
Page 55: Changing The Arcnet Power Supply
SeaHub 7.6. Changing the ArcNet Power Supply The SeaHub has an internal jumper (‘J14’) to select between +5V and +12V power options for the ArcNet line drive. The SeaHub will be supplied with the ArcNet Power Supply set to the factory default setting of +12V. -
Page 56: Changing The Arcnet Termination Resistor
For twisted pair cables that are greater than 100 metres in length, two termination resistors should be installed, one at either end of the cable. At the surface SeaHub module, a 270Ω resistor should be fitted. At the subsea end of the cable, a 39Ω resistor should be fitted – if there is more than one Sensor connected then this resistor should be fitted at the junction / splice point of the cable. -
Page 57: Enabling The Legacy Serial Port On The Aif Connector
Observe Precautions For Handling Electrostatic Sensitive Devices – see Section 2.2 CAUTION! 1) Unplug the SeaHub unit from any power sources. 2) Follow the steps described in section 7.1 to open the housing. 3) This procedure requires access to the underside of the PCB, which must first be completely removed from the housing. - Page 58 R75, R76, R77 and R78. These are located directly beneath the “AIF-ArcNet connector header J23” 10) Reverse the above steps to reassemble the SeaHub unit. 11) Take particular care when inserting the PCB back into the housing, that it is fully slid back prior to tightening the M6 flanged earthing nut.
-
Page 59: Firmware & Software Update Procedure
Support section of the Tritech website (www.tritech.co.uk). Whenever this new version of Seanet Pro is installed, the SeaHub Node 252 ‘Status’ in Seanet Setup will indicate that the unit will require an “Update”. Whenever this happens, follow the procedures below to update the SeaHub with the new firmware / software changes. -
Page 60: Updating The Seahub With New Fpga Firmware
The following procedure describes this… 1) Run the “Seanet Setup” application from the Windows desktop icon. 2) Ensure the SeaHub Node 252 is detected in the table. If not, then follow steps in Section 4.3.2 (page 21) which describes setup and configuration of the SeaHub USB connection and COM port allocation. - Page 61 ‘Rebuild’ button and verify that the Node 252 ‘Status’ is now showing “OK” (in Green). This confirms that the new firmware was successfully downloaded into the SeaHub. Issue 1 TIL – Eng – Spec – 080 Page 61 of 70...
-
Page 62: Portable Appliance Testing Guidelines
7.10. Portable Appliance Testing Guidelines As part of the compliance with EEC Low Voltage Directive (73/23/EEC with amendment 93/68/EEC), the SeaHub unit is fully portable-appliance-tested at the factory. Should the test need to be re-performed, it is recommended the following guidelines are adhered to…... -
Page 63: Troubleshooting
8. Troubleshooting The list below covers some of the most common connection and operational faults associated with the SeaHub. Contact Tritech technical support (see page 7) if your problem is not listed below or the suggested remedies have no effect. - Page 64 My serial port device doesn’t Check RX and TX connections are correct on both ends – work in RS232 mode the SeaHub is wired as a DTE, the same as a PC. The sensor should use DCE wiring. • Check that ground connections are correct, and made to the COMMS GROUND.
- Page 65 Check that the half-duplex turnaround time is less than a ½- baud period on the RS485 device. • If the device is drawing power from the SeaHub, check that the power supply requirements for either the AC (Mains) or DC source have not been exceeded.
-
Page 66: Technical Specifications
Operator Manual SeaHub 9. Technical Specifications 9.1. Electrical AC “Universal” Mains Input • Power Input to 264V 47Hz to 63Hz. IEC-320 ‘C14’ power socket (Use with IEC-320 ‘C13’ power cord) 20mm × 5mm 2A 250V “Antisurge” (T) Fuse DC Input to 36V 2.1mm pin (0.08”) Power Socket (Positive on centre pin... - Page 67 Operator Manual SeaHub USB 2.0 “Hi-Speed” (480Mbps) Type “B” upstream socket on the rear of • PC Interface the device. For optimum performance, the unit should be connected directly to the PC (i.e. avoiding any USB hubs), with a “Type-A” to “Type-B” cable, not exceeding 5m in length.
-
Page 68: Software
Microsoft Windows 98, 98SE, ME, 2000, XP and XP-Embedded Microsoft Windows CE Linux 2.40 or greater MAC OS-8, OS-9 and OS-X The SeaHub internal firmware may be field updated using the Tritech • Field Upgradeable “Seanet Setup” application, with the “V4” communications protocol and Firmware compatible released “Bin-Files”. -
Page 69: Environmental
-20°C to +50°C Storage Temperature Range • Water Ingress The SeaHub module housing is NOT sealed against the ingress of water, and should not be used in wet conditions or in close proximity to water. DANGER! 9.4. Statutory Compliances This product is designed in compliance with the essential •... -
Page 70: Til - Eng - Spec - 080
Operator Manual SeaHub 9.5. Mechanical Width 232mm • Dimensions Height 52mm Depth 185mm • 1.3Kg Weight • Painted Aluminium, Matte Anthracite Textured Finish Materials 228.0mm Side 231.0mm Rear Front Do not scale from drawings Issue 1 TIL – Eng – Spec – 080...
Need help?
Do you have a question about the SeaHub and is the answer not in the manual?
Questions and answers