
Related Manuals for Hitachi 3HRNM1Q


Summary of Contents for Hitachi 3HRNM1Q
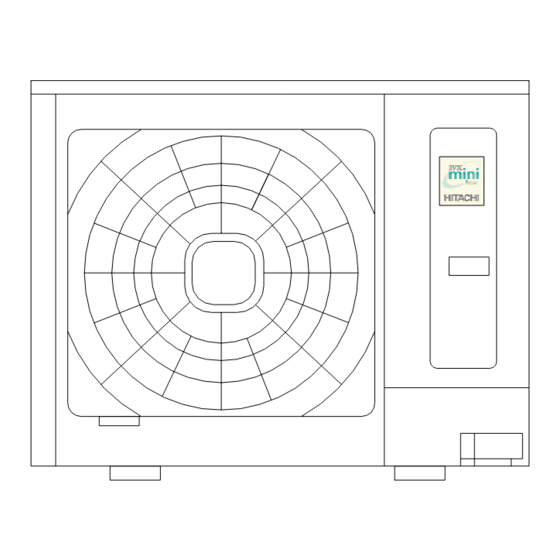
- Page 1 INVERTER-DRIVEN MULTI-SPLIT SYSTEM HEAT PUMP AIR CONDITIONERS - IVX -mini(R410A) - Outdoor Unit Model 3HRNM1Q 4HRNM1Q 5HRNM1Q 5HYNM1Q P 0 0 6 9 1 Q ORIGINAL INSTRUCTIONS...
- Page 3 2 3 W B 15WB 43 DB -5 DB 30 DB 15 DB 17 WB -20 WB...
-
Page 4: Safety Summary
SAFETY SUMMARY G Use refrigerant R410A in the refrigerant cycle. Do not charge oxygen, acetylene or other flammable and poisonous gases into the refrigerant cycle when performing a leakage test or an air-tight test. These types of gases are extremely dangerous and can cause an explosion. - Page 5 SAFETY SUMMARY G Do not install the indoor unit, outdoor unit, remote control switch and cable within approximately 3 meters from strong electromagnetic wave radiators such as medical equipment. G Supply electrical power to the system to energize the oil heater for 12 hours before start-up after a long shutdown.
-
Page 6: Checking Product Received
Therefore, the utilization of the unit other than those indicated in these instructions is not recommended. Please contact your local agent, as the occasion arises. HITACHI's liability shall not cover defects arising from the alteration performed by a customer without HITACHI's consent in a written form. -
Page 7: Table Of Contents
TABLE OF CONTENTS 1. Safety Summary ........................1 2. Structure ........................... 1 Outdoor Unit & Refrigerant Cycle ..................1 Necessary Tools and Instrument List for Installation ............4 3. Transportation and Handling ....................5 Transportation ......................... 5 Handling of Outdoor Unit ....................5 4. -
Page 8: Safety Summary
1. Safety Summary 2. Structure RAS-3HRNM1Q Four-way Electronic... - Page 9 RAS-4~5HRNM1Q and RAS-5HYNM1Q High Pressure Switch for Protection Strainer Solenoid Valve(SVF) Solenoid Valve(SVA) Reversing Valve Pressure Sensor of High Pressure Micro-Computer Control Expansion Valve Pressure Sensor of Low Pressure Accumulator Electrical Box Oil Separator Check Joint for High/Low Pressure (Cool/Heat)
- Page 10 RAS-3HRNM1Q Mark Part Name Compressor Heat Exchanger Electronic Expansion Valve Strainer Distributor Liquid Line Refrigerant Piping Connection Check Joint (φ9.53) SVA Capilary Tube Solenoid Valve Pressure Switch for Control High Pressure Switch for Protection Stop Valve for Liquid Line Stop Valve for Gas Line...
-
Page 11: Necessary Tools And Instrument List For Installation
Necessary Tools and Instrument List for Installation Tool Tool Tool Tool Handsaw Copper Pipe Bender Spanner Leveller Clamper for Solder- Screwdriver Manual Water Pump Charging Cylinder less Terminals Hoist Vacuum Pump Pipe Cutter Gauge Manifold (for Indoor Unit) Refrigerant Gas Brazing Kit Cutter for Wires Ammeter... -
Page 12: Transportation And Handling
Fig. 3.2 Handling of Outdoor Unit Fig. 3.1 Lifting Work for Transportation Unit Gross Weight Model 3HRNM1Q 4HRNM1Q G Lift the outdoor unit in its factory packaging 5HR(Y)NM1Q with 2 wire ropes. G For safety reasons ensure that the outdoor unit is lifted smoothly and does not lean. -
Page 13: Outdoor Unit Installation
4. Outdoor Unit Installation Factory-Supplied Accessories Check to ensure that the following accessories Direction of Strong Wind are packed with the outdoor unit. Table 4.1 Factory-Supplied Accessories Accessory Q'ty Washer Direction of Air Discharge • In case of installation in the open spaces NOTE unavoidably where there is no buildings or If any of these accessories are not packed with... -
Page 14: Service Space
Service Space Install the outdoor unit with a sufficient space around the outdoor unit for operation and maintenance as shown below. (1) Upper Side is Open. (unit:mm) Upper Side is Open Single Installation Keep a distance of 100mm between service cover and wall. The dimension in "( )"... -
Page 15: Installation Work
(4) Fix the outdoor unit firmly so that declining, Installation Work making noise, and falling down by strong (1) Secure the outdoor unit with the anchor wind or earthquake is avoided. bolts. (unit:mm) Air Flow Direction Base of Outdoor Unit Fixing Plate Both sides on the unit fixing (Field-Supplied) - Page 16 Incorrect Base Width of Outdoor Unit 75mm Outdoor Unit is Unstable. Frame Frame Width 60mm (Field-Supplied) Correct Base Width of Outdoor Unit 75mm Outdoor Unit is Stable. Metal Plate Frame Metal Plate 100mm or more Recommended Metal Plate Size (Field-Supplied) Material: Hot-Rolled Mild Steel Plate (SPHC) Plate Thickness: 4.5T (unit:mm)
-
Page 17: Refrigerant Piping Work
G Flaring Dimension Refrigerant Piping Work Perform the flaring work as shown below. (unit:mm) Use refrigerant R410A in the refrigerant cycle. Diameter Do not charge oxygen, acetylene or other flammable and poisonous gases into the refrigerant cycle when performing a leakage test or an air-tight test. -
Page 18: Refrigerant Piping Work
(1) Ensure that the directions for refrigerant piping work according to the tables. Table 5.1 Limitation of Outdoor Unit Outer Diameter and Length Maximum Piping Length Piping Size (mm) Model Liquid Actual Length 3HRNM1Q 4HRNM1Q Actual Length 5HR(Y)NM1Q 0.8~1.5 1.8~2.0 2.3~6.0 Applicable Range... -
Page 19: Piping Connection
(5) Pipes can be connected from 4 directions Piping Connection as shown Fig. 5.1. Make a knock-out hole Pipes can be connected from 4 directions. in the front pipe cover or bottom base to pass through the hole. After removing the pipe cover from the unit, punch out the holes following the guide line with screwdriver and a hammer. -
Page 20: Air Tight Test
(4) Stop Valve (c) Rear Piping Work Operation of the stop valve should be After removing rear piping cover, punch performed according to the below. out the “C” holes along the guide line. Rear Cover Do not apply two spanners at this posotion.If applied, leakage will occur Use two spanners... -
Page 21: Vacuum Pumping
(5) Check for any gas leakage by gas leak (5) Connect the gauge mani-fold using charging hoses with a nitrogen cylinder to detector or forming agent. Use the foaming agent which does not generate the the check joints of the liquid line and the gas line stop valves. - Page 22 1. Calculating Method of Additional Refrigerant Charge (W kg) <Example> <Table 1> 5HRNM1Q Outdoor Unit Outdoor Unit Ref. Charge 3HRNM1Q 4HRNM1Q 5HR(Y)NM1Q NOTE: is outdoor unit ref. charge before shipment. See Example for Model RAS-5HRNMQ, and fill in the following table. Pipe Diameter (mm)
-
Page 23: Caution Of The Pressure By Check Joint
Caution of the Pressure by Check Joint When the pressure is measured, use the check joint of gas stop valve ((A) in the figure below) and use the check joint of liquid piping ((B) in the figure below). At that time, connect the pressure gauge according to the following table because of high pressure side and low pressure side changes by operation mode. -
Page 24: Collecting Refrigerant
Collecting Refrigerant Electrical Wiring When the refrigerant should be collected into the outdoor unit due to indoor/outdoor unit relocation, collect the refrigerant as follows. G Turn OFF the main power switch to the (1) Attach the manifold gauge to the gas stop indoor unit and the outdoor unit and wait for valve and the liquid stop valve. -
Page 25: Electrical Wiring Connection
(2) Connect the wires between the outdoor Electrical Wiring Connection and indoor units to terminals 1 and 2 on the (1) Connect the power supply wires to the terminal board. terminal board in the electrical control box If power supply wiring is connected to 1 of both outdoor unit and indoor unit. - Page 26 220-240V~/50HZ 220-240V~/50HZ Main Switch Main Switch Remote Remote Remote Remote Remote Remote Remote Remote Main Switch Control Switch Control Switch Control Switch Control Switch Control Switch Control Switch Control Switch Control Switch (Option) (Option) (Option) (Option) (Option) (Option) (Option) (Option) FUSE Outdoor Unit Outdoor Unit...
- Page 27 Power Source Cable Size EN60335-1 *1 (mm ) 220-240V~/50HZ 220V~/60HZ 380-415V 3N ~/50HZ 380V 3N~/60HZ Transmitting Power Source Cable Size Cable Size EN 60335-1 EN 60335-1 220-240V~/50HZ 220V~/60HZ 380-415V 3N ~/50HZ 380V 3N~/60HZ (2) The wire sizes marked with *1 in the table are selected at the rated current of the unit according to the European Standard ,EN60 335-1,Use the wires which are not lighter than the ordinary tough rubber sheathed fixible cord (cord sheathed flexible cord.
- Page 28 5) Install main switch and ELB for each system separately. Select the high response type ELB that is acted within 0.1 second. 6) Separate the control wiring between outdoor unit and indoor unit more than approximately 5 to 6cm from power supply wiring.
-
Page 29: Test Run
Test Run Test run should be performed according to the Table 7.2 on page 24. And use the Table 7.1 on page 23 for recording test run. G Do not operate the system until all the check points have been cleared. (A) Check to ensure that the electrical resistance is more than 1 megohm, by measuring the resistance between... - Page 30 Table 7.1 Test Run and Maintenance Record MODEL: SERIAL. No. COMPRESSOR MFG. No. CUSTOMER'S NAME AND ADDRESS: DATE: 1. Is the rotation direction of the indoor coil fan correct? 2. Is the rotation direction of the outdoor coil fan correct? 3.
- Page 31 Table 7.2 Checking of Wire Connection by Test Run NOTE: "TEST RUN" shall be performed with each refrigerant cycle (each outdoor unit). (1) Turn ON the power source of the units. Setting Temperature (2) Procedure for "TEST RUN" mode of remote control switch. HIGH SET TEMP.
- Page 32 Table 7.3 Alarm Code (RAS-3HRNM1(Q)) Code Category Content of Abnormality Leading Cause High Water Level in Drain Pan, Indoor Unit Activating of Protection Device Activated Float Switch. Activated High Pressure Switch. Activating of Protection Device Locked Motor in Cooling Operation. Outdoor Unit (Except Alarm Code 41 and 42) Abnormality of Power Supply Phase...
- Page 33 Table 7.4 Alarm Code (RAS-4/5HRNM1(Q) and RAS-5HYNM1(Q)) Code Category Content of Abnormality Leading Cause Activation of Float Switch, Indoor Unit Activating of Protection Device High Water Level in Drain Pan. Activation of PSH, Pipe Clogging. Activating of Protection Device Outdoor Unit Excessive Ref., Inert Gas Mixing.
-
Page 34: Safety And Control Device Setting
The other way, when the discharge pressure exceeds the setting. temperature becomes lower, limitation is cancelled. Model RAS-3HRNM1Q RAS-4HRNM1Q RAS-5HRNM1Q RAS-5HYNM1Q For Compressor Automatic Reset,Non-Adjustable Pressure Switch... - Page 36 P00691Q 2013.11 V00...
Need help?
Do you have a question about the 3HRNM1Q and is the answer not in the manual?
Questions and answers