Table of Contents
Advertisement
Advertisement
Chapters
Table of Contents

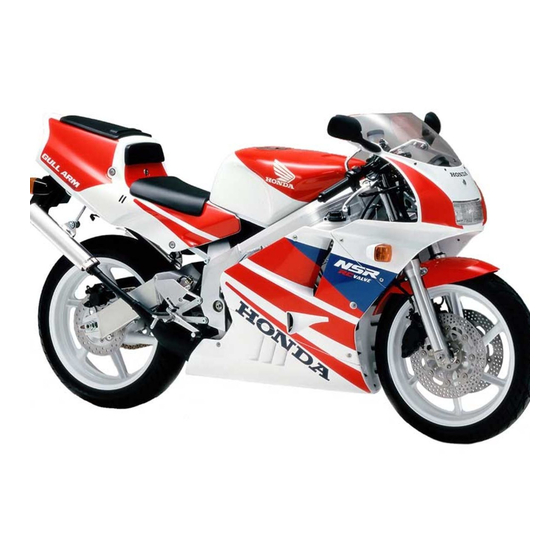
Related Manuals for Honda 1994 NSR 250 SP


Summary of Contents for Honda 1994 NSR 250 SP
- Page 2 Apart from the items in this manual, refer to “Honda NSR 250R Service Manual” by Honda The parts in this list are specially developed for ‘94-SP class. Repairs of the standard may be required to equip these parts. Please Note: •...
-
Page 3: Table Of Contents
PART ‘A’ CONTENTS • 1. Guidelines on using 6 Thermostat 1-10 Spring bayonet 1-19 Fuels Installing the thermostat seal in the kit 1-10 (iv) Rear shock absorber 1-19 (ii) Cooling water Exchanging rear shock absorber spring 1-19 7 A.C Generator 1-10 (vi) Final drive sprocket... -
Page 4: Guidelines On Using
1–2 1. GUIDELINES ON USING 2. Fuels A machine installed with this kit is used after removing the standard oil pump. Fuels should be mixed petrol. Petrol: Avgas (equivalent to No3 petrol for common aeroplanes) Specified mixing oil (proportion 30:1): Elf HTX 975 (part no. -
Page 5: Machine Operating
MACHINE OPERATING 1. Starting the engine • Start the engine after ensuring transmission oil and cooling water are in. (Ensure that the oil drain bolt/check bolt are lock wired). Ensure that the HRC card has been firmly inserted. Press the ‘kill switch’ on ‘RUN’ side. The power supply is on. iii) Ensure that the indication on the metre is the same as the illustration on the right. -
Page 6: (Iii) Driving
3. Driving Slowly raise engine speed, starting with low. Idle engine speed within 6,000 rpm until the temperature indicator registers 50°C. iii) Warm up the engine, idling within 10,000 rpm until the temperature indicator registers over 50°C. Check for oil and water leakage. Finish when the indicator registers 70°C (depending on temperature and conditions outside). -
Page 7: Setting The Carburettor
3. SETTING UP THE CARBURETTOR (Parts to be modified) 1. 2-Stroke oil feed pipes • Remove the tubes of the 2-Stroke oil feed pipes, apply adhesive to the caps and fix it to the pipes. Caps: 16097-ME9-671 • Alternatively, cut the tubes of 2-Stroke oil feed pipes by approximately 20mm. Apply adhesive to aluminium caps (the cone plug 4x5) and insert them into the pipes. -
Page 8: (Iii) Solenoid Valve
Change the screw A, which connects the throttle valve with the link for the screw 4x20 in the kit. Screw A 4x20: 93892-04020-10 [CAUTION} • Remove the screw A with a screwdriver, pulling it upwards. How to exchange jet needles Open up the throttle and the throttle valve all the way Remove the screw and slide to remove the link arm from the throttle valve, then turn down the throttle valve. -
Page 9: (Iv) Set Up Data For Reference
4. Set up data for reference Rear bank #1 Front bank #2 Main jet (MJ) #195 #192 Jet needle (JN) J8YB 2.765-3.0 grade J8YB 2.765-4.0 grade Slow jet (SJ) Air screw (AS) • How to set up Temperature, humidity and places are the factors to alter how to set up. Start setting up by fitting main jets with bigger numbers to the carburettors. -
Page 10: Carburettor Box Set
CARBURETTOR BOX SET 1. Installing the carburettor box set. Fit the air guide plate to the radiator with tie wrap. Remove the standard filter / air box, then install the carburettor box. iii) Fix the wiring loom with tie wrap. Set the carburettor insulator band R/L like ‘/ \’. -
Page 11: Sealing Plug Set
5. SEALING PLUG SET 1. Kick starter • As the kick start is not used during racing, remove the spindle shaft, then press the sealing plug ∅ 28 in where the shaft has stayed. Sealing plug ∅ 28: 90871-733-003 2. Oil pump •... -
Page 12: Thermostat
1-10 6. THERMOSTAT 1. Installing the thermostat seal in the kit. Remove the thermostat to circulate cooling water better. • A thermostat rubber is used as a thermostat cover in place of a gasket, therefore, a seal should be the same thickness as a thermostat. Thermostat seal: 19300-NKD-970 Set the thermostat seal, then tighten the cover with the rubber adjusted. -
Page 13: Radiator Set
1-11 8. RADIATOR SET 1. Removing the standard radiator Remove the radiator hose from the radiator. (It is easy to handle if you strike the end of the hose with a screwdriver and slightly move it before hand.) Remove the overflow tube from the radiator. iii) Detach the radiator from the body, removing the nuts and bolt. -
Page 14: Steering Damper Set
1-12 9. STEERING DAMPER SET 1. Steering stopper • Adjust the angle of the steering of the standard machine. (Adjust the width of the handle bars as the angle narrows) Detach the front brake clamp from the front stem. Fit the steering stopper. Tightening torque: 1.2kgf.m 2. -
Page 15: Front Brake Hose Set
1-13 10. FRONT BRAKE HOSE SET Removing the standard brake hoses. Remove the bolt and the joint bolt of the front fender (mud guard) Remove the banjo bolt of the master cylinder after covering it with a cloth. iii) Remove the banjo bolt of the callipers and detach the brake hoses. 2. -
Page 16: Front Brake Pads
1-14 11. FRONT BRAKE PADS 1. Exchanging the front brake pads Remove the pad securing pins of the front callipers and exchange it for the kit. For racing: Z22W 45105-NKD-970 For endurance: TT2501 45105-MN8-006 When exchanging the pads, it is easy to remove pins with the pads pushed towards the centre of the wheel. - Page 17 1-15 2. Installing the rear sets. Loosen the lock nut of the master cylinder brake rod joint, then exchange it for the kit rod end. Fit the brake pedal and foot peg to the L. hanger in the kit. iii) Fit the gear change lever and foot peg to the R.
-
Page 18: Adjustment
1-16 13. ADJUSTMENT 1. Cylinder RC valve • Turn the fuel cock of the fuel tank on, pass the petrol to the carburettors, turn the cock off, start the engine and turn the control switch off when the motor registers ‘Hi’ on the servo wheel at around 2,000 rpm, then adjust the items below. -
Page 19: Spring Bayonet
3~19mm Reverse 7 clicks Reverse 7 clicks Position of rebound adjuster from MAX from MAX Honda fork oil Honda fork oil Honda fork oil Brand of Oil (lot number) • A kit is set up to the standard spring. •... - Page 20 1-18 3. Exchanging the front fork spring Put bike on front paddock stand and remove the front tyre/mudguard. Turn the pre-load adjusters to the minimum and loosen the bolt of the top yoke. Detach the front fork bolt, slowly raise the bottom case and push the damper COMP out of the fork pipe. iii) Remove the fork bolt from the damper COMP.
- Page 21 1-19 4. Rear shock absorber • Standard specification NSR250R NSR250R SE/SP 10mm from the length of 10mm from the length of Sizes of spring preload spring free spring free Length of setting spring (for reference) 179mm (for reference) 165mm Position of compression adjuster 1.0 reverse (from MAX) Position of rebound adjuster 1.0 reverse (from MAX)
- Page 22 1-20 6. Final drive sprocket Remove the final drive sprocket. Loosen the swingarm-bearing holder tightening bolt. iii) Fix the drive sprocket suitable for the course. Tightening torque: 3.4kgf.m Adjust the chain, then tighten the bearing holder tightening bolt considering the direction of the hose clamp.
- Page 23 1-21 14. ELECTRICAL EQUIPMENT 1. Removing the clock harness. Remove the screws on the back of the clocks and detach the meter harness. [CAUTION] • Never remove three screws altogether as it makes the clocks free in the cowl (fairing) . •...
- Page 24 1-22 PGM HRC memory card • As for the SP harness all power supplies are controlled by the kill switch. • Turn the kill switch off when setting the card • PGM HRC memory card set Set the card in the card holder.⇒ The kill switch ‘RUN’. Setting the card for the first time.
- Page 25 1-23 Gear main shaft DRIVE Recommended Ratio DRIVEN W: ……………for wet clutch • Tsukuba (A) Set up the transmission of KV3 (‘90~’94 model base D: …………….for dry clutch machine) and HRC NKD (1 ) to the base machine. 106L • Suzuka/Tsukuba (B) Set up the transmission gear of the HRC NH3/NF5 A thin line has been drawn on the ∅17side of the main shaft indicating the kit.
- Page 26 1-24...
- Page 27 1-25...
- Page 28 1-26...
- Page 29 HRC. Order them from an HRC service shop or consult HRC dealer. • The group of engine. The parts without ‘ 1 ‘ mark are manufactured by ‘Honda Ltd’. Ask for E – 1 Cylinder-cylinder head piston them at the nearest Honda motorcycle dealer.
-
Page 30: How To Use The Parts List
Left L (100L)Link (link100) Millimetre Right How to use the parts list • Please use it when you order or repair parts. • This list contains the parts for sale. • Order these parts by part numbers. (Indicate the type, colour, manufacturer and model when required as parts may be altered.) •... -
Page 31: Cylinder-Cylinder Head Piston
Block N° E – 1 Cylinder- cylinder head- piston (SP recommended parts) NOTE (1) These parts are the same as NOTE (2) base models, however, recommended as the most suitable parts for SP models The rear head COMP (P/ N° 12220-KV3- 680) can be used in place of the front head COMP (P/ N°... -
Page 32: Sealing Plug Set
Block N° E – 2 Sealing plug set- Drive sprocket- A.C. generator Ind. N° Part N° Items Price (Y) Note Ind. N° Part N° Items Price (Y) Note Quantity Quantity • 06470-NKD-970 Sealing plug set 1,700 • 14102-NKD-980 Intake rectifier •... -
Page 33: Transmission Set (Dry/Wet)
Block N° E – 3 Transmission set- (DRY/WET) NOTE • transmission contains components of E – 3 (Dry/Wet each) • D…….Dry Clutch W……Wet Clutch Ind. N° Part N° Items Price (Y) Note Ind. N° Part N° Items Price (Y) Note Quantity Quantity •... -
Page 34: Carburettor Setting Kit
Block N° E – 4 Carburettor setting kit NOTE A carburettor setting kit contains all the components of E - 4 Ind. N° Part N° Items Price (Y) Note Ind. N° Part N° Items Price (Y) Note Quantity Quantity • 16020-NKD-970 99101-393-1750 Carburettor setting kit... -
Page 35: Steering Damper Set
Block N° F – 1 Steering damper set- Ind. N° Part N° Items Price (Y) Note Ind. N° Part N° Items Price (Y) Note Quantity Quantity • 06530-NKD-970 Steering damper set 39,800 • 53215-NKD-970 Handle stopper 4,500 • 53700-NF5-762 Steering damper ASSY 23,700 •... -
Page 36: Final Driven Sprocket
Block N° F – 2 Final driven sprocket Front/rear shock absorber spring Maintenance stand ASSY Items Note Items Note Ind. N° Part N° Price (Y) Quantity Ind. N° Part N° Price (Y) Quantity 18332-KS6-000 Exhaust pipe spring • 18333-ND4-760 Spring tube •... -
Page 37: Front Brake Hose Set-Brake Pad
Block N° F – 3 Front brake hose set- Brake pads Items Note Items Note Ind. N° Part N° Price (Y) Quantity Ind. N° Part N° Price (Y) Quantity • 06451-NKD-970 Brake hose set 8,500 45105-MN8-006 Brake pads COMP. (TT2501) 2,750 endurance •... - Page 38 2-10 Block N° F – 4 Rear sets kit NOTE A rear sets kit contains all the components of F - 4 Ind. N° Part N° Items Note Ind. N° Part N° Items Note Price (Y) Quantity Price (Y) Quantity •...
-
Page 39: Hrc Card Set
2-11 Block N° F – 5 HRC card set NOTE A memory card 020 (Wet) is sold separately Ind. N° Part N° Items Note Ind. N° Part N° Items Note Price (Y) Quantity Price (Y) Quantity • 06111-NK3-971 HRC card set 0/0 22,000 •... -
Page 40: Spark Plug Set-Carburettor Box Set
2-12 Block N° F – 6 Spark plug set Carburettor box set Items Note Items Note Ind. N° Part N° Price (Y) Quantity Ind. N° Part N° Price (Y) Quantity • 06113-NKD-970 Spark plug set 12,000 • 17210-NKD-970 Carburettor box set 35,000 •... -
Page 41: Engine Mounting Rubber Set
2-13 Block N° F – 7 Engine mounting rubber set NOTE engine mounting rubber set contains all the components of F - 7 Items Note Items Note Ind. N° Part N° Price (Y) Quantity Ind. N° Part N° Price (Y) Quantity •... -
Page 42: Radiator Set
2-14 Block N° F – 8 Radiator set NOTE A radiator set contains all the components of F - 8 Items Note Items Note Ind. N° Part N° Price (Y) Quantity Ind. N° Part N° Price (Y) Quantity • • 06190-NKD-970 Radiator set 120,000... - Page 43 2-15 Block N° F – 9 Connect hose NOTE (1) No.1 water hose A is NOTE (2) used when a rear head No.2 rear thermo COMP utilised hose is used in the place of a front head same way as No.1 COMP (for kit radiator) water hose A (for standard radiator...
- Page 44 2-16...
- Page 45 2-17...
- Page 46 2-18...
- Page 47 SPECIFICATION Model NSR250SP Model No. MC28 Liquid-cooled,2-stroke crankcase reed Engine valve 90° V-twin Bore x Stroke 54 x 54.5mm Displacement 249cm² Max. Power Output 40PS/9000rpm Max. Torque 3.3kgm/8.500rpm Compression 7.5:1 Ignition Digital CDI Carburetor 2 x 34mm Keihin flat slide carbs Fuel Capacity 16 litres 2-stroke Oil Capacity...