
Related Manuals for JVC AV-14JT5EU, AV-21JT5EU


Summary of Contents for JVC AV-14JT5EU, AV-21JT5EU
- Page 1 VICTOR COMPANY OF JAPAN, LIMITED 2000 VICTOR COMPANY OF JAPAN, LIMITED AV-14JT5EU AV-21JT5EU COLOUR TELEVISION TV/AV PMJV1V2022 0500-T-CR-DW INSTRUCTIONS VIDEO AUDIO...
- Page 2 ADDITIONAL INFORMATIONS FOR THE SET SOLD IN GREAT BRITAIN The appliance is supplied with a moulded three pin main plug fitted with 5Amp fuse. Should the fuse require replacement, it must be replaced with a fuse rated at 5 amp and approved by ASTA or BSI to BS1362.
-
Page 3: Table Of Contents
CONTENTS IMPORTANT SAFEGUARDS ... 2 BEFORE LAUNCHING ... 3 CONNECTING THE EXTERNAL EQUIPMENT ... 4 IDENTITY OF FEATURES ON LOCAL AND REMOTE CONTROL ... 6 INSTALLATION... 8 DAILY USE ... 16 TELETEXT ... 24 TROUBLESHOOTING ... 26 SPECIFICATIONS ... 27... -
Page 4: Important Safeguards
IMPORTANT SAFEGUARDS WATER AND MOISTURE Never install the set in the following places; In a wet basement, bath- room. Do not place any container with liquid on the set. HEAT Never place the set near heat sources. VENTILATION Do not cover the ventilation opening in the cabinet and never place the set in a confined space such as bookcase or built-in unless proper ventilation is provided. -
Page 5: Before Launching
BEFORE LAUNCHING INSERTING BATTERIES INTO THE CONTROL UNIT Insert the batteries (two 1.5V, type AAA(R03)) MAINS CONNECTION Plug the mains cable into the power socket with 230V/50Hz AC. AERIAL CONNECTION When using an outdoor aerial, it is usually con- nected to the set by means of 75 ohms. SWITCHING ON AND OFF Switching on Switch the set on with the MAIN POWER button (... -
Page 6: Connecting The External Equipment
CONNECTING THE EXTERNAL EQUIPMENT TV and AV Use the AV button on the remote control, or on the front of the set to select one of the three options. Whenever the AV button is pressed, on the on-screen display will be changed as shown: AV S-VHS SCART JACK (... - Page 7 CAMCODER FRONT AV JACK (AUDIO/VIDEO) Connect the AV (Audio/Video) socket with an appreciate cable to the corresponding socket of the external equipment. Select AV mode by pressing the AV button. Press the AV button to return to the TV mode. Note that you can play only one apparatus, if two apparatuses are connected FRONT AV JACK and SCART JACK.
-
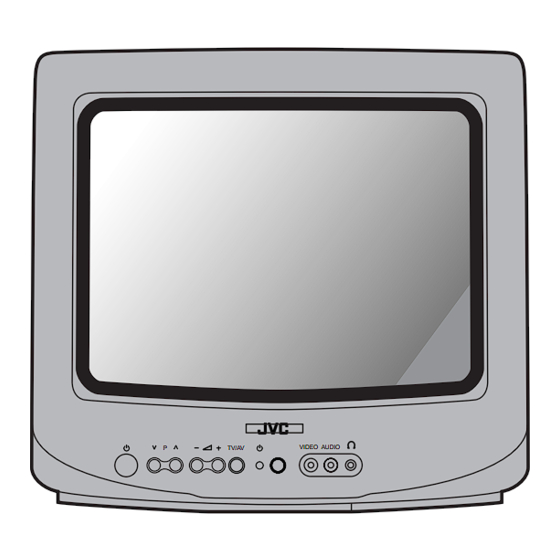
Page 8: Identity Of Features On Local And Remote Control
IDENTITY OF FEATURES ON LOCAL AND REMOTE CONTROL LOCAL CONTROL Front MAIN PROGRAMME POWER DOWN/UP BUTTON BUTTONS Back AERIAL TERMINAL SCART JACK TV/AV VOLUME STAND-BY REMOTE DOWN/UP BUTTON INDICATOR SENSOR BUTTONS VIDEO AUDIO TV/AV VIDEO AUDIO VIDEO AUDIO HEAD INPUT INPUT PHONE... - Page 9 REMOTE CONTROL TV mode POWER NUMBER 0-9 P. MODE/OK (PR/CURSOR) UP VOLUME UP (CURSOR RIGHT) MENU (PR/CURSOR) DOWN VOLUME DOWN (CURSOR LEFT) 10 MUTING 11 RECALL 12 SLEEP 13 Not used 14 MOVE 15 SKIP 16 TV/TEXT 17 DELETE 18 MODE 19 VCR/ /DVD switch 20 VCR/DVD Control buttons...
-
Page 10: Installation
INSTALLATION Read this “INSTALLATION” before using the TV for the first time. Press the MENU button to dis- play the MENU. To exit the MENU, press the MENU button again. Menu Picture MENU Timer Language Install Select INSTALL from the MENU with the UP/DOWN buttons, then press the RIGHT button. - Page 11 Select LANGUAGE from the MENU with the UP/DOWN but- tons, then press the RIGHT but- ton. Menu Menu Picture Picture Timer Timer Language Language Install Install Choose the appropriate country with the UP/DOWN buttons, then press the RIGHT button. Note: •...
- Page 12 INSTALLATION Select INSTALL from the MENU with the UP/DOWN buttons, then press the RIGHT button. Menu Picture Timer Language Install Use the UP/DOWN buttons to select the number of the programme you want to edit. Edit Pr Name Picture Sound Skip 01 ----- C01 Euro ----- C07...
- Page 13 Select EDIT with the UP/DOWN buttons, then press the RIGHT button. Install Auto setup Manual tuneu Fine tune Edit Edit the programme in accordance with the explanations of SKIP, DELETE, MOVE, NAME, CH., PICTURE and SOUND. When the editing has been completed, press the MENU button 3 times and exit from the MENU.
- Page 14 INSTALLATION The MOVE function can be used to move a channel to a different programme number. Press the MOVE button to start the MOVE function. Edit Pr Name Picture Sound Skip 01 ----- C01 Euro 02 ----- C07 Euro 03 ----- C25 Euro 04 ----- C35 Euro...
- Page 15 If the picture is not displayed correctly, use the PICTURE func- tion to change the colour system. Use the LEFT/RIGHT buttons to move the cursor to below “PIC- TURE”. Edit Pr Name Picture Sound Skip 01 ----- C01 Euro 02 ----- C07 Euro 03 ----- C25 Euro...
- Page 16 INSTALLATION Manually register the channel to a programme number. When no menu is displayed, use the UP/ DOWN buttons or the NUMBER 0-9 buttons to select the program number to which you want to register the channel. Menu MENU Picture Timer Language Install...
- Page 17 Select MANUAL TUNE with the UP/DOWN buttons. Install Auto set Manual tune Fine tune Edit Note: • If the sound is not correct even when the picture of the channel is displayed correctly, press the MODE button to select the sound system that has the correct sound. •...
-
Page 18: Daily Use
DAILY USE The set has a total of 100 programme numbers, 0...99. The NUMBER button 0...9 are used for direct programme selection. In order two digit programme, press the second numbered button within two seconds. Switch through the programme number step by step with the UP/DOWN buttons (P 8/9). Adjust the volume with the VOLUME DOWN/UP buttons (–... - Page 19 The RECALL button is used to display the current status: programme number, station name, clock. This display appears for 5 seconds unless any button is pressed. By pressing the SLEEP button repeatedly, you can select one of the following settings: 0:00 0:20 0:40...
- Page 20 Menu MENU Picture Timer Language Install You can control your JVC brand VCR or DVD player with the TV remote control. Set the VCR/ /DVD switch to the VCR or DVD position. You can operate the menus with the buttons on the front panel of the TV.
- Page 21 When the adjustments have been completed, press the MENU button twice and exit from the MENU. Contrast If you press the RECALL button with the MENU displayed on the screen, the OSD, except text will be half-toned. If you want to return to the normal OSD, press the RECALL button again.
- Page 22 DAILY USE Select TIMER from the MENU with the UP/DOWN buttons, then press the RIGHT button. Menu Menu Picture Picture Timer Timer Language Language Install Install Setting the TV clock. Select CLOCK from the TIMER menu with the UP/DOWN buttons and press the RIGHT button.
- Page 23 Perform the settings in accord- ance with the explanations of CLOCK, WAKE UP and AUTO CLOCK. Clock --:-- Wake up Time --:-- Prog. Pr01 Auto Clock Prog. Pr01 Use the UP/DOWN buttons to set the minutes. The TV clock starts. Clock 17:-- Wake up...
- Page 24 DAILY USE You can use the WAKE UP func- tion to automatically turn the TV on at a set time. You can also select the channel to be displayed when the TV is turned on. Select WAKE UP from the TIMER menu with the UP/DOWN buttons, then press the RIGHT button.
- Page 25 Select TIME with the UP/DOWN buttons, then press the RIGHT button. Clock 17:30 Clock Wake up Wake up Time --:-- Time Prog. Pr01 Prog. Auto Clock Auto Clock Prog. Pr01 Prog. After exiting from the menu by pressing the MENU button twice, press the POWER button on the remote control and turn the TV off.
-
Page 26: Teletext
TELETEXT 1-SWITCHING TELETEXT ON/OFF Set the VCR/ /DVD switch to the ). To return to the TV mode, press the TELETEXT button again. Note: Some of the buttons may not work if the VCR/ position. 2-COLOUR BUTTONS IN TOP/FLOF TELETEXT A red, green, yellow and blue field is shown at the bottom of the screen. - Page 27 6-CALLING UP SUBPAGE DIRECTLY Pressing the SUBPAGE, ( ), button, “Sub-Code – – – –” appears beside page number. Enter the subpage number that you want to call up with the NUMBER button 0...9, for exam- ple, the 2nd page, sequence 0002. The desired subpage is sought and displayed. 7-WATCHING TELEVISION DURING TELETEXT MODE Some pages are continually updated, for example, stock market reports, sports announce- ment and the latest news.
-
Page 28: Troubleshooting
TROUBLESHOOTING • If the plug is disconnected from the AC socket, or the TV aerial has problems, you may think there is a problem with the TV itself. Be sure to check the following before calling for service. IMPORTANT • Review all instructions in this manual Problem GENERAL The TV cannot be turned on. -
Page 29: Specifications
SPECIFICATIONS Model Item TV RF systems CCIR B/G, I, D/K, L Colour systems PAL, SECAM (NTSC 3.58 / 4.43 MHz only in AV modes) Channels and frequencies E2-E12, E-21-E69, S1-S41, X, Y, Z, Z+1, Z+2, A-H, H+1, H+2, F2-F10, F21-F69, R1-R12, R21-R69 Teletext systems FLOF (Fastext) / TOP / WST (standard system)
Need help?
Do you have a question about the AV-14JT5EU, AV-21JT5EU and is the answer not in the manual?
Questions and answers