Heatilator ST36D Owner's Manual
Wood burning fireplace installation and operation
Hide thumbs
Also See for ST36D:
- Owner's manual (48 pages) ,
- Installation manual (40 pages) ,
- Brochure & specs (4 pages)
Table of Contents
Advertisement
Models:
ST36D
Wood Burning Fireplace
•
Important operating
a n d m a i n t e n a n c e
instructions included.
WARNING
If the information in these instruc-
tions is not followed exactly, a
fi re may result causing property
damage, personal injury, or death.
• Do not store or use gasoline or other fl am-
mable vapors and liquids in the vicinity of
this or any other appliance.
• Do not overfi re. Overfi ring will void your
warranty.
• Comply with all minimum clearances to
combustibles as specifi ed. Failure to
comply may cause house fi re.
Installation and service of this fi replace
should be performed by qualifi ed personnel.
Hearth & Home Technologies suggests NFI
certifi ed or factory-trained professionals, or
technicians supervised by an
NFI certifi ed professional.
NOTICE
DO NOT DISCARD THIS MANUAL
•
Read, understand
and follow these
instructions for safe
i n s t a l l a t i o n a n d
operation.
Heatilator • ST36D • 20396 • Rev AG • 7/12
Owner's Manual
•
Leave this manual with
party responsible for
use and operation.
WARNING
Hot screen/mesh and glass doors will cause burns.
•
DO NOT touch screen/mesh or glass doors until
cooled
•
NEVER allow children to touch screen/mesh or glass
doors
•
Keep children away
•
CAREFULLY SUPERVISE children in same room as
fi replace.
•
Alert children and adults to hazards of high
temperatures.
High temperatures may ignite clothing or other
fl ammable materials.
•
Keep clothing, furniture, draperies and other
fl ammable materials away.
WARNING
Fire Risk
•
For use with solid wood fuel or decorative
gas appliance only.
•
DO NOT install unvented gas logs.
Installation and Operation
HOT SURFACES!
Screen/mesh, glass doors
and other surfaces are hot
during operation AND cool
down.
1
Advertisement
Table of Contents

Related Manuals for Heatilator ST36D


Summary of Contents for Heatilator ST36D
- Page 1 • For use with solid wood fuel or decorative technicians supervised by an gas appliance only. NFI certifi ed professional. • DO NOT install unvented gas logs. Heatilator • ST36D • 20396 • Rev AG • 7/12...
-
Page 2: Congratulations
CONTACT: HEARTH & HOME TECHNOLOGIES INC., ADJUST DAMPER TO THE FULLY OPEN POSITION. 1915 W. SAUNDERS ST., MT. PLEASANT, IA 52641. Note: An arrow ( ) found in the text signifies change in content. Heatilator • ST36D • 20396 • Rev AG • 7/12... -
Page 3: Table Of Contents
Tools and Supplies Needed E. Contact Information G. Fireplace System Requirements H. Inspect Fireplace and Components Framing & Clearances A. Select Fireplace Location B. Clearances C. Sidewalls/Surrounds D. Frame the Fireplace Heatilator • ST36D • 20396 • Rev AG • 7/12... -
Page 4: Warranty
Limited 3 years Firebox and heat exchanger Lifetime All replacement parts 90 Days beyond warranty period See conditions, exclusions, and limitations on next page. 4021-645C 12-29-10 Page 1 of 2 Heatilator • ST36D • 20396 • Rev AG • 7/12... - Page 5 THE EXTENT PROVIDED BY LAW, HHT MAKES NO EXPRESS WARRANTIES OTHER THAN THE WARRANTY SPECIFIED HEREIN. THE DURATION OF ANY IMPLIED WARRANTY IS LIMITED TO DURATION OF THE EXPRESSED WARRANTY SPECIFIED ABOVE. 4021-645C 12-29-10 Page 2 of 2 Heatilator • ST36D • 20396 • Rev AG • 7/12...
-
Page 6: Listing And Code Approvals
NOTICE: This fireplace is tested and approved as a decorative fireplace. It should not be factored as a primary heat source in residential heating calculations. Heatilator • ST36D • 20396 • Rev AG • 7/12... -
Page 7: User Guide
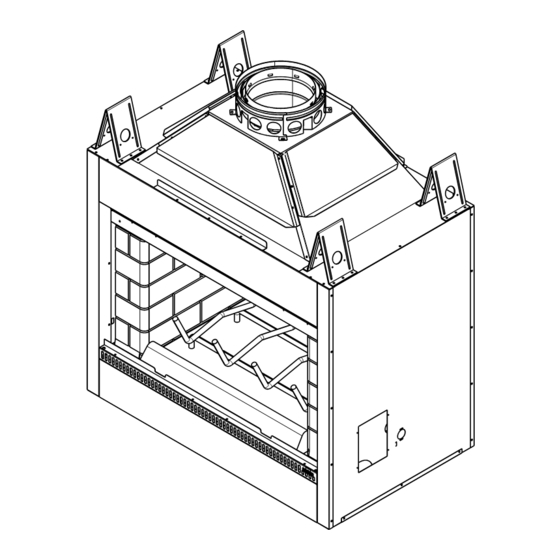
WARNING! DO NOT operate fi replace before reading and understanding operating instructions. Failure to operate fi replace according to operating instructions could cause fi re or injury. Figure 2.1 General Operating Parts Heatilator • ST36D • 20396 • Rev AG • 7/12... -
Page 8: Seasoned Wood
Add a minimum of three average size pieces of split firewood, placed to allow combustion air and flames between them. CAUTION! Odors and vapors released during initial operation may be irritating to sensitive individuals. Open windows for air circulation. Heatilator • ST36D • 20396 • Rev AG • 7/12... -
Page 9: Glass Doors
HOT when fireplace is in operation. Adjust BEFORE lighting fire. 48 in. (1219 mm) Clear Space 12 in. (305 mm) Front of Fireplace Clear Space Sides of Fireplace (from the FP opening) Figure 2.3 Clear Space Heatilator • ST36D • 20396 • Rev AG • 7/12... -
Page 10: Wood Fuel
Do not poke or stir the logs while they are burning. Use formation of creosote. only firelogs that have been evaluated for the application in manufactured fireplaces and refer to firelog warnings and caution markings on packaging prior to use. Heatilator • ST36D • 20396 • Rev AG • 7/12... -
Page 11: Maintenance And Service
SCREW Slip Chase Section TCT375 ST375 TS345/TS345P TR344/TR342 Square Square Terra Cotta Round Termination Cap Termination Caps Termination Cap DT SERIES Termination Cap Figure 3.1 Chimney & Termination Cap Cleaning Heatilator • ST36D • 20396 • Rev AG • 7/12... -
Page 12: Check Firebox Refractory
Clean glass with a non-abrasive commercially available cleaner or ashes: • Light deposits Use household glass cleaner • Heavy deposits Use wood ash on damp cloth or, Use commercial fireplace glass cleaner (consult with your dealer) Heatilator • ST36D • 20396 • Rev AG • 7/12... -
Page 13: Troubleshooting Guide
Add glass doors to slow down air flow. Overdrafting Check for correct vent height; too much vertical height creates overdrafting. Check location of vent termination (refer to chimney assembly section). Heatilator • ST36D • 20396 • Rev AG • 7/12... -
Page 14: Getting Started
(1.83m) off (Section 11) ground level. Hearth extension Outside (Section 11) combustion air Factory-built fireplace (Section 7) Protective metal hearth strip(s) (Section 7) Figure 5.1 Typical Fireplace System Heatilator • ST36D • 20396 • Rev AG • 7/12... -
Page 15: Design And Installation Considerations
Tight sealing construction of the structure • Mechanical exhausting devices NOTICE: Hearth & Home Technologies Inc. recommends • Improper location of the chimney the use of direct vent fireplaces in basements. Heatilator • ST36D • 20396 • Rev AG • 7/12... -
Page 16: Locating Fireplace & Chimney
• Too close to tree • Below adjacent structure Recommended: • Insulated exterior chase • Lower roof line • Avoid outside wall in cooler climates Windward Leeward Multi-level Roofs Figure 5.2 Recommended Chimney Locations Heatilator • ST36D • 20396 • Rev AG • 7/12... -
Page 17: Tools And Supplies Needed
Misc. screws and nails G. Fireplace System Requirements This fireplace system requires: • Hearth Refractory • Grate Assembly • Outside Air Hood Duct must be installed, but sold separately. Heatilator • ST36D • 20396 • Rev AG • 7/12... -
Page 18: Framing & Clearances
52 in. (1321 mm) 36 in. (914 mm) (hearth 16 in. (406 mm) extension) 12 in. (305 mm) min. to perpendicular 48 in. wall. (1219 mm) Figure 6.1 Fireplace Locations Heatilator • ST36D • 20396 • Rev AG • 7/12... -
Page 19: Clearances
1/2 in. (13 mm) to back & sides of appliance 48 in. 1219 mm 0 in. to floor Figure 6.2 Clearances to Combustible Materials Note: Chimney air kit is not shown, but is required in Canada. Heatilator • ST36D • 20396 • Rev AG • 7/12... -
Page 20: Sidewalls/Surrounds
Note: Fireplace Header cannot be positioned until after the fireplace assembly is in place. 41 in. (1041 mm) 23 in. (584 mm) Figure 6.4 Framing the Fireplace Heatilator • ST36D • 20396 • Rev AG • 7/12... -
Page 21: Installation Of Fireplace
• Check fireplace opening for square to ensure proper fit of glass doors. Measure diagonals of fireplace opening to make sure they are equal. Heatilator • ST36D • 20396 • Rev AG • 7/12... - Page 22 Figure 7.4 Outside Combustion Air Placement Heatilator • ST36D • 20396 • Rev AG • 7/12...
-
Page 23: Install Outside Air Kit
Figure 7.5 Outside Air Installation • Assemble flexible duct (not supplied) between the door assembly and the inlet tube assembly. Secure it in position with the supplied wire ties. Heatilator • ST36D • 20396 • Rev AG • 7/12... -
Page 24: Chimney Assembly
Lock chimney sections together firmly to resist movement Ceiling firestops are required where chimney passes through ceiling or floor Figure 8.1 Typical Chimney System - Guidelines for Chimney System Installation Heatilator • ST36D • 20396 • Rev AG • 7/12... -
Page 25: Chimney Requirements
20 ft. (6.10 m) min. height (double offset-return) (1200 mm) 90 ft (27.4 m) max. height Effective SL324 22-3/4 Height SL336 34-3/4 SL348 46-3/4 1187 * Dimensions reflect effective height. Figure 8.2 Chimney Requirements Heatilator • ST36D • 20396 • Rev AG • 7/12... -
Page 26: Using Offsets/Returns
2629 49-1/4 1251 94-1/2 2400 Proper assembly of air-cooled chimney parts result in an overlap at chimney joints of 1-1/4 in. (32 mm). Effective length is built into this chart. Heatilator • ST36D • 20396 • Rev AG • 7/12... -
Page 27: Assemble Chimney Sections
• Vertical straight runs of chimney must be supported every 35 ft (10.7 m). D. Install Chimney Air Kit • Required in Canada. • Follow instructions provided with this accessory. Heatilator • ST36D • 20396 • Rev AG • 7/12... -
Page 28: Install Ceiling Firestops
(use 600° F sealant). Catalog # Angle FS338 14-1/2 14-1/2 0° FS339 14-1/2 18-3/8 15° FS340 14-1/2 30° Figure 8.5 Installing the Ceiling Firestop Heatilator • ST36D • 20396 • Rev AG • 7/12... -
Page 29: Install Attic Insulation Shield
Attic Insulation Shield 14-1/2 in. (368 mm) diameter 6 Tabs bent in 90° Insulation Insulation 10-1/2 in. Ceiling Firestop Pipe (267 mm) Figure 8.8 Install Attic Insulation Shield (firestop below ceiling) Heatilator • ST36D • 20396 • Rev AG • 7/12... -
Page 30: Cut Out Hole In Roof
All nail heads must be caulked with a roofing sealant. • Caulk the overlap seam of any exposed pipe sections that are located above the roof line to prevent leaks. Heatilator • ST36D • 20396 • Rev AG • 7/12... -
Page 31: Chimney Termination Requirements
In a staggered installation with both gas and wood terminations, the wood termination cap must be higher than the gas termination cap. Figure 8.10 Multiple Chimney Locations Heatilator • ST36D • 20396 • Rev AG • 7/12... -
Page 32: Chase Installations
Insulation Insulation • Failure to prevent contact between insulation or other False Ceiling False Ceiling materials and chimney system may cause overheating Chimney and fire. Figure 9.1 Chase Assembly Heatilator • ST36D • 20396 • Rev AG • 7/12... -
Page 33: Install Fireplace & Chimney
WARNING! Risk of Fire! DO NOT caulk the pipe to the Galvanized chase top collar. Chase Top • Caulk all seams to prevent leaks. • Refer to Figure 9.3. Figure 9.3 Chase Top Construction Heatilator • ST36D • 20396 • Rev AG • 7/12... -
Page 34: Install Termination Cap
Installing a TR344 Round Termination Cap maximum Chase Chimney Pipe Termination cap pipe and chimney section must overlap 1-1/2 in. (38 mm) Figure 9.6 Installing an ST375 Square Termination Cap Heatilator • ST36D • 20396 • Rev AG • 7/12... - Page 35 2 in. (51 mm) 7 in. (178 mm) Chase Chimney Pipe Termination cap pipe and chimney section must overlap 1-1/2 in. (38 mm) Figure 9.8 Installing a TCT375 Terra Cotta Cap Heatilator • ST36D • 20396 • Rev AG • 7/12...
-
Page 36: Shrouds
584 x 584 Min. Opening Width 17 x 17 22 x 22 20 x 20 432 x 432 559 x 559 508 x 508 Figure 10.2 Open Top Shroud Dimensions Heatilator • ST36D • 20396 • Rev AG • 7/12... - Page 37 Min. Base Dims. 27 x 27 27 x 27 686 x 686 686 x 686 Min. Height Above Radiation Shield Min. Opening Width Min. Opening Height Figure 10.4 Roofed Style Shroud Dimensions Heatilator • ST36D • 20396 • Rev AG • 7/12...
-
Page 38: Finishing
0.20 5-1/8 in. Common Brick 0.20 5-1/8 in. Ceramic Tile 12.50 0.08 12-1/4 in. Armstrong™ Privacy Guard Plus 0.46 2.18 1/2 in. Marble 14.3-20.0 0.07-0.05 14-5/8 in. - 20-3/8 in. Heatilator • ST36D • 20396 • Rev AG • 7/12... -
Page 39: Finishing Material
Metal strips are placed 2 in. (51 mm) equivilent under the front of the fireplace and must insulation extend beyond the front and sides of fireplace opening by 2 in. (51 mm) Figure 11.3 Decorative Facing Heatilator • ST36D • 20396 • Rev AG • 7/12... -
Page 40: Combustible Mantel
6 in./152 mm minimum brick, tile, concrete, slate, glass, plasters Seal joint with Measured from top of fireplace opening non-combustible sealant Figure 11.4 Clearances to Mantels or other Combustibles above Fireplace Heatilator • ST36D • 20396 • Rev AG • 7/12... -
Page 41: Sidewalls/Surrounds
• Combustible or non-combustible mantel legs, surrounds and stub walls may be constructed per Figure 11.5. Figure 11.5 Mantel Leg or Wall Projections (acceptable on both sides of opening) Heatilator • ST36D • 20396 • Rev AG • 7/12... -
Page 42: Accessories
Combustible materials may be located at zero clearance to gas line Repack beyond 4 in. (102 mm) insulation from fireplace side. knockout 4 in. (102 mm) Figure 12.1 Gas Line Installation Heatilator • ST36D • 20396 • Rev AG • 7/12... -
Page 43: Reference Materials
(1321 mm) 16 in. (406 mm) 1/2 in. (13 mm) HX3 Hearth Extension Bi-fold Glass Doors DM1036, DM1036B, DM1036S See your Heatilator dealer for a complete listing of optional components. Heatilator • ST36D • 20396 • Rev AG • 7/12... -
Page 44: Chimney Components
Adapter - May be used with the following copper caps Inside CT-Series Diameter DT-Series 20-3/4 in. 8 in. (527 mm) (203 mm) Outside 4-3/4 in. (121 mm) Diameter Effective Height 10-1/2 in. (267 mm) SL3 Vent Stabilizer Heatilator • ST36D • 20396 • Rev AG • 7/12... - Page 45 (787 mm) TR Top Vent Kit RF371 Roof Flashing CT-3A 15-3/4 in. (400 mm) 34-3/4 in. (883 mm) 32-1/2 in. (826 mm) TR344 Round Termination Cap TR342 Round Telescoping Termination Cap Heatilator • ST36D • 20396 • Rev AG • 7/12...
- Page 46 (1829 mm) (914 mm) DTS134 /DTS146 DTO134 / DTO146 Decorative Caps 10-7/8 in. DTO134 (276 mm) DTO146 22.7 1168 2 in. (51 mm) DTS134 21.18 CT35 Chase Top DTS146 21.18 1168 Heatilator • ST36D • 20396 • Rev AG • 7/12...
-
Page 47: Service Parts
D. Service Parts Heatilator • ST36D • 20396 • Rev AG • 7/12... -
Page 48: Contact Information
1915 W. Saunders Street Mt. Pleasant, Iowa 52641 www.heatilator.com Please contact your Heatilator dealer with any questions or concerns. For the number of your nearest Heatilator dealer, please visit www.heatilator.com. – NOTES – CAUTION DO NOT DISCARD THIS MANUAL •...
Need help?
Do you have a question about the ST36D and is the answer not in the manual?
Questions and answers