Samsung Galaxy S 4G User Manual
Portable quad-band mobile phone
Hide thumbs
Also See for Galaxy S 4G:
- User manual (256 pages) ,
- User manual (248 pages) ,
- Start manual (27 pages)

Related Manuals for Samsung Galaxy S 4G


Summary of Contents for Samsung Galaxy S 4G
- Page 1 P O R T A B L E Q U A D - B A N D M O B I L E P H O N E User Manual Please read this manual before operating your phone, and keep it for future reference. DRAFT DRAFT FT F...
-
Page 2: Intellectual Property
Intellectual Property All Intellectual Property, as defined below, owned by or which is otherwise the property of Samsung or its respective suppliers relating to the SAMSUNG Phone, including but not limited to, accessories, parts, or software relating there to (the “Phone System”), is proprietary to Samsung and protected under federal laws, state laws, and international treaty provisions. - Page 3 Do you have questions about your Samsung Mobile Phone? For 24 hour information and assistance, we offer a new FAQ/ARS System (Automated Response System) at: www.samsung.com/us/support T9 Text Input is licensed by Tegic Communications and is covered by U.S. Pat. 5,818,437; U.S. Pat. 5,953,541; U.S. Pat. 6,011,554 and other patents pending.
- Page 4 Dynamic Noise Suppression from Audience Your phone is equipped with an advanced voice processing chip that delivers clear mobile calls by suppressing background noise, intermittent sounds (like a siren or nearby conversation), and echoes, allowing you to hear and be heard nearly anywhere. How Does It Work? Based on the intelligence of the human hearing system, the technology: Captures, evaluates and distinguishes all the sound signals surrounding your phone, and the person you're speaking with.
- Page 5 MANUAL SHALL BE CONSTRUED TO CREATE AN EXPRESS OR IMPLIED WARRANTY OF ANY KIND WHATSOEVER WITH RESPECT TO THE PRODUCT. IN ADDITION, SAMSUNG SHALL NOT BE LIABLE FOR ANY DAMAGES OF ANY KIND RESULTING FROM THE PURCHASE OR USE OF THE PRODUCT OR ARISING FROM THE BREACH OF THE EXPRESS WARRANTY, INCLUDING INCIDENTAL, SPECIAL OR CONSEQUENTIAL DAMAGES, OR LOSS OF ANTICIPATED PROFITS OR BENEFITS.
-
Page 6: Table Of Contents
Home Screen ........29 Using the Samsung QWERTY Keypad ....70 Screen Navigation . - Page 7 Section 6: Contacts ............75 Sending an Audio Postcard ......98 Email ......... . . 98 Accounts .
- Page 8 AirSync ......... 125 Market .
- Page 9 Stopwatch ........169 Samsung Mobile Products and Recycling ....211 Setting a Timer .
- Page 10 FCC Hearing Aid Compatibility (HAC) Regulations for Wireless Devices ....... 220 Restricting Children's Access to Your Mobile Device .
-
Page 11: Section 1: Getting Started
Section 1: Getting Started This section explains how to get started with your phone by Note: Instructions in this manual are based on default settings, and may vary installing and charging the battery, installing the SIM card and from your phone, depending on the software version on your phone, optional memory card, and setting up your voice mail. -
Page 12: Battery Cover
Text Conventions To remove the battery cover: Hold the device firmly and locate the cover release latch. This manual provides condensed information about how to use your phone. To make this possible, the following text conventions Place your fingernail in the opening and firmly “pop” the are used to represent often-used steps: cover off the device (similar to a soda can). -
Page 13: Sim Card Overview
To replace the battery cover: Carefully slide the SIM card into the SIM card socket until Position the battery cover over the battery compartment the card clicks into place. Make sure that the card’s gold and press down until you hear a click. contacts face into the phone and that the upper-left angled SIM Card Overview corner of the card is positioned as shown. -
Page 14: Installing The Microsd Memory Card
To remove the SIM card: Firmly press the card into the slot and make sure that it If installed, remove the battery from its compartment catches with the push-click insertion. For more information (1 and 2). The battery can block the proper removal of the on how to use the SD card see “Using the SD Card”... -
Page 15: Battery
Removing the microSD Memory Card Remove the battery cover. Installing Battery Firmly press the card into the slot and release it. The card should pop partially out of the slot. Remove the card from the slot. Battery Before using your phone for the first time, install the battery and charge it fully. - Page 16 Use only approved batteries and chargers. Ask your cause the phone to become damaged. local Samsung dealer for further details. Before using your phone for the first time, you must fully charge Important!: Although the battery comes partially charged. It is recommended you fully charge the battery before using your device for the first the battery.
-
Page 17: Low Battery Indicator
Important!: If your handset has a touch screen display, please note that a touch screen responds best to a light touch from the pad of your finger or a non-metallic stylus. Using excessive force or a metallic object when pressing on the touch screen may damage the tempered glass surface and void the warranty. -
Page 18: Extending Your Battery Life
Extending Your Battery Life Animated wallpapers use processing power, memory, and more power. • Change your Live Wallpaper to a non-animated Wallpaper gallery or Active applications, light levels, Bluetooth usage, and GPS Gallery image. functionality all act to drain your battery. The following is a list of Power Control helpful tips that can help conserve your battery power: Use the Power Control shortcut bar. -
Page 19: Switching The Phone On Or Off
With a SIM card installed Tap any of the icons on the Power Control shortcut bar to activate/deactivate the feature. Press and hold until the phone switches on. The phone searches for your network and after finding it, Note: A green bar displayed beneath the icon means the application is active you can make or receive calls. -
Page 20: Creating A New Google Account
Creating a New Google Account ™ You should create a Google Account when you first use your device in order to fully utilize the functionality. This account provides access to several device features such as Gmail, Google Maps, Google Search, and the Android Market applications. Before you are able to access Google applications, you must enter your account information. -
Page 21: Signing Into Your Google Account
Retrieving your Google Account Password Note: If you already have a Google account, you only need to sign in. A Google account password is required for Google applications. If you misplace or forget your Google Account password, follow To create a new Google Account from the Web: these instructions to retrieve it: From a computer, launch a Web browser and navigate to From your computer, use an Internet browser and navigate... -
Page 22: Visual Voicemail
Accessing Your Voice Mail From Another Phone For new users, follow the instructions below to set up voice mail: Dial your wireless phone number. Note: Voicemail setup may be different depending on your network. When you hear your voicemail greeting, press the asterisk From the Home screen, tap and then touch and hold key on the phone you are using. -
Page 23: Task Manager
Task Manager • Package displays any installed packages or applications from the Market that are taking up memory space. Tap Uninstall to remove Your phone can run applications simultaneously, with some them from your phone. applications running in the background. •... -
Page 24: Section 2: Understanding Your Phone
Section 2: Understanding Your Phone This section outlines key features of your phone. It also describes Supports synchronizing with a corporate email account • the phone’s keys, screen and the icons that display when the 5 Megapixel camera and video with autofocus, multi shot •... -
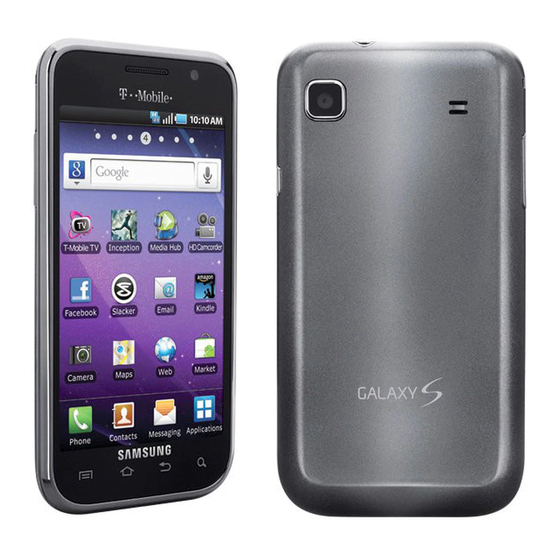
Page 25: Front View
Front View The following list correlates to the illustrations. USB Power/Accessory connector allows you to connect a The following illustrations show the main elements of your phone: power cable or optional accessories such as a USB/data cable. Strap holder is used to connect a carrying strap to the phone. -
Page 26: Back View Of Your Phone
Quick search is used to search the device for applications, Proximity Sensor detects how close an object is to the contact information, or searches the internet for surface of the screen. This is typically used to detect when information. your face is pressed up against the screen, such as during a phone call. -
Page 27: Phone Display
Phone Display Your phone’s display provides information about the phone’s status, and is the interface to the features of your phone. The display indicates your connection status, signal strength, battery status and time. Icons display at the top of the phone when an incoming call or message is received and also alerts you at a specified time when an alarm was set. -
Page 28: Status Bar
Display settings Indicates there is no signal available. In this menu, you can change various settings for the for the wallpaper, cube, brightness or backlight. Displays when there is no SIM card in the phone. From the Home screen, tap (Applications) (Settings) Display. - Page 29 Displays your current battery charge level is Displays when there is a new voicemail message. very low. Shows your current battery only has three percent Displays when there is a new visual voicemail power remaining and will immediately shutdown. message. Represented as a blinking icon.
-
Page 30: Notification Bar
Displays when Wi-Fi is connected, active, and Displays when the External SD card is being prepared communicating with a Wireless Access Point (WAP). for mounting to the device. This is required for communication with the External SD card. Displays when Wi-Fi is active but there is a communication issue with the target Wireless Displays when the phone has detected an active USB Access Point (WAP). -
Page 31: Function Keys
Accessing Additional Panel Functions Tap a notification entry to open the associated application (2). In addition to notifications, this panel also provides quick and ready access to five device functions. These can be quickly activated or deactivated. The following functions can either be activated (blue) or deactivated (white): Wi-Fi, Bluetooth, GPS, Silent, or Auto rotation. -
Page 32: Back Key
Back Key Wallpaper ( ) lets you to customize the current screen’s • wallpaper image by choosing from either Home screen Wallpaper, Live The Back key ( ) returns you to the previously active screen. Wallpaper or Wallpaper gallery). If the on-screen keyboard is currently open, this key closes the –... - Page 33 Using Google Search Using Additional Voice Search Functions Use the Google Search box to manually search for a term on both For more information, refer to: your device and on the Web. http://www.google.com/mobile/voice-actions/. Press to launch the Google Search box. From an open Voice Search dialog, speak the following words to access additional features: to select a search area:...
-
Page 34: Home Screen
note to self [message] allows you to search for a note save to your new voicemail, upcoming event, USB connection, emails, and • Memo Pad. Text/MMS messages. Home Screen – These notifications appear at the top-left of the screen (within the Status bar area) and display important user information. - Page 35 Google search is an on-screen Internet search engine powered by Primary Shortcuts: are four shortcuts present throughout all of the • • Google™. Touch to access the Voice Search feature where you can available screens and can be used to both navigate within the device verbally enter a search term and initiate an online search.
-
Page 36: Screen Navigation
Screen Navigation As you transition from screen to screen, the screen counter (located at the top) displays the current panel number in a circle. Using the touch screen display and the keys, you can navigate the features of your phone and enter characters. The following conventions are used in this manual to describe the navigation action in the procedures. - Page 37 Press and hold: Pressing relates to use of the hardware keys and • buttons to select or activate an item. For example: press the Swipe or slide Navigation key to scroll through a menu. Some buttons and keys and Drag require you to press and hold them to activate a feature, for example, you press the Lock key to lock and unlock the phone.
-
Page 38: Menu Navigation
Menu Navigation Pinch: “Pinch” the screen using your thumb and forefinger to zoom • out when viewing a picture or a Web page. (Move fingers inward to You can tailor the phone’s range of functions to fit your needs zoom out.) using both menus and applications. - Page 39 Using Sub-Menus Using Context Menus Sub-menus are available from within most screen and Context menus (also called pop-up menus) contain options that applications. apply to a specific item on the screen. They function similarly to menu options that appear when you right click your mouse on Press A sub-menu displays at the bottom of the your desktop computer.
-
Page 40: Applications
Accessing Recently-Used Applications Accounts and sync Press and hold the to open the recently-used Allows you to add applications and determine which applications window. type of account information you want to synchronize with your Contact list. For more information, refer to Note: This recent applications screen also provides access to the Task “Accounts and Synchronization”... - Page 41 DLNA (Digital Living Calendar Network Alliance) and built-in AllShare™ technology. Launches a calendar application that syncs to your Samsung’s AllShare makes staying connected easy. Facebook™, Google™, or Microsoft Exchange work For more information, refer to “AllShare” on page 125. calendars.
- Page 42 Camera doubletwist Launches the built-in 5.0 megapixel camera application doubleTwist Player is the best all-in-one music, radio from where you can take a picture with either the front or and video app. For more information, refer to rear facing cameras. “doubletwist”...
- Page 43 Files Google Search Lets you view supported image files and text files on your Provides an on-screen Internet search engine powered by microSD card. Organize and store data, images, and more Google™. For more information, refer to “Using Google in your own personal file folders. Files are stored to the Search”...
- Page 44 Latitude Market Lets you see your friends’ locations and share yours Allows you to find and download free and for-purchase with them. The application also lets you see your applications on Android Market. For more information, friends’ locations on a map or in a list. It also lets you refer to “Downloading a New Google Application”...
- Page 45 Mini Diary Navigation Allows you to create a mini diary where you can add a Launches a Web-based navigation application. photo, and text to describe an event or other memorable Caution!: Traffic data is not real-time and directions may be life event.
- Page 46 Slacker Task Manager Slacker offers free, internet radio for mobile phones. Use Task Manager to see which applications are running on your phone, and to end running applications to extend For more information, refer to “Slacker” on page 145. battery life. Swype Tips For more information, refer to “Task Manager”...
- Page 47 Video Player Voice Search Launches your device’s built-in video application Launches your phone’s built-in voice recognition that plays video files stored on your microSD card. software and initiates a Google search based on the For more information, refer to “Using the Video Player” on recognized text.
-
Page 48: Customizing The Screens
YouTube Important!: Your phone can only contain at most seven screens and at least one screen. Launches the YouTube webpage via the browser. For more information, refer to “YouTube” on page 123. To delete a screen: Press Customizing the Screens then tap Edit ( You can customize the Home screens (panels) to display the Touch and drag the... - Page 49 Rearranging the Screens Press and then tap Save. Press and then tap Edit ( to return to the Home screen. Managing Shortcuts Touch and hold a screen and then drag it into its new location. Upper-left is screen position #1 and bottom-right Note: To move a shortcut from one screen to another, you must carefully is screen position #7.
- Page 50 Tap Applications ( ) to reveal all your current available To delete a shortcut: applications. By default, applications are displayed as an Press to go to the Home screen. Alphabetical grid. Touch and hold the desired shortcut. This unlocks it from Scroll across the screens and locate your desired its location on the current screen.
- Page 51 Creating and Managing a Folder To remove a Widget: Touch and hold a Folders hold items that you want to organize and store together on the workspace. Widget until it unlocks from the current To create a new on-screen folder: screen.
- Page 52 Deleting a folder • Tap Wallpaper gallery, scroll through the images, tap a wallpaper image, then tap Set wallpaper. Touch and hold a desired folder. This unlocks it from its location on the current screen. Drag the folder over the Remove tab ( ) and release it.
-
Page 53: Section 3: Memory Card
Section 3: Memory Card SD card Overview Your device lets you use a microSD™ (SD) or microSDHC™ card (also referred to as a memory card) to expand available memory After mounting an SD card in the device you can use your space. - Page 54 Touch Connect USB storage OK. Both the phone and Important!: DO NOT remove a microSD card while the device is accessing or computer display icons to show that the device is transferring files. Doing so will result in loss or damage of data. Make sure your battery is fully charged before using the microSD mounted.
- Page 55 SD card Memory Status Factory Data Reset To view the memory allocation for your external SD card: From this menu you can reset your phone and sound settings to the factory default settings. Press and then tap (Settings) Press and then tap (Settings) SD card and phone storage.
-
Page 56: Section 4: Call Functions And Contacts List
Section 4: Call Functions and Contacts List This section describes features and functionality associated with Note: When you activate the Auto redial option in the Call settings menu, the making or answering calls, and the Contacts list, which is used to phone automatically redials up to 10 times when the person does not store contact information. -
Page 57: Dialing Options
Dialing Options Add 2 sec pause to insert a two-second pause to enter a • 2-second delay within a number string (the phone continues dialing When you enter numbers on the after 2 seconds without any additional keys being pressed). Keypad, you will see three on- Add wait to insert a hard pause within the number string (the phone •... -
Page 58: Prefix Dialing
To add a prefix: Tap Prefix dialling list Create. The list is empty until you add a prefix. Enter a prefix number using the keypad and tap Save. The Touch and drag prefix displays in the Prefix dialing list. upward to reject Touch and slide with a message Tap the white circle icon beside the prefix. -
Page 59: Using The Voice Dialer
International Calls Tap Delete. Using the Voice Dialer From the Home screen, tap , then touch and hold . The + symbol displays. Voice dialer is a voice recognition software used to activate a wide variety of functions on your phone. Use the on-screen keypad to enter the country code, area From the Home screen, tap (Applications) -
Page 60: Speed Dialing
Call Use the keypad to enter the additional numbers that will be dialed automatically after the second pause. Once prompted, tap to dial the remaining digits. Send Redialing the Last Number Tip: You can create pauses longer than two seconds by entering multiple 2-sec pauses. - Page 61 Setting Up Speed Dial Entries Changing a Speed Dial Entry From the Home screen, tap Important!: Speed dial location #1 is reserved for Voicemail. No other number can be assigned to this slot. Press and then tap Speed dial setting. From the Home screen, Important!: The number 1 is reserved for Voicemail and another number cannot be assigned to this slot.
-
Page 62: Wi-Fi Calling
Press to return to the previous screen. Important!: Wi-Fi must first be active and communicating prior to launching Making a Call Using Speed Dial Wi-Fi Calling. Activating Wi-Fi: You can assign a short cut number to a phone number in the Contacts List for speed dialing. - Page 63 Tap the slider to Note: When you select an open network you are automatically connected. activate Wi-Fi Calling. The Wi-Fi Connected slider shows On. Displays when Wi-Fi is connected, active, and Your device communicating with a Wireless Access Point (WAP). connects to the Wi-Fi Communication Issue Wi-Fi Calling...
-
Page 64: In Call Options
In Call Options When Action Then Your phone provides a number of features that are available for Displays on the You are connected to the use during a call. screen status T-Mobile network and can bar. make Wi-Fi calls. Does not display You are charged normal calling on the screen rate minutes. - Page 65 Adjusting the Call Volume To make a new call while a call is in progress: Enter the new phone number that you wish to dial or look it During a call, use the Volume keys on the left side of the phone, to adjust the earpiece volume.
- Page 66 Muting a Call Creating a Memo During a Call Mute (Mute off) so the other caller cannot hear you During a call it may be necessary to record information (a Note). speaking. Press and then tap Memo. (Mute on) so to turn mute off and resume your Mute Use the keyboard to enter the note then tap Save.
- Page 67 Tap Add call, enter the second phone number and Press and then tap Manage Conference Call. . The first caller is placed on hold. Call adjacent to the participants you would like to Wait for the second caller to answer the incoming call and split from the current call.
-
Page 68: Call Logs Tab
Dropping One Participant Tap Swap to switch between the two calls. This places the new caller on hold and activates the previous call. The Press and then tap Manage Conference Call. active call displays with a green background. to the right of the number to drop. Tap Swap again to switch back. - Page 69 Accessing the Call Logs Tab Accessing Call Logs from The Notifications Area From the Home screen, tap Call logs tab. Locate from the Notifications area of the Status bar. Tap an entry to view available options. Tap the Status bar to reveal the Notifications tab, and then drag the tab to the bottom of the screen to open the Note: The Call logs tab only records calls that occur while the phone is turned Notifications panel (1).
- Page 70 Call Logs - Caller Overview Tap a contact entry name or number to reveal the call options screen: • • Call allows you to redial the entry by name or number. • Send message allows you to create a new text message to the Call options (tap) selected entry.
- Page 71 Erasing the Call Log • Add to reject list to add the current phone number to an automatic rejection list. Similar to a block list, the selected caller will be You can delete either an individual call log entry or all current blocked from making an incoming calls to your phone.
- Page 72 Viewing Missed Calls from Lock Screen When you are unable to answer a call for any reason and your screen is locked, the number of missed calls are displayed on the Lock screen immediately after a call is missed. To view a missed call immediately: Press to reactive...
-
Page 73: Section 5: Entering Text
Select the desired input method (Swype or Samung There are two text input methods available: keypad). Samsung Keypad: an on-screen QWERTY keypad that can be • used in both portrait and landscape orientation. •... -
Page 74: Using The Swype Keyboard
Enabling and Configuring SWYPE setting: Locate the Preferences section to alter these settings: If you configure another text input method (Samsung keypad) you must re-enable SWYPE before using the SWYPE keyboard. • Language: allows you to select the current text input language. -
Page 75: Using The Samsung Qwerty Keypad
Shorter or Longer and touch OK. the delete key to erase an entire word. Using the Samsung QWERTY Keypad • Word choice window: sets the amount of times the word choice selection window displays on screen. Move the slider between This QWERTY keypad can be used to enter text in either a Portrait Never or Always and touch OK. - Page 76 There are two main keypad layout keys that change the on- characters. screen keys viewed on the QWERTY keypad. To use the Samsung keypad you must first configure the settings The available text input modes are: Abc and Sym (symbols). to default to the Samsung keypad.
- Page 77 Using Abc Mode Note: After typing an initial uppercase character, the key changes to From within an active text entry screen, rotate the phone and all letters that follow are in lower case. counterclockwise to a landscape orientation, if desired. Enter your text using the on-screen keyboard.
-
Page 78: Using Xt9 Predictive Text
– or – From within an active text entry screen, tap at the bottom of the screen to access the Samsung keypad settings screen. Tap the XT9 field. A checkmark indicates activation. Tap the XT9 advanced settings and configure any of the following advanced options: •... - Page 79 • Word completion point sets how many letters should be entered • XT9 auto-substitution allows you create a word rule by adding before a word prediction is made. Choose from 2 letters, 3 letters, words for automatic substitution during text entry (for example 4 letters, or 5 letters.
-
Page 80: Section 6: Contacts
Section 6: Contacts This section explains how to use and manage your Contacts List. From the Manage You can save phone numbers to your phone’s memory. accounts area, tap Accounts next to the account you From the Accounts menu you decide if you want applications to want to synchronize. -
Page 81: Contacts List
Contacts List Note: If the phone is ever reset to its factory default parameters, contacts Creating a Contact stored on the phone can be lost. The default storage location for SIM contacts are stored within the SIM Card. • saving phone numbers to your Contacts List is your phone’s Note: SIM contacts only store the Name and Phone number for an entry. - Page 82 Enter additional information such as: Email, IM, Groups, Note: You can also add a new contact by entering a number from the keypad Ringtone, Postal address, Organization or More fields to and pressing and then tap Add to Contacts (Create input additional category information.
-
Page 83: Finding A Contact
Tap the First name and Last name fields, and enter a name Tap the Search contacts field and begin entering the entry’s for this contact. name. Matching entries are then displayed. This process filters through all of your current account Contact entries to Tap the label button (to the left of the Phone number field) only show you the matching entries. - Page 84 Editing Contact Information Adding a Number to an Existing Contact From the Home screen, tap From the Home screen, tap Tap a contact name from the list. Touch and hold an entry and select Edit to reveal Press and select Edit. the Contact entry’s Note: You can also access an entry’s context menu by touching and holding details screen (page 81).
-
Page 85: Contact List Options
• Use your finger to slide the page up or down to see additional fields • Display options: You can choose to only display contacts that have and categories. phone numbers, sort by first or last name, display contacts first name first or last name first, display contacts stored to your SIM Tap Save to complete and store the new entry. -
Page 86: Contact Menu Options
Contact Menu Options • Add to group: allows you to add the current Contacts entry to an existing group. From the Home screen, • Mark as default: allows you to assign default numbers, email, etc.. for a selected Contact. For more information, refer to “Marking a Contact as Default”... -
Page 87: Joining Contact Information
Joining Contact Information Next time you synchronize your phone with your accounts, any updates contacts make to email account names, email Most people now maintain multiple email accounts, social addresses, etc. automatically update in your contacts list. networking logins, and other similar account information. For For more information about synchronizing accounts, see “Get example, a Facebook account login name might differ from a Friends”... - Page 88 Marking a Contact as Default Important!: It is the second contact image that is displayed for both buy the first contact’s name that is used. When you use applications such as the Voice Dialer or other For example: If Amy (original entry) is joined with Julie (second messaging type applications, the application needs to know entry).
-
Page 89: Sending A Namecard
Sending a Namecard • Bluetooth to transmit this contact to another bluetooth-compatible device. A Namecard contains contact information, and can be sent to • Email to attach the contact card to a new outgoing email (Exchange recipients as a Virtual Business Card (V-card) attachment using or Internet). -
Page 90: Copying Contact Information
Copying Contact Information Copying Contact Information to the microSD Card Copying Contact Information to the SIM Card This procedure allows you to copy entry information saved on the phone’s memory, onto the SIM card. The default storage location for saving phone numbers to your From the Home screen, tap Contacts list is your phone’s built-in memory. -
Page 91: Synchronizing Contacts
Synchronizing Contacts Your Contacts tab then reflects any updated Contact information. Syncing data from your managed accounts allows you to add and manage a new or existing contact from your online or remote accounts to your phone. Prior to syncing, you must first have an Note: Syncing of contacts requires you are logged into your Gmail and Corporate accounts via the device. -
Page 92: Get Friends
Tap Done. To add Facebook content to your Contacts list: Get Friends You can now add your Facebook contact information, such as pictures, email, and phone numbers directly to your Contacts list. When you synchronize applications such as Facebook, Twitter, All of their current contact information is then migrated over to MySpace, a corporate email account, or Google, using the Get your phone. -
Page 93: My Profile
My Profile Tap Facebook from the Integrated contact accounts section of the Add an account screen. You can send this Virtual Business Card (V-card) to other contacts as an attachment. My Profile is the first Contact listed in the • This process adds your Facebook account to the list of managed Contacts list. -
Page 94: Additional Contact Options
Additional Contact Options Contact List Settings Sending an Email to a Contact From this menu you can determine the default storage location for Contacts, display you phone’s primary number, and view service numbers listed in your Contact list. Note: Contacts must contain and email account and address before you can use the Send email feature. -
Page 95: Groups
Groups Removing an Entry From a Caller Group From the Home screen, tap Groups tab. This feature allows you to add a new or existing contact to a call group. This group can be one of the already present groups Touch a group entry. -
Page 96: The Updates Tab
The Updates Tab Sending a Message to a Group From the Home screen, tap Groups tab. From the Updates tab you can view updated contact information that were synchronized with Facebook, Myspace, or Twitter. Tap an existing group, From the Home screen, tap and press and then tap Send message. -
Page 97: Section 7: Messages
Section 7: Messages This section describes how to send or receive different types of The Multimedia Messaging Service (MMS) lets you send and messages. It also explains the features and functionality receive multimedia messages (such as picture, video, and audio associated with messaging. -
Page 98: Message Options
If adding a recipient from either Recent, Contacts, or • Add/Remove subject: inserts or deletes a Subject field in your message. Group, touch the contact to place a checkmark then tap • Add/Remove Cc/Bcc: allows you to copy or blind copy other Add. -
Page 99: Viewing Newly Received Messages
– Contacts: allows you to tap on an existing Address Book entry to to play a multimedia message. add their contact info to your message. In a single motion, touch and scroll up or down the page to – Calendar: allows you to tap on an existing Calendar event and add it scroll through the message (if additional pages were to your message. - Page 100 To reply to a text message: To access additional Bubble options: Current Recipient My Text From the Home screen, Touch and hold the message bubble to display the following options: • Delete message: deletes the currently selected message bubble While the message is from the thread.
-
Page 101: Deleting Messages
Deleting Messages Use the on-screen keypad to enter a word or phrase in Deleting a single message which to search, then tap From the Home screen, tap All messages that contain the entered search string display. Touch and hold a message, then select Delete thread. Messaging Settings At the prompt, tap Yes to delete or No to cancel. -
Page 102: Text Templates
Notification settings • Message center: allows you to enter the number of your message center where your messages reside while the system is attempting • Notifications: allows you to see message notifications on your to deliver them. status bar. • Input mode: allows you to set the input mode for your text •... -
Page 103: Sending An Audio Postcard
To create your own text template: Tap Send to send the Audio Postcard. Email From the Home screen, tap rom the Messaging list, press and then tap Text Email (or Internet Email) enables you to review and create email using several email services. You can also receive text message templates. -
Page 104: Composing Email
Creating an Email Account Tap Done to store the new account. From the Home screen, tap (Applications) Important!: Only some “Plus” accounts include POP access allowing this (Email). If you already have email accounts, your accounts program to connect. If you are not able to sign in with your correct email address and password, you may not have a paid screen is displayed “Plus”... -
Page 105: Configuring Email Settings
Tap Compose. • Email check frequency: Tap to adjust the time interval used by your device to check your email account for new email messages. Enter the message recipient’s email address in the To field. • Default account: Assign this account as the default email account •... -
Page 106: Microsoft Exchange Email (Outlook)
Microsoft Exchange Email (Outlook) When prompted to provide additional detailed information, scroll down the screen and tap Next. Your phone also provides access to your company’s Outlook Exchange server. If your company uses either Microsoft Enter a Domain, and confirm your Username, and Password Exchange Server 2003 or 2007, you can use this email information and tap Next. - Page 107 Identify your new account with a unique name and provide • If you are sending the email message to several recipients, separate the email addresses with a comma. You can add as many message the outgoing name text then tap Done. recipients as you want.
- Page 108 Toggle either the Sync Contacts or Sync Calendar fields to • Email notifications enables the phone to display a status bar icon when new email messages have been received. force the device to manually resync either the exchange • Select ringtone assigns an audible ringtone when a new or Contacts or Calendar entries.
-
Page 109: Using Google Mail
Using Google Mail Refreshing Google Mail From within the Gmail message list, press and then Google Mail (Gmail) is Google’s web-based email. When you first setup the phone, Gmail is configured. Depending on the tap Refresh to send and receive new emails and synchronization settings, Gmail is automatically synchronized synchronize your email with the Gmail account. -
Page 110: Google Talk
Google Talk Viewing a Gmail Message From the Gmail Inbox, touch a message to view. The Google Talk™ is a free Windows and web-based application for instant messaging offered by Google. Conversation logs are following options are available: automatically saved to a Chats area in your Gmail account. This •... -
Page 111: Section 8: Multimedia
Section 8: Multimedia This section explains how to use the multimedia features of your Using the phone’s main display screen as a viewfinder, phone, including the Camera/Camcorder, Music Player, and how adjust the image by aiming the camera at the subject. to manage your photos, images and sounds. -
Page 112: Camera And Camcorder Options
Camera / Camcorder Mode: allows you to take a photo in various modes. Once you change the mode, the corresponding indicator appears at the top left of the display. Choose from Camera or Camcorder. Shooting mode: allows you to set the following options: •... - Page 113 • Action shot: detects action and creates a panorama of the moving • Scene mode: to select a camera setting for better image capture object. under different lighting environments. Choose from: None (default), Portrait, Landscape, Night, Sports, Party/Indoor, Beach/Snow, Default Dest.: sets the default destination for sending or Sunset, Dawn, Fall color, Firework, Text, Candlelight and Backlight.
- Page 114 HD Camcorder Options • Image quality: allows you to set the image quality to: Superfine, Fine, or Normal. You can change options using your keypad in capture mode. The • Adjust: allows you to adjust the Contrast, Saturation and Sharpness following short cuts are available: for this photo.
- Page 115 Default Dest.: sets the default destination for sending or • White balance: allows you to set this option from the following choices: Auto, Cloudy, Fluorescent, Daylight, or Incandescent. saving videos. Selections are: Recent recipient, Phone • Effects: allows you to change the color tone or apply special effects Book, Online Album, New Email, or New Number.
-
Page 116: Photo Options
Pictures and Videos Image Viewer Options Camera Gallery Options After you take a photo or record a video, you can access various The Gallery is where you can access the Gallery of stored camera options. images. Photo options From the Home screen, •... - Page 117 Camera Image Options When you take a picture, the file is saved in the Photo folder. You can view your pictures immediately or view them anytime in the Photo folder. From the Home screen, tap (Applications) (Gallery). Select a folder location and tap a file to open it in the Image viewer.
- Page 118 • More: provides you with the additional options such as: With the image displayed, tap Menu More Set as – Send to My Album Online: allows you to send the file to your Contact icon. pre-configure My Album Online. Tap a contact to make a selection. –...
-
Page 119: Using The Hd Camcorder
Tap Save to assign the wallpaper image. Press the record video key ( ) to begin shooting video. – or – Touch to pause the recording or touch to stop the Tap Discard to stop without updating the wallpaper image. recording and save the video file to your Photo folder. -
Page 120: Amazon Mp3
Select a folder location and tap a video icon to begin video From the Home screen, tap (Applications) playback. (Amazon MP3). – or – Tap one of the categories to begin browsing the Touch and hold the video icon from the main Gallery to music files. -
Page 121: The Gallery
The Gallery Opening and Navigating within Files DCIM is the default location for pictures or video taken by the The Gallery is where you view photos and play back videos. For device. These files are actually stored in the DCIM folder location. photos, you can also perform basic editing tasks, view a slideshow, set photos as wallpaper or caller image, and share as From the Home screen, tap... -
Page 122: Doubletwist
doubletwist From the Home screen, tap (Applications) (Airsync). The doubleTwist Player is the best all-in-one music, radio and video application. Read the on-screen description and tap Yes. In conjunction with the Airsync application on your phone, it Write down the on-screen passcode and follow the on- ®... -
Page 123: Media Hub
Media Hub From the Home screen, tap (Applications) (MediaHub). Samsung Media Hub is your one stop for the hottest movie and TV content. With hundreds of titles available, entertaining your Press and tap My Account. family on the go was never easier. You can rent or purchase your Use the keypad to enter the required information, then tap favorite content and watch from any location. -
Page 124: Media Hub Notices
• My Media: allows you to view all of the media that you have You may remove Media Content from a device as many times as you’d • purchased or rented. Touch a media entry to view it. like. You will have the ability to re-download the Media Content at a later point in time subject to content re-download availability and •... -
Page 125: Music Player
• In no event will rented Media Content be available for a period of more than thirty (30) days (or shorter on a title-by-title basis) after Pause the song. the Media Content has been rented (e.g., if you begin viewing rented Media Content on the 29th day after the rental transaction, Start the song after pausing. -
Page 126: Using Playlists
Using Playlists Music Player Options The Music Player Settings menu allows you to set preferences for Playlists are used to assign music files into groups for playback. the music player such as whether you want the music to play in These Playlists can be created using the Music player on this the background, sound effects, and how the music menu device, or using a third-party application (such as Windows... -
Page 127: Transferring Music Files
Editing a Playlist Press and tap Add. – or – Besides adding and removing music files in a playlist, you can also share, delete, or rename the playlist. (Add music). Only those playlist you have created can be edited. Default playlists can not be renamed. -
Page 128: Removing Music Files
Removing Music Files Note: T-Mobile TV must be initialized over a cellular network before it can be From the Home screen, tap (Applications) used. During this initial registration process, any current Wi-Fi connections must be disabled. (Music Player). Tap Disable Wi-Fi if you currently have an active Wi-Fi Tap the All tab. -
Page 129: Section 9: Applications And Development
Section 9: Applications and Development Accounts and sync This section outlines the various applications that are available on your phone. This application allows you to configure general synchronization Applications settings that determine whether the background data is synchronized, and whether you automatically synchronize data The Applications list provides quick access to all the available with the phone. -
Page 130: Airsync
AllShare • Play file from server on another player via my phone allows you This application wirelessly synchronizes your Samsung mobile to “piggy-back” content playback on an external Wi-Fi TV/receiver. phone with your TV, streams content and even keeps tabs on Your phone retrieves content from an external wireless source (eg.,... -
Page 131: Configuring Allshare Settings
Configuring AllShare Settings adjacent to one of the selected transmission methods. (This procedure assumes selection of the first The AllShare™ application must first be configured prior to its initial use. You must setup parameters such as connected Wi-FI, option). Items to share, source server address, and external device If transmitting local media to an external device, scroll acceptance rights. -
Page 132: Amazon Mp3
Amazon MP3 Audio Postcard Amazon MP3 is a digital music store owned and operated by In this menu you can select a frame, take a picture and then Amazon.com. Using you can download DRM-Free (digital rights record a voice message up to one minute long and send it as an management) MP3 formatted songs and albums. -
Page 133: Calendar
Enter the operation for your calculation by touching the • Go to: displays a specific date. • Today: displays the date highlighted with a Blue box highlighting Plus, Minus, Multiplication, or Division key. the date. Enter the next number. • Delete: allows you to delete All events, All events before today, or To view the result, tap the = (equals) key. -
Page 134: Call Logs
Call logs Car Home The Call log lists all the calls missed, received, or dialed. Configures the phone’s user interface to be easier to use while you are driving. For more information, refer to “Call Logs Tab” on page 63. Contacts Warning!: Please use this application responsibly. -
Page 135: Doubletwist
doubletwist • Enable Bluetooth activates Bluetooth and routes all incoming calls to your handsfree device. doubleTwist Player is the best all-in-one music, radio and video • Enable Auto Response enables or disable an automatic SMS text app. For more information, refer to “doubletwist” on page 117. message response to all incoming text messages notifying users From the Home screen, tap (Applications) -
Page 136: Files
Enter your Email and Password information and tap Login. For more information, refer to “Using Google Mail” on page 104. Gogo Files Gogo, powered by Aircell, turns a commercial airplane into a Organize and store data, images, and more in your own personal Wi-Fi hotspot with true inflight Internet access. -
Page 137: Hd Camcorder
HD Camcorder Kindle Use your built-in camera lens to activate the HD camcorder (720P) Using your 3G connection you can download books through the and record videos that are stored on the microSD card. Amazon Kindle™ application with no annual contracts, monthly fees, and no hunting for hotspots. -
Page 138: Latitude
Latitude Layar Google Latitude allows you and your friends share locations and The Layar Reality Browser shows what is around you by status messages with each other. It also lets you send instant displaying real time digital information on top of the real world as messages and emails, make phone calls, and get directions to seen through your mobile phone. -
Page 139: Maps
Enabling a Location source • Layers: displays Layars entries from the following categories: – Featured: displays featured Layar locations. Before you use Google Maps and find your location or search for – Local: displays local Layar locations. places of interest, you must enable a location source. To enable –... - Page 140 Opening Maps • My Location: when touched, the location displays on the map with a blinking blue dot. From the Home screen, tap (Applications) Press and select one of the following options: (Maps). • Search: allows you to search for a place of interest. Locate the top row of the applications to access additional •...
-
Page 141: Market
Market Downloading a New Google Application Android Market provides access to downloadable applications To download a new application, you will need to use your Google and games to install on your phone. Android Market also allows account to sign in to Android Market. The Android Market home you to provide feedback and comments about an application, or page provides several ways to find applications. -
Page 142: Launching An Installed Google Application
Launching an Installed Google Application Note: Use caution with applications which request access to any personal From the Home screen, tap (Applications). data, functions, or significant amounts of data usage times. Tap the newly installed application. This application is If prompted, follow the on-screen instructions to pay for typically located on the last Applications page. -
Page 143: Media Hub
Manage applications This feature allows you to manage and remove installed Samsung Media Hub is your one stop for the hottest movie and TV applications. You can also view the amount of memory or content. You can rent or purchase your favorite content and watch resources used as well as the remaining memory and resources from the convenience of anywhere. -
Page 144: Messaging
Mini Diary Touch and hold the memo then select Send via and choose the method to send this memo: Bluetooth, Email, or This application allows you to create a mini diary where you can add a photo, and text to describe an event or other memorable Messaging. -
Page 145: Music Player
Mini Diary settings • Send via MMS: attaches this entry and sends it as a multimedia message. From the Home screen, tap (Applications) • Change photo: replaces the photo in this entry by allowing you to (Mini Diary). take another photo or use another image. From the main Diary listings page, press Settings. -
Page 146: My Device
The differences between My Account and My Device are these: – Over Limit Alert: sends an alert when usage exceeds your plan’s total available minutes. • My Account: check usage, pay your T-Mobile bill. • Message Usage: tracks the number of messages used and •... -
Page 147: Navigation
Support Tip: Use the Menu key ( ) to toggle between My Account and My Device. Displays support information My Account Feedback, T-Mobile Forums, and T-Mobile on Twitter. The differences between My Account and My Device are these: Storage Battery •... -
Page 148: Navigation Options
Enabling GPS Location • Contacts: allows you to receive turn-by-turn directions to the address stored for a selected Contacts entry. Press and then tap (Settings) • Starred Places: allows you to obtain directions to locations that Location and security have been starred within Google maps (maps.google.com). Navigation Map options Tap Use GPS satellites. -
Page 149: News And Weather
Places Search in plain English: manually search for a destination address, • place, name of business, or even a type of business. Google Places displays company logos on a layer of Google Set Destination: returns you to the navigation options screen where •... -
Page 150: Settings
Settings Begin selecting the music you want to listen to. Swype tips This icon navigates to the sound and phone settings for your phone. It includes such settings as: display, security, memory, Using the SwypeTips application you can watch a video or start a and any extra settings associated with your phone. -
Page 151: Task Manager
Task Manager • Summary displays a visual graph indicating the available and used space within the internal Program storage location and External Sometimes your phone might seem to slow down over time, and the SD card. biggest reason for this are background applications. These are •... -
Page 152: Thinkfree Office
ThinkFree Office Qik Video Chat ThinkFree Office Mobile for Android is a Microsoft Office This is a mobile video sharing and 2-way video calling service. compatible office suite. This application provides a central place This application also lets you record and share experiences with for managing your documents online or offline. - Page 153 Recording Qik Video • Sharing allows you to setup sharing preferences. – Facebook: set up your Qik creadentials for Facebook posting of videos. From the Home screen, – Twitter: set up your Twitter account sharing preferences. (Applications) – YouTube: set up your Qik creadentials for YouTube posting of videos. (Video Chat) –...
-
Page 154: Video Player
Video Player Voice Dialer The Video Player application plays video files stored on your Voice dialer is a voice recognition software used to activate a microSD card. wide variety of functions on your phone. From the Home screen, tap (Applications) From the Home screen, tap (Applications) (Video Player). -
Page 155: Voice Search
Voice Search The Voice Search feature is a voice-activated application that Open the browser to start surfing the web. The browser is fully allows you to tell the phone what to search for and then the optimized and comes with advanced functionality to enhance the phone activates a Google search based on what you said. -
Page 156: Write And Go
Write and Go To watch a high quality video: While playing a video, press Settings Use write and go to job down an idea, then decide what format you want to use to save, send, or post it. You can send as a High quality on mobile. -
Page 157: Section 10: Connections
Section 10: Connections Your phone is equipped with features that allow you to quickly Yahoo Mail: displays the Sign in for Yahoo Mail. Register by sending a • connect to the web. text message with the word START to 92500 if you are not already registered. -
Page 158: Search The Internet
Browser Options – Settings: allows you to change the way you view your web pages by changing these options. See “Browser Settings” on page 156. From the home page, press to access the following Entering a URL options: You can access a website quickly by entering the URL. Websites •... -
Page 159: Using Bookmarks
Adding and Deleting Windows next to the listing to delete the window. Using Bookmarks You can have up to eight Internet windows open at one time. To add a new window, follow these steps: While navigating a website, you can bookmark a site to quickly From your browser, press and then tap New Window. -
Page 160: Adding Bookmarks
• Edit bookmark: Allows you to edit the name or URL of the Tap Edit bookmark. bookmark. For more information, refer to “Editing Bookmarks” Use the on-screen keypad to edit the name of the on page 155. bookmark or the URL. •... - Page 161 Using Web History Browser Settings The History list displays a list of the most recently viewed To make configure browser settings, follow these steps: websites. These entries can be used to return to previously From the Home screen, tap (Applications) unmarked web pages.
-
Page 162: Bluetooth
• Enable plug-ins: Allows the download of plug-ins such as Adobe • Remember passwords: Stores usernames and passwords for Flash. visited sites. Remove the checkmark to disable this function. • Open in background: New pages are launched in a separate page •... -
Page 163: Bluetooth Status Indicators
Turning Bluetooth On and Off Bluetooth Settings To turn Bluetooth on: The Bluetooth settings menu allows you to set up many of the characteristics of your device’s Bluetooth service, including: Press and then tap (Settings) • Entering or changing the name your device uses for Bluetooth Wireless and networks Bluetooth settings. -
Page 164: Pairing Bluetooth Devices
Tap OK to complete the rename process. Note: Pairing between two Bluetooth devices is a one-time process. Once pairing is established the devices continue to recognize their To set visibility: partnership and exchange information without entering a passcode. Verify your Bluetooth is active. To pair your device with another Bluetooth device: From the Bluetooth settings page, tap Visible. - Page 165 Disconnecting a Paired Bluetooth Device From the Bluetooth settings page, touch and hold the name of the previously paired device (from the bottom of Disconnecting a paired device breaks the connection between the device and your phone, but retains the knowledge of the the page).
-
Page 166: Enable Downloading For Web Applications
Enable Downloading for Web Applications What is Kies Mini? Samsung Kies Mini is a software that enables you to update your Important!: Before you can download a web application you must insert an device firmware by connecting to the PC. - Page 167 Synchronizing with Windows Media Player Connecting as a Mass Storage Device Ensure that Windows Media Player is installed on your PC. You can connect your device to a PC as a removable disk and access the file directory. If you insert a memory card in the Press and then tap (Settings)
-
Page 168: Wi-Fi
Wi-Fi Connecting to a Wi-Fi Network About Wi-Fi Press and then tap (Settings) Wireless and network Wi-Fi settings. Wi-Fi (short for "wireless fidelity") is a term used for certain types of Wireless Local Area Networks (WLAN). Wi-Fi The network names and security settings (Open network or communication requires access to an existing and accessible Secured with WEP) of detected Wi-Fi networks display in Wireless Access Point (WAP). - Page 169 Manually Add a New Network Connection Deactivating Wi-Fi Tap Add Wi-Fi network. Press and then tap (Settings) Wireless and network Wi-Fi settings. Enter the Network SSID (the name of your Wireless Access Point). Tap the Wi-Fi field to deactivate the feature. The checkmark grays.
-
Page 170: Mobile Ap
Wi-Fi Advanced Settings Tap Mobile AP and place a checkmark in the adjacent field to activate the service. The Wi-Fi settings - Advanced menu allows you to set up many of the device’s Wi-Fi services, including: Tap OK to continue with the activation. •... - Page 171 To connect to the Hotspot: Important!: The more complex the password, the harder it will be for Enable Wi-Fi (wireless) functionality on your target device intruders to break your security. It is recommended that you not use names, birthdays, or (laptop, media device, etc.).
-
Page 172: Section 11: Time Management
Section 11: Time Management This section describes how you can manage time using time- • Delete: allows you to delete All events, All events before today, or an individual event. related applications such as the Calendar, Alarm Clock, Analog or Digital clock, and the World clock. -
Page 173: Alarm And Clocks
Alarm and Clocks Tap Calendar sync and select the type of general synchronization settings you want. A check mark indicates This feature allows you to create an alarm to ring at a specified time, track time in other parts of the world, use a stopwatch, or selection. -
Page 174: World Clock
Tap the radio button to activate a tone for one of the To assign DST settings: following alarm types: Snooze or Smart alarm. Locate a desired city from the World Clock list. Tap the Alarm type field and select one of the following: Touch and hold a city and select DST settings. -
Page 175: Setting A Timer
Setting a Timer From the Home screen, tap (Applications) (Alarm & Clocks) Timer tab. Tap the hr, min, or sec field and use the on-screen keypad to enter the hour, minute, or seconds. Tap Start to start the timer. Tap Stop to stop the timer or Reset to reset the timer and start over. -
Page 176: Section 12: Changing Your Settings
Section 12: Changing Your Settings Activating Wi-Fi This section explains the sound and phone settings for your phone. It includes such settings as: display, security, memory, and any Press and then tap (Settings) extra settings associated with your phone. Wireless and networks Wi-Fi settings. - Page 177 Network Notification WPS allows you to push buttons instead of entering a network name and wireless security PIN. By default, when Wi-Fi is on, you receive notifications in the Press and then tap (Settings) Status bar anytime your phone detects an available Wi-Fi network.
-
Page 178: Activating Bluetooth
Bluetooth settings Activating Visibility Press and then tap (Settings) In this menu you can activate Bluetooth, view or assign a device name, activate your phone so other Bluetooth devices can Wireless and network Bluetooth settings Visible. discover it, or scan for other, available Bluetooth devices with The phone is now activated for discovery for 119 seconds which to pair. - Page 179 Tethering To disconnect tethering: Press and then tap (Settings) This option allows you to share your phone’s mobile data connection via a direct USB connection between your phone and Wireless and networks Tethering. computer. A wireless version of this same functionality would be Tap USB tethering from the Tethering menu to remove the the Mobile AP feature.
-
Page 180: Mobile Networks
To establish a PPTP (Point-to-Point Tunneling Protocol): To establish a L2TP/IPSec CRT (Certificate based L2TP/IPSec): Establish a VPN name (a name for this connection). Establish a VPN name (a name for this connection). Set the VPN server. Set the VPN server. Enable encryption (if desired). - Page 181 Use packet data Network mode Allows you to activate data usage on your phone. You can configure your phone to either manually detect and use either a 2G (GSM) or 3G (WCDMA) data network connection. Press and then tap (Settings) Press and then tap (Settings)
- Page 182 Using the 3G Network Tap Select automatically to automatically select a network connection. If you are using applications that require the 3G network speed, follow these instructions to connect to the 3G network. Note: Connecting to 2G networks slows the data transfer speed and time. Press and then tap (Settings)
-
Page 183: Call Settings
Call Settings • Prefix dialling: when activated, this feature automatically prepends a string of numbers (such as an area code) to any dialed number. To access the Call settings menu: This feature is useful for international dialing, or dialing within an Press and then tap (Settings) -
Page 184: Fixed Dialing Numbers
– Forward when unanswered: automatically forwards to your Important!: Not all SIM cards use a PIN2 code. If your SIM card does not, this voicemail number when the phone is not answered, and otherwise menu does not display. allows you to enter a voicemail number. The PIN2 code is provided by your carrier. - Page 185 Managing the FDN List Voicemail When this feature is enabled, you can make calls only to phone You can view your voicemail number from this menu. numbers stored in the FDN list on the SIM card. Press and then tap (Settings) Press and then tap...
-
Page 186: Drive Smart
Sound Settings Your phone is compatible with select TTY devices. Please check with the manufacturer of your TTY device to ensure that it is From this menu you can control the sounds on the phone as well compatible with digital cell phones. as configure the display settings. - Page 187 Adjusting the Volume Settings Setup Phone Vibration Press and then tap (Settings) Sound The Volume menu now provides access to various volume settings within one on-screen popup menu. Tap Vibrate and select a vibration mode. Choose from: Press and then tap (Settings) Sound Always, Never, Only in silent mode, or Only when not in silent...
-
Page 188: Display Settings
Display Settings Screen Lock Sounds The screen lock sounds option is used to activate/deactivate In this menu, you can change various settings for the display sounds when locking and unlocking the screen. such as the font, orientation, pop-up notifications, puzzle lock feature, animation, brightness, screen timeout, power saving Press and then tap... - Page 189 Connecting your Phone to the TV • Screen timeout: adjusts the delay time before the screen automatically turns off. Selections are: 15 seconds, 30 seconds, TV out 1 minute, 2 minutes, and 10 minutes. This feature allows you to connect your phone to your television •...
-
Page 190: Location And Security
Horizontal Calibration Enabling the GPS Satellites Press and then tap (Settings) Calibrate your phone by using the built-in accelerometer. Location and security. Press and then tap (Settings) Display Horizontal calibration. Tap Use GPS satellites enable the GPS satellite. Enabling the sensor aiding Place the phone on a level surface and tap Calibrate. -
Page 191: Screen Unlock Pattern Settings
Screen Unlock Pattern Settings Draw your pattern by touching your first on-screen point. Then, without removing your finger from the screen, drag To secure data and limit phone access, set the phone to require a screen unlock pattern each time you turn on the device, or every your finger over adjacent points until the gray trace line time the phone wakes up from sleep mode (when the screen overlaps each point and they are highlighted with a green... - Page 192 Using Visible a Pattern Tap Set screen lock. When enabled, this feature displays the text entered into the Tap Password. password field. Enter a password using the keypad and tap Continue to Using Tactile Feedback confirm the password. When enabled, the User tactile feedback option, you will feel Confirm the password by re-entering it and tap OK to vibration as feedback while drawing the pattern.
-
Page 193: Device Administration
To change an existing SIM Card PIN: Tap Select device administrators to begin configuring this Tap Change SIM PIN. setting. Enter the old SIM PIN code and tap OK. Select an administrator device and follow the prompts. Enter the new SIM PIN code and tap OK. Re-type the new SIM PIN code and tap OK. -
Page 194: Applications
Applications Credential Storage This option allows certain applications to access secure This phone can be used for Android development. You can write certificates and other credentials. Certificates and credentials applications in the SDK and install them on this device, then run can be installed to the SD card and password protected. - Page 195 Managing Applications Uninstalling Third-party Applications This feature allows you to manage installed applications. You can Important!: You must have downloaded applications installed to use this view and control currently running services, or use the device for feature. application development. Press and then tap (Settings) You can also view the amount of memory or resources used as...
- Page 196 Moving Third-party Applications to your SD Card Running Services Your phone’s built in memory is augmented by using a microSD The Running services option allows you to view and control card to store additional data. When the phone’s built-in memory currently running services such as Backup, doubletwist, Google capacity is reached, it can be possible to move some applications Talk, SNS (messaging), Swype, and more.
-
Page 197: Android Development
Android Development USB Settings Press and then tap (Settings) This menu selects the method of communication for the USB port. Applications Development. Note: Before initiating a USB connection with the phone you must disable the Important!: These features are used for development purposes only. Bluetooth feature, and/or USB debugging feature. -
Page 198: Accounts And Synchronization
Accounts and Synchronization Synchronizing a Google Account Your phone provides the ability to synchronize data from a variety By default, there are no accounts managed by the device. These of different sources or sites. These accounts can range from must be manually added. Google, a Corporate Microsoft Exchange Email Server, and other To manage an existing Google account: social sites such as Facebook, Twitter, and MySpace. - Page 199 Synchronizing Your Corporate Account To configure the Google management settings: Press and then tap (Settings) By default, there are no Corporate Calendar events managed by the device. These must be manually added. Accounts and sync. within the Google account field to reveal the Note: Once a corporate email account is created, it is automatically added as account’s synchronization settings screen.
-
Page 200: Privacy Settings
Privacy Settings Factory Data Reset Location settings, backup configurations, or reset the phone to From this menu you can reset your phone and sound settings to erase all personal data. the factory default settings. Press and then tap (Settings) Press and then tap (Settings) Privacy. -
Page 201: Search Settings
Select Input Method – Use My Location: uses your My Location information for Google search results and services. There are two input methods available: Swype and Samsung – Search history: determines whether you also wish to included keypad. personalized search history results in the list of matches. - Page 202 Swype Settings Swype Advanced settings For more information, refer to “SWYPE Settings” on page 69. Advanced settings provide access to Swype operation parameters. Press and then tap (Settings) Locale • Auto-spacing: automatically inserts a space between words. and text Swype. When you finish a word, just lift your finger or stylus and start the Tap one of the following Swype preferences to activate the next word.
- Page 203 Tap Voice input to activate the Voice input feature. This is Samsung Keyboard Settings an experimental feature that uses Google’s networked For more information, refer to “The Samsung Keypad” on speech recognition application. page 71. Tap Automatic full stop to automatically insert a full stop by...
-
Page 204: Accessibility Settings
Tap the Spell correction field. This option corrects Tap XT9 auto-substitution to add words to substitute (for typographical errors by selecting from a list of possible example youve becomes you’ve). A list of substitutions words that reflect the characters of the keys you touched displays. -
Page 205: Voice Input And Out Settings
Voice Input and Out Settings Configuring Text-to-speech Configuring Voice Input Recognition This feature allows the phone to provide a verbal readout of on-screen data such as messages and incoming caller This feature allows the phone to correctly recognize verbal input. information. -
Page 206: Date And Time
About Phone • Language: assigns the language used for verbal readout. Choose from American English or Spanish. This menu contains legal information, system tutorial • Pico TTS: configures the pico TTS settings for various languages. information, and other phone information such as the model Date and Time number, firmware version, baseband version, kernal version, and software build number. -
Page 207: Software Update
• System Tutorial: provides a quick, online tutorial that walks you through basic phone features. Read the on-screen information and follow the system prompts. • Model Number: displays the phone’s model number. • Firmware version: displays the firmware version loaded on this handset. -
Page 208: Section 13: Health And Safety Information
Section 13: Health and Safety Information This section outlines the safety precautions associated with using The low levels of RF cell phones emit while in use are in the your phone. The terms “mobile device” or “cell phone” are used microwave frequency range. - Page 209 While RF energy does not ionize particles, large amounts can Results of this study did NOT show that cell phones caused brain increase body temperatures and cause tissue damage. Two cancer. In this study, most people had no increased risk of brain areas of the body, the eyes and the testes, are particularly cancer from using cell phones.
- Page 210 Risk of Brain Cancer from Exposure to Radio Frequency Fields Cell Phone Industry Actions in Childhood and Adolescence (MOBI-KIDS) Although the existing scientific data do not justify FDA regulatory actions, the FDA has urged the cell phone industry to take a MOBI-KIDS is an international study investigating the relationship number of steps, including the following: between exposure to radio frequency energy from...
- Page 211 Reducing Exposure: Hands-Free Kits and Other Because there are no known risks from exposure to RF emissions Accessories from cell phones, there is no reason to believe that hands-free kits reduce risks. Hands-free kits can be used for convenience Steps to Reduce Exposure to Radio Frequency Energy and comfort.
-
Page 212: Specific Absorption Rate (Sar) Certification Information
Use speaker mode or a headset to place more distance between the World Health Organization (WHO): • • head and the cell phone. http://www.who.int/peh-emf/en/. International Commission on Non-Ionizing Radiation Protection: • Some groups sponsored by other national governments have http://www.icnirp.de. advised that children be discouraged from using cell phones at Health Protection Agency: •... - Page 213 The exposure limit set by the FCC for wireless mobile phones For body-worn operation, this phone has been tested and meets employs a unit of measurement known as the Specific FCC RF exposure guidelines when used with an accessory that Absorption Rate (SAR).
-
Page 214: Smart Practices While Driving
Body-worn: 0.12 W/Kg. • of driving becomes impaired. Samsung is committed to promoting SAR information on this and other model phones can be viewed responsible driving and giving drivers the tools they need to online at http://www.fcc.gov/oet/ea. -
Page 215: Battery Use And Safety
Samsung, even if they appear to be working properly. Never watch videos, such as a movie or clip, or play video games Do not place your battery in or near a heat source. -
Page 216: Samsung Mobile Products And Recycling
Samsung's warranty does not cover damage to the phone caused by non-Samsung-approved batteries and/or chargers. We've made it easy for you to recycle your old Samsung mobile device by working with respected take-back companies in every state in the country. -
Page 217: Ul Certified Travel Charger
Follow local regulations regarding disposal of mobile devices Drop It Off and batteries You can drop off your Samsung-branded mobile device and batteries for recycling at one of our numerous Samsung Dispose of your mobile device and batteries in accordance with Recycling Direct (SM) locations. -
Page 218: Display / Touch-Screen
ORIENTED IN A VERTICAL OR HORIZONTAL OR FLOOR MOUNT POSITION. GPS & AGPS Display / Touch-Screen Certain Samsung mobile devices can use a Global Positioning Please note the following information when using your mobile System (GPS) signal for location-based applications. A GPS uses device: satellites controlled by the U.S. - Page 219 Certain Samsung mobile devices can also use an Assisted Global AGPS has limitations and might not work in your area. Therefore: Positioning System (AGPS), which obtains information from the Always tell the emergency responder your location to the best of your •...
-
Page 220: Emergency Calls
Check with local service providers. Keep your Samsung Mobile Device away from: To make an emergency call: Liquids of any kind If the phone is not on, switch it on. -
Page 221: Responsible Listening
Responsible Listening Extreme heat or cold Avoid temperatures below 0°C / 32°F or above 45°C / 113°F. Caution!: Avoid potential hearing loss. Microwaves Damage to hearing occurs when a person is exposed to loud Do not try to dry your mobile device in a microwave oven. sounds over time. - Page 222 You should follow some common sense recommendations when any temporary hearing difficulty after listening to your portable audio using any portable audio device: device, discontinue use and consult your doctor. Always turn the volume down before plugging the earphones into an •...
-
Page 223: Operating Environment
Using Your Mobile Device Near Other Electronic Devices National Institute for Occupational Safety and Health (NIOSH) Most modern electronic equipment is shielded from Radio 395 E Street, S.W. Frequency (RF) signals. However, certain electronic equipment Suite 9200 may not be shielded against the RF signals from your wireless Patriots Plaza Building mobile device. - Page 224 Potentially Explosive Environments For more information see: http://www.fcc.gov/oet/rfsafety/rf- faqs.html#. Switch your mobile device off when in any area with a potentially Other Medical Devices explosive atmosphere and obey all signs and instructions. Sparks in such areas could cause an explosion or fire resulting in bodily If you use any other personal medical devices, consult the injury or even death.
-
Page 225: Fcc Hearing Aid Compatibility (Hac) Regulations For Wireless Devices
FCC Hearing Aid Compatibility (HAC) use a rated mobile device successfully. Trying out the mobile Regulations for Wireless Devices device with your hearing device is the best way to evaluate it for your personal needs. On July 10, 2003, the U.S. Federal Communications Commission M-Ratings: Mobile devices rated M3 or M4 meet FCC (FCC) Report and Order in WT Docket 01-309 modified the requirements and are likely to generate less interference to... -
Page 226: Restricting Children's Access To Your Mobile Device
“Normal usage” in this context is defined as a signal quality that is acceptable for normal operation. The M mark is intended to be synonymous with the U mark. The T mark is intended to be synonymous with the UT mark. The M and T marks are recommended by the Alliance for Telecommunications Industries Solutions (ATIS). -
Page 227: Fcc Notice And Cautions
FCC Notice and Cautions Other Important Safety Information FCC Notice Only qualified personnel should service the mobile device or install the • mobile device in a vehicle. Faulty installation or service may be The mobile device may cause TV or radio interference if used in dangerous and may invalidate any warranty applicable to the device. - Page 228 Dispose of phones in accordance with local regulations. In some areas, • the disposal of phones in household or business trash may be prohibited. For safe disposal options for phones, contact your nearest Samsung authorized service center.
-
Page 229: Section 14: Warranty Information
Warranty does not cover any battery if (i) the battery has been charged abnormal conditions, improper storage, exposure to moisture or by a battery charger not specified or approved by SAMSUNG for charging dampness, neglect, unusual physical, electrical or electromechanical... - Page 230 THE MERCHANTABILITY OF THE PRODUCT OR ITS FITNESS FOR ANY • Product and the sellers' name and address. To obtain assistance PARTICULAR PURPOSE OR USE; on where to deliver the Product, call Samsung Customer Care at WARRANTIES OF TITLE OR NON-INFRINGEMENT; • 1-888-987-4357. Upon receipt, SAMSUNG will promptly repair DESIGN, CONDITION, QUALITY, OR PERFORMANCE OF THE PRODUCT;...
- Page 231 LIMITATIONS ON HOW LONG AN IMPLIED WARRANTY LASTS, SO THE CONSTRUED TO BE LIMITED BY ITS TERMS OR AS LIMITED AS THE LAW ABOVE LIMITATION MAY NOT APPLY TO YOU. IN ADDITION, SAMSUNG PERMITS. SHALL NOT BE LIABLE FOR ANY DAMAGES OF ANY KIND RESULTING...
-
Page 232: End User License Agreement For Software
SAMSUNG and BE BOUND BY THE TERMS OF THIS EULA. IF YOU DO NOT should not be relied upon. ACCEPT THE TERMS IN THIS EULA, YOU MUST CLICK THE "DECLINE" BUTTON, DISCONTINUE USE OF THE SOFTWARE. - Page 233 License will terminate automatically without your initial copy of the Software, unless we provide other terms notice from Samsung if you fail to comply with any of the terms along with such upgrade. To use Software identified as an and conditions of this EULA.
- Page 234 SAMSUNG AND ITS LICENSORS (COLLECTIVELY REFERRED TO AS 10. EXCLUSION OF INCIDENTAL, CONSEQUENTIAL AND CERTAIN "SAMSUNG" FOR THE PURPOSES OF SECTIONS 9, 10 and 11) OTHER DAMAGES. TO THE EXTENT NOT PROHIBITED BY LAW, IN HEREBY DISCLAIM ALL WARRANTIES AND CONDITIONS WITH...
- Page 235 To avoid unintended information leaks and other problems of this end users pursuant to the terms and conditions herein. sort, it is recommended that the device be returned to Samsung’s 13. APPLICABLE LAW. This EULA is governed by the laws of Customer Care Center for an Extended File System (EFS) Clear TEXAS, without regard to conflicts of laws principles.
- Page 236 Important!: If you are using a handset other than a standard numeric keypad, dial the numbers listed in brackets. Phone: 1-888-987-HELP (4357) © 2011 Samsung Telecommunications America. All rights reserved. No reproduction in whole or in part allowed without prior written approval. Specifications and availability subject to change...
-
Page 237: Index
Index Numerics AllShare Using the Camera Configuring Settings Video Player 2G network Receiving Media Voice Recorder using Transmitting Media Voice Search Amazon MP3 YouTube Answering a call Applications and Development Accessing Application cache and data Audio Postcard Recently-used applications clearing Sending voice mail Application Menus... - Page 238 Battery Life etnering a URL Call volume Extending navigation Adjusting Battery Use & Safety Search Engine Call Waiting Bing Settings Calling Set Search Engine Bubble Using Wi-Fi Block List Options Calls Bluetooth Making a about Multi-party Calendar Change Name Muting creating an event Deleting a Paired Device Camcorder...
- Page 239 Contact groups Copying to microSD Card Last Name First Deleting Copying to SIM Card Sending a message Creating a New Sending All multiple messages New From Keypad Setting Default Location Deleting a contact Contact Entry Settings Desk Home Options Contacts List Display Contact Image Context Menu...
- Page 240 Internet Email Factory data reset Gmail Opening FCC Hearing Aid Compatibility (HAC) Opening Opening Internet Email Regulations for Wireless Devices Signing In Refreshing Messages FCC Notice and Cautions viewing a message sending an Folder Gogo Emergency Calls Creating and Managing Google Ending a call Deleting...
- Page 241 Group Home Screen Wallpaper Indicator icons Adding an Member to an Existing Set as indicator icons Group Setting Individual Ringtone creating a new caller group Home screens Set as Editing Customizing International Call Removing an Entry Horizontal Calibration international calls Group settings HSPA+ making a call...
- Page 242 Message Microsoft Exchange Read Mini Diary making Reply deleting an entry international calls threads settings Making a call Message Options Missed Call Managing Applications Message Search Viewing from Lock Screen Clearing Application Cache Message threads Mobile AP Moving Third-party Applications to Messages Activating Card...
- Page 243 Music Player Sharing adding music Pico TTS On/off switch creating a playlist Power Control Operating Environment removing music predictive text Organizer My Profile using XT9 Calculator Prefix Dialing World Clock Adding Prefix Namecard Other Important Safety Information Deleting Send Via Outlook Primary Shortcuts Sending...
- Page 244 Settings browser Specific Absorption Rate (SAR) Certifi- XT9 Advanced Settings Contact list cation Information Samsung Mobile Products and Recy- display Speed Dial cling enabling wireless network locations changing an entry Save a Number removing an entry...
- Page 245 Swype T-Mobile Contacts Backup USB settings Advanced Settings Tools as a mass storage device Help Camera mass storage device Settings Transferring Music Files Windows Meida Player Tutorial TTY Mode Use wireless networks Swype keyboard Twitter Using Favorites using Adding Favorites System Volume Deleting a Favorite Setting...
- Page 246 Voice mail Stopwatch accessing Wi-Fi accessing from another phone about setting up Activating Volume Settings activating Adjusting advanced settings Calling connecting to Wait deactivating Wait dialing manually scan for network Wallpapers status icons Changing Windows Media Player Managing synchronizing with Warranty Information World Clock WCDMA...
Need help?
Do you have a question about the Galaxy S 4G and is the answer not in the manual?
Questions and answers