
Related Manuals for Tyco Electronics T200 IDENT

Summary of Contents for Tyco Electronics T200 IDENT
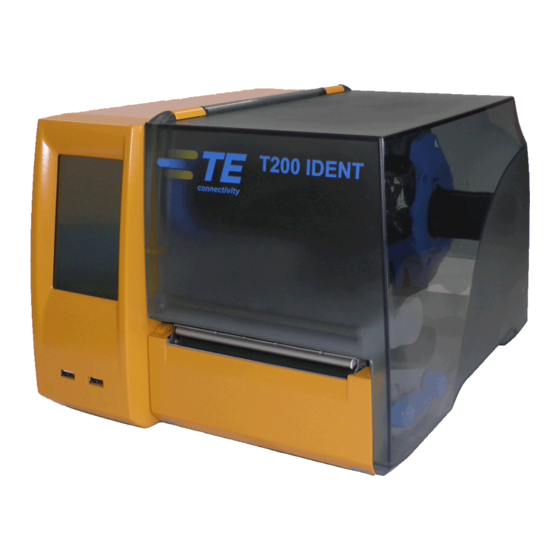
- Page 1 Thermal Transfer Printer T200 IDENT Printer Operator's-Manual (412-121029 Revision 1)
- Page 2 Operator's Manual Edition: 412-121029 rev 1 Copyright This documentation as well as translations hereof are property of TE Connectivity. The replication, conversion, duplication or divulgement of the whole manual or parts of it for other intentions than its original intended purpose demand the previous written authorization by TE Connectivity.
-
Page 3: Table Of Contents
Table of Contents Introduction ..................5 Product Description .................5 Instructions ..................5 Intended Use ...................6 Disclaimer ..................6 Safety Instructions ................6 Environment ..................7 Installation ..................8 Printer Overview ................8 Unpacking and Setting-up the Printer ..........9 Connecting the Printer ..............10 2.3.1 Connecting to the Power Supply ..........10 2.3.2 Connecting to a Computer or Computer Network ......10 Switching on the Printer .............. - Page 4 Table of Contents Licences ..................32 EC Declaration of Conformity ............32 FCC ....................33 Open Source Software Information ..........33 Index .....................39...
-
Page 5: Introduction
Introduction 1.1 Product Description The device is an industrial thermal transfer printer for printing TE Connectivity cable Identification and label products hence forth referred to as media. 1.2 Instructions Important information and instructions in this documentation are designated as follows: Danger! Draws your attention to an exceptionally grave, impending danger to your health or life. -
Page 6: Intended Use
Introduction 1.3 Intended Use • The printer is manufactured in accordance with the current technological status and recognized safety rules. However, danger to the life and limb of the user or third parties and/or damage to the printer and other tangible assets can arise during use. -
Page 7: Environment
Introduction • When the printer is in operation the cover must be closed. However when loading or operating the printer, ensure all loose clothing, long hair, jewelry etc, do not come into contact with the exposed rotating parts. • The printer or parts of it can become hot while printing. Do not touch during operation, and allow to cool down before changing media and before disassembly. -
Page 8: Installation
Installation 2.1 Printer Overview 1 Cover 2 Margin stops 3 Media roll retainer 4 Ribbon supply hub 5 Ribbon take-up hub 6 Roller 7 Print mechanics 8 Touchscreen display Fig. 1 Printer with Tear-off Plate 9 Cutter or Perforator Fig. 2 Printer with Cutter or Perforator... -
Page 9: Unpacking And Setting-Up The Printer
Lift the printer out of the box and set it up on a level surface. Check printer for damage which may have occurred during transport. Check delivery for completeness. Contents of Delivery: • T200 Ident Printer • Power Cable EU • Power Cable UK •... -
Page 10: Connecting The Printer
Installation 2.3 Connecting the Printer 1 Power switch 2 USB master ports for keyboard, scanner or memory stick, I =500mA 3 USB full-speed slave port 4 Ethernet 10/100 Base-T 5 Power connection jack Fig. 4 Connections 2.3.1 Connecting to the Power Supply The printer is equipped with a wide area power unit for a supply voltage of 100 V to 240 V. -
Page 11: Switching On The Printer
Installation 2.4 Switching on the Printer When all connections have been made: Switch the printer on at the power switch (1). The printer performs a system test, and then shows the system status Ready in the display. If an error occurs during the system test, the symbol , Critical fault and type of error are... -
Page 12: Control Panel
Control Panel 3.1 Structure of the Touchscreen Display Notice! It is advantageous, whenever possible, to make adaptations to various print jobs in the software. The touchscreen display (1) indicates the current status of the printer and the print job, indicates faults and shows the printer settings in the menu. -
Page 13: Symbols On The Start Display
Control Panel 3.3 Symbols on the Start Display Symbol Status Function Ready To offline menu Ready Feeds a marker Ready After the end of a print job, reprint the last label Printing label Interrupt print job, printer goes into "Pause" state Pause Continue the print job, printer goes into "Printing label"... -
Page 14: Printer States
Control Panel 3.4 Printer States State Display Description Ready The printer is in the ready state and can receive data. Ready Printing Label Printing Label The printer is currently processing an active print job. and the number of the Data can be transmitted for a new printed label in the print print job. -
Page 15: Loading Media
Loading Media 4.1 Loading Media from Roll Attention! The diameter of media spool greater than 170mm (6 inches ) can not be fitted in the media roll retainer. Fig. 7 Loading Media from Roll 1. Turn ring (2) counterclockwise, so that the arrows points to the symbol and thus release the margin stop (1) from the media roll retainer (4). -
Page 16: Loading Externally Fed And Fanfold Media
Loading Media 4.2 Loading Externally Fed and Fanfold Media Fig. 8 Loading externally fed and fanfold media 1. Position media (2) behind the printer. 2. Guide the media below the roll retainer (1) to the printing unit. Ensure that the printing side of the media is visible from above. 3. -
Page 17: Adjusting The Media Sensor
Loading Media 4.3 Adjusting the Media Sensor Notice! When the printer is delivered the media sensor is positioned in the middle of the media feed. Thus, the media sensor must only be adjusted if: • media with reflex or cut-out marks, which are not in the middle, •... -
Page 18: Loading Transfer Ribbon
Loading Media 4.4 Loading Transfer Ribbon Fig. 10 Transfer Ribbon Feed Path Fig. 11 Edge Guide Adjustment Attention! Clean the printhead before loading the transfer ribbon ( 7.2 on page 7.2). 1. Turn lever (6) counterclockwise to open the printhead. 2. -
Page 19: Setting The Feed Path Of The Transfer Ribbon
Loading Media Attention! Guide transfer ribbon over the media sensor (7). 6. Secure the starting end of the transfer ribbon to the ribbon core (3) using adhesive tape. Ensure counterclockwise rotation direction of the transfer ribbon take-up hub (2). 7. -
Page 20: Cutter / Perforator (Option)
3. Fold up the cutter / perforator (1) so that it snaps on both sides of the retainer (2). Notice! When setting up the perforator please consult TE document "T200 Ident Perforator setup instruction"(411-121015) found on the DVD enclosed in the printer box and enclosed in the Perforator box. -
Page 21: Printing Operation
Printing Operation Attention! Printhead damage is caused by improper handling! Do not touch the underside of the printhead with fingers or sharp objects. Ensure the media is clean by storing in a clean environment. The printer is ready for operation when all of the connections have been made, and the media and the transfer ribbon has been loaded. -
Page 22: Maintenance
Maintenance 7.1 Cleaning Instructions Danger! Risk of death from electric shock! Disconnect the printer from the power supply before performing any maintenance work. It is important to clean the thermal printhead regularly. This guarantees a consistently good printed image and reduces wear of the printhead. Otherwise, the maintenance is limited to monthly cleaning of the printer. -
Page 23: Changing The Printhead
Maintenance Fig. 14 Printhead Line 1. Lift the printhead. 2. Remove media and transfer ribbon from the printer. 3. Clean printhead line(1) with TE recommended cleaning materials. 4. Allow the printhead to dry for 2 - 3 minutes before commencing printing. 7.3 Changing the Printhead Fig. -
Page 24: Cleaning Or Replacing The Print Roller
Maintenance 7.4 Cleaning or Replacing the Print Roller Accumulations of dirt on the print roller may impair the media transport and the print quality. Attention! Damage of the print roller. Do not use sharp objects (knives, screwdrivers, etc.) to clean the print roller. -
Page 25: Cleaning Cutter / Perforator And Replace Blades
Maintenance 7.5 Cleaning Cutter / Perforator and Replace Blades Warning! Disconnect printer from the power supply to prevent accidental blade movement. Warning! Risk of injury! The cutter / perforator blades are sharp! Notice! When cutting through the label material instead of the label gap remains of adhesive may accumulate on the blades. - Page 26 Maintenance Fig. 18 Replace Blades Fig. 19 Springs 4. If the blades are very dirty with residues of adhesive or if they are worn, change blades: Turn the shaft (6) clockwise using a torx wrench TX10 until the gear racks (7) no longer engage.
-
Page 27: Fault Correction
Fault Correction 8.1 Types of Errors The diagnostic system indicates an error on the touchscreen display when an error occurs. State Display Button Correctable error Continue, Cancel Display turns red Irrecoverable error Cancel Display turns red Critical fault Cancel Display turns red Table 3 Error States 8.2 Problem Solution... - Page 28 Fault Correction Problem Cause Remedy Vertical white lines in the Printhead is dirty Clean the printhead. print image 7.2 on page 22 Printhead is defective Change the printhead. (failure of heat 7.3 on page 23 elements) Table 4 Problem Solution...
-
Page 29: Error Messages And Fault Correction
Fault Correction 8.3 Error Messages and Fault Correction Error message Cause Remedy Barcode too The barcode is too big for the Reduce the size of the barcode allocated area of the media or move it. Barcode Invalid barcode content, e.g. Correct the barcode content. - Page 30 Fault Correction Error message Cause Remedy Memory Current print job contains Cancel current print job. overflow too much information, e.g. Reduce amount of data to be selected font, large graphics printed. Name exists Duplicate usage of field name Correct programming in the direct programming Network e.g.
- Page 31 Fault Correction Error message Cause Remedy Structural Error in the file list of the Format data medium. err. data medium, data access is uncertain. System Error e.g. FPGA defective, invalid Switch the printer off and then setup, voltage error on. Please note error details shown on the display.
-
Page 32: Licences
Licences 9.1 EC Declaration of Conformity Tyco Electronics UK Ltd Faraday Road Dorcan, Swindon Wiltshire SN3 5HH EC Declaration of Conformity We declare herewith that as a result of the manner in which the device designated below was designed, the type of construction and the devices which, as a result have been brought on to the general market comply with the relevant fundamental regula- tions of the EC Rules for Safety and Health. -
Page 33: Fcc
GPL and LGPL are available at GNU’s official website www.gnu.org . If you require information on obtaining access to the code subject to GPL and LGPL used in this product, please send your inquiry to: Identification (Open source inquiry) Tyco Electronics UK Ltd Faraday Road Dorcan Swindon... - Page 34 Licences The software in this product is based in part of the work of the FreeType Team. Nano-X is distributed under Mozilla, and source code for Nano-X and any modifica- tions thereto in this product are available under the terms of Mozilla by sending an inquiry to the above address*.
- Page 35 Licences ---- Part 2: Networks Associates Technology, Inc copyright notice (BSD) ----- Copyright (c) 2001-2003, Networks Associates Technology, Inc All rights reserved. Redistribution and use in source and binary forms, with or without modification, are permitted provided that the following conditions are met: * Redistributions of source code must retain the above copyright notice, this list of conditions and the following disclaimer.
- Page 36 Licences ---- Part 3: Cambridge Broadband Ltd. copyright notice (BSD) ----- Portions of this code are copyright (c) 2001-2003, Cambridge Broadband Ltd. All rights reserved. Redistribution and use in source and binary forms, with or without modification, are permitted provided that the following conditions are met: * Redistributions of source code must retain the above copyright notice, this list of conditions and the following disclaimer.
- Page 37 Licences ---- Part 4: Sun Microsystems, Inc. copyright notice (BSD) ----- Copyright © 2003 Sun Microsystems, Inc., 4150 Network Circle, Santa Clara, California 95054, U.S.A. All rights reserved. Use is subject to license terms below. This distribution may include materials developed by third parties. Sun, Sun Microsystems, the Sun logo and Solaris are trademarks or registered trademarks of Sun Microsystems, Inc.
- Page 38 Licences ---- Part 5: Sparta, Inc copyright notice (BSD) ----- Copyright (c) 2003-2009, Sparta, Inc All rights reserved. Redistribution and use in source and binary forms, with or without Modification, are permitted provided that the following conditions are met: * Redistributions of source code must retain the above copyright notice, this list of conditions and the following disclaimer.
-
Page 39: Index
Index Cleaning Pause ........14 Cutter / Perforator ..25 Power save mode ....14 Printhead .....22 Power supply .....10 Print Roller ....24 Printer states .....14 Cleaning Instructions ..22 Printhead Connecting ......10 Cleaning ......22 Contents of delivery .....9 Damage ....21, 22 Correctable error ....14 Printing label ......14 Critical error .......14 Problem solution ....27... - Page 40 Tyco Electronics UK Ltd Faraday Road Dorcan, Swindon Wiltshire SN3 5HH...
Need help?
Do you have a question about the T200 IDENT and is the answer not in the manual?
Questions and answers