Table of Contents
Advertisement
Available languages
Available languages
Quick Links
Advertisement
Table of Contents

Related Manuals for Coustic AMP400S


Summary of Contents for Coustic AMP400S
- Page 2 To further explore the potential of your Coustic amplifier, we recommend you match it with our dynamic full-range speakers or subwoofers and electronic crossovers. Whatever you need for your ultimate car audio system, look to Coustic for a wide range of car audio components to meet the most critical demands.
-
Page 3: Specifications
• CEA 2006 Compliant. All power ratings are not created equal. CEA 2006 Compliance ensures that the power of this amplifier is measured according to strict standards dictated by the Consumer Electronics Association. SPECIFICATIONS AMP400S AMP600S AMP800S AMP1200S RMS per channel @... -
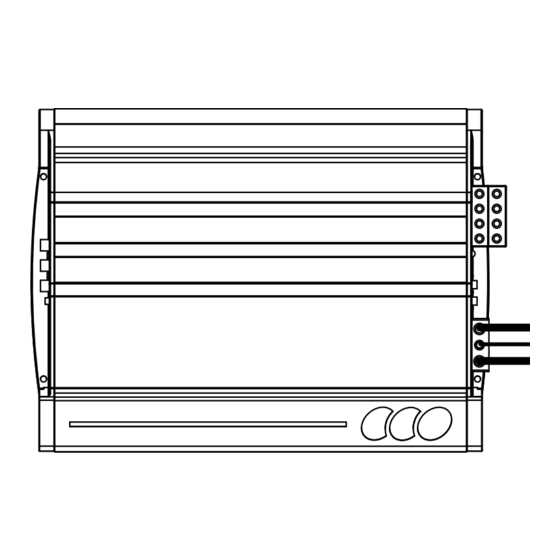
Page 4: Installation
INSTALLATION Disconnect the ground at the vehicle battery before proceeding. 1. Connect the amplifier to the battery For maximum amplifier performance, we suggest 4 gauge wire and a 1 Farad stiffening capacitor. A fuse or circuit breaker is required at maximum distance of 18” from the battery to protect the battery, the vehicle, and more importantly you. - Page 5 4. Remote Gain Control Included is a remote gain control, which is a volume control that is active with the low pass filter engaged. This control should be mounted near the driver in an easily accessed location. This is not a gain knob, this is a level control.
- Page 6 WIRING DIAGRAM (CHARGING SYSTEM) 1 Farad Stiffening Capicitor...
- Page 7 WIRING DIAGRAM (5.1 SURROUND SOUND EXAMPLE)
- Page 8 WIRING DIAGRAM (SINGLE 4-CHANNEL AMPLIFIER SYSTEM)
- Page 9 WIRING DIAGRAM (MULTI AMPLIFIER SYSTEM)
- Page 10 SYSTEM TUNING (INPUT GAIN ADJUSTMENT) Located on the Input Panel, the objective of input GAIN adjustment is to match the output of the source unit with the input of the amplifier. The output voltage of individual source units can vary. Some source units have an output of 200 mV and others have 5 Volts or more.
- Page 11 SYSTEM TUNING (CROSSOVER ADJUSTMENT) Note: If you are using the Remote Gain, make sure to take this into account during set-up procedures of the subwoofer amplifier. You should set the system up with the Remote Gain plugged in and with the level knob turned all the way down (counter-clockwise).
-
Page 12: Troubleshooting
TROUBLE SHOOTING 1. No power: Verify that the Ground, +BATT and remote are securely attached to the amp, the connection at the + terminal of the battery is secure, the remote turn-on is securely fastened to the source unit and that the in-line fuse at the battery is good as well as the fuse on the amp. If fuses are blown, replace them and attempt to power the amp back on. -
Page 13: Limited Warranty
Any expenses in the removal and reinstallation of products are not covered by this warranty. COUSTIC’s total liability will not exceed the purchase price of the product. If a defect is present, your authorized COUSTIC dealer may be able to effect repairs. -
Page 14: Instalación
CARACTERÍSTICAS • Fuente de alimentación y etapa de salida patentada con tecnología de punta • Disipador térmico de aluminio extruído de alta masa para dar máximo control térmico y confiabilidad a prueba de fallas. • Crossover de pasabajas (Low-Pass, LP) y pasaaltas (High-Pass, HP) ajustable. De 40 Hz a 350 Hz y 12 dB/oct para dar máxima flexibilidad de diseño al sistema. - Page 15 3. Conecte la conexión a tierra del amplificador al chasis del vehículo Para obtener el máximo rendimiento del amplificador, sugerimos cable calibre 4. Localice una pieza de metal sólida y raspe la pintura en el punto en el cual va a fijar la conexión a tierra (NO FIJE LA CONEX- IÓN EN PERNOS DE FÁBRICA).
- Page 16 SINTONIZACIÓN DEL SISTEMA (AJUSTE DE AMPLIFICACIÓN DE ENTRADA) El ajuste de amplificación de entrada (GAIN) se encuentra en el panel de entrada y su objetivo es hacer corresponder la salida de la fuente de audio con la entrada del amplificador. El voltaje de salida de las fuentes de audio puede variar.
- Page 17 SINTONIZACIÓN DEL SISTEMA Nota. Si está usando el control remoto de amplificación, asegúrese de tomar esto en cuenta durante los procedimientos de configuración del amplificador del subwoofer. Usted debe configurar el sistema con el control remoto de amplificación enchufado y con la perilla de nivel al mínimo (contra las manecillas de reloj).
-
Page 18: Resolucion De Problemas
RESOLUCION DE PROBLEMAS 1. No hay alimentación. Asegúrese de que los cables de conexión a tierra (Ground), al positivo de la batería (+BATT) y al control remoto (Remote) estén firmemente conectados al amplificador, que la conexión al positivo de la batería sea firme, que la conexión de encendido por control remoto esté firme- mente unida a la fuente de audio y que el fusible en línea de la batería y el fusible del amplificador estén en buenas condiciones. - Page 19 4. No hay sonido en uno de los dos lados. Revise las conexiones de altavoz, las conexiones de entrada, el control de balance de la fuente de audio y luego vea con el multímetro digital si hay cortocircuitos en los altavoces. 5.
-
Page 20: Caractéristiques
CARACTÉRISTIQUES • Alimentation électrique et étage de sortie brevetés les plus sophistiqués • Dissipateur thermique en aluminium extrudé massique pour une gestion thermique maximale et une fiabilité à toute épreuve • Filtre passif HP/LP réglable – 40 Hz-350 Hz, 12 dB/oct pour une flexibilité maximale de la conception du système •... - Page 21 3. Connectez la mise à la terre de l’amplificateur au châssis du véhicule Pour une meilleure performance de l’amplificateur, nous vous suggérons d’utiliser un fil de calibre 4. Repérez une pièce en métal et gratter la peinture à l’endroit où le fil sera attaché (PAS DE BOULONS D’USINE).
- Page 22 RÉGLAGE DU SYSTÈME (RÉGLAGE DU GAIN D’ENTRÉE) Situé sur le panneau d’entrée, l’objectif du réglage de GAIN d’entrée est de faire correspondre la sortie de l’unité source à l’entrée de l’amplificateur. La tension de sortie des unités sources individuelles peut varier.
- Page 23 RÉGLAGE DU SYSTÈME (RÉGLAGE DE FILTRE PASSIF) Remarque : Si vous utilisez le réglage de gain à distance, assurez-vous de prendre ce point en compte pendant les procédures d’installation du caisson d’extrêmes graves. Vous devriez installer le système avec le réglage de gain à distance branché et avec le bouton de niveau complètement baissé (dans le sens inverse des aiguilles d’une montre).
- Page 24 RECHERCHE DES CAUSES DE PANNES 1. Pas d’alimentation : Vérifiez que les câbles de mise à la terre, +BATT et de branchement à distance sont bien branchés sur l’amplificateur, que le branchement sur la borne positive de la batterie est bien fait, que la mise en marche à...
- Page 25 4. Pas de son d’un côté : Vérifiez les branchements de l’amplificateur, les branchements d’entrée, le réglage de la balance sur l’unité source, puis vérifiez les haut-parleurs à l’aide d’un multi- mètre numérique pour vous assurez qu’ils ne sont pas court-circuités. 5.
- Page 26 FEAUTURES • Patentiertes Netzteil und Endstufe auf dem neuesten Stand der Technik • Massiver Kühlkörper aus stranggepresstem Aluminium garantiert maximale Temperaturkontrolle und absolute Zuverlässigkeit. • Hoch-/Tiefpass-Crossover-Einheit ist von 40-350 Hz, 12 dB/Okt. einstellbar und bietet maximale Flexibilität beim Systemdesign. • Stereo-Verstärkungskontrolle ermöglicht präzise Anpassung Ihres Verstärkers an das Radio. •...
- Page 27 2. Schließen Sie den Verstärker an die Fernbedienung an. Verbinden Sie den Fernbedienungseingang am Verstärker mit dem Fernbedienungsausgang am Autoradio (nur bei Verwendung von RCA-Steckern), um den Verstärker durch den Ein-/Aus-Schalter des Autoradios ein- und ausschalten zu können. Wenn das Autoradio nicht über einen Fernbedienungsausgang verfügt, schließen Sie ihn an eine geschaltete 12-Volt-Quelle (wie den Zündschalter) an.
- Page 28 SYSTEMEINSTELLUNG (ANPASSUNG DES EINGANGSVERTSÄRKUNGSREGLERS Die Funktion des Eingangsreglers (GAIN) an der Eingangskonsole besteht darin, das Ausgangssignal des Autoradios an den Eingang des Verstärkers anzupassen. Die Ausgangsspannung der jeweiligen Autoradios kann unterschiedlich sein. Manche Autoradios haben eine Ausgangsspannung von 200 mV, andere hingegen 5 Volt oder mehr.
- Page 29 SYSTEMEINSTELLUNG (CROSSOVER-ANPASSUNG) Hinweis: Wenn Sie den Fernbedienungs-Verstärkungsregler verwenden, müssen Sie dies beim Einstel- lungsverfahren für den Subwoofer-Verstärker mit einberechnen. Sie sollten das System bei eingestecktem Fernbedienungs-Verstärkungsregler einstellen, wobei der Niveauregler ganz nach unten (gegen den Uhrzeigersinn) gedreht ist. Der Fernbedienungs-Verstärkungsregler funktioniert nur, wenn Sie die Tiefpass-Crossoverkonfiguration (LPF) gewählt haben.
-
Page 30: Problemlösungen
PROBLEMLÖSUNGEN 1. Kein Strom: Prüfen Sie, ob das Masseskabel, +BATT und die Fernbedienung fest am Verstärker angeschlossen sind, dass die Verbindung am Pluspol der Batterie sicher ist, dass der Fernbedienungsregler fest im Autoradio eingesteckt ist und dass sowohl die Sicherung an der Batterie als auch die am Ver- stärker in Ordnung sind. - Page 31 4. Kein Sound auf einer Seite: Prüfen Sie die Lautsprecheranschlüsse, Eingangsanschlüsse, den Balanceregler am Autoradio, und prüfen Sie dann mit einem digitalen Multimeter, ob beim Lautspre- cher ein Kurzschluss vorliegt. 5. Niedrige Lautstärke bei Radio und CD: Prüfen Sie den Fader-Regler des Radios und die Eingangsempfindlichkeit des Verstärkers.
-
Page 32: Back Cover
BACK COVER...
Need help?
Do you have a question about the AMP400S and is the answer not in the manual?
Questions and answers