
Related Manuals for RadiSys EPC-8A

Summary of Contents for RadiSys EPC-8A
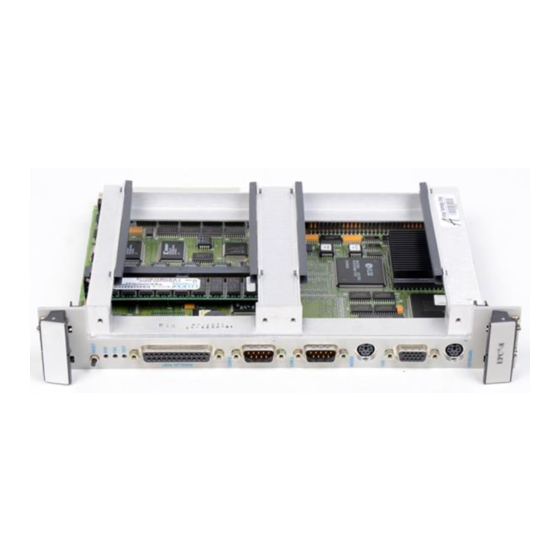
- Page 1 EPC-8A Hardware Reference RadiSys Corporation 5445 NE Dawson Creek Drive Hillsboro, OR 97124 (503) 615-1100 FAX: (503) 615-1150 www.radisys.com 07-0961-01 December 1998...
- Page 2 EPC-8A Hardware Reference EPC, INtime, and RadiSys are registered trademarks of RadiSys Corporation. † All other trademarks, registered trademarks, service marks, and trade names are the property of their respective owners. December 1998 Copyright © 1998 by RadiSys Corporation All rights reserved.
-
Page 3: About This Guide
This guide describes the EPC-8A, a highly integrated PC-compatible computer designed specifically for use in the VMEbus and extended VMEbus (VXIbus) environments. About this guide This guide explains how to install, configure, and troubleshoot the EPC-8A, and describes the EPC-8A and how it works. Guide contents... - Page 4 Where to get more information You can find out more about the EPC-8A from these sources: • Readme file: Lists features and issues that arose too late to include in other documentation.
-
Page 5: Table Of Contents
Specifications..............................Chapter 2: Configuration and Installation Before you begin............................... Configuring the EPC-8A ..........................Slot-1 Functionality ........................... Selecting the EPC-8A Slot Location ........................ Installing the VMEbus Backplane Jumpers...................... EPC-8A Insertion.............................. Connecting Peripherals to the EPC-8A ......................Remaining Steps ............................... Chapter 3: BIOS Configuration BIOS Setup Screens............................ - Page 6 EPC-8A Hardware Reference Resident Flash/SRAM Memory ........................ Resident Flash Memory........................SRAM..............................Watchdog Timer ............................Battery................................ Peripheral Ports............................RS-232 Port ............................RS-422/485 Port ..........................Parallel Port ............................Keyboard ............................Front Panel LEDs ............................Resetting the EPC-8A..........................Power-off, Power-on .......................... Power low............................
- Page 7 VME Event Enable Register (8155h) ....................... VME Interrupt Generator Register (8158h)...................... Unique Logical Address Register (815Ch)....................... Module Status/Control Register (815Dh) ......................VMEbus Mapped Registers ..........................Appendix G: XFORMAT Software for the EPC-8A XFORMAT Software ............................Appendix H: AUTOSET Software AUTOSET Software............................Installing the Software ............................
- Page 8 EPC-8A Hardware Reference Adapter Architecture ..........................Boot PROM ............................... Configuring Additional Ethernet Controllers .................... Diagnostics ..............................Error Messages ............................Appendix I: SVGA Video Controller Hardware ..........................Display Drivers and Utilities ..........................Introduction............................... Before you begin............................Notational conventions ..........................Easy installation............................
- Page 9 Contents Figures Figure 2-1. Jumper Locations..........................Figure 2-2. Daisy-Chain Signal Concept ......................Figure 2-3. Backplane Jumpers Required for EPC-8A Subsystem............... Figure 2-4. VMEbus Jumpers on Rear Wirewrap Pins..................Figure 2-5. VMEbus Jumpers on Front Stake Pins....................Figure 3-1. Main menu............................
- Page 10 Table A-10. Second Interrupt Controller: RadiSys R400EX emulating 8259 of PC⁄AT ........Table A-11. Second (16-bit) DMA Controller: RadiSys R400EX emulating 8237 of PC⁄AT....... Table A-12. Coprocessor Interface: For the EPC-8A DX, DX replaces the 80287 of PC⁄AT ....... Table A-13. EXM Configuration..........................
-
Page 11: Chapter 1: Product Description
PC-compatible computer designed specifically for use in the VMEbus and extended VMEbus (VXIbus) environments. The EPC-8A is available s either a Single- or Dual-slot 6U VMEbus module. The two configurations are functionally identical, and differ only in that the two-slot module includes mechanical support for two EXM modules. -
Page 12: Vmebus
VMEbus. All the VMEbus address spaces can be addressed from both protected-mode and real-mode operating systems. The EPC-8A can generate or respond to all 7 standard VMEbus interrupts, and can also receive the VMEbus signals ACFail, BERR, and Sysfail as interrupts. When it is used to... -
Page 13: Vmebus Extended Register Set
Chapter 1: Product description VMEbus extended register set As an extension to the VMEbus interface, the EPC-8A implements the set of VXIbus (IEEE 1155-1992) standard multiprocessor support registers in the A16 space. These registers provide a set of standard identification, status, control and communication functions that are useful in multiprocessor environments. - Page 14 EPC-8A Hardware Reference Table 1-2. Additional EPC-8A Specifications Characteristic Value Master address A16, A24, A32 Master transfer D08(EO), D16, D32 Slave address Slave transfer D08(EO), D16 Interrupter I(1–7) Interrupt handler D08(O),D16 IH(1–7) Requester ROR, RONR Arbiter RRS, PRI System controller...
-
Page 15: Chapter 2: Configuration And Installation
During the installation process, ensure that power to your system is off. The EPC-8A is not designed to be inserted or removed while the chassis is powered up. Configuring the EPC-8A Slot-1 Functionality Every VMEbus system must have a System (Slot-1) Controller. -
Page 16: Selecting The Epc-8A Slot Location
The Slot-1 configuration option is enabled (default) by installing the Slot-1 shunt (jumper) on the processor board (see Figure 2-1). Removing the jumper disables Slot-1 functionality. When the EPC-8A is configured as the Slot-1 controller, it performs all the standard VMEbus system control functions. -
Page 17: Installing The Vmebus Backplane Jumpers
Chapter 2: Configuration and Installation • The EPC-8A connects to its peripherals via a subplane which extends to the right of the EPC-8A. Make sure that the location you choose provides sufficient room for all the attached peripherals (EXMs and mass storage module). -
Page 18: Figure 2-3. Backplane Jumpers Required For Epc-8A Subsystem
Figure 2-3. Backplane Jumpers Required for EPC-8A Subsystem The figure above shows the jumpers required for a five-slot EPC-8A subsystem, consisting of a two-slot EPC-8A, an EXP-MC module carrier for two additional EXM modules, and an EXP-MX storage module. Note that the left-most slot does not require any jumpers. -
Page 19: Epc-8A Insertion
Consult your VME chassis reference manual or contact the chassis manufacturer if you are unsure where to jumper your particular system. EPC-8A Insertion The EPC-8A must be installed onto a subplane that fits between the EPC-8A and the VMEbus backplane. Subplanes are discussed in more detail in Appendix E. -
Page 20: Connecting Peripherals To The Epc-8A
The subplane is installed first, connecting to the backplane. After installing the subplane, the EPC-8A processor module can be inserted into the VMEbus chassis. Make sure that power to your VME system is off. the EPC-8A module is not designed to be inserted or removed from live backplanes. -
Page 21: Chapter 3: Bios Configuration
Diagnosis. BIOS Setup Screens The EPC-8A’s BIOS contains a setup function to display and alter the system configuration. This information is maintained in the EPC-8A’s nonvolatile CMOS RAM and is used by the BIOS to initialize the EPC-8A hardware. -
Page 22: Main Bios Setup Menu
Diskette A/Diskette B Identifies the type of floppy disk drive installed as the A drive. If the EPC-8A has a floppy drive installed, the proper setting is usually for a 1.44 MB floppy disk drive. Other options include 360K, 720K, 1.2 Mbyte, and 2.88 Mbytes. If no drive is installed, the proper setting is NOT INSTALLED. -
Page 23: Ide Adapter Sub-Menus
EXM-HD, EXM-MX, or EXP-MX series mass storage unit, you must configure a master adapter; the slave is optional, and not relevant to most RadiSys hardware. To see the detailed characteristics of the device or to change the device, choose the IDE Adapter 0 Master Sub-Menu to configure the fixed disk. - Page 24 Note that there are some restrictions when setting up devices on the EPC-8A. If you plan to boot from a non-IDE device, such as the resident Flash memory or VMEbus, set the C: drive as None and use the BIOS extension. Flash and VMEbus BIOS extensions are enabled and configured in the Advanced Menu.
-
Page 25: Memory Cache Sub-Menu
Chapter 3: BIOS Configuration Memory Cache Sub-Menu PhoenixBIOS Setup - Copyright 1985-95 Phoenix Technologies Ltd. Main Memory Cache Item Specific Help Memory Cache: [Enabled] ↑↓ Help Select Item Change Values Setup Defaults ←→ Select Menu ESC Exit Enter Select Sub-Menu F10 Previous Values Figure 3-3. -
Page 26: Memory Shadow Sub-Menu
EPC-8A Hardware Reference Memory Shadow Sub-Menu The term “Memory Shadow” refers to the technique of copying information from ROM into RAM and accessing it in this alternate memory location. The Memory Shadow Sub-Menu is discussed below. PhoenixBIOS Setup - Copyright 1985-95 Phoenix Technologies Ltd. -
Page 27: Boot Sequence Sub-Menu
Chapter 3: BIOS Configuration Boot Sequence Sub-Menu The Boot Sequence Sub-Menu allows you to change the boot sequence options. The following displays: PhoenixBIOS Setup - Copyright 1985-95 Phoenix Technologies Ltd. Main Boot Options Item Specific Help Boot delay: [ 0] Boot sequence: [A: then C:] SETUP prompt:... - Page 28 BIOS extensions at addresses C8000, CC000, D000, D4000, D8000 and DC000 for more devices, up to the maximum of two. There are many different boot options. Two supported directly on the EPC-8A hardware and BIOS are booting from a Flash ROMdisk and booting from a VME ROM disk. For more information on booting from a VME ROMdisk or a Flash ROMdisk, refer to setups in the Advanced Menu and Appendix G, XFORMAT Software.
-
Page 29: Keyboard Features Menu
Chapter 3: BIOS Configuration Keyboard Features Menu Use this sub-menu to enable or disable various keyboard features. PhoenixBIOS Setup - Copyright 1985-95 Phoenix Technologies Ltd. Main Keyboard Features Item Specific Help Numlock: [Off] Key Click: [Disabled] Keyboard auto-repeat rate: [30/sec] Keyboard auto-repeat delay: [1/4 sec] ↑↓... -
Page 30: Advanced Menu
Sets the action for the BIOS to take following a hardware reset timer) Reset condition caused by a timeout of the watchdog timer on the EPC-8A. When such a timeout occurs, first the system generates a VMEbus SYSRESET. The EPC-8A then either halts, displaying an error message, or simply reboots, depending on the entry here. - Page 31 Important: Do not place at the same base address as other BIOS extensions. VME ROMdisk Enables VME memory on the EPC-8A. This must be selected for the VME memory to appear as a drive. The base address you select defines where the VME ROMdisk BIOS extension is installed.
-
Page 32: Integrated Peripherals Sub-Menu
EPC-8A Hardware Reference Field Description VME Scan Range Used for VME booting. To boot from VME: 1. Use XFORMAT with the /F option to first create a file that looks like a FAT/boot record. 2. Upload the file to VME memory on a 100000h boundary in one of the memory ranges below. -
Page 33: Exm Menu
Menu. EXM Menu Use this menu to set up the optional EXM expansion modules in your EPC-8A. Enter the EXM-ID, plus option byte information for OB1 and OB2. This information is found in the hardware reference manual shipped with each EXM expansion module. -
Page 34: Figure 3-10. Slot Numbering
• EXM Slot 31: refers to the optional resident Flash memory. The ID should be set to FF if your EPC-8A does not have this feature. If present, then set the ID to “FD” and Option Byte 1 to “01”. -
Page 35: Vme Menu
Arbitration Priority Sets the arbitration priority. Possible values include 0, 1, 2, and 3, with 0 indicating the highest priority. This determines which VMEbus request signal the EPC-8A uses when it accesses the VMEbus. Arbitration Mode Selects the arbitration mode. Possible values are “Round Robin”... -
Page 36: Exit Menu
00 through FF. The logical address controls where in the VME A16SD space the EPC-8A extended registers are mapped. If the ULA=0, the registers are at C000. If the ULA=FF, the registers are at FFF0. In general, the registers map to [C000 + (ULA*40)] (all numbers in hexadecimal). - Page 37 Chapter 3: BIOS Configuration Field Description Save Changes Saves the edits you made during this session but does not exit. Exit & Update BIOS Updates the BIOS from a floppy disk. Note: Select this exit option only if you obtained BIOS update replacement software from your supplier and reviewed the documentation and procedures provided with that distribution.
- Page 38 EPC-8A Hardware Reference...
-
Page 39: Chapter 4: Theory Of Operation
This is described in detail later in this chapter. The EPC-8A maps a standard set of VXI configuration registers onto the VMEbus A16 space. These are dual-ported and accessible both by other VMEbus modules and the... -
Page 40: Processor Board
EPC-8A Hardware Reference Resident Flash memory (on the EPC-8A board) is I/O mapped and appears as an EXM expansion module as if in EXM slot 31. SRAM is memory mapped. The PC BIOS is shadowed into main memory at start-up. -
Page 41: Memory
01FFFFFF 31 Mbytes DRAM extended memory BIOS ROM and ROM Shadowing The EPC-8A contains a Flash boot device (chip) as its BIOS ROM. The BIOS ROM is mapped into the top of the processor’s 32-bit address space. The BIOS consists of an 16K boot block and a System BIOS combined with a VGA BIOS in a 128 Kbyte partition. -
Page 42: Cmos Backup And Restore
Video Controller The EPC-8A hardware includes a VGA graphics controller implemented using the Chips and Technologies 65545. This is connected to the CPU local bus to give the best possible graphics performance. VGA memory is 512 Kbytes, resulting in the following resolutions:... -
Page 43: Ethernet Controller
AUTOSET.EXE program, optionally available from your supplier. The possible alternative interrupts are IRQ3, IRQ9 and IRQ15. The EPC-8A Ethernet port has two 8 Kbytes x 8 RAM chips for packet buffering and a 10BASE-T interface. You cannot use eight-bit network drivers with the EPC-8A. -
Page 44: Battery
The 3.0V lithium battery supplied with the EPC-8A is a Panasonic BR2330 “coin cell” or equivalent. It is mounted behind the reset button at the top of the EPC-8A. Should the battery fail, you may obtain and install a replacement. -
Page 45: Peripheral Ports
EPC-8A to allow use of standard PC/AT keyboards with larger 5-pin connectors. Front Panel LEDs The EPC-8A has three LEDs in the top left corner of the front panel. These LEDs are described below: This LED is lit whenever a write access to DRAM is made. This provides a normally lit LED indicating that the CPU is operating. -
Page 46: Resetting The Epc-8A
This only occurs during a hardware reset. Resetting the EPC-8A You can reset (reboot) the EPC-8A in a number of ways. Resets are summarized in the table below, with details in the paragraphs that follow. Table 4-3. Reset Conditions... -
Page 47: Ctrl+Alt+Del
VME bus, without interrupting (or resetting) the 486 processor on the EPC-8A. The Soft Reset state is entered when the SRST bit is set. In this state the EPC-8A removes any asserted interrupts (clears the Interrupt Generator register, disables its VME master... -
Page 48: Signal Register Fifo
EPC-8A responds to the assertion of SYSRESET* by placing the EPC-8A into a state almost identical to the Soft Reset state. The only difference between the two states is that the PASS bit (bit 2 of Status/Control register) is not cleared by the assertion of SYSRESET* (as long as SRIE is 0—to avoid a warm reset), but the PASS bit... -
Page 49: Vme Interface
This ID byte is the same identification byte discussed earlier in Chapter 3, BIOS Configuration in the section on the EXM Menu. The EXM expansion interface is provided on rows A, C, and D of the EPC-8A’s 4-row DIN P2 connector. The subplane carries the EXM interface to other modules, such as to EXM modules and the EXP-MX Mass Storage module. -
Page 50: Byte Ordering
Byte 1 Byte 0 The EPC-8A contains programmable byte-swapping hardware to allow programs to read or write VMEbus memory in either byte order. When using the E-page to access the VMEbus, the order is selected by bit 5 (BORD) in the VME modifier register (8151h) When using direct memory mapping, the order is address-range dependent (For example, E0000000–E0FFFFFF accesses the A24 space with big endian byte ordering, and... -
Page 51: Vmebus Interrupt Response
When the EPC-8A’s Interrupt Generator register (815Fh) is used to assert an interrupt, the EPC-8A formulates a status/ID value that is transmitted on the bus as the response to a matching interrupt acknowledgment cycle. The EPC-8A acts as both a D08(O) and D16 interrupter. -
Page 52: Passing Vme Interrupts And Events To The Cpu
EPC-8A Hardware Reference Passing VME Interrupts and Events to the CPU The diagram below shows how VME interrupts and VME events are generated and passed to the CPU: RRDY WRDY IRQ1 interrupt interrupt IRQ2 enable enable register IRQ3 register IRQ4... -
Page 53: Chapter 5: Programming The Vmebus Interface
All of these instructions perform a read followed by a write. When such a read occurs that is mapped to the VMEbus, the EPC-8A treats it as the start of a VME RMW cycle. The next VME access from the CPU is treated as the write that terminates the RMW cycle. -
Page 54: Setting The Vmebus Access Bit
486 address bits 15–0 It should be noted that the EPC-8A drives all 32 address lines even when performing an A24 or A16 access. Although the VME specification states that boards should not decode address lines outside their respective address spaces, some boards do anyway. Because of this, all “unused”... -
Page 55: Supported Address Modifiers
Chapter 5: Programming the VMEbus Interface Supported Address Modifiers The table below lists supported address modifiers: Table 5-1. Supported Address Modifiers Address modifier Description A16 non-privileged A16 supervisor A24 non-privileged data A24 non-privileged program A24 supervisor data A24 supervisor program A32 non-privileged data A32 non-privileged program A32 supervisor data... -
Page 56: Example #2
EPC-8A Hardware Reference for these bits. 2Dh = 00101101b Bit 3 (Address Modifier bit 5) = 1 Bit 2 (Address Modifier bit 4) = 0 Bit 1 (Address Modifier bit 2) = 1 Bit 0 (Address Modifier bit 1) = 0... -
Page 57: Low-Level Handling Of Vmebus Interrupts
The following is a description of how VMEbus interrupts (IRQ1–IRQ7), VXIbus message interrupts and error interrupts (BERR, ACFAIL, WDT, and so on.) should be handled on the EPC-8A. Note that, in general, the use of EPConnect is highly recommended for handling interrupts. -
Page 58: Start Of Loop
EPC-8A Hardware Reference masked after doing the EOI to the interrupt controller. Remember to re-enable them prior to leaving the interrupt handler. • If you are using DOS, you may need to switch to an internal stack. This may or may not be necessary in other environments and applications. -
Page 59: Generating Iacks In Protected Mode
0, if set, enables the 32-bit access mechanism. If the E-page mechanism is disabled, then the E-page is available for EXMbus options that require more DOS memory below 1MB. The type of VME access performed by the EPC-8A is a function of the address supplied. -
Page 60: Programming The Watchdog Timer
(like most DOS extenders). Programming the Watchdog Timer The watchdog timer on the EPC-8A can be set to either halt the system or reboot when a watchdog timer event occurs. The counter causes a watchdog event after a specified time. -
Page 61: Appendix A: Chipset And I/O Map
Appendix Chipset and I/O Map The following defines the I/O addresses decoded by the EPC-8A. It does not define addresses that might be decoded by EXMs and the EXP-MX. Table A-1. First (8-bit) DMA controller: RadiSys R400EX chip emulating 8237 of PC⁄AT... -
Page 62: Table A-4. Counter-Timer Functions: Radisys R400Ex Emulating 8254 Of Pc⁄At
A status B status C status D Table A-7. DMA Page Registers: RadiSys R400EX emulating 74LS612 of PC/AT I/O Addr Functional group Usage Phoenix BIOS status information Channel 2 page register Channel 3 page register... -
Page 63: Table A-8. Port A
Table A-10. Second Interrupt Controller: RadiSys R400EX emulating 8259 of PC⁄AT I/O Addr Functional group Usage Interrupt controller 2 Port 0 Port 1 Table A-11. Second (16-bit) DMA Controller: RadiSys R400EX emulating 8237 of PC⁄AT I/O Addr Functional group Usage Channel 4 address Channel 4 count Channel 5 address... -
Page 64: Table A-12. Coprocessor Interface: For The Epc-8A Dx, Dx Replaces The 80287 Of Pc⁄At
EPC-8A Hardware Reference Table A-12. Coprocessor Interface: For the EPC-8A DX, DX replaces the 80287 of PC⁄AT I/O Addr Functional group Usage Coprocessor Clear coprocessor busy Reset coprocessor Table A-13. EXM Configuration I/O Addr Functional group Usage EXM Configuration EXM IDs (on each EXM module) -
Page 65: Table A-18. Serial I/O (Com1) Port: National Semiconductor Pc87336 Emulating 8552 Of Pc/At
Modem control register Line status register Modem status register Table A-19. EPC Registers I/O Addr Functional group Usage 8102 EPC-8A registers Peripheral Enables Table A-20. VME Registers I/O Addr Functional group Usage 8130 VME and misc. control VME map WA21–16 8132 VME and misc. -
Page 66: Table A-21. Vxi, Vme/Misc., And On-Board Exm-2A Registers
EPC-8A Hardware Reference Table A-21. VXI, VME/Misc., and On-board EXM-2A Registers I/O Addr Functional group Usage 8140 VXI Registers ID low 8141 ID high 8142 Device type low 8143 Device type high 8144 Status/Control low 8145 Status/Control high 8148 Protocol low... -
Page 67: Appendix B: Interrupts And Dma Channels
IRQ13 Coprocessor IRQ14 IDE disk controller IRQ15 Unassigned DMA Channels The assignment of DMA channels for the EPC-8A is shown in the following table. Table B-2. DMA Channels Channel Description Unassigned (8-bit) Unassigned (8-bit) Usually needed for floppy disk (8-bit) Usually needed for SCSI disk (8-bit) (Channel 0–Channel 3 cascade through Channel 4) - Page 68 EPC-8A Hardware Reference...
-
Page 69: Port (Com1)
Appendix Connectors This Appendix specifies the details of the connectors on the EPC-8A. Please note, however, that all the connectors adhere to existing standards. The EXM expansion interface connectors are not defined here; their definition is available upon request. Connectors on EXMs and the EXP-MX are described in the separate manuals for those products. -
Page 70: Parallel Port
EPC-8A Hardware Reference Parallel Port The DB-25 LPT1 parallel port connector is defined as: Table C-3. DB-25 Pin-out Signal Signal Strobe Auto line feed Error Initialize printer Select in Signal ground Signal ground Signal ground Signal ground Signal ground Acknowledge... -
Page 71: Vga
Appendix C: Connectors The SVGA DB-15 monitor connector is defined as follows: Table C-5. DB-15 Pin-out Signal Signal (key) Green Ground Blue (not used) (not used) (not used) Ground Horizontal sync Ground Vertical sync Ground programmable Ground output Ethernet The DTE RJ-45 phone jack supplies the 10BASE-T interface to the Ethernet controller. Table C-6. - Page 72 EPC-8A Hardware Reference...
-
Page 73: Appendix D: Memory
Do not handle the EPC-8A or memory modules unless you are in a static-free environment. Memory The EPC-8A has a single SIMM socket that can handle a SIMM as large as 32 MB. The memory configurations use a SIMMs with the following specifications: •... - Page 74 EPC-8A Hardware Reference...
-
Page 75: Appendix E: Subplanes
Primarily it acts as the PC/AT bus. Additionally, it provides power from the VMEbus backplaneVME to the EPC-8A and expansion modules. Depending on the particular EPC-8A subsystem configuration, a specific subplane may need installing. Locate the appropriate subsection for the subplane you are using either by name or by picture. -
Page 76: Exp-Bp2 Subplane
The lower EXM EXM connector is denoted as EXM slot 0 and the upper as slot 1 as shown in the diagram. This information is needed later when configuring the installed EXMs. Insert EPC-8A in these two slots Figure E-2. EXP-BP2 Subplane... -
Page 77: Exp-Bp4 Subplane
Appendix E: Subplanes EXP-BP4 Subplane The EXP-BP4 subplane is used to couple an EPC-8A processor module, two TXM modules, and an EXP-MX Mass Storage module. The EXP-BP4 is a T-shaped board with four connectors on the front side and three on the rear. -
Page 78: Exp-Bp3A Subplane
VMEbus backplane such that the P2 connector on the back of the 4-row DIN is pressed into the J2 connector of the left-most VMEbus slot that the EPC-8A subsystem will occupy. The EXM slot numbers are shown in the drawing. Insert EPC-8A... -
Page 79: Exp-Bp5 Subplane
P2 connector on the back of the 4-row DIN is pressed into the J2 connector of the left-most VMEbus slot that the EPC-8A subsystem will occupy. The EXM slot numbers are shown in the drawing. Insert... -
Page 80: Exp-Bp4A Subplane
VMEbus backplane such that the P2 connector on the back of the 4-row DIN is pressed into the J2 connector of the left-most VMEbus slot that the EPC-8A subsystem will occupy. The EXM slot numbers are shown in the drawing. -
Page 81: Exp-Bp6 Subplane
Plug the subplane into the VMEbus backplane such that the P2 connector on the back of the 4-row DIN is pressed into the J2 connector of the left-most VMEbus slot that the EPC-8A subsystem will occupy. The EXM slot numbers are shown in the drawing. - Page 82 EPC-8A Hardware Reference...
-
Page 83: Appendix F: Registers
Registers Registers Specific to the EPC-8A Registers in the I/O space that are specific to the EPC-8A are defined below. Only registers 8140h–814Fh are “dual-ported” to both the PC and VME bus. The addresses shown below are used by the PC port. The VME addresses for the registers 8140h–814Fh are described later. -
Page 84: Configuration (8102H)
Bus release mode: ROR (Release on Request), if set. RONR (Release on No Request) The “fair requester” mode. ARBM Arbitration mode. This bit is pertinent only if the EPC-8A is jumpered to be the slot 1 controller. Priority Round Robin... -
Page 85: Vme A21-16 Address Register (8130H)
SRIE SYSRESET input enable. If set, assertion of VME SYSRESET generates a reset of the EPC-8A. One use of this bit is having EPC-8A software reset other VME devices (via bit SYSR) without resetting the EPC-8A. This bit may be read/written from the PC port, but is read-only from the VME port. -
Page 86: Reserved (8146H And 8147H)
This bit may be read/ written from both the VME and PC ports. SRST Soft Reset. Setting this bit places the EPC-8A into the soft reset state. This bit may be read/written from both the VME and PC ports. MODID This read-only bit is connected to pin 30 in row A of the VMEbus P2 connector. -
Page 87: Protocol Register/Signal Fifo (8148H And 8149H)
FIFO (two deep) or returns a bus error (BERR) if the FIFO is already full. A write to the signal register is a happening of some significance for the EPC-8A, since it potentially asserts an EPC interrupt, shuffles a signal-register FIFO, and may return BERR if the FIFO is already full. - Page 88 The message register can be locked for the sending of a message. The message register is locked. WRCP This EPC-8A specific bit is a read-only copy of the WRDY bit. FSIG Defined only when SIG=1, in which case FSIG is the number (0 or 1) of the register in the FIFO holding the earliest signal.
-
Page 89: Reserved (814C And 814D)
BORD IACK This register is also used when the EPC-8A makes an access through its E page to the VMEbus. Bits 7 and 6 provide VME address bits A23 and A22, respectively. Bits 3–0 define the value placed on the associated VMEbus address-modifier lines. Register bits... -
Page 90: Vme Interrupt State Register (8152H)
All bits are read-only except BERR and VMER. BERR is a sticky bit that is cleared whenever an access from the EPC-8A is terminated by a bus error or is held clear, and remains clear (0) unless changed by software (by writing any value to this register). -
Page 91: Vme Interrupt Generator Register (8158H)
Appendix F: Registers a 1 and the corresponding bit in the event state register is a 0, the EPC-8A IRQ10 interrupt is asserted. Software may then examine the interrupt and event state registers to determine the cause. VME Interrupt Generator Register (8158h) -
Page 92: Vmebus Mapped Registers
The EPC-8A maps a standard set of VXI configuration registers onto the VMEbus A16 space and thus accessible by other VMEbus modules. These registers are 16-bit registers occupying 64 bytes of A16 space at a base address defined by the EPC-8A’s logical address. The base address is... -
Page 93: Appendix G: Xformat Software For The Epc-8A
XFORMAT Software You use the XFORMAT utility program to: • Build DOS file structures on the EPC-8A’s optional resident flash memory. • Build file system images that can be used in VME RAM disks. For complete information about XFORMAT, see the XFORMAT Software User’s Manual. - Page 94 EPC-8A Hardware Reference...
-
Page 95: Appendix H: Autoset Software
The software is contained on the optional Net 1 software diskette that is an optional item for the EPC-8A. The AUTOSET program must be run from DOS or a DOS shell and enables these actions: •... -
Page 96: Figure H-1. Autoset Program Main Menu
EPC-8A Hardware Reference To start the program, move to the Ethernet controller subdirectory and type AUTOSET, then press Enter. The menu depicted in the figure below displays. Figure H-1. AUTOSET Program Main Menu The following options are in the main menu: Display/Change Adapter Configuration, Diagnostics, and Quit. -
Page 97: Novell Configuration
4. Select the Interrupt Assignment. Be sure to avoid any interrupts used by other interfaces in the system. 5. Select the Physical Media cabled up: only 10BASE-T is available for the EPC-8A. 6. Select the Adapter architecture. Use “I/O Port” for NE2000 mode, or use “Shared Memory”... -
Page 98: Adapter Architecture
Diagnostics routine in AUTOSET to detect invalid interrupts and IRQs. Physical Media The only physical media option for the Ethernet controller on the EPC-8A is 10BASE-T. Adapter Architecture There are two options for the method of data exchange between the CPU and the Ethernet controller. -
Page 99: Boot Prom
Systems with ample memory, where increased performance is important, should select Shared Memory mode. Boot PROM (This option is for systems with an EXM-10A installed. The EPC-8A does not support the boot PROM option of AUTOSET. For more information, refer to the EXM-10A Hardware Reference Manual.) -
Page 100: Diagnostics
• Out of memory error This message displays only during development and should never display during normal operation. If this message displays, contact RadiSys Technical Support. • No adapter at this address This message displays when the address selected does not have an attached Ethernet controller network adapter card. - Page 101 These messages display if there is a problem during the Buffer Memory test. The first two messages highlight errors in the transfer of data. The third message identifies where the data transfer error occurred. This is a fatal hardware error. Contact RadiSys Technical Support.
- Page 102 EPC-8A Hardware Reference • Using AUTOSET on Large Systems If you are using AUTOSET on a system with more than eight (8) EXM slots, you must use a switch when starting AUTOSET to tell it how many slots are present. For...
-
Page 103: Appendix I: Svga
Drivers for other operating systems are available on the Chips and Technologies website at www.chips.com. Introduction This section provides operating instructions for user utilities and installation instructions for the display drivers supplied with your Chips and Technologies SVGA for the EPC-8A. -
Page 104: Before You Begin
EPC-8A Hardware Reference Before you begin The following instructions assume that the user is familiar with DOS and certain DOS commands. Please review the associated DOS commands before performing the installation. Notational conventions Throughout this manual, the term ’DOS’ refers to both MS-DOS and PC-DOS, except when noting features that are unique to one or the other. -
Page 105: Utility Software
Appendix I: SVGA Utility software The Chips and Technologies SVGA software for Windows 95 provides several functions for setting screen resolution and color depths. These are selected under the Display tab as normally accessed through Windows 95. Microsoft Windows 3.1 Before upgrading from a previous release Before installing the new drivers you should use Windows Setup to select the VGA or SUPERVGA video driver so that when you install the new drivers, there is no chance of... -
Page 106: Microsoft Windows 95
EPC-8A Hardware Reference To install Windows 3.1 drivers from within Windows, proceed as follows: 1. Ensure that Windows 3.1 is already installed on your computer and start Windows 2. From the Main window of the Program Manager run the Windows 3.1 Setup program. - Page 107 Appendix I: SVGA 3. Click the Settings tab, then click the Advanced Properties button. 4. Click the Change button in the Adapter area. 5. Click the Have Disk button, then click the OK button. 6. Specify the path to the new driver and press the <ENTER> key. 7.
- Page 108 EPC-8A Hardware Reference...
-
Page 109: Appendix J: Error Messages And Diagnosis
+5V power is good. Verify that the self-test. May be subplane is fully seated in the VME accompanied by backplane and the EPC-8A is fully combinations of beep seated in the subplane. tones from the speaker. BIOS detected a failure See BIOS Beep Codes table below. -
Page 110: Bios Beep Codes
Slot-1 arbitration. controller jumper is set. EPC-8A or subplane may Remove the EPC-8A and the have bent pins. subplane and verify that no pins are bent. Then reinsert the subplane and the EPC-8A. - Page 111 Appendix J: Error Messages and Diagnosis Bad or missing command interpreter Problem: The DOS operating system cannot find the Command line interpreter. Solution(s): Either COMMAND.COM is not present at the specified (or default) directory level of the boot disk or the “SHELL=” statement in your CONFIG.SYS lists the file incorrectly (wrong directory or misspelled).
- Page 112 EPC-8A Hardware Reference If you are using the EXM-9 to cable to an external disk, make sure that you have power to the disk, the ribbon cable is good and correctly oriented, and that the end of the ribbon cable is not shorting to the front panel of the EXM-9.
- Page 113 Solution(s): This is can be caused by using a drive type number or head/ cylinder combination in the EPC-8A’s IDE Adapter 0 Master Menu that does not match the type number used to format the hard disk.
- Page 114 CMOS. Solution(s): Run the BIOS setup program to determine what is wrong, and correct it. If the error occurs repeatedly, the EPC-8A’s battery has failed. System battery is dead - Replace and run SETUP Problem: The CMOS clock battery indicator shows the battery is dead.
-
Page 115: Appendix K: Configuring The Ethernet Drivers
After the EPC-8A is installed, cabled and configured, follow the instructions in this appendix to configure the network interface drivers. The distribution diskettes supplied with the EPC-8A contain drivers for IPX, ODI, NDIS and a packet driver under DOS/ Windows. -
Page 116: Ndis Driver For Dos Installation
Refer to the Novell NetWare ODI Shell for DOS manual for additional installation instructions. Once the EPC-8A is configured using AUTOSET, and the distribution diskettes are loaded onto the system, use a text editor to modify the NET.CFG file to match the AUTOSET parameters. -
Page 117: Packet Driver Installation
This section explains how to use the NE2000 driver provided with Windows NT to access the network using the EPC-8A. Be sure to use a 16-bit data width, and run AUTOSET first (in DOS) to set up the hardware parameters in I/O Port mode. - Page 118 EPC-8A Hardware Reference...
-
Page 119: Index
Index 41, 44, 45, 49, 82 cache 44, 45, 49, 75 chassis 44, 45, 46, 49, 75 Chips and Technologies 47, 80 ACFAIL VGA GD5428 address lines web site 45, 49, 79 address modifier CMOS Altitude backup 11, 34 Arbitration mode Arbitration priority restore ATLANIC.COM driver... - Page 120 EPC-8A Hardware Reference error messages Installation Interrupt 7, 38, 69 49, 79, 81 acknowledge configuration error acknowledge cycle 38, 59 expansion interface acknowledge signal setup menu assignments slot numbers generator register EXMID signal mapping EXP-AM reset 65, 66 EXP-BP2 interrupts...
- Page 121 : Index setup parameters 11–27 Setup screen 105, 106 NDIS shadowing NET.CFG file Shock network interface drivers Signal register Non-system disk error 78, 80 Signal register FIFO notational conventions 31, 63 SIMMs slave boards Slot 0 105, 106 arbitration timeout Slot-1 5, 6, 8, 39, 100 controller...
- Page 122 EPC-8A Hardware Reference address bits chassis device type event enable register manufacturer code mapped registers model code modifier register protocols 41, 82 VME access bit registers VMEbus 39, 43, 45, 49 accesses addressing warm boot arbiter 34, 50 warm reset...
Need help?
Do you have a question about the EPC-8A and is the answer not in the manual?
Questions and answers