Table of Contents
Advertisement
Quick Links
Advertisement
Table of Contents

Related Manuals for Hudson 8 1932


Summary of Contents for Hudson 8 1932
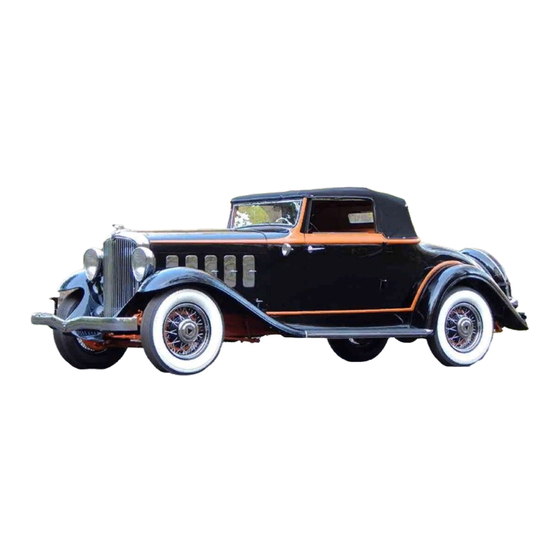
- Page 3 T H E G R E A T E R H U D S O N 8 F O R 1 9 3 2 SERIAL NUMBERS 119" W. B.-930770 126" W. B.- 62884 132" W. B.-250001 HUDSON MOTOR CAR COMPANY DETROIT, MICHIGAN, U. S. A.
- Page 5 LOCK YOUR CAR. Protection against loss by damage to the mecha- nism has been provided in Hudson automobiles by providing adequate means of lubrication for all working parts. Although the system of lubrication...
-
Page 6: Table Of Contents
I N D E X General Page BREAKING-IN INSTRUCTIONS CARE OP THE FINISH LICENSE DATA AND TECHNICAL INFORMATION OPERATION STARTING THE ENGINE WARRANTY Lubrication BRAKE CROSS SHAFT CHASSIS LUBRICATION CHART CLUTCH DISTRIBUTOR DOOR DOVETAILS DOOR LOCKS ENGINE FRONT WHEEL BEARINGS GENERATOR HOOD LEDGE LACINGS HOOD LOCKS... - Page 7 "This warranty shall not apply to any vehicle which shall have been repaired or altered by other than an authorized Hudson and Essex Distributor or Dealer in any way so as, in the judgment of the Manufacturer, to affect its stability or reliability nor which has been subject to misuse, negligence or accident."...
- Page 11 Operation The operation of the Hudson Eight follows standard practice in many respects; however, even those accustomed to Hudson products may refresh their memories on some of the details by reading the following paragraphs: The clutch is disengaged in the conventional manner by depressing the left foot pedal to release the engine drive from the transmission.
-
Page 12: Starting The Engine
H U D S O N E I G H T O P E R A T I O N Free wheeling is obtained by pressing the button on top of the shifting lever knob and pulling the knob up until the button comes out flush with the top of the knob. To revert from free wheeling"... -
Page 13: Starting The Engine
Your electrical system should be checked by your Hudson dealer. The "gasoline or oil" gauge indicates the quantity of gasoline in the tank when the ignition switch is turned either to the right or left position. -
Page 14: Breaking-In Instructions
H U D S O N E I G H T O P E R A T I O N Breaking-in Instructions Keep Radiator Full Keep Oil Reservoir Full Heat is a major consideration in a new engine. Do not allow the engine to overheat. - Page 16 A bayonet gauge is also provided at the oil filler. See illustration. The Hudson Duoflo oiling system provides not only purification from dilution but also double screening and cooling of the oil. The oil is therefore maintained in good condition for a longer time than in other lubricating systems.
-
Page 17: Operation
H U D S O N E I G H T L U B R I C A T I O N Water Pump Use Motor Oil Supply three or four drops of light motor oil in the oil cup "A," shown in the illustration, every 1000 miles. - Page 18 Harsh clutch action indicates the need of fresh oil and the clutch should be promptly inspected by your Hudson dealer if this condition develops. In any event the oil should be changed at least every 15,000 miles.
-
Page 20: Transmission
H U D S O N E I G H T L U B R I C A T I O N Transmission The lubricant in the transmission and free wheeling units should be maintained to the level of the filler plugs "A" and "B." The plugs "C"... -
Page 21: Front Wheel Bearings
H U D S O N E I G H T L U B R I C A T I O N Rear Axle Use High-Grade Gear Oil— Heavy Body or S. A. E. 90 in Summer— S. A. E. 80 in Winter The oil supply in the axle housing should be kept level with the lower edge of the filler plug opening "A."... -
Page 22: Rear Wheel Bearings
H U D S O N E I G H T L U B R I C A T I O N Rear Wheel Bearings Use Cup Grease The rear wheel bearings should be lubricated every 5000 miles. Jack up rear of car and remove the wheel from the hub. -
Page 23: Brake Cross Shaft
H U D S O N E I G H T L U B R I C A T I O N Miscellaneous THROTTLE CONTROL RODS AND LEVERS—Oil or grease all accelerator connections. Throttle linkage should work with a snap. Grease choke and throttle wires occasionally to eliminate sticking. -
Page 24: Engine
Should the distributor require any other adjustments, the car should be taken to an authorized Hudson or Electric Auto-Lite Service Station. The following instructions are given for use in case of an emergency, but should not be attempted by the owner unless absolutely necessary. -
Page 25: Spark Plugs
H U D S O N E I G H T A D J U S T M E N T Crank the engine by hand until the breaker arm fiber block of points "D" is on the highest point of the cam. Loosen screws "E" one-half turn and adjust points "D" to exactly .020" by turning the eccentric screw "F."... -
Page 26: Tappets
H U D S O N E I G H T A D J U S T M E N T Tappets Before adjusting tappets see that the tappet clamp cap screw "C" is tight. Adjust tappet by loosening lock nut "B"... -
Page 27: Water Pump
H U D S O N E I G H T A D J U S T M E N T Fan and Water Pump To adjust the belt, loosen the nut "A" and raise the fan until the belt can be deflected 5/8" below a straight edge laid on the fan and pump pulleys. -
Page 28: Clutch
H U D S O N E I G H T A D J U S T M E N T Vacuum Tank The glass sediment chamber at the bottom of the vacuum tank should be removed and cleaned whenever its contents show an accumulation of water or dirt. -
Page 29: Battery
H U D S O N E I G H T A D J U S T M E N T Steering Gear The bearings on the steering gear worm shaft are preloaded by the pressure of a spring located between the outer race of the upper bearing and cover plate. -
Page 30: Front Wheel Bearings
H U D S O N E I G H T A D J U S T M E N T Front Wheel Bearings The adjustment of the front wheel bearings is impor- tant, as it affects braking and steering, as well as the free running of the car. -
Page 31: Tires
H U D S O N E I G H T A D J U S T M E N T Removal and Installation of Wheels To remove either the demountable wood or wire wheels, place a screwdriver behind the hub cap and pry off. Loosen the five cap screws "A"... -
Page 32: Brakes
H U D S O N E I G H T A D J U S T M E N T Brakes When the brake pedal travels to within 1-1/2" of the toe board, the brakes should be adjusted as follows: Jack up all four wheels and remove the inspection cover "A"... -
Page 33: Spring Mountings
H U D S O N E I G H T A D J U S T M E N T Spring Mountings Chassis noise, erratic spring action and wandering of the car on the road can often be attributed to spring mountings. -
Page 34: Radiator
Keep the shock absorbers tight on the frame at all times and do not permit any play to develop in the linkage. All repairs and adjustments, including refilling of the shock absorbers, should be made by an authorized Hudson or Gabriel Service Station. Radiator Drain, flush out and refill frequently. -
Page 35: Headlamps
H U D S O N E I G H T A D J U S T M E N T Headlamps Place the vehicle under normal load on a level floor squarely facing a smooth wall 25 feet from the headlamps. Measure the height of the lamp bulbs from the ground and draw a horizontal line on the wall at the same height as the bulbs.
Need help?
Do you have a question about the 8 1932 and is the answer not in the manual?
Questions and answers