Table of Contents
Advertisement
ABM International, Inc.
Series: 1018, 1022 & 1026 V5.0
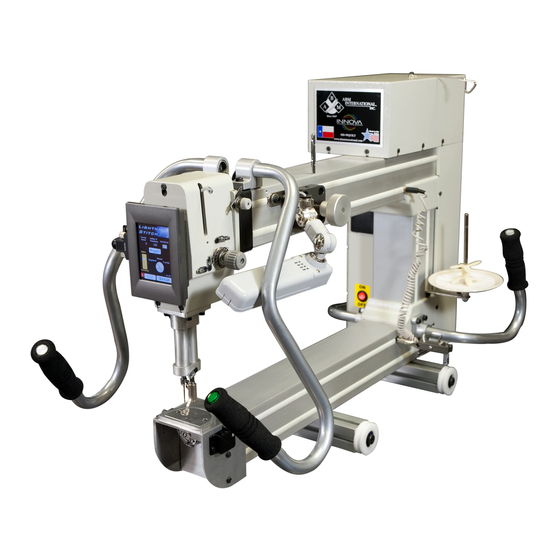
Model: Innova Longarm Quilting Machine
Service Guide
ABM International, Inc.
INNOVA 18, 22 & 26 SERVICE MANUAL
Proprietary information of ABM INTERNATIONAL, Inc. furnished for customer use only.
1
No other uses are authorized without the prior written permission of
ABM INTERNATIONAL, INC.
Advertisement
Table of Contents

Related Manuals for ABM International INNOVA 22


Summary of Contents for ABM International INNOVA 22
- Page 1 Model: Innova Longarm Quilting Machine Service Guide ABM International, Inc. INNOVA 18, 22 & 26 SERVICE MANUAL Proprietary information of ABM INTERNATIONAL, Inc. furnished for customer use only. No other uses are authorized without the prior written permission of ABM INTERNATIONAL, INC.
-
Page 2: Table Of Contents
ADJUSTING THE HOOK DRIVE MECHANISM – BELT / GEAR 14.0 SEWING HEAD AXLE ADJUSTMENT 15.0 REMOVAL AND INSTALLATION OF INNOVA PARTS Proprietary information of ABM INTERNATIONAL, Inc. furnished for customer use only. No other uses are authorized without the prior written permission of ABM INTERNATIONAL, INC. -
Page 3: Tools Required For Maintenance
Small Standard screw driver – Precision set Utility knife Vice grips Needle nose pliers Tape measure Proprietary information of ABM INTERNATIONAL, Inc. furnished for customer use only. No other uses are authorized without the prior written permission of ABM INTERNATIONAL, INC. -
Page 4: Installing A Needle In The Innova
Innova, the operator should be able to see through the eye of the needle. Proprietary information of ABM INTERNATIONAL, Inc. furnished for customer use only. No other uses are authorized without the prior written permission of... - Page 5 If pliers are used, pay careful attention not to snap off the needle in the needle bar. Proprietary information of ABM INTERNATIONAL, Inc. furnished for customer use only. No other uses are authorized without the prior written permission of...
-
Page 6: Threading The Innova
As the thread is pulled through the needle, the check spring #8 should move and thread should pull from the cone #1. Proprietary information of ABM INTERNATIONAL, Inc. furnished for customer use only. No other uses are authorized without the prior written permission of... -
Page 7: Oiling The Innova
NOTE: This is not necessary, but good preventive maintenance. Proprietary information of ABM INTERNATIONAL, Inc. furnished for customer use only. No other uses are authorized without the prior written permission of ABM INTERNATIONAL, INC. -
Page 8: Rotary Thread Tension Assembly
1. Push tension assembly, o-ring side first into hole in casting. Set check spring position to about 10 o’clock. Tighten set screw. Proprietary information of ABM INTERNATIONAL, Inc. furnished for customer use only. No other uses are authorized without the prior written permission of... -
Page 9: Setting The Needle Bar Height
NOTE: It may be easier to see with the presser foot rotated backwards. Proprietary information of ABM INTERNATIONAL, Inc. furnished for customer use only. No other uses are authorized without the prior written permission of... - Page 10 If the needle bar is set too high, the thread guide will tap against the bottom of the needle bar bushing when running. Readjust if necessary. Proprietary information of ABM INTERNATIONAL, Inc. furnished for customer use only. No other uses are authorized without the prior written permission of...
-
Page 11: Setting The Hook Timing
Use the hand wheel to help hold needle bar position while rotating hook. Proprietary information of ABM INTERNATIONAL, Inc. furnished for customer use only. No other uses are authorized without the prior written permission of ABM INTERNATIONAL, INC. - Page 12 NOTE: The finger must still be in notch of basket to keep it from rotating and damaging the hook. 7. Re-install the needle plate. Proprietary information of ABM INTERNATIONAL, Inc. furnished for customer use only. No other uses are authorized without the prior written permission of...
-
Page 13: Adjusting The Hook Positioning Finger
NOTE: The finger must still be in notch of basket to keep it from rotating and damaging the hook. 4. Tighten the finger position screw. 5. Re-install the needle plate. Proprietary information of ABM INTERNATIONAL, Inc. furnished for customer use only. No other uses are authorized without the prior written permission of ABM INTERNATIONAL, INC. -
Page 14: Adjusting The Presser Foot Height
5. Turn the hand wheel a few revolutions to ensure the presser bar does not interfere with the needle bar crank. Proprietary information of ABM INTERNATIONAL, Inc. furnished for customer use only. No other uses are authorized without the prior written permission of... -
Page 15: Setting The Needle Up Position
7. Press green button to stop machine. DO NOT ALTER THE POSITION OF WHERE THE MACHINE STOPS. THIS IS THE ELECTRONIC NEEDLE UP POSITION. Proprietary information of ABM INTERNATIONAL, Inc. furnished for customer use only. No other uses are authorized without the prior written permission of... - Page 16 13. Repeat steps 9 thru 12 until you obtain the desired positions. 14. Replace the rear cover and motor cover. Proprietary information of ABM INTERNATIONAL, Inc. furnished for customer use only. No other uses are authorized without the prior written permission of...
-
Page 17: Adjusting The Handle Bar Height
3. Tighten the screw on the handle bar clamp. WARNING: Only tighten the screw until handle bar will not move. Over-tightening of the screw will break the clamping unit. Proprietary information of ABM INTERNATIONAL, Inc. furnished for customer use only. No other uses are authorized without the prior written permission of... -
Page 18: Replacement Of Handle Bar Button
6. Push new button into handle bar being careful not to pinch wires. 7. Return foam grip to position. Proprietary information of ABM INTERNATIONAL, Inc. furnished for customer use only. No other uses are authorized without the prior written permission of... -
Page 19: Adjusting The Hook Drive Mechanism - Belt / Gear
Additionally, remove the bobbin case from the hook and clean all thread, dust and debris from around the hook assembly. Proprietary information of ABM INTERNATIONAL, Inc. furnished for customer use only. No other uses are authorized without the prior written permission of... - Page 20 Note: It is normal for the belt to “walk” in and out on the pulleys a small amount when the machine is running. Proprietary information of ABM INTERNATIONAL, Inc. furnished for customer use only. No other uses are authorized without the prior written permission of...
- Page 21 Make sure the needle is centered in the needle plate hole before re-tightening the lash adjustment screws. When proper lash is achieved, install the guard plate into the machine base. Proprietary information of ABM INTERNATIONAL, Inc. furnished for customer use only. No other uses are authorized without the prior written permission of...
-
Page 22: Sewing Head Axle Adjustment
The sewing head should roll smoothly. The adjustment is complete. Figure 9.2: Sewing head axle adjustment. Proprietary information of ABM INTERNATIONAL, Inc. furnished for customer use only. No other uses are authorized without the prior written permission of ABM INTERNATIONAL, INC. -
Page 23: Removal And Installation Of Innova Parts
Take-up Lever. Tighten screw on the flat of the Take-up Lever Pin using 2.5mm hex key. Proprietary information of ABM INTERNATIONAL, Inc. furnished for customer use only. No other uses are authorized without the prior written permission of...
Need help?
Do you have a question about the INNOVA 22 and is the answer not in the manual?
Questions and answers
How do you get the belt over the top gear on the Innova
To install the belt over the top gear on the ABM International Innova 22:
1. Remove the guard plate by unscrewing the four screws on either side of the machine.
2. Mark the motor drive pulley with a pencil for reference.
3. Loosen the four screws on the motor mount and lower the motor to its lowest position.
4. Hold the motor pulley so the mark stays in place.
5. Turn the sewing head drive shaft counter-clockwise (from the rear of the machine).
6. Jump the belt onto the motor pulley until the needle reaches its highest point and the take-up lever is about ¾ inch from the top of the slot.
This aligns the belt properly over the top gear.
This answer is automatically generated