
Related Manuals for Matrix MFC500


Summary of Contents for Matrix MFC500
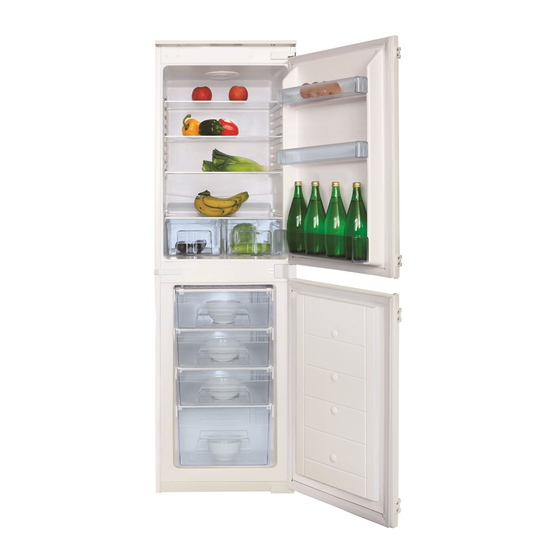
- Page 1 MFC500/MFC700 Integrated Fridge Freezer Manual for Installation, Use and Maintenance Customer Care Department • The Group Ltd. • Harby Road • Langar • Nottinghamshire • NG13 9HY T : 01949 862 012 F : 01949 862 003 E : service@cda.eu W : www.cda.eu...
-
Page 2: Appliance Information
Important The manufacturer cannot be held responsible for injuries or losses caused by incorrect use or installation of this product. Please note that we reserve the right to invalidate the guarantee supplied with this product following incorrect installation or misuse of the appliance. This appliance is not designed to be used by people (including children) with reduced physical, sensorial or mental capacity, or who lack experience or knowledge about it, unless they have had supervision or instructions on... - Page 3 This appliance has been manufactured to the strictest standards and complies with all applicable legislation, including Electrical safety (LVD) and Electromagnetic interference compatibility (EMC). Parts intended to come into contact with food conform to EEC/89/109.4 IMPORTANT INFORMATION FOR CORRECT DISPOSAL OF THE PRODUCT IN ACCORDANCE WITH EC DIRECTIVE 2002/96/EC.
- Page 4 Important Never store inflammable or explosive items and strong corrosive acids or alkalis in the appliance. This is a household appliance, which is produced in accordance with the national standard. It is intended for food storage only, not for storage of blood, medicine and biological products.
-
Page 5: Before First Use
Before first use You must allow the fridge to settle for at least twenty four hours prior to switching the power on. It is recommended that you clean the interior of the appliance prior to first use, using a solution of bicarbonate of soda and warm water and then thoroughly drying the interior. - Page 6 Fridge • Never put liquids in the refrigerator uncovered. • Never put hot foods in the refrigerator. Warm food should be allowed to cool to room temperature before being put into the refrigerator. • Nothing should rest against the rear wall of the refrigerator, as this will cause frost and possible condensation problems which will be difficult to remove.
- Page 7 • Store food in small packages (ideally less than 2.5kg). This reduces the freezing time and improves the quality of the food after thawing. • Wrap food before putting into the freezer. To stop the wrapping sticking together, ensure it is dry. •...
- Page 8 Storage The fridge section is for short term food storage. Although the temperature can be maintained between 0-10˚ C , extended periods of food storage is not recommended. As the cold air circulates within the fridge, the temperature can vary between the different sections.
-
Page 9: Control Panel
The fridge shelves can be moved according to the storage requirements within the fridge section. To move the shelf, lift up the front section and then pull it outwards. To replace, slide the shelf back into the slot, and the lower fig. - Page 10 D. Red Temperature Warning light When the freezer is over temperature, this light will switch on. The light will remain on until the freezer temperature is below 5˚ C . E. Audio Alert release button When the freezer is over temperature, there will be a series of intermittent beeps.
-
Page 11: Care And Cleaning
H. Freezer Thermostat dial The freezer temperature is regulated by this dial. The thermostat can be set between fully anticlockwise (least cold) and fully clockwise (coldest). Please note: the control panel lights switch off automatically after 30 seconds Care and cleaning Always disconnect the appliance from the power supply before any cleaning or maintenance. -
Page 12: Defrosting The Fridge
Defrosting the fridge Cleaning Rod The fridge is self-defrosting. Any water created will run out of the fridge through the channel at the back of the fridge. It is important to keep the channel clear at Water Outlet all times using the cleaning tool supplied. The defrosted water is collected in the evaporating tray at the back of the appliance. - Page 13 • 24 hours before defrosting the freezer, turn the super frost function on to ensure the frozen food is fully frozen. • Before switching off the freezer, wrap the the frozen food in sheets of paper and store it in a cool place. •...
-
Page 14: Changing The Light Bulb
Changing the light bulb Disconnect the appliance from the power. • Release the light cover by pressing on the hooks at the back of the cover, then slide it towards the back of the fridge to remove • Unscrew the light bulb to remove it and replace with a new bulb of the same rating (not more than 15W). - Page 15 The appliance is working, but not very well • The appliance is not overloaded. • The thermostat is set to an appropriate temperature. • The doors are closing properly. • The cooling system at the rear of the appliance is clean and free of dust, and not touching the rear wall.
-
Page 16: Installation And Ventilation
Installation And 560-570 Ventilation This appliance must never be installed close to heat sources, e.g. heating 1785- 1790 elements, cookers or in damp places. 1778 • To ensure the appliance is level, you 40 - 50 should use the height adjustable feet = airflow at the front of the appliance. - Page 17 Mounting the Fascia Door • Using a screwdriver, fix the mounting brackets to the appliance door, as shown in figure 9. • Position the appliance within the unit. Ensure that there is a gap of 3 to 4 mm between the non-hinged side and the fig.
-
Page 18: Reversing The Door
Reversing the door We recommend you seek the help of another individual to support the doors whilst performing this operation 1. Carefully prise off the cover cap for the top hinge and unscrew the screws fixing the top hinge to the appliance, you should support the upper door whilst doing this. - Page 19 Take care not to use the hair dryer too close to the appliance, which could damage the seal. A distance of approximately 10 cm should be adequate. When completed, allow the seal and door to cool before touching them. Once done, the seal will remain in position.
-
Page 20: Electrical Information
Electrical information Warning! This appliance must be earthed. fig. 12 The mains lead of this appliance has been fitted with a BS 1363A 13 amp fused plug. To change a fuse in this type of plug, follow the steps below: 1. - Page 21 As the colours of the wires in the mains lead of this appliance may not correspond with the coloured markings identifying the terminals in your plug, proceed as follows:- • The wire which is coloured GREEN and YELLOW must be connected to the terminal which is marked with letter (E) or by the Earth symbol coloured GREEN and YELLOW.
- Page 24 Serviced by To contact our Customer Care Department, or for Service, please contact us on the details below. Passionate about style Customer Care Department • The Group Ltd. • Harby Road • Langar • Nottinghamshire • NG13 9HY T : 01949 862 012 F : 01949 862 003 E : service@cda.eu W : www.cda.eu...
Need help?
Do you have a question about the MFC500 and is the answer not in the manual?
Questions and answers