Table of Contents
Advertisement
AUTOMATIC DEMONSTRATION
Automatic
Demonstration
place when "DEMO MODE" is set to
"ON" (factory-preset).
• Available when the Power Switch is set to
" " or " ".
• To cancel Automatic Demonstration, set
"DEMO MODE" to "OFF" (
For Customer Use:
Enter below the Model No. and Serial No. which
is located on the bottom of the camcorder.
Retain this information for future reference.
Model No.
Serial No.
Dear Customer,
Thank you for purchasing the JVC Compact
takes
VHS camcorder. Before use, please read
"SAFETY PRECAUTIONS" (
ensure safe use of this product.
pg. 15).
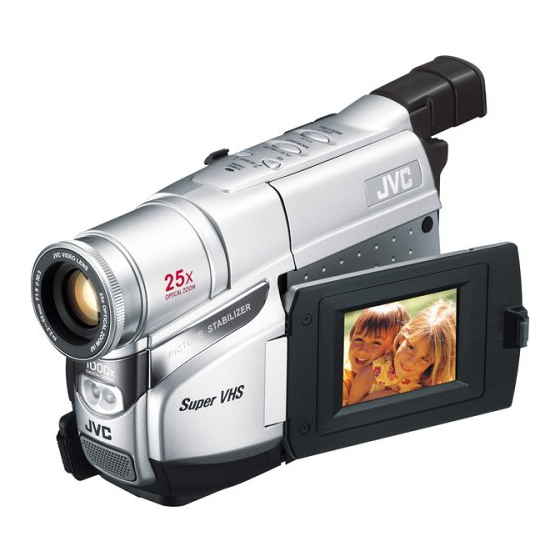
COMPACT VHS CAMCORDER
GR-SXM37
CONTENTS
GETTING STARTED
RECORDING/PLAYBACK
BASIC FEATURES
MENU SETTINGS
TERMS
5 ~ 9
9 ~ 10
10 ~ 12
12 ~ 16
24
pg. 3, 4) to
LYT1378-001A
Advertisement
Table of Contents

Related Manuals for JVC GR-SXM37


Summary of Contents for JVC GR-SXM37
- Page 1 Model No. Serial No. GETTING STARTED RECORDING/PLAYBACK BASIC FEATURES MENU SETTINGS TERMS Dear Customer, Thank you for purchasing the JVC Compact takes VHS camcorder. Before use, please read “SAFETY PRECAUTIONS” ( ensure safe use of this product. pg. 15). GR-SXM37 CONTENTS...
-
Page 2: Provided Accessories
) Cassettes TC-40/ 30/20 • Active Carrying Bag CB-V75 • A/V (Audio/Video) Cable • S-Video Cable Some accessories are not available in some areas. Please consult your nearest JVC dealer for details on accessories and their availability. ) Cassettes ST-... -
Page 3: Safety Precautions
However, live recording and LCD monitor/viewfinder playback are possible anywhere. • Use the JVC BN-V10U/V12U/V20U/V400U battery packs and, to recharge them or to supply power to the camcorder from an AC outlet, use the provided multi-voltage AC Adapter. -
Page 4: Important Safety Instructions
The EPA certified RBRC® Battery Recycling Seal on the nickel-cadmium (Ni-Cd) battery indicates JVC is voluntarily participating in an industry program to collect and recycle these batteries at the end of their useful life, when taken out of service in the United States. The RBRC® program provides a convenient alternative to placing used Ni-Cd batteries into the trash or the municipal waste stream, which may be illegal in your area. -
Page 5: During Recording
– – – – – – Refer to this diagram while reading the instructions. During shooting Keep the lens cap attached to the camcorder Cassette holder 90° 180° LCD monitor > – – – pg. 17 for “Warning Indications” &... - Page 6 1 • MENU Wheel [–, +] ... • BRIGHT Wheel [–, +] ... • Speaker Volume Control [VOL.] ... • TRACKING Wheel [–, +]... 2 5- Second Recording Button [5 SEC. REC]... 3 Power Zoom Lever [T/W] ... 4 • Manual Focus Button [ FOCUS]...
-
Page 7: Getting Started
To AC outlet AC Adapter Charging the Battery Pack 1) Hook the end of the battery pack to the camcorder and push the battery in until it locks in place. • If the battery pack is attached wrongly, a malfunction may occur. -
Page 8: Grip Adjustment
15) in SYSTEM MENU. • The date/time cannot be stored in memory if the built-in clock battery runs out. Consult an authorised JVC dealer for replacement, or set the date/time as necessary before you start shooting. D A T E... -
Page 9: Shoulder Strap Attachment
CAUTION : When using a tripod, be sure to extend its legs fully to stabilize the camcorder. To prevent damage to the unit caused by falling over, do not use a small tripod. Loading/Unloading A Cassette 1) Open the LCD monitor fully and keep it aligned vertically with the camera (do not tilt it). -
Page 10: Basic Features
( pg. 14) to “OFF” in CAMERA MENU. Quick Review To check the end of the last recording. 1) Make sure the camcorder is in Record– Standby mode. 2) Press 1 ~ and release quickly. Tape is rewound for approx. 1 second and played back automatically, then pauses in Record–Standby mode for the next shot. -
Page 11: Tape Dubbing
Be sure to sure to use the following black/white cable: YTU94146A S-Video cable. Consult the JVC Service Center described on the sheet included in the package for details on its availability. Make sure to connect the end with a core filter to the camcorder. The core filter reduces interference. -
Page 12: Menu Settings
finished. Using The Cassette Adapter Use this to play back an S-VHS-C/VHS-C video cassette recorded with this camcorder on a S- VHS-C/VHS VCR. 1) Slide the latch 1 to open the compartment door, then insert the cassette and close the compartment door 2. - Page 13 • The battery pack’s charge may be low even though the battery indicator ( blink, the camcorder may turn off automatically when you turn on the video light, or when you start recording with the video light turned on.
-
Page 14: Camera Menu
WINDOW (Wipe): Wipes in on a black screen from the centre of the screen towards the corners, revealing the scene, or wipe out from the corners to the centre, leaving a black screen. SCROLL (Wipe): Wipes in on a black screen from the bottom to the top, revealing the scenes, or wipes out from the top to the bottom, leaving a black screen. -
Page 15: System Menu
Super VHS ET (Expansion Technology). “S-VHS REC” 2 appears during recording. OFF: Records in VHS on a VHS or S-VHS cassette. • JVC EHG (Extra High Grade) tapes are recommended for superior results. • Use S-VHS tape for storing recordings for an extended period or for recording important scenes, as it enables higher-quality recording and playback. -
Page 16: Counter Memory
VCR MENU C O U N T E R M E M O R Y C O U N T E R R E S E T 2 E X I T COUNTER MEMORY Makes it easier to locate a specific tape segment. 1) Set the Power Switch $ to “PLAY”... -
Page 17: Troubleshooting
Before consulting your JVC dealer, please check the following to see if you can correct the problem yourself. Vertical white lines appear when shooting a very bright object. • This sometimes occurs when the contrast between the background and the object is great. - Page 18 American National Standard C73 series type use an AC plug adapter, called a "Siemens Plug", as shown. For this AC plug adapter, consult your nearest JVC dealer. Plug adapter • If there is dust or dirt on the AC Adapter, wipe it clean before using.
- Page 19 Serious malfunctioning If malfunctioning occurs, stop using the unit immediately and consult your local JVC dealer. 3 Blow the lens with a blower brush, then wipe it gently with lens cleaning paper. 4 Remove dust from the viewfinder using a blower brush.
-
Page 20: Specifications
Camcorder General Format : S-VHS/VHS NTSC standard Power source : DC 11 V Adapter) DC 6 V pack) Power consumption Viewfinder on : 3.5 W LCD monitor on : 4.3 W Video light : 0.4 W Maximum : 9.2 W (When charging a battery) -
Page 21: Español - Alimentación
ESPAÑOL — ALIMENTACIÓN Enganche. Conmutador BATTERY RELEASE Batería A la toma de corriente alterna Adaptador de CA Carga de La Bateria 1) Asegúrese de que la batería esté colocada en la cámara de video. Enganche el extremo a la cámara de video y presione la batería hacia el interior hasta que quede bloqueada en su lugar. - Page 22 ESPAÑOL — GUIA PARA OPERACIÓN RAPIDA Si la unidad comienza a funcionar mal, deje de usarla inmediatamente y consulte a su concesionario local de JVC. Colocación/Extracción de un cassette 1) Abra completamente el monitor LCD y manténgalo alineado verticalmente con la cámara (no lo incline de un lado).
- Page 23 GRABACIÓN 1) Retire el cubreobjetivo. Ajuste el conmutador de alimentación $ en “ ” o “ ” mientras presiona el botón de bloqueo # localizado en el conmutador. Filmación utilizando el visor: Asegúrese que el monitor LCD esté cerrado y bloqueado. Filmación utilizando Asegúrese...
- Page 24 Brighten/Darken The Image ...pg. 13 Brighten/Darken The LCD Monitor... pg. 9, 15 Cassette Adapter ...pg. 12 Charging The Battery Pack ...pg. 7 Clean The Camcorder ...pg. 19 Connection To a VCR/ TV...pg. 11 Counter Memory ...pg. 16 Date/ Time Display ...pg. 15 Date/ Time Settings...pg.
Need help?
Do you have a question about the GR-SXM37 and is the answer not in the manual?
Questions and answers