Table of Contents
Advertisement
Advertisement
Table of Contents

Subscribe to Our Youtube Channel
Summary of Contents for Gadget Geek DIVA112
- Page 1 VHS to DVD M Maker Quick Ins stallation Guide Mode el # DIVA1...
- Page 2 CONGRATULATIONS Congratulations on your purchase of the Gadget Geek VHS to DVD Movie Maker. Now you can record all your favourite video clips off your video camera, VHS recorder or other device that contains video clips. This will enable you to edit them, and then burn them to DVD Discs, upload them to YouTube, or transmit them to other portable devices such as mobile phone, PSP and IPod. Some of the great features of this product include an editing software called Arcsoft Showbiz DVD2 with these features: ...
- Page 3 We have taken great care to deliver you with the high quality product. Please read this manual carefully before you commence to ensure a smooth installation. We trust you will enjoy this product, happy editing! Gadget Geek also has a new website that will have driver updates, downloads and FAQ’s which will help with this product. Please go to: www.gadgetgeek.biz Please Note: One hour of DV video requires a minimum of 13GB of hard drive space. ...
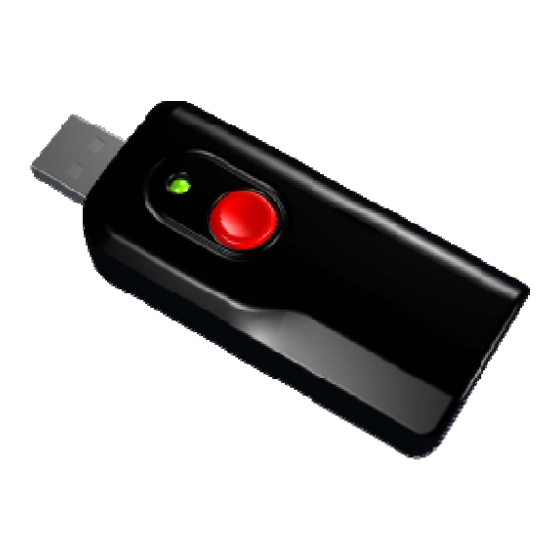
- Page 4 CONTENTS USB Extension (20cm) Cable AV/S‐Video Cable Gadget Geek VHS to DVD Movie Maker Software Driver CD (Arcsoft Showbiz DVD2 + Media Converter) Quick Installation Guide CONNECTION REFERENCE ...
- Page 5 SPECIFICATIONS Interface USB 2.0 Video Input Composite (yellow) S-Video (black) Video Resolution NTSC: 720 X 480 @ 30 FPS PAL: 720 X 576 @ 25 FPS Audio Input RCA Jack L(white)/R(red) Dimension 78 X 30 X 20 mm (L X W X H)
- Page 6 DRIVER INSTALLATION Step 1: Insert the Driver & Software CD into your CD/DVD ROM drive. The following screen will appear: If the “Auto run” menu does not automatically appear, click on “My Computer”/ “Computer”, then right click on the CD/DVD ROM drive icon and select “Auto play”. Step 2: Select the driver option and follow the installation instructions to finish the driver installation procedure. ...
- Page 7 Step 3: When the driver installation is complete, the computer will prompt you to ‘restart’. Select “yes, I want to restart my computer now”. ...
- Page 8 SOFTWARE INSTALLATION Step 4: After your computer has restarted, it will now be necessary to install the ‘ShowBiz DVD2” software before you can start to use the device. To do this, go to “Computer/My Computer”, double click on the CD/DVD ROM drive icon. The following screen will appear. You can also eject the Disc and reinsert into the drive to make this screen reappear. Select the ‘ShowBiz DVD2’ option. At the end of the installation of the ShowBiz DVD2 software, there may be a software prompt message asking you to install Microsoft Visual C++ 2005 SP1 Runtime libraries. If so prompted, click on “YES” to install these files. ...
- Page 9 Step 5: After successful driver and software installation, connect the DVD Maker to the computer’s USB port and then you can start to use the device Step 6: Plug in the DVD Maker into an available USB Port on your computer (use the USB extension cable to make this process easier). USING ARCSOFT SHOWBIZ 2 Arcsoft ShowBiz DVD2 is a professional editing software. You ...
- Page 10 Step 2: Choose “Capture, create, or edit videos”. Step 3: Choose “Capture from Device” to capture video clips from device. ...
- Page 11 Step 4: Ensure that video device is “USB 2863 Device” and the audio device is “WDM 2863 Audio”. When this is complete, you are ready to start recording and editing. Please Note: If the S‐video connector is used, you must select the “S‐video” option under “INPUT” in the capture options. Please Note that this is a quick set up guide only. For a detailed ...
- Page 12 USING THE MEDIA CONVERTER The Arcsoft Media Converter allows you to convert videos that you have captured with the DVD Maker so you can upload to YouTube or transfer to portable devices such as your mobile phone, PSP and IPod. Below is a simple overview ...
- Page 13 Step 2: Select “Add File” to add the file you would like to convert. You can set up the file format from the left hand side of the screen (see “Notes on Formats” below). Select the folder where you would like to save the file and click “Start” to complete file conversion. ...
- Page 14 ...
- Page 15 HOW TO UPLOAD FILES TO YOUTUBE Media Converter can convert your files directly into the YouTube format and upload onto the “YouTube” website. For instructions on how to setup YouTube account, convert file formats, and upload to the website please refer to the Media Converter Help files or the manual located on the CD. ...
- Page 16 You will be prompted to the screen below with language options. Choose ‘English’. ...
- Page 17 Double click the below icon to activate the User Manual for Arcsoft Showbiz DVD2. For the Media Converter manual please click on the “Media Converter” icon instead. You will now be able to access all the help files contained in the Manual from the CD. Please Note: The manual is in the Adobe Acrobat (PDF) format ...
- Page 18 SNAPSH HOT FEATUR RE Please Not te: The Snaps shot Feature is s only available e with Arcsoft Sho owBiz DVD2. ShowBiz c an not only s support video clip recording g and editing, bu t also has the unique Snapsh ot function ena abled. With only o one click away, ShowBiz will a utomatically ca apture ...
- Page 19 modify the images to achieve the desirable effects. TROUBLESHOOTING MY COMPUTER WON’T RECOGNIZE THE USB MAKER. Solution: Check that the USB host you are using is compatible with USB 2.0 devices. Some USB host slots can only read USB 1.1, however most modern types will read both. Failing this, you can try plugging into another port available on your computer. Ensure that the driver of this USB device connected is installed ...
- Page 20 installation, refer to the instruction manual of the USB device or contact the manufacturer for further information.) THE CONNECTOR CANT REACH THE PORT In some cases, the connector of the USB device won’t reach into the USB port for various reasons. One of these may be because you have something that may be large in the port next to it. Solution: Plug in the USB extension cable that is supplied with this product. This will allow the device to be sitting further away ...
- Page 21 Video Recorder Tab, then under “Video Standard” select a suitable standard such as “PAL_B” for Australia/NZ. Please remember to check out our new site for products, driver updates, FAQ’s and manuals as well as other information to help with your product: www.gadgetgeek.biz ...
Need help?
Do you have a question about the DIVA112 and is the answer not in the manual?
Questions and answers