Table of Contents
Advertisement
Advertisement
Table of Contents

Related Manuals for Thuraya FDU-XT (Fixed Docking Unit)


Summary of Contents for Thuraya FDU-XT (Fixed Docking Unit)
-
Page 2: Table Of Contents
4.6. Connecting a Group 3 fax machine to the FDU-XT 9.3. How to change the PIN 4.7. Connecting a PC to Laptop to the FDU-XT n i t 4.8. Docking a Thuraya satellite 11. LED Indications 4.9. Undocking the handset from the FDU-XT 5. Receiving/Making Voice Calls 13. -
Page 3: Introduction
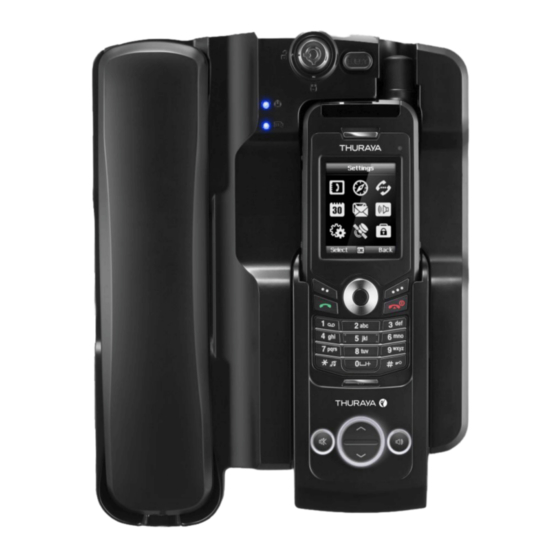
This indoor enabler enhances the capabilities of your Thuraya handset to meet your communication requirements, both in the home and in the office. When a Thuraya handset is used with FDU-XT, the handset becomes an indoor communication center providing voice, fax and data communication. -
Page 4: How To Align The Satellite A N E T N N A
Leave enough length for a small loop and secure the rest of the cable using the The locations of the Thuraya satellites are on a geostationary orbit (at the cable ties. -
Page 5: Installing The Gps A N E T N N A
4. Getting Started The FDU-XT is intended to be used as a desktop or wall-mounted phone while the Thuraya handset is docked. Slots are provided at the base of the unit to allow Attention The FDU-XT to be hooked securely to a wall. Interfaces for connecting external equipments such as Group 3 fax machines and PCs are provided at the back 1. -
Page 6: Connection Interface
4.3. Using FDU-XT as a wall mounted unit 4.2. Connection Interface The FDU-XT can be fixed on the wall by using the included brackets. Slots for brackets are provided on the back of the FDU-XT. 1. Find an appropriate location on the wall to mount the FDU-XT. 2. -
Page 7: Connecting A Group 3 Fax Machine To The Fdu-Xt
FDU-XT. 2. Connect the other end of the RJ-11 cable to the Group 3 Fax machine. Ensure that the dust caps on the reverse side and on the bottom side of the Thuraya handset are removed before docking. Note Contact your Service Provider to register fax services on your SIM card. -
Page 8: Receiving/Making Voice Calls
3. The SIM card is valid and working. 4. The connections are properly set-up as described in the previous steps. Calling from the Auxiliary Handset 5. The Thuraya handset is properly docked in the FDU-XT as described in the Method 1 previous steps. -
Page 9: Volume C O
5. Press the start button on the fax machine. the speakerphone volume as required. Adjusting ringtone volume 1. Select the ringtone of your Thuraya handset from the handset menu. 6.2. Receiving fax messages with a fax machine 2. Switch the speakerphone on. -
Page 10: Sending Fax Messages With A P C L / A P O T P
2. Connect the PC to the USB or DTE serial interface of the FDU-XT. 3. Switch on the FDU-XT. 4. Start the data communication software on the PC/Laptop. 5. You will hear a special signal on the docked Thuraya handset when a data 6.4. Receiving fax messages with a PC/Laptop call is arriving. - Page 11 4. Once all the settings are complete, a new phone connection icon will be 2. Right-click the mouse on the “Standard 33600bps Modem” which is newly generated on the main screen. created in the Modems window. Right-click the mouse to select “Properties” 5.
-
Page 12: Extension Phone O L K C N I G
1. Connect the extension phone to the RJ-11 interface marked "EXT" on the reverse 3. Afterwards the icon "Phone Connection Network" will be shown on the side of the FDU-XT. Windows task bar and on the Thuraya handset you will see the "G" symbol. 2. Press # Old PIN (4 digits) New PIN (4 digits) (e.g.: # 0000 1234 ) -
Page 13: Troubleshooting
Do not use chemicals, cleaning solvents, or strong detergents to clean it. through RJ-11 Check if the SAT signal level on the Thuraya handset is adequate. Wipe it smoothly with a soft cloth. Do not paint it. Paint can clog the device’s moving parts and prevent proper Please note that not all Group3 fax machines are able to handle operation. -
Page 14: Led Indications
APSI will not be responsible for products or accessories not manufactured or provided by APSI or Thuraya. APSI will not take responsibility for the failures caused by misuse, accident, alteration or neglect, removal or repair, neglect or failure to follow instructions as to installation and maintenance, fire, flood or other natural calamities. -
Page 15: Specifications
13. Specifications...
Need help?
Do you have a question about the FDU-XT (Fixed Docking Unit) and is the answer not in the manual?
Questions and answers