Table of Contents
Advertisement
Advertisement
Table of Contents
Troubleshooting

Related Manuals for Venmar ERV5000-10000


Summary of Contents for Venmar ERV5000-10000
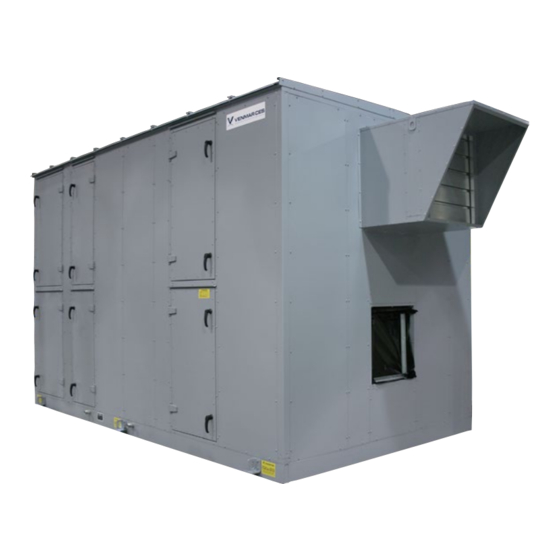
- Page 1 Aston-built Products Custom-built Dedicated Outdoor Air Systems Installation, Operation and Maintenance Instructions Manual Capacities: 1,000 to 300,000+ cfm Model: EnergyPack , ERV5000–10000 (indoor/ ® outdoor), HRV3000–10000 (indoor/outdoor) ©2008 Venmar CES Inc.
-
Page 2: Table Of Contents
Table of Contents Nomenclature..................................3 Safety.Considerations................................8 General.Information................................8 Recommended.Spare.Parts............................8 Unit.Inspection.on.Arrival.............................9 Unit.Application.Limitations............................9 Installation....................................9 Unit.Location.Requirements............................9 Roofcurbs.Supplied.by.Venmar.CES.(External.Applications.Only)................10 Roofcurbs.Supplied.by.Others.............................10 Rigging,.Lifting.and.Assembling..........................11 Hood.Installation.................................17 Indoor.Suspended.Installation............................17 Field.Fabricated.Ductwork............................18 Electrical.Connections..............................19 Coil,.WSHP.or.Humidifier.Piping.Connections......................20 Condensate.Drain.Trap.and.Lines..........................21 Gas.Connections................................21 Refrigerant.Systems..............................21 Start-up....................................21 Pre.Start-up.Check...............................21 Start-up.Procedure...............................23 Airflow.Balancing................................24 Maintenance..................................25 Long-term.Storage.Maintenance.Procedures......................25 Maintenance.Summary.Chart............................25 Energy.Recovery.Wheel...............................25... -
Page 3: Nomenclature
©Venmar CES Inc. 2008. All rights reserved throughout the world. Illustrations cover the general appearance of Venmar CES products at the time of publication and Venmar CES reserves the right to make changes in design and construction at any time without notice. - Page 4 ERV5000–ERV10000 Indoor Nomenclature (4,000–10,000) 14 15 17 18 19. COIL ARRANGEMENT 1. FROST CONTROL H – Heating, cooling, access section D – Recirc defrost C – Cooling, heating, access section E – Exhaust only S – Heating, cooling, no access section V –...
- Page 5 ERV5000–ERV10000 Outdoor Nomenclature (4,000–10,000) 14 15 17 18 1. FROST CONTROL 19. ROOFCURB D – Recirc defrost R – Insulated roofcurb E – Exhaust only X – No roofcurb V – VSD frost prevention 18. COIL ARRANGEMENT N – Non-defrost H –...
- Page 6 HRV3000–HRV10000 Indoor Nomenclature (2,500–11,500 cfm) 10 11 14 15 1. FROST CONTROL 18. COIL ARRANGEMENT D – Recirc defrost H – Heating, cooling, access section E – Exhaust only C – Cooling, heating, access section F – Face and bypass S –...
- Page 7 HRV3000–HRV10000 Outdoor Nomenclature (2,500–11,500 cfm) 10 11 14 15 1. FROST CONTROL 18. ROOFCURB D – Recirc defrost R – Insulated roofcurb E – Exhaust only X – No roofcurb F – Face and bypass 17. COIL ARRANGEMENT T – Traversing defrost H –...
-
Page 8: Safety.considerations
• Mechanical drawings unit. This manual has been designed for a general purpose • Unit nomenclature and describes all options offered by Venmar CES that • Electrical schematics could be included in the unit. Consult the manual from • Sequence of control the component manufacturer if more detailed technical •... -
Page 9: Unit.inspection.on.arrival
CAUTION Fine dust, larger particulate matter, solvents, varnishes and other chemicals may cause filter clogging and elevated Venmar CES equipment is not designed to be used for cabinet pressures, higher power consumption and possible temporary heating, cooling and/or ventilation during irreparable damage to the desiccant material of the energy construction. -
Page 10: Roofcurbs.supplied.by.venmar.ces.(External.applications.only)
Roofcurbs supplied by others must be designed with the IMPORTANT same dimensions, cross member arrangement and loca- Venmar CES is not liable for any damages, costs or other tion as per Venmar CES roofcurb drawings and must be issues arising from roofcurbs supplied by others. -
Page 11: Rigging,.Lifting.and.assembling
Rigging,.Lifting.and.Assembling IMPORTANT supplied by Venmar CES and located inside one (or more) • Carefully read all the instructions contained herein. of the unit sections, where this (yellow) label, as shown Before proceeding with any work, correlate these below, is applied on the door. - Page 12 The unit or a unit end section with bottom duct con- 12” [305 mm] beyond the sides. Venmar CES will not be nection of a multi-section (modular) unit must be set responsible for any damage caused to the unit casing dur- onto the curb first such that a gap of ½”...
- Page 13 b. Set the upper or top section over the lower sec- tion lining up the bolt holes in the perimeter flanges for a horizontally split indoor unit or sec- tion (see Figure 5b). Figure 3: Set unit or an end section with bottom duct con- nection of a multi-section (modular) unit first using ½”...
- Page 14 per procedure #2 above before proceeding. Use ½” 7. Install the ½” x 1½” [13 x 38 mm] polyvinyl gasket [13 mm] wood shims on outer sides to properly posi- with adhesive strip directly on one side of the split tion and to prevent movement when pulling multi- section perimeter frames and middle interior parti- section (modular) unit together when mounted on a...
- Page 15 8. Use tools (chains, chain blocks, chain type come along, etc.) connected to the side lifting lugs (attached to the base) on both sides of the unit to pull the second or next section to the first end section evenly until both sections are ¼”...
- Page 16 Note: Cap should be on same j oint. Figure 12a: Install the metal roof seam end with applied gas- ket by applying a 45° force to it until the neoprene is fully compressed. Lock into position with two self-drilling 5/16” hex head #12-14 x 1”...
-
Page 17: Hood.installation
Item name: Canette peinture grise RAL7001 the universally recognized RAL code. To match the Vendor number: VEN00002429 Venmar CES standard grey specify color RAL K7 Clas- sic #RAL7001, two-component polyurethane paint In USA with a gloss of 30+/−4. -
Page 18: Field.fabricated.ductwork
Field.Fabricated.Ductwork On outdoor bottom vertical duct connections, support all all duct connections to prevent air leakage and system ducts to the roofcurb and building structure. Do not sup- performance problems. Ductwork must be supported by port ductwork from the unit. the building structure. -
Page 19: Electrical.connections
a pressure loss greater than its ”handbook” value and When an Energy Recovery Ventilator (ERV) is installed in must be included in the external static pressure calcula- conjunction with a forced air system Air Handling Unit tions. Consult the AMCA Fan Application Manual publica- (AHU), the AHU and network of ducts are used to sup- tion 201 for recommendations and system static pressure ply fresh air inside the building. -
Page 20: Coil,.Wshp.or.humidifier.piping.connections
Electrical Field Connections CAUTION High voltage power lines, shipped loose sensors, items CAUTION or remote control option field wiring entry points may Electrical components and contacts must be protected only be field extended through the cabinet within des- from damaging metal shavings before drilling holes into ignated areas. -
Page 21: Condensate.drain.trap.and.lines
Condensate.Drain.Trap.and.Lines Cooling coils, humidifiers, sensible heat exchangers or flow not less than 1/8” per foot toward the building drain- other options that can produce condensation are provided age system; otherwise use a condensate pump. Refer to with a drain pan with a 1¼” [32 mm] MPT (Male Pipe local codes for proper drainage requirements. - Page 22 26. If the unit is equipped with compressors, power must be tered and does not tilt. If there is any indication turned on with the unit in ‘Off’ mode for 24 hours of a problem call Venmar CES Tech Support at before start-up. This will energize crankcase heat- 1-866-4-VENMAR.
-
Page 23: Start-Up.procedure
Start-up.Procedure To ensure proper operation of each unit, qualified person- 1. Before proceeding, complete the pre start-up checklist. nel should perform the start-up as outlined below (based 2. Check that all access panels or doors are closed. on options included with unit) and complete the Start-up 3. -
Page 24: Airflow.balancing
Start-up Report and Checklist ing water. With entering water of 60°F to 80°F to Venmar CES to validate warranty. Maintain a copy [15.6°C to 26.7°C], leaving temperature should of the report at the unit for future reference. -
Page 25: Maintenance
Basic Casing Rotation maintenance consists of checking parts to ensure they are tight and working correctly. Venmar CES recommends Outside/supply Spoke air side that the wheel be checked on a weekly basis that it is... - Page 26 See Appendix this range, please consult Venmar CES for recommended for belt repair and replacement instructions. Checking lubrication schedules. Use a premium quality lithium based the belt every three months for wear is recommended.
- Page 27 3. Remove belt tensioner and discard. Install new belt hand, if any deformation to the lips can be seen, it means tensioner (contact Venmar CES Tech Support at the seal is installed too close and should be moved back 1-866-4-VENMAR for parts using description and until the lips are straight again.
- Page 28 However, any method of cleaning has the potential to cause damage to Wrong an enthalpy wheel media or desiccant if done improperly. Venmar CES is not liable for any damage caused as a result of energy recovery wheel cleaning. Wrong close Figure 22: Airloop™...
-
Page 29: Flat.plate.heat/Enthalpy.exchangers
Venmar CES offers four types of plate heat/enthalpy ex- inside. Oils, solvents, etc. can be removed with hot water, changers. They are factory installed and ready to use upon harmless grease solvents or cleansing agents by washing. -
Page 30: Refrigerant.systems
Scroll type compressors are the most common type of should be arranged based on experience and knowledge compressor used by Venmar CES. Other types of compres- of the building or local water supply loop. sors are available upon request, if required. -
Page 31: Dampers
(P1), the evaporator pressure (P2) and the equivalent pres- sure of the superheat spring (P3). Dampers Units from Venmar CES usually come with two sets of • Attachment mechanism linking motors to dampers dampers. However, units may have more than two sets if should be checked for tightness. -
Page 32: Belt.driven.fans
Belt.Driven.Fans Table 2: Wheel set screw torque in lb-ft WARNING Carbon Steel Set Screw Torque* Many of the following steps need to be performed with Set Screw Size the unit powered off and locked out. Disconnect the Diameter (Inches) lb-in lb-ft main power switch to the unit before performing service and maintenance procedures. - Page 33 5. Belt driven fan bearings are fitted with grease nipples WARNING for lubrication. The grease quantity and lubrica- Many of the following steps need to be performed with tion interval depends on bearing (fan size) and rpm the unit powered off and locked out. Disconnect the and are indicated in the tables in Appendix L.
-
Page 34: Fanwall ® .Array
FANWALL .Array ® WARNING Many of the following steps need to be performed with the unit powered off and locked out. Disconnect the main power switch to the unit before performing service and maintenance procedures. Maintenance Schedule FANWALL array of multiple direct driven plenum fan and motor “cubes”... - Page 35 WARNING Many of the following steps need to be performed with the unit powered off and locked out. Disconnect the main power switch to the unit before performing service and maintenance procedures. 5. After removing the motor pedestal retaining bolts, slide the motor/fan/pedestal assembly out to the point where the motor lifting ring is clear of the cube frame enough to use.
- Page 36 purpose of the damper is so that maintenance staff WARNING can block the intake of a single fan to prevent back Many of the following steps need to be performed with flow until service on an inoperative assembly can be the unit powered off and locked out.
- Page 37 7. Gently rotate the fan wheel to verify cone adjustment for WARNING proper clearance from wheel. Many of the following steps need to be performed with the unit powered off and locked out. Disconnect the main power switch to the unit before performing service and maintenance procedures.
- Page 38 4. Place the blank-off plate over the optional airflow WARNING straightener panel frame (if supplied) or onto the Many of the following steps need to be performed with matching “Z” frame and pre-drilled holes and fasten the unit powered off and locked out. Disconnect the together with or remove tek screws.
-
Page 39: Motors
After cleaning the coil, be sure to rinse thoroughly. Venmar CES recommends cleaning the coil a minimum of once per year to prevent dirt buildup in the coil fins where it may not be visible. -
Page 40: Controls
4. Using a steam cleaning machine, clean the leaving WARNING airside of the coil first (going downward) then clean Many of the following steps need to be performed with the entering airside. Use a block-off to prevent the the unit powered off and locked out. Disconnect the steam from penetrating a dry section of the unit. -
Page 41: Appendix.a:.roofcurb.generic.assembly.instructions
Appendix A: Roofcurb Generic Assembly Instructions 2” Wood nailer Mineral wool Mineral wool 2” Standard design Standard With wood design nailer option With wood Detail C nailer option Detail A Detail B ® Figure A1: Roofcurb assembly – EnergyPack , ERV5000–10000, HRV3000–10000 (outdoor units only) VCES-ASTON-IOM-1D –... -
Page 42: Appendix.b:.water.source.heat.pump.(Wshp).Piping,.Installation,.Maintenance.and.troubleshooting
Appendix B: Water Source Heat Pump (WSHP) Piping, Installation, Maintenance and Troubleshooting Units have the WSHP supply and return line connections provided and installed outside of the unit. These compo- for each compressor condenser set piped to the outside nents and installation are available as an option. See the on the side of the casing as standard. -
Page 43: General Maintenance
air in order to avoid unexpected high head pres- make-up water at the same rate. Check the pressure sure and poor cooling/heating performance. gauge at the pump suction and manually adjust the f. A flow balancing valve in the return water line to make-up to hold the same positive steady pressure both before and after opening the drain valves. - Page 44 OEM recommended lu- motor (refer to the respective compressor manual or bricant, ready for use with R410a. contact the service department at Venmar CES). Compressor.Burnout.–.System.Cleanup Charging Any maintenance requiring refrigerant evacuation must be Due to the zeotropic nature of R410a, it should be performed using proper recovery procedures.
- Page 45 parison purposes after the cleaning operation is com- filter drier for a minimum of two hours. If the pres- plete. Suitable 2 ounce bottles are available at any sure drop exceeds the maximum limits for a tempo- drug store. rary installation, replace the filter drier and restart the system (see literature from filter drier’s manufacturer WARNING for pressure drop maximum limits).
- Page 46 Table B2: Performance Troubleshooting Performance Heating Cooling Possible Cause Solution Troubleshooting Insufficient capacity. Dirty filter. Replace or clean. Check for dirty air filter and clean or replace. Check fan motor operation and airflow restriction. Too high Reduced or no airflow. of external static.
-
Page 47: Appendix.c:.positive.and.negative.pressure.trapping
Appendix C: Positive and Negative Pressure Trapping Removable plug Cleanout K = Minimum 0.5” [13 mm] H = 0.5” [13 mm] + maximum total static pressure X = 3.9375” [100 mm] if unit has a 6” [152 mm] tubular steel base L = H + K + pipe diameter + insulation −... -
Page 48: Appendix.d:.gas-Fired.furnace.modules.installation.and.maintenance
Appendix D: Gas-fired Furnace Modules Installation and Maintenance Tubular.Gas-fired.Duct.Furnace.Module 2. Do not install the appliance where it may be exposed WARNING to potentially explosive or hazardous atmospheres Fire or explosion hazard containing flammable vapors or combustible dust. 1. Failure to follow safety warnings exactly could cause 3. -
Page 49: Indoor Installation
Outdoor Installation Where sufficient height for proper vertical venting must be greater or in jurisdictions requiring a greater separation Air.for.Combustion between flue gas discharge and combustion air inlet the The furnace is power vented with a combustion air draft vent stacks provided with the unit must be replaced by inducer/blower and needs an ample supply of air for separate self-supported factory built closed chimneys or proper and safe combustion of the fuel gas. - Page 50 Venting 7. Dampers must not be used in vent piping runs. Spill- age of flue gases into the occupied space could result. Each furnace must be connected to a venting system to 8. Vent connectors serving Category I heaters must not convey flue gases outside of the heated space.
- Page 51 Separated Combustion Air Intake Systems as the required vent pipe diameter. The vent termi- nal must be at least 12” [305 mm] from the exterior On indoor units for operation with separated combustion wall that it passes through to prevent degradation air intake systems, the burner section is in a reasonably of building material by flue gases.
- Page 52 4. For the furnace(s) to operate properly, the minimum 5 ft. [1.5 m] min. Building overhang 25 ft. [15.2 m] max. equivalent length inlet gas supply pressure to each furnace for natural Pitch pipes down ¼ in./ft [21 mm/m] toward terminal caps to allow for gas operation is 5.0”...
- Page 53 tubes near the base in the furnace control ves- and the discharge sensor limits the maximum supply tibule. A condensate drain pan should be field air leaving temperature. In the event of a heat recov- provided for these applications. A condensate ery failure where the furnace design temperature rise drain fitting is provided in the flue box.
- Page 54 wal 35-61 Series Direct Ignition Control based on the WARNING – FOR YOUR SAFETY burner firing rate control (on/off, two-stage or full The use and storage of gasoline or other flammable va- modulation) and Troubleshooting Guide provided on pors and liquids in open containers in the vicinity of this the furnace at the end of this appendix.
-
Page 55: Shut Down
Shut Down tween burner and manifold pipe, or debris in the main burner orifice. Soft brush or vacuum clean 1. Set thermostat or controller to lowest setting. affected areas. 2. Turn off electrical supply to unit at disconnect switch. b. Poorly defined, substantially yellow flames or 3. -
Page 56: Replacement Parts
Security Device Operation WARNING 1. A combustion air pressure switch is provided as part The circulating blower air proving switch is adjustable of the control system to verify airflow through draft and must be set properly to avoid damage due to furnace inducer by monitoring the difference in pressure cycling on high limit. - Page 57 Venmar CES Inc. sor within 10 seconds, the spark and gas valve will be 1502 D Quebec Avenue de-energized. A 15 second inter-purge period begins Saskatoon, SK S7K 1V7 and the combustion blower continues to run. After Email: venmarservice@venmarces.com the inter-purge period another ignition trial will take Phone: 1-866-4-VENMAR (1-866-483-6627) place.
- Page 58 HF Sequence of Operation – Two-stage TR1, turning off the second stage gas valve and re- Operation with 2 Speed Controller turning the combustion blower to low speed. 14. When the thermostat (controller) is satisfied and the Fenwal.35-61.Series.Direct.Ignition.Control.with. demand for heat ends, the first stage valve is de-en- TR1.Timer.Relay.Control ergized immediately, the control senses loss of flame When system is powered up 24 VAC will be applied to the...
- Page 59 3. If the airflow signal is lost during operation, the 9. When flame is detected by flame sensor, the spark control immediately de-energizes the gas valve and is shut off and gas valve(s) and combustion blower maintains blower operation. If the call for heat re- remains energized.
- Page 60 the inter-purge period another ignition trial will take IC Fault Conditions and LED Key place. LED Steady On Internal control fault 3. If burner fails to light or prove the flame sensor fol- 1 Flash Combustion airflow fault lowing the two additional trials the control will go 2 Flash Flame with no call for heat into lockout.
- Page 61 Table D3: LED Code Troubleshooting LED Code System Description Actions Check for open fuse or circuit breaker. No power None On call for heat, nothing happens. Check for poor wiring connection. to T1 Check for failed 24 volt transformer. System fault. Repeated lockouts (five) during continuous call for heat.
-
Page 62: Ig.series.drum.and.tube.gas-Fired.duct.furnace.module
Read the contents carefully before tions, Venmar CES will, at its option repair or replace proceeding. Due to the custom nature of this duct any defective component. -
Page 63: Installation Instructions
1. To return defective products under these warranty terms, for the particular application is the responsibility of please contact your supplier or a Venmar CES cus- the air handler manufacturer. Safety considerations include the accessibility of the equipment to non- tomer service representative at 1-800-563-6695. - Page 64 the heat exchanger. The covers for the openings shall The drain must be installed in accordance with all be attached in such a manner as to prevent leaks. plumbing codes. The condensate is to be drained via 6. Seal the perimeter of the duct furnace between the ½”...
- Page 65 Exhaust.Stacks.and.Venting the trap must be at atmospheric pressure and not tied into a pressurized line or the trap will not func- 1. Installations must be in accordance with the require- tion properly. ments of authorities having jurisdiction or in the 4.
- Page 66 Overfire Positive’ pressure ratings on the rating plate normally open vent valve (if any of these components of the duct furnace. are supplied) must be vented to atmosphere sepa- 17. Power Venting Adjustment – The flue draft should be rately from all other components. Vent lines should terminate outside the building with a turndown adjusted at the damper of the induced draft (ID) fan when the duct furnace is operating on high fire.
- Page 67 vided in the remote control cabinet and on the junc- IMPORTANT tion box on the duct furnace for the connection of Do not split or branch off leaving ducts or mount temper- these controls (see wiring diagram). Check inside the ature sensors directly after the duct furnace allowing suf- control panel for labels indicating entry location(s) for ficient distance for air temperature to blend evenly.
- Page 68 the temperature settings indicated. The temperature the switch to open just below the design airflow. Ad- limiting control setpoints are given below for most just the air throughput to be within the range speci- duct furnace installations, however refer to the wir- fied on the duct furnace rating plate.
- Page 69 Contact Venmar CES Customer Service at 1-866-4-VENMAR (1-866-483-6627) or email tech vide a slight increase in temperature rise.
- Page 70 10. Follow the procedures for start-up. Should there be a de- locks out within the proper time. Contact Venmar mand for heat, the duct furnace should attempt to start. CES Customer Service at 1-866-4-VENMAR (1-866- 11.
- Page 71 Shut Down Instructions P/N 033 T68-7C P/N 022-1 General P/N 042 1. Set the burner operating switch, controls, remote panel switches, etc. to ‘Off’ or to the ‘Summer’ position. 2. To prevent possible gas leaks close the main manual P/N 036 P/N 029 P/N 044 gas valve.
- Page 72 2. Inspect the stack to make certain there are no obstruc- run in hot, severe dirt or wet conditions should be tions. Check for carbon deposits, soot, scale or rust. lubricated at least every six months. 3. Inspect the condensate and drain connections and Table D5: Re-lubrication Schedule disposal systems.
- Page 73 Burner Linkage and Low Fire Adjustment signal generator if this has not been done per Item 6, Start-up Instructions. Dial the signal generator to WARNING 2 volts or less. With power off the actuator and link- age should position the combustion air damper to an Do not attempt to start the burner if the duct furnace is opened position for maximum air throughput.
- Page 74 Loosen the swivel joint on the connecting rod at the butterfly crank arm and slide the rod to close the valve very slightly. Flame rolling back into the burner could damage some internal burner components. A yellow flame is normal on low fire. 8.
- Page 75 b. Tighten the burner air damper quadrant at the Run/test switch screw in the slot so the linkage cannot move. Captive mounting screw c. Loosen the rod at one of the two ball joints on the air linkage. Plugin purge card d.
- Page 76 Table D6: Blinking Fault Codes and Recommended Troubleshooting Fault Code System Failure Recommended Troubleshooting Code 1-1: Low AC Check the relay module and display module connections. Low AC line detected. line voltage Reset and sequence the relay module. Check the 7,800 power supply and make sure that frequency and Code 1-2: AC Excessive noise or device running on slow, voltage meet specifications.
- Page 77 Table D6: Blinking Fault Codes and Recommended Troubleshooting Fault Code System Failure Recommended Troubleshooting Check wiring to make sure that the lockout interlocks are con- nected properly between Terminals 6 and 7. Correct any errors. Reset and sequence the relay module. If the fault persists, measure the voltage between Terminal 6 and G (Ground), then between Terminal 7 and G.
- Page 78 Table D6: Blinking Fault Codes and Recommended Troubleshooting Fault Code System Failure Recommended Troubleshooting Inspect the jumper connections. Make sure the clipped jumpers Code 5-1: were completely removed. Pre-ignition Pre-ignition interlock fault. Reset and sequence the relay module. interlock If the fault persists, replace the relay module. Check wiring and correct any errors.
- Page 79 Operation 3. If the meter reads less than 0.8 µA or reading is un- steady, recheck points under Check Flame Sensor The S89 is powered by a 24V transformer. It operates in Igniter. response to a call for heat from the thermostat. Flame sensor current check –...
- Page 80 Troubleshooting Check.Spark.Ignition.Circuit The S89 spark generator relay switches 120 VAC to the WARNING remote mounted spark generator, which, in turn, powers Fire or explosion hazard. Can cause severe injury, death, the spark igniter at the burner. Check as follows: or property damage. 1.
- Page 81 Start Review normal operating sequence. Turn gas supply on. Turn thermostat up to call for heat. Power to S89 (24 VAC and Check line voltage power. Low voltage transformer, limit controller, thermostat 120 VAC Normal). and wiring. Also, air proving switch on pre-purge systems (see wiring hookups). S89E –...
- Page 82 This page intentionally left blank. VCES-ASTON-IOM-1D – EnergyPack, ERV5000–10000, HRV3000–10000...
-
Page 83: Appendix.e:.energypack ® ,.Erv5000-10000(I/E).And.hrv3000-10000(I/E).Start-Up.form.and.checklist
• Complete all forms under this appendix for each St. Léonard d’Aston, QC unit and email, fax or mail to Venmar CES imme- Canada J0C 1M0 diately after start-up to validate warranty and to provide valuable information for personnel perform- Email to tech support: venmarservice@venmarces.com... - Page 84 Visually inspect the wheel(s) to ensure it is centered and does not tilt. If there is any indication of a problem call Venmar CES Tech Support at 1-866-4-VENMAR. d. Check that the wheel seals are properly positioned from the face of the wheel.
- Page 85 Serial Number: _____________________________________ Table E1: Pre Start-up Checklist Check √ Checklist Item Check the heat pipe fins for any fin defects from shipping or installation. a. Remove retaining bolts on heat pipe tilt mechanism. b. Check the heat pipe flexible connection is properly attached and sealed on tilt mechanism. c.
- Page 86 Appendix E. Send a copy of the completed Start-up Report and Checklist to Venmar CES to validate warranty. Maintain a copy of the report at the unit for future reference. Once completed, return setpoints to original or required values, return the unit to the correct mode of operation and adjust the time clock if required.
- Page 87 Serial Number: _____________________________________ Start-up Readings • Allow unit to reach steady state before taking readings. • Complete based on options included with unit Nameplate voltage Input voltage L1–L2 L2–L3 L1–L3 Table E3: Start-up Readings – Supply Fan Amp Draw Rotation Full Load Amps O/L Amp Hertz...
- Page 88 Serial Number: _____________________________________ Table E5: Start-up Readings – Condenser Fan Amp Draw Full Load Amps Rotation Correct O/L Amp Setting (Nameplate Amps) Fan 1 Fan 2 Fan 3 Fan 4 Fan 5 Fan 6 Fan 7 Fan 8 Fan 9 Fan 10 Fan 11 Fan 12...
- Page 89 Serial Number: _____________________________________ Table E7: Start-up Readings – WSHP Waterside Cooling Mode Waterside Heating Mode Entering Leaving Temp. Entering Leaving Temp. Entering Leaving Temp. Temp. Difference Temp. Temp. Difference Pressure Pressure US GPM (°F/°C) (°F/°C) (°F/°C) (°F/°C) (°F/°C) (°F/°C) (PSI) (PSI) Condenser 1 Condenser 2...
- Page 90 Serial Number: _____________________________________ Table E10: Start-up Readings – Gas-fired Duct Furnace Fuel Natural Gas Propane Furnace #1 Furnace #2 Rotation correct Full load amps (nameplate amps) Combustion air fan Amp draw L1/L2/L3 O/L amp setting Rotation correct Full load amps (nameplate amps) Induced draft fan motor Amp draw L1/L2/L3 O/L amp setting...
-
Page 91: Appendix.f:.hepa.filter.installation
Appendix F: HEPA Filter Installation These instructions are for installing AAF HEPA filters (11½” depth) into AAF HEPA holding frames. The holding frames are available in multiple sizes and materials, but include the PN series of 30619XX-XXX, where the X’s vary with frame size and material. - Page 92 Step 4 a frame bank of multiple frames, install the lower filters first so that the upper filters can rest on the lower filters. Once all four corner latches have been tightened within ¼” of the leg extension coupling, complete the installation by tightening each corner until the latch and leg extension coupling meet.
-
Page 93: Appendix.g:.electric.heating.coil.and.controls.information
Appendix G: Electric Heating Coil and Controls Information 2 – Electrical Installation of Electric Coil Heaters This electric heating coil module covered by this appen- dix is a component of a “Listed” product, subject to the 2.1.Disconnect.Power.Source guidelines of application as designated by the Certifying Disconnect all power sources before opening the control Agency and outlined in the appliance Manufacturer’s in- box and working within. - Page 94 3 – Operating Electric Coil Heaters 4.2.Electrical.Inspection Two weeks after start-up, all electric connections to con- 3.1.Minimum.Airflow tactors should be checked and tightened up. Before each Ensure that sufficient airflow as marked on the nameplate heating season, check the resistance between the heating is passing through the heater.
-
Page 95: Appendix.h:.extended.dormant.unit.maintenance.procedure
Dormant Unit Maintenance Checklist below and send a traindicated and will void our warranty. copy to the Venmar CES service department every six 2. Unit must be stored on a level surface with the months and when unit is put into service. - Page 96 Serial Number: _____________________________________ Table H1: Extended Dormant Unit Maintenance Checklist Item Description Is the unit stored indoors in a clean, dry environment? Is the unit storage facility temperature regulated to within 50°F to 75°F? Is the indoor storage facility humidity regulated to within 10% to 50% RH? Is the unit mounted on a level surface along the perimeter of the base with weight evenly distributed? Has the plastic wrapping been removed from the unit to perform inspection and maintenance?
- Page 97 Serial Number: _____________________________________ Table H1: Extended Dormant Unit Maintenance Checklist Item Description Refrigerant pressure Date PSIG Date PSIG Date PSIG every three months Compressor 1 Compressor 2 Compressor 3 Compressor 4 Compressor 5 Compressor 6 Compressor 7 Compressor 8 Compressor 9 Compressor 10 Compressor 11 Compressor 12...
-
Page 98: Appendix.i:.energypack ,.Erv5000-10000.And.hrv3000-10000.Maintenance.summary.chart
Appendix I: EnergyPack , ERV5000–10000 and HRV3000–10000 ® Maintenance Summary Chart Table I1: Maintenance Summary Chart – EnergyPack, ERV5000–10000, HRV3000–10000 Semi- Item No. Description Note Monthly Quarterly Annually annually Inspect the general condition of the unit. Remove any dirt or debris. General Check for unusual noise or vibration. -
Page 99: Appendix.j:.measuring.and.adjusting.v-Belt.tension
Appendix J: Measuring and Adjusting V-belt Tension Table J1: Measuring V-belt Tension Recommended Deflection Force (lbs) Small Sheave Diameter V-belt Cross Section Retensioned Range (Inches) Initial Installation Maximum Minimum 3.0 to 3.4 3.6 to 4.2 4.6 to 6.0 4.6 to 5.4 5.6 to 7.4 8.6 to 9.4 7.0 to 8.5... - Page 100 Appendix K: Energy Recovery Wheel Multi-link Drive Belt Instructions How to Measure, Assemble and Install 2. Place end tab through two links at once. 3. Flex belt further and insert second tab through end How.to.Measure link by twisting tab with thumb. Pull belt tight around sheaves to 4.
-
Page 101: Appendix.l:.fan.bearing.lubrication.schedule
Appendix L: Fan Bearing Lubrication Schedule Table L1: Recommended Grease Quantity Shaft Size Maximum Grease Capacity of Bearing Chamber Inches Millimeters Ounces Kilograms 0.50 to 0.75 13 to 19 0.125 0.004 0.875 to 1.187 25 to 31 0.375 0.011 1.25 to 1.50 32 to 38 0.625 0.018... -
Page 102: Appendix.m:.fanwall
Appendix M: FANWALL Inlet Cone Alignment ® Table M1: FANWALL Wheel/Cone Alignment Dimensions Wheel Size Backplate OD Blade Width Backplate Extension Wheel/Cone Overlap 10.375 3.495 0.700 0.250 12.500 4.280 0.700 0.250 13.750 4.720 0.700 0.250 16.750 5.760 0.700 0.250 20.451 6.990 0.700 0.400... -
Page 103: Appendix.n:.filter.resistance.and.latches
1,000 0.68 90–95% 24” x 24” [610 x 610 mm] 2,000 0.68 Table N3: Filter Latches for Front or Upstream Access Final Filter Prefilter Latch Venmar PN None C-70 207312240 1” nominal or single header 2” C-86 19516104 4” C-89... -
Page 104: Appendix.o:.troubleshooting
Seal all leaks in ducts and unit walls. Verify pressure drop of both airflows and compare to the Exchanger does not perform as per submittal. submittal. Contact Venmar CES if a significant difference is noted. Fan belt is slipping. Adjust belt tension. - Page 105 Filter rack is damaged. Repair filter racks and re-install filters. Some filter clips are missing. Order new clips from Venmar CES. Water Issues Airflow is too high. Lower airflow by adjusting the drive. Water carryover from Clean drain pan and ensure suction into the unit is not too Drain pan not properly draining.
-
Page 106: Appendix.p:.adjusting.refrigerant.charge
Appendix P: Adjusting Refrigerant Charge CAUTION temperature from the saturated temperature to de- termine the liquid sub-cooling. The Clean Air Act of 1990 bans the intentional venting 4. Compare calculated sub-cooling to Table P1 for the of refrigerant (CFCs and HCFCs) as of July 1, 1992. Ap- appropriate unit type and options. - Page 107 3. The system is undercharged if the superheat is too 5. If the sub-cooling is correct and the superheat is too high and the sub-cooling is too low high, the TXV may need adjustment to correct the 4. Correct an undercharged system by adding refriger- superheat.
- Page 108 The Manufacturer has a policy of continuous improvement and reserves the right ©2008 Venmar CES Inc. to change design and specifications without notice. FANWALL TECHNOLOGY ® VCES-ASTON-IOM-1D and FANWALL ® are trademarks of Huntair, Inc. Products in this literature are cov- March 2014 ered by one or more of the patents listed on www.ces-group.com/patents.
Need help?
Do you have a question about the ERV5000-10000 and is the answer not in the manual?
Questions and answers