
Related Manuals for Hoefer GD2000

Summary of Contents for Hoefer GD2000
- Page 1 GD2000 Slab Gel Dryer Vacuum Gel Dryer System GD2000-IM/Rev.B0/07-12...
-
Page 2: Table Of Contents
Important Information ..........ii Waste Electrical and Electronic Equipment (WEEE) .......vii 1. Gel Dryer function and description ......1 Design Features ..........2 2. Unpacking the GD2000 ........3 Setting Up the Vacuum System ......4 Gel dryer controls ..........5 3. Specifications ...........7 4. Operating instructions ........8 Step 1: Prepare the dryer ........8... -
Page 3: Important Information
Important Information – English elektrické bezpečnostní normy. Přesto, že by měly být použity pouze řádně vyškolený operátorů. Číst celé • If this equipment is used in a manner not specified by toto ruční před použitím nástroje a použití pouze v Hoefer, Inc. the protection provided by the equipment souladu s pokyny. may be impaired. • Přístroj musí být vždy používají se na výkonu zemi vést • This instrument is designed for indoor laboratory šňůra správně zemněny k zemi na síti výústce. use only. • Využití pouze nepoškozené elektrické dráty a vybavení • Only accessories and parts approved or supplied by pro napětí budete používat. Všechna zařízení spojené Hoefer, Inc. may be used for operating, maintaining, s vysokým napětím by měla být v souladu s EN61010- and servicing this product. 1:2001. • Warning! Because this instrument can develop suffi- • Si ponechá nástroje jako suchý a čistý jako možné. cient voltage and current to produce a lethal shock, Otřete pravidelně s a měkké, vlhkým hadříkem. Nechť care must be exercised in its operation. je nástroj nenastavený úplně před použitím. • This instrument is designed in accordance with the • Nejsou provozována na nástroj v extrémní vlhkost (nad EN61010-1:2001 electrical safety standard. Never- 80%). Předešlo kondenzaci o pronájmu jednotky na theless, it should be used only by properly trained okolní teplotu nechá při přijímání nástroj z chladnější... - Page 4 Tärkeää Tietoa – Finnish 80%). Undgå kondensation ved lade enheden equili- brate til omgivende temperatur ved tageen instru- • Jos tätä varusteita käytetään tavassa ei määritetty mentets fra et koldere til et varmere miljø. Hoeferille, Inc. suojelu ehkäisty varusteille saattaa • At tillade tilstrækkelig afkøling, forsikrer, at lufthullerne olla avuton. af instrumentet er ikke dækket. • Tämä väline suunnitellaan sisälaboratoriokäytölle vain. • Vain lisävarusteet ja osat hyväksyivät tai toimitti Belangrijke Informatie – Dutch Hoeferin oheen, Inc.:ää voi käyttää käyttämiselle, • Indien deze uitrusting in een manier wordt gebruikt valvoalle, ja servicing tämä tuote. die niet door Hoefer is gespecificeerd, Nv. de • Varoittaminen! Koska tämä väline voi kehittää riittävä bescherming die door de uitrusting is verzorgd kan jännitteen ja virran tuottaa kuolettavan järkytyksen, worden geschaad. huolta täytyy harjoittaa toiminnossaan. • Dit instrument is voor binnenlaboratoriumgebruik • Tämä väline suunnitellaan EN61010-1:2001 sähkö- enkel ontworpen. turvallisuusstandardin mukaisesti. Silti pitäisi käyt- • Enkel onderdelen en delen keurden goed of leverden tää vain ohi oikeasti koulutetut käyttäjät. Lue tämä door Hoefer, Nv. kan voor het bedienen worden kokonainen manuaalinen ennen välinettä ja käyttö gebruikt, handhavend en onderhouden van dit vain ohjeiden mukaan.
- Page 5 • Um das genügend Abkühlen zu erlauben, stellen Sie sicher, dass die Öffnungen des Instrumentes nicht • Ne pas fonctionner l’instrument dans l’extrême bedeckt werden. humidité (au-dessus de 80%). Eviter la condensa- tion en laissant l’equilibrate d’unité à la température Informazioni Importanti – Italiano ambiante en prenant l’instrument d’un plus froid à un environnement plus chaud. • Se quest’apparecchiatura è usata in un modo • Permettre le refroidissement suffisant, garantir que les specificato da Hoefer, Inc. la protezione fornito conduits de l’instrument ne sont pas couverts. dall’apparecchiatura potrebbe essere indebolita. • Questo strumento è disegnato per l’uso di laboratorio Wichtige Informationen – German interno solo. • Wenn diese Ausrüstung gewissermaßen nicht angege- • Solo gli accessori e le parti hanno approvato o hanno ben durch Hoefer, Inc verwendet wird, kann der fornito da Hoefer, Inc. potrebbe essere usato per oper- durch die Ausrüstung zur Verfügung gestellte Schutz are, per mantenere, e per revisionare questo prodotto. verschlechtert werden. • Avvertendo! Perché questo strumento può sviluppare • Dieses Instrument wird für den Innenlaborgebrauch il voltaggio sufficiente e la corrente di produrre una nur dafür entworfen.
- Page 6 • Tylko akcesoriów i części zatwierdzone lub dostarczone portare lo strumento da un più freddo a un ambiente przez Hoefer, Inc. mogą być wykorzystane do eksp- più caldo. loatacji, utrzymania i obsługi tego produktu. • Di permettere raffreddare sufficiente, assicura che gli • Uwaga! Ponieważ ten akt prawny może być rozwinięcie sbocchi dello strumento non sono coperti. odpowiednich napięcie i bieżących do wyprodu- kowania śmiertelnego szoku, opiekę musi być wykony- Viktig Informasjon – Norwegian wane w działaniu. • Ten instrument został zaprojektowany zgodnie z • Hvis dette utstyret blir brukt i en måte ikke spesifisert tym EN61010-1: 2001 Bezpieczeństwo elektryczne ved Hoefer, Inc. beskyttelsen som ha blitt git av utsty- standard. Niemniej jednak, należy stosować jedynie ret kan bli svekket. przez odpowiednio przeszkoleni operatorów. Znajdą • Dette instrumentet er utformet for innendørs labora- państwo to cały podręcznika przed zastosowaniem toriumbruk bare. instrumentu i stosować jedynie zgodnie z instrukcjami. • Bare tilbehør og deler godkjente eller forsynte ved • Instrument musi zawsze być wykorzystane z ziemi Hoefer, Inc. kan bli brukt for drive, vedlikeholde, og doprowadzić do zasilania detonującego właściwie betjene dette produktet. uzasadnione na ziemię w sieci wodociągowej rynku zbytu. • Varsler ! Fordi dette instrumentet kan utvikle tilstrek- kelig spenning og strøm til å produsere et dødelig...
- Page 7 (encima de 80%). Evite condensación permitiendo la terra nos canos saída principais. unidad equilibra a la temperatura ambiente al tomar el instrumento de un más frío a un ambiente más tibio. • Usa fio eléctrico só intacto e equipamento específico para as voltagens que você usará. Todo equipamento • Permitir refrigeración suficiente, asegure que las conectado a voltagem alta deve ser de acordo com aberturas del EN61010-1:2001. Viktig Information – Swedish • Mantem o instrumento tão seco e limpo como possível. Limpe regularmente com um pano húmido • om denna utrustning används i ett sätt som inte har macio. Deixe o instrumento secar completamente specificeras av Hoefer, Inc. skyddet tillhandahöll vid antes de uso. utrustningen kan skadas. • Não opera o instrumento em humidade extrema • Detta instrument formges för inomhuslaboratorium (acima de 80%). Evite condensação deixando o equili- användning bara. brate de unidade a temperatura ambiental quando • Bara medhjälpare och delar godkände eller levererade tomar o instrumento de um mais frio a um ambiente vid Hoefer, Inc. kan användas för fungera, underhålla, mais quente. och servicing denna produkt. • Permitir esfriar suficiente, assegura que as aberturas do • varna! Därför att detta instrument kan utveckla tillräck- instrumento não são cobertas.
-
Page 8: Waste Electrical And Electronic Equipment (Weee)
Waste Electrical and Electronic Equipment (WEEE) English This symbol indicates that the waste of electrical and electronic equipment must not be disposed as unsorted municipal waste and must be collected separately. Please contact an authorized representative of the manufacturer for information concerning the decommissioning of your equipment. -
Page 9: Gel Dryer Function And Description
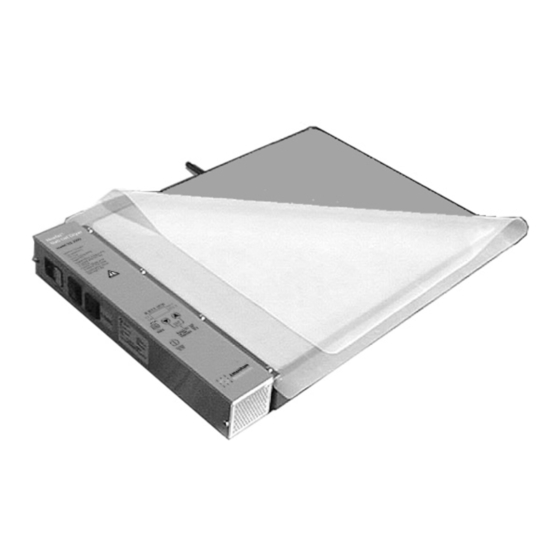
1. Gel Dryer function and description The Hoefer ® GD2000 Slab Gel dryer rapidly dries acrylamide and agarose gels and perma- nently bonds them to filter paper or transparent porous cellophane. This is accomplished by heat- ing the gel slab while simultaneously drawing away released moisture with an external vacuum pump. -
Page 10: Design Features
Design Features Drying surface The PTFE coated, cast aluminum platen is resis- tant to acidic fumes that may be released while drying certain types of gels. A grid of vacuum conduits on the surface allows released moisture to be pulled away. Vacuum port Accepts vacuum tubing of 9-mm (3/8") ±1 mm i.d. -
Page 11: Unpacking The Gd2000
If any part is missing, contact your local Hoefer, Inc. sales office. Inspect all components for damage that may have occurred while the unit was in transit. If any part appears damaged, contact the carrier immediately. -
Page 12: Setting Up The Vacuum System
Attach the vacuum tubing (9 mm ± 1 mm i.d.) from the vacuum pump to the vacuum port on the GD2000. Plug the vacuum pump either into the dryer control cabinet (the power cord receptacle is on the left side of the control panel) or into a lab power receptacle. -
Page 13: Gel Dryer Controls
Gel dryer controls The GD2000 control panel is located on the top of the gel dryer. (See Fig 1). A detailed view of the features of the control panel is shown in Fig 2. Fig 2. Gel dryer controls. •... - Page 14 number control feature function LED display Shows Set Temperature, Set Time or Elapsed Time. On the left of the LED display, a light indicates whether the displayed value is °C (temperature) or Hrs (time). When the displayed value is time and the LED colon blinks, the value is Elapsed Time.
-
Page 15: Specifications
• used in laboratory locations, Pump Outlet 575 W • used as delivered from Power requirements Model: Hoefer, Inc., except for 80-6428-84: 115 V~, alterations described in the 50/60 Hz user manual, and 80-6429-03: 230 V~, • connected to other... -
Page 16: Operating Instructions
GD2000 Gel Dryer prepare the dryer and gel drying stack. Once you reaches high temperatures set the temperature and the timer, the GD2000 during operation. Do not automatically starts the vacuum pump and turns touch the plate surface during on the heat after 10 seconds. -
Page 17: Step 2: Prepare The Gel Drying Stack
Step 2: Prepare the gel drying stack The slab dryer accommodates both agarose and polyacrylamide gels. The configuration of the gel stack layers depends on the next processing step and the thickness of the gel(s). Drying between cellophane sheets Immerse two sheets of porous cellophane in water. Note: Cellophane provides Lay one cellophane sheet smoothly on top of the a transparent support for filter paper liner. - Page 18 Drying thin or low-concentration polyacrylamide gels (≤ 1.5 mm) and agarose gels on paper Lay a sheet of filter paper on top of the filter paper liner and position the gel on this sheet, taking care to avoid trapping air beneath the gel. Cover the gel with thin plastic wrap. Do not leave wrinkles in the plastic wrap.
- Page 19 porous cellophane filter paper liner stainless steel screen Drying thick gels (> 1.5 mm), high concentration gels, gradient gels on paper Lay a sheet of filter paper on top of the filter paper liner and then position the gel on this sheet, taking care to avoid trapping air beneath the gel. rubber sealing sheet stiff plastic cover sheet* thin plastic wrap...
-
Page 20: Step 3: Set The Temperature
Step 3: Set the temperature The highest setting, 80 °C, can be used for many types of gels for reliable, rapid drying. Use a Note: The melting temperature of an agarose gel is dependent on temperature of 50 °C for agarose gels. Poly- its concentration and properties. acrylamide gels prepared for fluorography may The drying temperature should not require a setting of 60 °C to protect the fluors. -
Page 21: Step 4: Set The Timer
Step 4: Set the timer The amount of time required for a gel to dry depends on such factors as gel thickness, gel concentration, drying temperature, and vacuum applied. A typical sequencing or 1.5 mm 10% T gel can be expected to dry in approximately 45 minutes at 80 °C. - Page 22 To start the heater and the vacuum pump • You can press the Time/Temp key to immedi- ately start the heater and vacuum pump. • If you don’t press the Time/Temp key, ten seconds after you stop adjusting the time, the heater and vacuum pump start automatically. As the heater and vacuum pump start, the timer begins to count Elapsed Time (Hours:Minutes).
-
Page 23: Step 5: Create A Vacuum Seal
Step 5: Create a vacuum seal Ten seconds after you set the timer, the vacuum Note: If using a cold trap with starts automatically if it is connected through inline valves, close the valve the vacuum receptacle on the dryer. Watch for between the trap and gel dryer and a seal to form between the rubber overlay and then open the valve between the trap and the pump. -
Page 24: Options For Manual Operations
Options for manual operations To apply a vacuum without heat. Set the Note: When you manually preheat Temperature to 0:FF, then set the timer. Ten the dryer, be sure the set time seconds after you set the time, the vacuum includes the time needed to prepare the gel stack as well as starts without heat. -
Page 25: Care And Maintenance
5. Care and maintenance Cleaning Turn mains power switch off and unplug the power cord. Remove the stainless steel screen and cover sheets and wash separately with a mild laboratory detergent. Do not use abrasives or solvents on any part of the dryer. Periodically remove accumulations left by autoradiography reagents from the platen and stainless steel screen. -
Page 26: Replacing Fuses
Replacing fuses 115 V~ Model. The fuse drawer holds one Important! Fuses protect F 12A 250V 3AG fuse and one shorting coil. equipment by disconnecting loads 230 V~ Model. The fuse drawer holds two too large for the circuit design. Always replace fuses with those F 6.3A 250V 5 ×... -
Page 27: Replacing The Rubber Sealing Sheet
Replacing the rubber sealing sheet Occasionally, a tear or nick in the rubber sealing sheet (SE1143) may inhibit the formation of the vacuum seal. The rubber sealing sheet is attached to the dryer by four screws in a retaining bar along the edge of the platen. To change the seal- ing sheet, you also need a small tube of clear silicone adhesive, available at hardware stores. -
Page 28: Troubleshooting
No heat Make sure time is set and the LED colon is blinking. Make sure the temperature is not set to OFF. If still no heat, contact your local Hoefer, Inc. distributor for service. No vacuum Make sure the tubing connects the vacuum port to the vacuum pump. -
Page 29: Ordering Information
7. Ordering information product quantity code number GD2000 Vacuum Gel Dryer System Includes: stainless steel screen, VP200 Vacuum pump, Vacuum tubing, 10 sheets of filter paper, 50 sheets of porous cellophane, one mylar sheet and one porous polyethylene sheet 115 V~ GD2001... - Page 30 Holliston, MA 01746 Toll Free: 1-800-227-4750 Phone: 1-508-893-8999 Fax: 1-508-893-0176 E-mail: support@hoeferinc.com Web: www.hoeferinc.com Hoefer is a registered trademark of Hoefer, Inc. Coomassie is a trademark of ICI plc. Contrad 70 and Decon 90 are trademarks of Decon Lab. © 2012 Hoefer, Inc. —...
Need help?
Do you have a question about the GD2000 and is the answer not in the manual?
Questions and answers