Table of Contents
Advertisement
Quick Links
Advertisement
Table of Contents

Related Manuals for Mvix PVR


Summary of Contents for Mvix PVR
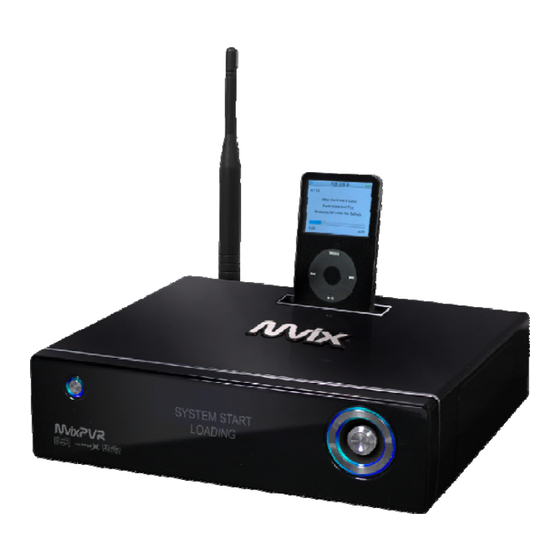
- Page 1 MVIX PVR Player Ver 1.0 Users Manual www.mvixusa.com MvixUSA...
-
Page 2: Safety Notes
Safety Notes The following are to protect safety of user and to prevent damages to property. Use product properly after carefully reading the following contents. Violating instructions Caution Violating instructions Warning may lead to slight may lead to serious injury or damage to injury or death. - Page 3 Safety Notes The following are to protect safety of user and to prevent damages to property. Use product properly after carefully reading the following contents. Violating instructions Violating instructions may lead to slight Warning Caution may lead to serious injury or damage to injury or death.
-
Page 4: Table Of Contents
About Product Notes Specifications Components Hardware Installation Connection Remote Controller Functions Chapter 1. PVR Setting 1) HDD Formatting 2) Language/ Resolution/ Time Setting in Wizard 3) Network Setting in Wizard Summary of Main Menus Chapter 2. Major Functions 1) MEDIAPLAY... -
Page 5: About Product
MvixPVR supports UPnP server functions. MvixPVR supports free DDNS so that you can connect to the internal HDD of the PVR not only from your local PC, but also from any PC with a Internet connection. This function can be used from an external device that supports UPnP client. - Page 6 About Product Multimedia library High-Resolution HD-level Media File Playback: MvixPVR supports the max. of 1920X1080 interface scan to provide clear and high-resolution video picture quality. MvixPVR is built on the sophisticated video-decoding technology of Sigma Chipsets, thus delivering crystal-clear, video output to your HD-LCD or Plasma. Supporting Diverse Movie Format Types MvixPVR supports a variety of HD files, such as TP, TS and TRP files, along with the popular MPEG, DivX (3/4/5), Xvid, DAT, ISO, DVD (VOB, IFO) and MKV / WMV / ASF / MOV (if using trans-code server), etc.
-
Page 7: Notes
Do not leave product near highly magnetic objects. This may lead to data loss and breakdown of product. Connect all cables when power to MvixPVR and TV is turned off. Mvix can be used as a multimedia player and a mobile disk when connected to PC. -
Page 8: Specifications
Specifications Titles of Parts ⑦ ⑦ ⑤ ⑥ ① ② ③ ⑨ ① ④ ③ ⑬ ⑫ ④ ② ⑧ ⑥ ⑤ ⑩ ⑪ Front Back ① Direction key (up/ down/ left/ right) ① Wireless antenna ② Direction key OK (press) ②... - Page 9 Specifications Specifications Product Name MvixPVR Operating System Linux Recording Partition : UDF (UNIX file system) File Format File Partition : FAT32 / NTFS Recording HQ, SP,LP,EP,SLP Mode Encoding Video MPEG II (PAL 720x576, 352x576 / NTSC 720x480, 352x480) (Recording) Audio MPEG II (48KHz Stereo 256Kbps / 192Kbps) MPEG2 HD(ts,tp), Divx HD(avi), Xvid HD(avi), MPEG1/2 (dat,mpg.vob.ifo.iso), Divx (avi),...
-
Page 10: Components
Components MvixPVR R2 Remote Control 5dBi Antenna HDMI Cable A/V Cable Power Adaptor Power Cable USB Cable User Manual Driver CD MvixUSA... -
Page 11: Hardware Installation
Hardware Installation 1. As shown above, unfasten the HDD cover screw 2. Remove the HDD cover on the side of product and open the HDD cover on the side of product. by pressing it down in the middle as shown in the picture. - Page 12 Hardware Installation 5. As shown above, slowly push the HDD guard 6. Install power cable and SATA cable to the together with the SATA HDD into the main body of mounted hardware. MvixPVR. 7. When hardware mounting is completed, close 8.
-
Page 13: Connection
Out put >> MvixPVR and TV Connection Y/Pb/Pr Video HDMI terminal Connect Connect Connect Connect Connect terminal Y/Pb/Pr Video HDMI PVR and Audio Device Connection Audio Coaxial Optical terminal Connect Connect Connect Coaxial Coaxial Optical Optical TV에 내장되어 있는 단자 TV에 내장되어 있는 단자... -
Page 14: Remote Controller Functions
Remote Controller Functions 1. POWER //STAND BY 2. LIBRARY 21. SETUP 3. VIDEO IN 22. MVIX LIVE 4. NUMBER BUTTONS 23. RECORDINGS 5. TVOUT 24. INFO 6. REC 25. STOP 7. PAUSE 26. PLAY 8. RETURN 27. HOME 9. NAVIGATION buttons 28. - Page 15 Remote Controller Functions Button Function POWER: To turn on/ off power or stand-by mode LIBRARY: Shortcut to LIBRARY menu VIDEO IN: Shortcut to DIGITAL RECORDER menu NUMBER BUTTON: To press buttons for numbers 0 ~ 9 TVOUT: Shortcut to HOME (menu) screen when playing DVD file REC: To start recording/ repetitive pressing for recording by one-touch recording (OTR) with REC: To start recording/ repetitive pressing for recording by one touch recording (OTR) with the fixed value of 30min/ 60min/ 90min/ 120min/ 180 min...
- Page 16 MUTE: For mute function SYNC <- / ->: To adjust sync of subtitle files played with film (100ms/ 0.1sec) FUNC: To implement the function of ~ iPod: To convert remote controller to iPod control mode/ repressing for returning to PVR mode MvixUSA...
-
Page 17: Chapter 1. Pvr Setting
To use product, install the HDD and format it by using format menu. (HDD formatted in Windows –based PCs cannot be used.) After mounting HDD in PVR, move to SETUP->SYSTEM menu. Select “HDD Format” menu and choose the option used.) After mounting HDD in PVR, move to SETUP SYSTEM menu. - Page 18 Chapter 1. PVR Setting 3. Adjust the second stage of multimedia and recording. Capacity allocated to multimedia is divided again in FAT32 and NTFS, the next stage of Windows file system. After setup, select ‘Next’. Default: 50% , Min.: 10% file system UNIX (UDF)
- Page 19 Chapter 1. PVR Setting 5. When setup is finished, select ‘Format’ and press ‘Enter’ to proceed formatting. Do not turn off or adjust power of product while formatting is in progress. This may cause breakdown of HDD. 6. When message informing format completion is displayed, press ‘OK’. Rebooting is automatically carried out. When rebooting is completed, HDD initialization is completed.
-
Page 20: Language/ Resolution/ Time Setting In Wizard
Chapter 1. PVR Setting 2) Language/ Resolution/ Time Setting in Wizard 1. When HDD is formatted, initial setup screen is displayed as shown in the picture. Select your preferred language used and press OK.. 2. Adjust the ratio of TV output resolution. (Refer to description on TV resolution on page 47 (Setup ->... -
Page 21: Network Setting In Wizard
Chapter 1. PVR Setting 3) Network Setting in Start Wizard 1. Select the method to connect wired LAN to network. DHCP IP automatically allocates IP address. 2. To set static IP address and allocated them, make and save input by using number keys in remote controller. -
Page 22: Summary Of Main Menus
TV-OUT function can be used. Recording and play control are possible while charging is in progress. 9. UPnP SERVER (Additional Function) Using free DDNS, you can play or download all data by connecting to HDD mounted in PVR anywhere as long as there is a local connection PC or PC with Internet connection. -
Page 23: Chapter 2. Major Functions
Chapter 2. Major Functions 1) MEDIA LIBRARY 1-1. Music 1 1. Music <Screen for Preview Display> <Screen for Music Play> Music This menu displays only the music files. In preview screen, file capacity and ID3TAG (V1) are displayed. You can listen to music while experiencing the upgraded photo conversion effect. -
Page 24: Photo
Chapter 2. Major Functions 1-2. Photo <Screen for Photo Preview> <Rotated Screen> <Full Screen> <Enlarged Screen> Photo This menus displays only the photo files. Zooming function (2x/4x/6x/8x/16x/Fit) lets you expand photos and check their locations. Using <Left/ Right> keys, you can instantly rotate vertically taken photos without having to modify them (supporting BMP/ JPEG formats, progressive JPEG format not supported). -
Page 25: Movie
Chapter 2. Major Functions 1-3. Movie <Movie Preview Screen> < Screen for Movie Play > Movie This menus displays only the movie files. Supporting quick preview function, this menus enables you to check before playing files. You can change and apply setup by entering setup menu while various files (media file, etc.) are being played. -
Page 26: Network Share Folder And Trans-Code Server
Chapter 2. Major Functions 1-4. Network Share Folder and Using MvixFTS 1. Access net in the first screen of MEDIA LIBRARY. 2. Access net while network is being successfully connected to display network group name. Move to the position of shared folder in PC and play media file through network streaming. - Page 27 < MKV Preview Screen Using Mvix FTS > <MOV Preview Screen Using MvixFTS> If “The file you have requested cannot be displayed directly. Please use Mvix FTS installed in your PC.“ message is displayed, install MvixFTS program in PC. In MvixPVR, play the movie located in PC.
- Page 28 Chapter 2. Major Functions <WMV Preview Screen Using MvixFTS > <RMVB Preview Screen Using MvixFTS> ※ About MvixFTS Program Using MvixFTS application included with your MvixPVR, you can enjoy watching movies that are not natively supported by the MvixPVR media playback engine, such as MKV/WMV/MOV and RMVB, etc. In case of MKV, self-play function is supported.
-
Page 29: Digital Library
Chapter 2. Major Functions 2) Digital Recorder 2-1. Video In Recording <Screen to Select Digital Recorder (Video In) in Main Menu> <Input Signal Screen at Recording Time> Select DIGITAL RECORDER menu to display the Video Input digital media. To record the desired part, press remote controller to start recording. -
Page 30: Simultaneous Use Of Recording And Media Play
Chapter 2. Major Functions 2-2. Simultaneous Use of Recording and Media Library To check recording status, press INFO in remote controller and check save position, quality setting status and recording progress. To stop recording, press ‘ST in remote controller. g, p Press ‘HOME’... -
Page 31: Recordings Library
Chapter 2. Major Functions 3) Recordings Library 3-1. Play Recorded Title In Home screen, select RECORDINGS LIBRARY menu. <Screen to Select Recordings Library in Main Menu> <Screen to Preview Recorded Title> RECORDINGS LIBRARY menu displays the recorded and saved titles. Select a title and select medium in the left screen to preview the title. -
Page 32: Sort Recorded Title D D Titl
Chapter 2. Major Functions 3-2. Sort Recorded Title <Screen for Playback Title Sorting Menu> Return To return to the previous screen Title Number To sort titles according to title number, the order of recording Recording Time To sort titles according to recording time Title Name To sort titles according to title name Recently Added... -
Page 33: Change Name Of Recorded Title
Chapter 2. Major Functions 3-3. Change Name of Recorded Title Name Change Names of titles saved with input line and recording time as default can be changed. Make selection by using buttons of remote controller. Then, press OK to change title name. 3-4. - Page 34 Chapter 2. Major Functions Thumbnail Setting Set the parts displayed in preview screen. You must press PLAY button at start as it is in temporary stop status. Then, select Confirm and press in remote controller. Cut A-B Zone Set the desired points in the recorded file and delete the designated zone. Designate starting point as SET A and ending point as SET B.
- Page 35 Chapter 2. Major Functions Split A single recorded file is split into two. Move to the part for splitting by pressing PLAY or using forward function Then Press OK The point of split can be accurately designated by using function. Then, Press OK. The point of split can be accurately designated by using slow button (3/4x / 1/2x / 1/4x / slow button (3/4x / 1/2x / 1/4x / 1/8x / 1/16x/ 1x).
- Page 36 Chapter 2. Major Functions Chapter Designation/ Memory Quick screen conversion is possible in play position by designating/ memorizing random position in recorded title. If Using GOTO function, you can move immediately to the designated chapter position without having to memorize play time.
-
Page 37: Delete Recorded Title
To copy titles saved in RECORDINGS LIBRARY through connection to USB SLAVE in Windows OS, execute Copy to Record Hard and connect the titles to USB SLAVE. Then, the files can be viewed in the hard disk in PVR. MvixUSA... -
Page 38: Chapter 3. For Advanced Users
Chapter 3. For Advanced Users 1) TIMER Timer Automatic booting is carried out to start recording on the date and time designated by preset recording function. The time applied to scheduler is based on the time applied in MvixPVR. Therefore, before using product, set time to be the same as actual time in SETUP ->... - Page 39 Select OK and apply the setting. When preset recording schedule is saved and power is turned off, you will automatically enter standby mode. Then, the middle and right LEDs in the main body of PVR simultaneously start blinking. MvixUSA...
-
Page 40: Delete Timer
Chapter 3. For Advanced Users 1-2. Delete Timer Delete Timer Move to delete menu to find Select Menu in which you can delete the presetting selected from the preset list in scheduler and menu window where you can delete all preset list Press OK to use the function scheduler and menu window where you can delete all preset list. -
Page 41: Timer History
3 Chapter 3. For Advanced Users 1-3. Timer History Timer History This function is used to check the record scheduler menu. You can check the success status of schedules that have been completed within the preset recording window. Success is indicated as OK and failure as Fail. MvixUSA... -
Page 42: File Manager
Copy function can be used for all files in addition to video files. Two drives appear when accessing HDD mounted in PVR. Each drive holds the file system of Media Library : NTFS/ Copy Recordings Here : FAT32. MvixUSA... - Page 43 Chapter 3. For Advanced Users Check the original file to copy as shown above. Then, select the “copy to” position. Press right direction key in remote controller to display a window asking for the status to proceed copy. Select OK and press ENTER in remote controller.
-
Page 44: Mvixlive Function
Chapter 3. For Advanced Users 3) MVIX LIVE What is MvixLive? MvixLive supports real-time broadcasting streaming. Using online RSS, You can use popular film, digital photo and weather functions. For user convenience, MvixLive also supports a unique search function for easy accessibility. -
Page 45: Upnp Server Function
SYSTEM SETUP-> MISC-> UPNP MEDIA SERVER -> ON SYSTEM SETUP > MISC > UPNP MEDIA SERVER > ON Activate Mvix PVR UPnP function through the above sequence. In SYSTEM SETUP -> NETWORK, enter the allocated IP address for connection to MvixPVR UPnP Server. -
Page 46: Chapter 4. Media Environment Setting
Chapter 4. Media Environment Setting 1) Language Setting Menu Language Text Encoding Language for menu is changed. Available Method of display to fetch subtitle file from computer languages are English, Japanese, Spanish, French, is changed. German, Italian, Korean and Dutch. The changed Unicode(UTF8)/ Korean/ Western/ Turkish/ Central language is immediately applied. -
Page 47: Audio Setting
Chapter 4. Media Environment Setting 2) Audio Setting Digital Audio Output To output down-mixing option of DTS and Dolby5.1 to 2 channel stereo select HDMI/ SPDIF output as LPCM, To output DTS and Dolby 5.1 select RAW HDMI/ SPDIF, connect coaxial or optical cable to amplifier/ receiver, and it will decode the 5.1CH DTS/ Dolby digital output. - Page 48 Chapter 4. Media Environment Setting Contrast Brightness Contrast of the displayed screen is adjusted. Brightness of the displayed screen is adjusted. While video is in play, press SETUP button in While video is in play, press SETUP in remote remote controller. Contrast can be adjusted controller.
-
Page 49: Rec Setting
Chapter 4. Media Environment Setting 4) REC Setting Recording Quality Quality of recording is designated. For information on recording quality, refer to the table below. (Video CODEC: MPEG 2 , Audio CODEC : MPEG2, 2CH) Average Resolution Resolution Recording Mode Bitrates Audio Format (PAL) - Page 50 Chapter 4. Media Environment Setting Auto Chapter Time of automatic chapter use is designated. Permanent Time Shift Status of permanent time shift is set in using time shift function. Default: Off REC Device Recording storage position is changed. Time Shift Device Temporary storage is changed when executing real time temporary stop...
-
Page 51: Network Setting
Chapter 4. Media Environment Setting 5) Network Setting 5-1. Wired Network Setting <Wired Network Connected> <Wired Network Not Connected> Automatic Allocation Mode (DHCP) When making connection by using wired LAN, connection is automatically made to network if selecting automatic IP allocation allocation. -
Page 52: Wireless Network
Chapter 4. Media Environment Setting 5-2. Wireless Network Setting <Wireless Network Connected> <Wireless Network Not Connected> The following are descriptions on the method of wireless network connection by searching signals. To use wireless network, you need wired/ wireless sharer. Select Modify and move to the Select signal search mode. -
Page 53: System Setting
Chapter 4. Media Environment Setting 6) System Setting Time Time Set time of MvixPVR that serves as the basis of using TIMER function. Using up/ down/ left/ right keys in remote controller, set year/ month/ day/ hour/ minute/ second. Press OK to save the set values. HDD F HDD Format Manual format is enabled when installing hard disk for the first time or... - Page 54 Chapter 4. Media Environment Setting Restoring Default Value Restoring Default Value All set values are restored to default. ※ Data in hard disk are not deleted or initialized. To initialize HDD, use HDD Format menu. Firmware Upgrade The current firmware version is displayed. Firmware update through USB storage device is possible.
-
Page 55: Other Settings
Chapter 4. Media Environment Setting 7) Other Settings Slide Show Time This is to set the time of which display is produced and maintained when viewing photos. Time can be designated as off/ 2sec/ 5sec/ 10sec/ 30sec/ 1min/ 2min. Transition Effect When viewing photos, transition effect to move to the next photo is set. - Page 56 Chapter 4. Media Environment Setting MediaPlay Movie Preview In Media Play function, you can disable or enable preview function. This is not applied in Playback menu. On/Off setting can be made by using Preview key in remote controller. UPNP Media Server UPnP server implementation is possible.
-
Page 57: Chapter 5. Mvixfts Use And Share
When the above screen appears, click Next. Find Mvix FTS program in the CD enclosed in this product package and start installation. Mvix FTS program can be downloaded in data room at http://www.mvixusa.com Screen to designate program installation route is displayed. Click Install. -
Page 58: Windows Xp Share Folder Setting
Chapter 5. MvixFTS Use and Share When running program, the above screen is displayed. Click Net Share Dialog to display the following screen. If share folders exist in PC, the folders will be displayed in list. 2) Windows XP Share Folder Setting First you must share the folder that includes a movie First, you must share the folder that includes a movie you intend to play by using MvixFTS server. -
Page 59: Change/ Give Power For Windows Xp Share Folder (Copy Function)
PC is turned off or program is closed. ※ MvixFTS program does not operate when playing CODEC supported by PVR in network. Therefore, it is not necessary to execute the program. Run MvixFTS program when playing the movies of H.264/WMV/RMVB/MOV/RM, etc. -
Page 60: Chapter 6. Ipod Expanded Connection Control
PVR product. Connect iPod by using dock connector. -This can be used as iPod® charger. -Press iPod key on PVR power on/ off button on remote controller to change mode to iPod control. Here, LCD window displays ‘iPod’. This means that iPod mode conversion has succeeded. -
Page 61: Warranty Information
In case it is impossible to locate the date of purchase, warranty period is calculated from the day 2 months after the manufacturing date of this product. Product Name HD Multimedia Player Product Model Mvix (MvixPVR) Manufacturing No. Date of Purchase Place of Purchase Name Tel.
Need help?
Do you have a question about the PVR and is the answer not in the manual?
Questions and answers