
Related Manuals for Alcatel Onetouch Evolve 2


Summary of Contents for Alcatel Onetouch Evolve 2
- Page 1 For more information on how to use phone or to find frequently asked questions, visit www.alcatelonetouch.com.
-
Page 2: Table Of Contents
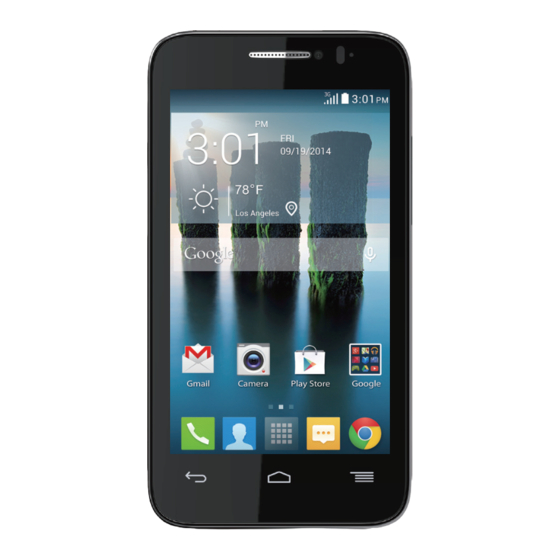
Introduction ............Table of Contents Thank you for purchasing an ALCATEL ONETOUCH Evolve 2 model 4037T. The 4037T comes General information ......................5 equipped with many of the features and functions you want and need. Your mobile ......................... 6 Keys and connectors ............................6 Home screen Getting started .............................. - Page 3 Getting connected ....................67 11 Settings ........................98 Connecting to the Internet ..........................67 11.1 Wi-Fi ..................................98 Chrome ................................69 11.2 Bluetooth ................................98 Connecting to Bluetooth devices .........................69 11.3 Data usage ................................98 Connecting to a computer ..........................71 11.4 Airplane mode ..............................99 Sharing your phone's mobile data connection ....................71 11.5 VPN settings ................................99 Connecting to virtual private networks .......................73 11.6 Tethering &...
-
Page 4: General Information
General information ........Your mobile ..........Your ALCATEL ONETOUCH Evolve 2 is a transceiver that operates on GSM Quadband with 850/ 900/1800/1900 MHz or UMTS Triband 850/1900/AWS (1700/2100) MHz. Keys and connectors Protection against theft Power key Your mobile phone is identified by an IMEI (mobile phone serial number) shown on the packaging label and in the product’s memory. - Page 5 Camera Back key • Touch to go back to the previous screen or to close a dialog box, options menu, Notifications panel, etc. Home key • While on any application or screen, touch to return to the Home screen. Volume up Menu key Volume down •...
-
Page 6: Getting Started
Getting started Removing SIM card 1. To remove SIM card, start by sliding the metal SIM card tray to left unlock position, tray will click 1.2.1 Set-up and release when unlocked. 2. Remove SIM card from slot. Attaching or removing back phone cover 3. - Page 7 Inserting or removing microSD card Charging battery Installing microSD card • To install microSD card, start by sliding the metal microSD card tray to left unlock position, tray will click and release when unlocked. Connect USB Cable provided to your phone and charger, then connect charger to electric outlet. •...
-
Page 8: Home Screen
Home screen Setting up your phone for the first time • Touch Get started, then select the phone's language. Home screen is provided in an extended format to allow more space for adding applications, shortcuts etc. Slide the Home screen horizontally left and right to get a complete view of the Home screens. The •... - Page 9 Status icons Touch and Hold Touch and hold the Home screen to get the widgets. 3G connected Vibrate mode Drag 3G in use Ringer is silenced Place your finger on any item to drag it to another location. 2G connected Phone microphone is mute Slide/Swipe 2G in use...
- Page 10 Notification icons Notifications panel Touch and drag down the Status bar to open the Notifications panel. Touch and drag up to close it. From the Notifications panel, you can view wireless service information, access reminders/notifications New text or multimedia message Missed call and open apps.
- Page 11 1.3.3 Search bar 1.3.4 Lock/Unlock your screen The phone provides a Search function which can be used to locate information within applications, To protect your phone and privacy, you can lock the phone screen by choosing slide or creating a the phone or the web.
- Page 12 To unlock phone screen Repositioning Apps and Widgets Press the power key once to light up the screen, draw the unlock pattern you have created or enter PIN Touch and hold the item to be repositioned to activate the Move mode, drag the item to the desired or password to unlock the screen.
-
Page 13: Applications And Widgets Menu
1.3.6 Applications menu Using volume settings menu To access Volume settings menu, drag down the Notifications panel then touch the Settings shortcut Touch on the Home screen to enter applications menu. panel then touch and hold AUDIO PROFILES, select General, then select Volume to set the To return to the Home screen, touch the Home key. -
Page 14: Text Input
To download new applications from applications menu or Home screen touch Google Play Store Text input ........... icon and search for preferred applications by name, subject or category. Accessing widgets menu In widgets menu you will view all available widgets that can be added to your home screens. Using Onscreen Keyboard To access the widgets menu touch the Menu key and select Add widgets from menu options. -
Page 15: Text Messaging
2.1.1 Swype keyboard In the Notifications panel, touch Select input method, from this input method shortcut menu you can choose between: Android keyboard, Google Keyboard, Swype or Google voice typing. Touch to view messaging options. Touch to add a contact from saved Groups. -
Page 16: Text Editing
Creating a text message Phone call, Call history log and People In message screen, touch the new message icon to create a new text/multimedia message. Phone ..................... 3.1.1 Placing a call Easily launch a call using Phone . Touch from the Favorite applications tray or from Applications menu to access dialing screen. - Page 17 International call 3.1.3 Accessing your voicemail To dial an international call, touch and hold to enter “+”, then enter the international country Voicemails are recorded messages left by incoming callers when calls are missed or forwarded to prefix followed by the full phone number and finally touch voicemail.
- Page 18 3.1.6 During a call 3.1.7 Call settings To adjust the volume during a call, press the Volume up/down key on right side of phone. When in Phone screen or dial pad screen, touch the Menu key to access the following options: New contact Gives you quick access to add a new contact or account to your People address book.
-
Page 19: Wi-Fi Calling
Wi-Fi Calling For security reasons, you’ll be prompted to enable FDN by entering SIM PIN2 which is usually acquired from your service provider or SIM maker. Wi-Fi Calling lets you make and receive voice calls and text /multimedia messages over your Wi-Fi Minute reminder network when your phone is connected to a Wi-Fi network and registered with your wireless carrier's network for Wi-Fi Calling. -
Page 20: Call History Log
Call history log Touch to view your Touch to view your contact groups favorite contacts. You can access your call history log by touching from the Dial screen. Touch on the right side of contact/number to place a call directly. There are three kinds of calls in Call log: Incoming calls (blue arrows) Touch to view the Touch icon to open... - Page 21 3.4.2 Managing contact groups Add to/remove from Favorites To add a contact to favorites, touch a contact to view details then touch to add the contact to Contact groups help you organize your contacts. You can add, remove and view groups in the Contact group screen.
- Page 22 3.4.5 Communicating with your contacts 3.4.6 Contacts importing, exporting and sharing From the contacts list, you can communicate with your contacts by making a call or exchanging This phone enables you to import contacts from SIM/microSD card and export contacts to a microSD messages.
- Page 23 3.4.8 Joining/Separating contacts Turn on/off the sync & Auto-sync Touch an account to enter the account screen, mark/unmark the checkbox(s) to turn on/off the To avoid duplication, you can add any new contact information to existing contacts in a single action. account’s Auto-sync app data.
-
Page 24: Messaging, Email
To communicate with a saved contact, touch contact photo to open Quick Contact panel. Messaging, Email ........For unsaved contacts, touch default photo to add the number to your Contacts. Sending a text message Messaging..................You can create, edit and receive SMS and MMS messages with this phone. To access this feature, touch Messaging icon in Favorite applications tray or Applications menu. - Page 25 Sending a multimedia message Slide show edit screen MMS enables you to send video clips, images, photos, animations, slides and sounds to other compatible mobiles and e-mail addresses. An SMS will be converted to MMS automatically when media files (image, video, audio, slides, etc.) are attached or subject or email addresses are added.
- Page 26 4.1.2 Managing messages 4.1.3 Adjust message settings When receiving a message, an icon will appear on status bar as notification. Drag down the status and touch Settings. Adjust message settings from Messaging application screen, touch Menu icon bar to open the Notifications panel, touch the new message to open and view. You can also access messages using Messaging application, touch message to open for viewing.
- Page 27 Multimedia Message(MMS) Notifications • Group messaging Select to use MMS to send single message when there are multiple recipients. Notifications • Select to display message notifications in status bar. • Request delivery Select to request a delivery report for each multimedia message you send. •...
-
Page 28: Gmail/Email
Gmail/Email • If you do not want to send the mail out right away, you can touch Menu icon and Save draft or touch Back key to save a copy. To view the draft, select Drafts. The first time you set up your phone, you can select to use an existing Gmail or to create a new Email account. - Page 29 Managing Gmails by Labels Gmail settings and select Settings in the Inbox screen. To conveniently manage conversations and messages, you can organize them using a Label. To manage Gmail settings, touch To label a conversation when reading a conversation’s messages, touch and Change labels to General settings assign a label for the conversation.
-
Page 30: Hangouts
Touch an account, the following settings will show: • If the account you entered is not provided by your service provider, you will be prompted to go to the email account settings screen to enter settings manually. Or you can touch Manual setup to •... - Page 31 4.3.1 Chatting with your friends 4.3.4 Settings To start a chat, touch the name of a friend in your Friends list, then type your message and finally A series of settings are available for your selection by touching from the Friends list screen. touch •...
-
Page 32: Calendar, Alarm Clock & Calculator
5.1.2 To create new events Calendar, Alarm clock & Calculator ..You can add new events from any Calendar view. • In portrait mode, touch Menu icon and New event from Calendar screen. • Fill in all required information for this new event. If it is a whole-day event, you can select All day. Calendar .................. -
Page 33: Clock
Touch and drag down the status bar to open the Notifications panel, touch event name to view 5.2.1 To set an alarm Calendar notification list. From the Clock screen, touch to enter the Alarm screen, touch to add a new alarm. The Touch Snooze to turn off all event reminders for 5 minutes. -
Page 34: Calculator
5.2.2 To adjust alarm settings To switch between panels, touch from the basic panel to open the option menu and touch Scientific calculator; or under auto rotation mode, rotate screen automatically to switch between Touch the Menu icon from the Alarm screen. The following options will be available: Basic calculator and Scientific calculator. -
Page 35: Getting Connected
To activate notification when a new network is detected Getting connected ........When Wi-Fi is on and the network notification is activated, the Wi-Fi icon will appear on the status bar whenever the phone detects an available wireless network within range. The following steps activate the notification function when Wi-Fi is on: To connect to the internet with this phone, you can use GPRS/EDGE/3G networks or Wi-Fi. -
Page 36: Chrome
Settings. • Drag down Notifications panel touch and touch You are recommended to use ALCATEL ONETOUCH Bluetooth headsets, which have been tested and proved compatible with phone. You can go to www.alcatelonetouch.com for more information about ALCATEL ONETOUCH Bluetooth headset. -
Page 37: Connecting To A Computer
Connecting to a computer To share your phone's data connection via USB Use the USB cable that along with your phone to connect the phone to a USB port on your computer. With the USB cable, you can transfer media files and other files between micro SD card/internal storage and a computer. -
Page 38: Connecting To Virtual Private Networks
Connecting to virtual private networks To edit/delete a VPN To edit a VPN: Virtual private networks (VPNs) allow you to connect to the resources inside a secured local network from outside network. VPNs are commonly deployed by corporations, schools, and other institutions •... -
Page 39: Google Play Store
Touch a category on Google Play Shop screen to browse its contents. You can also select a Google Play Store ......subcategory if there is any. Within each category you can select to view items sorted by Top paid, Top free, Top grossing, etc Google Play Shop is an online software store, where you can download and install applications and games to your Android Powered Phone. -
Page 40: Manage Your Downloads
Be especially cautious with applications that have access to many functions or to a significant To request a refund amount of your data. Once you accept, you are responsible for results of using this item on If you are not satisfied with the application, you can ask for a refund within 15 minutes of the purchase. your phone. -
Page 41: Multimedia Applications
Update notification Multimedia applications On Google Play Shop screen, touch the top left corner and Settings\Notifications to enable update notification. Auto update Camera ..................To auto update all installed applications, touch the top left corner and Settings\Auto-update apps to enable this function. Your phone is fitted with a Camera for taking photos and shooting videos. - Page 42 To take a picture 8.1.1 Settings in framing mode Before taking a photo/shooting a video, touch the icon to adjust a number of settings in framing The screen acts as the viewfinder. First position the object or landscape in the viewfinder, touch mode.
-
Page 43: Gallery
To view a picture/play a video Gallery .................... Pictures and videos are displayed by albums in Gallery. Gallery acts as a media player for you to view photos and playback videos. In addition, a set of further Touch to return to Touch to open camera. -
Page 44: Youtube
YouTube ..................YouTube is an online video-sharing service where the user can download, share and view videos. It supports a streaming function that allows you to start watching videos almost as soon as they begin downloading from the Internet. To access this function, touch Applications icon from the Home screen, then touch YouTube As an online video service, your phone must have a network connection to access YouTube. -
Page 45: Music
8.3.1 Watch videos 8.4.1 Playing music Touch a song or touch Play from drop-down menu to play the song. Touch a video to play it. In the Playing screen, you can view information and video comments, and also browse links to related videos.You can also rate, share, label as favorite, create a new playlist, etc from this screen. -
Page 46: Videos
8.4.2 Working with playlists Google Maps ......... Playlists allow you to conveniently organize all songs stored in the SD card. You can create a new playlist, add a song to the list, and delete or rename a playlist. Get My Location To create a playlist Touch Recently added from Playlists screen, touch and then Save as playlist, enter the name... -
Page 47: Search For A Location
Touch to show more information To move the map, drag the map with your finger. Star a location Just like bookmarking a web address on the Internet, you can star any position on the map for later use. To zoom in and out of a map, pinch or spread your fingers, or you can also zoom in by double-tapping a location on screen. -
Page 48: Get Driving, Public Transportation Or Walking Directions
Touch the gray star at the top of the screen to star the location. (Or touch a gold star to unstar that • Touch the enter bar to edit your start point by entering an address or selecting a saved item. location.) •... -
Page 49: Others
10.3 Radio ....................Others ............Your phone is equipped with a radio with RDS functionality. You can use the application as a traditional radio with saved channels or with parallel visual information related to the radio program on the display if you turn to stations that offer Visual Radio service. 10.1 File Manager .................. -
Page 50: Setup
Available options: Settings ..........• Save channel Save the current tuned station to the channels list. • Audio mode Listen to the radio using loudspeaker or headset. Exit • Turn off the radio. Drag down Notifications panel and touch and then touch to access Settings. - Page 51 11.7 Mobile networks Touch the Menu icon , and you can view more settings related to your data usage. • Data Connection Data usage is measured by your phone, and your carrier may count differently. Please consider using a conservative limit. Touch to open or close data connection.
- Page 52 11.9 Display • Phone vibrate Mark the check box to vibrate phone for incoming calls. • Volume Touch to set volume for incoming calls, media, alarm and notifications. • Lock screen notifications Mark the checkbox to show notifications on the lock screen. •...
- Page 53 11.12 Applications Device administrators Touch to view or deactivate device administrators. You use the Applications settings to view details about the applications installed on your phone, to manage their data and force them to stop, and to set whether you want to permit installation of Unknown sources applications that you obtain from web sites and emails.
- Page 54 Language • Popup on keypress Touch to select the language and the region you want. Mark the checkbox to popup the key that you touched. • Voice input key Spell checker Mark the checkbox to enable the system to show suggested words. Touch to activate/inactivate voice input key.
- Page 55 11.16 Backup and reset Swype Preferences • Back up my data Settings Mark the checkbox to back up your phone’s settings and other application data to Google Servers, with your Google Account. If you replace your phone, the settings and data you’ve backed up are Vibrate on keypress restored onto the new phone for the first time you sign in with your Google Account.
- Page 56 Factory data reset Automatic date & time Erase all of your personal data from internal phone storage, including information about your Google Mark the checkbox to use network provided time or use GPS provided time. Account, any other accounts, your system and application settings, and any downloaded applications. Automatic time zone Resetting the phone does not erase any system software updates you’ve downloaded or any files on your microSD card, such as music or photos.
- Page 57 11.19 Schedule power on/off Auto-rotate screen Touch to set automatic power on/off time. Mark the checkbox to rotate screen automatically. Speak passwords 11.20 Accessibility Mark the checkbox to speak passwords while typing. You use the Accessibility settings to configure any accessibility plug-ins you have installed on your phone.
-
Page 58: Developer Options
11.21 Developer options Select debug app Touch to select debug app. To access this function, touch Settings\About phone, then touch Build number 7 times. Now Developer options is available. Wait for debugger The Development screen contains settings that are useful for developing Android applications. For Mark the checkbox to wait for a debugger to attach before executing. - Page 59 Show GPU overdraw Strict mode enabled Mark the checkbox to show GPU overdraw. Mark the checkbox to enable strict mode. Once enabled, the screen will flash when applications do long operations on the main thread. Show surface updates Show CPU usage Mark the checkbox to show surface updates.
- Page 60 11.22 About phone Making the most of your phone ... This contains information on items ranging from legal information, model number, firmware version, baseband version, kernel version, build number etc. related to the following: FOTA updates System Updates Using FOTA Upgrade tool you can update your phone's software. Touch to check for system updates.
- Page 61 United States. How to obtain Hardware Service within the terms of this warranty: Create a user profile (alcatel. finetw.com) and then create an RMA for the defective device. Ship the device with a copy of the The limited warranty for your wireless device will be voided if any of the following conditions occur: original proof of purchase (e.g.
-
Page 62: Troubleshooting
• Try selecting the available network(s) manually (see “11.1.7 Mobile networks”) Troubleshooting ........• Try connecting at a later time if the network is overloaded. My phone cannot connect to the Internet • Check that the IMEI number (press *#06#) is the same as the one printed on your warranty card Before contacting the service center, you are advised to follow the instructions below: or box. - Page 63 Check with your operator to make sure that your subscription includes this service. The phone cannot be detected by others via Bluetooth • Make sure this feature does not require an ALCATEL ONETOUCH accessory. • Make sure that Bluetooth is turned on and your phone is visible to other users (see “6.3 Connecting to Bluetooth devices”).
- Page 64 ELECTRONIC DEVICES Safety and Use..........Your wireless handheld portable telephone is a low power radio transmitter and receiver. When it is ON, it receives and also sends out radio frequency (RF) signals. Most modern electronic equipment is shielded from RF energy. However, certain electronic equipment may We recommend that you read this chapter carefully before using your phone.
-
Page 65: Potentially Explosive Atmospheres
POTENTIALLY EXPLOSIVE ATMOSPHERES SAR INFORMATION Turn your phone OFF when in any area with a potentially explosive atmosphere and obey all signs and instructions. Sparks in such areas THIS MODEL PHONE MEETS THE GOVERNMENT’S could cause an explosion or fire resulting in bodily injury or even death. REQUIREMENTS FOR EXPOSURE TO RADIO WAVES. - Page 66 HEARING AID COMPATIBILITY (HAC) FOR WIRELESS FDA CONSUMER UPDATE TELECOMMUNICATIONS DEVICES U.S. FOOD AND DRUG ADMINISTRATION - CENTER FOR DEVICES AND OUR COMMITMENT RADIOLOGICAL We believe that all of our customers should be able to enjoy the benefits of digital wireless technologies. We are committed to providing HEALTH CONSUMER UPDATE ON WIRELESS PHONES a selection of compatible devices for our customers who wear hearing aids.
- Page 67 3. What kinds of phones are the subject of this update? 7. How can I find out how much radiofrequency energy exposure I can get by using my wireless phone? The term “wireless phone” refers here to hand-held wireless phones with built-in antennas, often called “cell,” “mobile,” or “PCS” All phones sold in the United States must comply with Federal Communications Commission (FCC) guidelines that limit radiofrequency phones.
-
Page 68: Fcc Compliance Information
YOU CAN OBTAIN ADDITIONAL INFORMATION ON THIS SUBJECT FROM THE 11. What about wireless phone interference with medical equipment? FOLLOWING SOURCES: Radiofrequency energy (RF) from wireless phones can interact with some electronic devices. For this reason, FDA helped develop a detailed test method to measure electromagnetic interference (EMI) of implanted cardiac pacemakers and defibrillators from wireless AMERICA ACADEMY OF AUDIOLOGY telephones. - Page 69 We will provide you with a complete copy of the corresponding source codes upon request within a period of three years from the distribution of the product by TCT. You may download the source codes from http://sourceforge.net/projects/alcatel/files/. The provision of the source code is free of charge from internet.
Need help?
Do you have a question about the Onetouch Evolve 2 and is the answer not in the manual?
Questions and answers