
Related Manuals for A-rival CarCam


Summary of Contents for A-rival CarCam
- Page 1 Quick Guide / User Information Please read this manual carefully before you use this unit, and keep it well for further checking.
- Page 2 (Important) FCC Verification NOTE: This equipment has been tested and found to comply with the limits for Class B digital device, pursuant to part 15 of the FCC Rules. These limits are designed to provide reasonable protection against harmful interference in a residential installation.
-
Page 3: Table Of Contents
Contents Introduction ................5 Brief Introduction ................ 5 Screen Icons ................5 Getting Started ..............6 Micro SD Card ................7 Charging ..................7 Button Definitions ..............8 Mode Button ................8 LED definitions ................9 How to Record and Take a Photo? ........10 Record Quality ................. - Page 4 Self-timer / photo mode ............20 Interval / Photo mode ............... 20 Image sequence ..............20 White balance ................20 Digital Effect ................21 AE ISO ..................21 AE BIAS ................... 21 Contrast ................... 21 Sharpness ................21 Motion detection ............... 22 G-sensor ..................
-
Page 5: Introduction
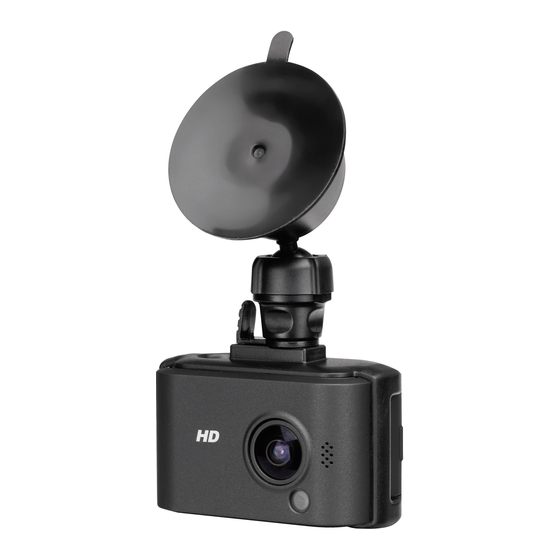
Introduction Brief Introduction Power/Record/Photo Lense Zoom in/ Speaker Fast backward/ Volume +/UP OK/Playback LED indicator Mode/Return Zoom out/ Fast forward/ LED indicator Volume -/Down USB | HDMI Microphone MicroSD card slot Screen Icons 1 2 3 5 6 7 8 1 Mute recording 2 Recording mode 3 Recording resolution... -
Page 6: Getting Started
Getting Started Install batteries Charging Connect the USB cable to camera USB port, insert the charger to socket and wait for 2-3 hours. During charging, the LED is yellow. When power full, the LED light will turn off automatic. Insert Micro SD Card Hold the camera;... -
Page 7: Micro Sd Card
Micro SD Card Select Micro SD Card The memory maximum up to 32 GB. 1 GB can store 7-30 minutes video. For more information about image and quality please refer to details below. Minimum memory 8GB is recommended, 16GB or 32GB will be better for full HD recording. -
Page 8: Button Definitions
Button Definitions [Power /Record/Photo] Power on: press this button and hold it down for 2 seconds to power Power off: in preview mode, press this button and hold it down for 2 seconds. Record: in record mode, press this button, it will start recording. ... -
Page 9: Led Definitions
Exit menu In setting mode, press to exit. File protect In recording, press to protect this video file. This file will not be erased by normal cycle recording. [<</+/ ] and [>>/-/ Digital zoom While in recording mode, no matter preview or recording mode, press [<</+/ ] to zoom in and [>>/-/ ] to zoom no zoom function for... -
Page 10: How To Record And Take A Photo
How to Record and Take a Photo? How to record? Record After the camera is powered on, press power button to start. The red LED is blinking now. Quick Record Before the camera is powered on, hold the power button for 2 seconds, it will power on and start recording. -
Page 11: Record Quality
Record Quality Resolution and quality decide the capacity of recording. Please read it carefully. Video quality Resolution 4007kbps 6270kbps 8334kbps 720p (30 min/GB) (20 min/GB) (15 min/GB) 8109kbps 10284kbps 12361kbps 1080p (15 min/GB) (11 min/GB) (9min/GB) Photo quality Photo quality Photo resolution Size 3.5M... -
Page 12: Install In Your Car
Install in your car Speed limit It will protect you from overspeeding. This function needs to work with GPS for speed test. When the real speed is beyond what you set in the menu, the GPS coordinator stamp will hide in the video. The default is 120KPK.you can change it with 5KPH interval. -
Page 13: Basic Operations
Basic operations How to make it? 1. Use your computer to create a “.txt” in your SD card a) Make a new folder [SYS] under the root of your SD card. b) Make a new.txt file under folder [SYS]. c) Input your car plate No. d) Choose “save as…”, and select Code to be [UNICODE] e) Name it “ID”. -
Page 14: File Protection
File protection 1. How to protect it? a) From G-Sensor If the G-Sensor detected movement, it will start recording and protect this video file. There will be [L] on the screen. This video will not be erased by normal cycle recording. b) Manual During recording, press [Mode/Return] button, your file will be locked from being deleted. -
Page 15: Mute Recording
Mute recording If you don't want to record your voice, just press the [OK] Button. There will be a mute icon on the screen. It will stop to record any sound now. How to use the GPS player? Installation 1) Connect it to computer via a USB cable. 2) Find the player .rar, copy it to your computer. - Page 16 Add video a. Press to add video folder (Refer to Pic2) b. Double click the video to play (Refer to Pic3) Pic2 Pic3...
-
Page 17: Settings
Settings Video settings 01/04 RESOLUTION 1920X1080P30 REC SCENE AUTO QUALITY ANTI-GLARE SPLIT MODE 5 MIN. MODE EXIT Resolution You can choose among 1920×1080P30, 1920×1080P25, 1280×720P60, 1280×720P50, 1280×720P30, 1280×720P25, 848×480P60, 848×480P50, and 320 × 240P120. Between 30fps and 25fps, which one should I choose? If you have PAL TV system in your country, please set it in 30fps. -
Page 18: Quality
Quality You can choose among H, M, L. For bitrate information, please check below. Resolution Quality Bitrate Mbit/s 1920×1080P30|25 1280×720P30|25 848×480P65|50 320×240P120 Anti-glare To see the car plate of the front car much clearer, try to turn it on. Split mode This is to set the file segment, so it will be much easier to share the file or upload. -
Page 19: Record Loop
Please note if you turn on the [Record Loop], then [split mode] will not work. RECORD LOOP VIDEO ROTATION PHOTO SIZE CAPTURE SCENE AUTO SELF CAPTURE AUTO MODE EXIT Record loop This is to set the loop recording on and set each file segment. There will be no gap between different video segments. -
Page 20: Capture Scene
Capture scene This is to set the photo scene to get better photos. You can choose among [Auto], [Sunset], [Portrait], [Landscape], [Sports], [Night], [Spotlight], [Water], [Sand Snow]. Self-timer / photo mode Here is a time for the self-timer can be set. To switch on, choose between 5, 10, 20, 30 or 60 seconds. -
Page 21: Digital Effect
Digital Effect To get a different style of your video, try the digital effects. You can choose Art, Sepia, Negative, Black & White, Vivid, OFF. AE ISO Change the ISO for photos and videos. You can choose among 100, 200, 400, 800, 1600 and Auto. -
Page 22: Motion Detection
Motion detection Turn on, the device will record the object movement, last one minute. G-sensor This is to change the sensitivity of the G-sensor. You can choose from 1 to 6 and OFF. 1 means it is very sensitive. Normal setting for G-Sensor can be 3 GPS switch This is to turn ON/OFF the GPS. -
Page 23: System Settings
System settings Car ID Input your car plate number into video. Please refer to page [Car plate stamp] for operation. 01/03 CAR ID QUICK RECORD CAR MODE STORAGE SELECT INTERNAL CARD GPS OSD GPS/SPEED MODE EXIT QUICK RECORD You can choose between ON and OFF. The record will start automatically after switch on the camera. -
Page 24: Time Stamp
02/03 TIME STAMP REC LED LCD OFF POWER OFF 3 MIN. MICROPHONE MODE EXIT Time Stamp You choose ON and OFF. If it is ON, it will date in Month/Date/Year mode and time on the video. REC LED You can choose between ON and OFF. If you set ON, the LED on frontside will flash while recording. -
Page 25: Volume
03/03 VOLUME FLICKER 50HZ TV TYPE NTSC TIME AND DATE 18.12.2012 11:07 FORMAT EXIT MODE Volume You can turn the beep volume from 1 to 3 and OFF. [3] means maximum. Flicker It is a setting of your light frequency. Choose between 60Hz and 50Hz. TV type If you want to watch video on TV, select the right TV type between NTSC and PAL. -
Page 26: Default Setting
DEFAULT SETTING FIRMWARE 107AB165/21207 LANGUAGE ENGLISH MODE EXIT Default setting This will restore all of the settings to factory default. If you find strange thing happen, try this. Firmware It tells the firmware version and product information. Better to help your check the quality problems. -
Page 27: Accessories
Accessories What’s in the package? Window mount Car Charger USB_Cable Camera GPS-Cable User Manual with integrated GPS module... -
Page 28: Specification
Specification Chipset Ambarella A2S70 1/2.7“ 2.1M Sensor Image Sensor 1920x1080 (30/25fps) | 1280x720 (60/50fps) | Video Resolution WVGA (60/50fps) | QVGA (120fps) Video Record Format .mp4 Photo Resolution 0,9 MB /2 MB /3 MB /3,5 MB Photo Record Format .JPG Lens Specs F/NO=2.8 f=2.8 Lens Angle... -
Page 29: Faq
Q:It won't turn on! A: Try turning it on and off again. Has the camera been left on/recording for a while? Is it charged? If not, check out “You got the Power: Charging the Battery”. Also, try to charge from a computer's USB socket. - Page 30 Guarantee Please keep the proof of purchase for this device for the entire duration of the guarantee period, as it must be produced in the event of any claim. You (as the end user) receive a 36-month guarantee from the date of sale. The article has been manufactured using the most modern production methods and subjected to strict quality controls.
Need help?
Do you have a question about the CarCam and is the answer not in the manual?
Questions and answers