Advertisement
Quick Links
IMPORTANT
4. Never operate this appliance if it has a
damaged cord or plug, if it is not work-
SAFETY
ing properly, or if it has been dropped or
damaged, or dropped into water. Do not
INSTRUCTIONS
attempt to repair the appliance. Incorrect
reassembly or repair could cause a risk
When using electrical appliances, especially
of fire, electric shock, or injury to persons
when children are present, basic safety pre-
when the appliance is used. Return the
cautions should always be taken, including
appliance to an authorized service center
the following:
for examination and repair.
READ ALL INSTRUCTIONS
5. Keep the cord away from heated surfaces.
Do not allow cord to contact heated surfaces.
BEFORE USING
Do not pull or twist cord. Let appliance cool
completely before putting away. Loop cord
DANGER -
Any appliance is electrically
loosely around appliance when storing.
live even when the switch is off.
6. This appliance has a polarized plug (one
To reduce the risk of death by electric shock:
blade is wider than the other). As a safety
1. Always unplug appliance immediately
feature, this plug will fit in a polarized outlet
after using.
only one way. If the plug does not fit fully in the
2. Do not place or store appliance where it can
outlet, reverse the plug. If it still does not fit,
fall or be pulled into a tub or sink.
contact a qualified electrician. Do not attempt
3. Do not place in, or drop into water or other
to defeat this safety feature.
liquids.
7. Never drop or insert any object into any
4. If an appliance falls into water, unplug it
opening.
immediately. Do not reach into the water.
8. Do not use outdoors or operate where aero-
sol (spray) products are being used or where
WARNING -
To reduce the risk of burns,
oxygen is being administered.
electrocution, fire, or injury to persons:
9. Do not use an extension cord to operate
1. This appliance should never be left un-
appliance.
attended when plugged in.
10. Surfaces of this appliance may be hot
2. Close supervision is necessary when
when in use. Do not let heated surfaces touch
this appliance is used by, on, or near chil-
eyes or skin.
dren or individuals with certain disabilities.
11. Do not place the steam nozzle directly on
Unsupervised use could result in fire or per-
any surface or on the appliance power cord
sonal injury.
while it is hot or plugged in.
3. Use this appliance only for its intended use
12. Unplug this appliance before filling or
as described in this manual. Do not use attach-
emptying. Do not overfill.
ments not recommended by the manufacturer.
13. Do not operate steamer without properly
filling the water container.
FOR HOUSEHOLD USE ONLY
14. Never yank cord to disconnect from
outlet; instead, grasp plug and pull to
FILLING INSTRUCTIONS
disconnect.
1. Place the unit on its back on a flat and stable
15. Burns could occur from touching hot parts,
surface.
hot water, or steam. Use care when removing
water reservoir or when you turn a steam
appliance upside down – there may be hot
water in reservoir. Always position steamer
head away from you and any other person
when turning on.
16. To reduce likelihood of circuit overload, do
not operate another high wattage appliance on
the same circuit.
17. When installing or removing attachments,
please be sure the unit is off and no steam is
being released to avoid contact with hot water.
18. Use caution when installing or removing
2. While holding the water reservoir with one
an attachment as it may contain hot water
hand, move the release switch up toward the
from condensation. Ensure that the attach-
steam head nozzle.
ment is dry or cooled off to avoid contact with
3. Pull the reservoir out, away from the body.
hot water.
4. Turn the reservoir over, revealing the rubber
inlet cover.
SAVE THESE
5. Open the inlet cover and fill the reservoir
with everyday tap water (filtered water may
INSTRUCTIONS
reduce hard water problems).
6. Close the inlet cover and return the reser-
voir to its place, making sure that it is secure.
IMPORTANT
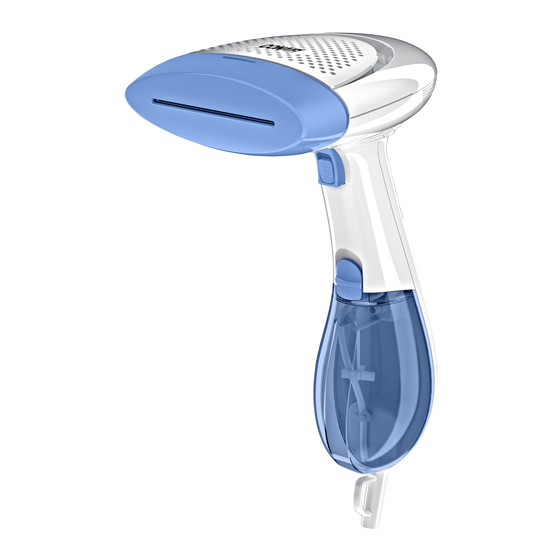
GETTING TO KNOW YOUR STEAMER
Green ready
light indicator
Steam trigger with built-in
switch for constant steam
3 removable attachments
Brush
Soft Cushion Brush
Meijer.com
Red power
light indicator
Dual heat–
Slide switch to adjust
temperature to Low or High
Water reservoir
release switch
Creaser
Easy-to-fill
water reservoir
9-ft. power cord
Advertisement

Summary of Contents for Conair GS2
- Page 1 Meijer.com IMPORTANT IMPORTANT GETTING TO KNOW YOUR STEAMER 4. Never operate this appliance if it has a 13. Do not operate steamer without properly damaged cord or plug, if it is not work- filling the water container. FOR HOUSEHOLD USE ONLY SAFETY ing properly, or if it has been dropped or 14.
- Page 2 LIMITED ONE-YEAR WARRANTY warranty gives you specific legal rights, and ™ you may also have other rights, which vary Conair will repair or replace (at our option) your 1. To prepare your fabric for steaming, brush INSTRUCTIONS fabric steamer from state to state.


Need help?
Do you have a question about the GS2 and is the answer not in the manual?
Questions and answers