Table of Contents
Advertisement
.......................................................................................
1.1 General Features ...........................................................
1.2 Accessories .......................................................................
2.1 Front Panel ................................................................................................5
2.2 Rear Panel .................................................................................................6
2.3 Remote Control Unit ...................................................................................7
3.1 Connecting to TV ......................................................................................9
3.2 Connecting to Dish LNB ...........................................................................10
4.1 Installation...................................................................................12
4.2 Channel Manager.........................................................................17
4.3 System Setting................................................................................18
4.4 Game.................................................................................................21
4.5 Other Useful Information................................................................22
5.1 Problem Solving..........................................................................28
5.2 Menu Screen Structure................................................................29
5.3 Glossary.......................................................................................30
Table of Contents
2
................
..
....
..3
...............
......4
1
Advertisement
Table of Contents

Subscribe to Our Youtube Channel
Summary of Contents for Tiger T6
-
Page 1: Table Of Contents
Table of Contents ..................Safety Precaution 1. Reference ....1.1 General Features ................1.2 Accessories ................4 2. Basic Function 2.1 Front Panel ....................5 2.2 Rear Panel ....................6 2.3 Remote Control Unit ...................7 3. Installation and Connection 3.1 Connecting to TV ..................9 3.2 Connecting to Dish LNB ................10 4. -
Page 2: Safety Precaution
Safety Precaution This STB has been designed and manufactured to satisfy the international safety standards. Please read the following safety precautions carefully before operating this receiver. Main Supply: Before operating, please check the units operating voltage is 90~250V AC 50/60Hz. Overload: Do not overload a wall outlet, extension cord or adapter, neither use damaged power cord or touch it with wet hand as this may result in electric... -
Page 3: Reference
1. Reference 1.1 General Features MPEG-2 & Fully DVB Compliant USB 2.0 OTG supports PVR, Playing MP3, MPEG1/2 Movie, JPEG/BMP,Down- loading Software, Uploading Database. PLL RF-Modulator UHF 21~69 with PAL B/G,I,D/K Multi LNB Control by DiSEqC 1.0,1.2,1.3(USALS) SCPC/MCPC Receivable from C / Ku-Band Satellites Digital Tuner with Loop-Through PAL/NTSC Conversion Variable Aspect Ratio (4:3,16:9) for TV... -
Page 4: Accessories
1.2 Accessories Users manual Remote Control Unit A/V Cable Batteries User Manual User Manual Battery Remote control A/V Cable Figure 1. Accessories... -
Page 5: Basic Function
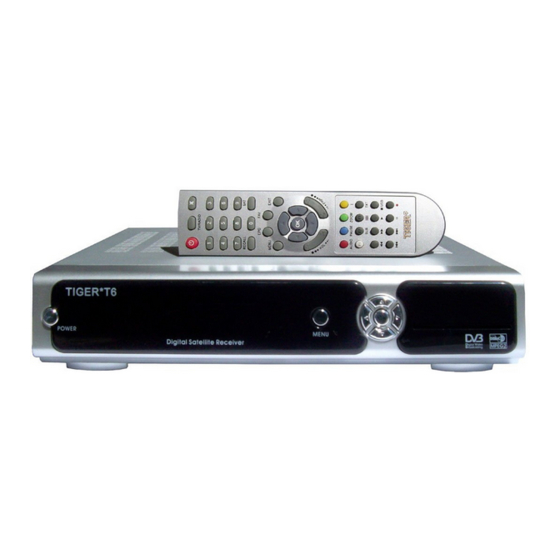
2. Basic Function 2.1 Front Panel Figure 2. Front Panel 1. Power Button The POWER button is used to turn the power on or to make it on Standby Mode. 2. MENU Button Activate the main menu in viewing mode, or exit all menu. 3. -
Page 6: Rear Panel
2.2 Rear Panel LNB IN Figure 3. Rear Panel 1. LNB IN 13/18V 500mA Max Connect the Satellite Dish LNB. 2. LOOP OUT Output the Dish LNB IN signal. 3. AUDIO, VIDEO Connect to Audio/Video of TV. Connect Yellow to Video port, connect Red and White to Audio Right and Audio Left. -
Page 7: Remote Control Unit
2.3 Remote Control Unit(RCU) You can control this receiver by this remote controller with full function. 1. POWER : Switch the receiver on or set it to standby mode. 2. MUTE : Turn the sound On/Off. 3. NUMERIC KEY (0~9): Change program or input number. - Page 8 21. F3.PIP : Activate Multi picture menu and select picture 22. TTX : Show the teletext content if teletext is transmitted. : Fast rewind : Fast forward : Start playing / Release pause : Play previous item. : Play next item. : Pause / Time-shift 29.
-
Page 9: Installation And Connection
3. Installation and Connection The following diagram shows you the connections among receiver, TV, LNB and other equipment, please read this first if you are not sure about the connection, and it will guide you to the correct connection. 3.1 Connecting to TV AUDIO VIDEO TV SCART RF IN LNB IN RF IN... -
Page 10: Connecting To Dish Lnb
3.2 Connecting to Dish LNB You can connect one fixed dish LNB directly to the LNB IN, or connect at least two dish LNB by DiSEqC Switch, you can also connect to HH mount dish LNB. DISH HH MOUNT DISH LNB IN COMPUTER Figure 6. - Page 11 LNB 2 LNB 3 LNB 1 LNB 4 DiSEqC LNB IN Figure 7. Connecting to Dish LNB...
-
Page 12: Installation And Operation
4. Installation and Operation After connecting the receiver to other required equipment, turn on the receiver, it will be main menu at the first startup, you need to follow the proce- dure to setup your receiver to search the channel. --Menu Guide-- --Main Menu-- Press MENU button to activate main menu,... - Page 13 A: Antenna setup Press Right button on RCU and move to the antenna setting,here to setup the correct LNB frequency,switch Type(None, LNB 1...LNB 4,burst A,burstB,Auto). B : LNB frequency and power Here you need to check the LNB frequency according to your antenna,set the correct frequency or define yourself, and keep LNB power be 13V/18V.
- Page 14 D :Multi Satellites Search After selecting satellites,you can press Blue button to start search channels. During searching the TV channel and Radio channel will be listed separately. E: Transponder list Here select transponder list by button,press OK button.Here you can Add, Edit, Delete transponder under the satellite you selected.
- Page 15 E-4.2: Rename You can press Yellow button to rename the selected channel. E-4.3: delete Press the Red button to delete the selected channel . F: Motorised System If you connect receiver to DiSEqC1.2 or DiSEqC1.3 antenna,set Motorised system to DiSEqC1.2 or USALS, Here press OK button to enter motor system.
- Page 16 Command Type Save Position: Save the current position. Go to Position: Press OK button to move the dish to the stored position. Go to Reference: Press OK button to move the dish to reference 0 position. Go to X.X (9.9): If you use USALS and select the Motor Mode to USALS, here one more option you can move the dish to exact position of the satellite.
-
Page 17: Channel Manager
4.2. Channel Manager Press Channel Manager in the main menu, you will get this window, here you can edit TV channels and Radio channels, sort channels and upgrade channels via SDX. A: Edit Channels Select Edit channel, you will go to the channel edit menu. -
Page 18: System Setting
D: Sort Channel you can select <Satellite > to sort channels by satellite,select <Transponder>to sort channels by transponder ,select <Alphabet >to sort channels by alphabet ,and select <Original channel list> to sort channels back to original channel list. E: Delete Satellite Channels After select one satellite, if you press OK ,All channels of this satellite will be deleted. - Page 19 A:System You can setup the menu language, audio language,RF, according to the standard of your country. B: OSD Here you can set some OSD options. Such as Menu Color, Transparency, Time out, and TV system, 4:3 and 16:9. C: Timer Adjust Here you can set Timer, Event Timer and Sleep Timer.
- Page 20 Timer Mode: <Auto> Auto detect timer from EPG time <Manual> Set the time by manual. Time zone: Select you the Time zone from the time difference. Summer Time: If you region need summer time to correct the current time, please make it ON.Source: <TV> Select channel from TV list <RADIO>...
-
Page 21: Game
D: Update Via SatcoDX If you have subscription to TELE-Satellite, then you can use this function to upgrade the channel data by RS232 through the computer. E: USALS Setup If you use USALS, you have to setup your Local parameters. F: About STB Here is some information about this STB, including software version, hardware version... -
Page 22: Other Useful Information
4.5. Other Useful Information This will guide you on how to use general info while watching TV program or listening Radio program. TV/RADIO: To Switch between TV and Radio. RECALL: Press Recall button you will get the viewing history of last 16. Press SAT button on the remote control, you will get this menu which contains the satel- lites you searched and stored, select one... - Page 23 EPG: Press EPG button on remote control, you can get the electronic program guide of seven days if available. FAV: In viewing mode, you can get the favorite channel group by pressing FAV, press Red button to change category Channel List-OK In viewing mode press OK button and you will get this window.
- Page 24 PAUSE: If a USB disk is connected, it will initialize Time-shift, otherwise it will freeze the picture. ZOOM: Picture Zooming function. In the viewing mode when you press INFO button, the info bar will pop up, it contains satellite and channel information, detailed EPG info will display in the menu if press INFO again.
- Page 25 In viewing mode ,press F3 you will get the multi picture selection ,select one and press ok ,multi picture will be displayed. Move to select channel,press F3 again to get that selected channelpop out and it is living ,press OK to display it in full screen or exit to select other channel.
- Page 26 A : Play Stream OK : View play list / Play the selected file in play list YELLOW_KEY : View play list : Play the selected file in play list / Resume playing file /USB : Stop playing file : Play the previous item : Play the next item / PAUSE : Pause AUDIO : Switch audio channel...
- Page 27 D : Play MP3 OK : Play the selected file in play list : Play the selected file in play list / Resume playing file /USB : Stop playing file : Play the previous item : Play the next item / PAUSE : Pause : Adjust volume EXIT : Exit playing state and return to file list menu...
-
Page 28: Additional Information
5. Additional Information 5.1 Problem Solving You might meet abnormal working of this STB with various reasons, check the following which may help you. What to do Problem Possible causes Check if the mains supply cable LED on the front panel Mains supply cable is is plugged into the power socket. -
Page 29: Menu Screen Structure
5.2 Menu Screen Structure Menu Navigator Main Menu Installation Channel Manager System Setting Games Code Code Code System Setting Channel Manager Games Installation System Edit Channel Hexa Antenna Setting Edit Favorite Mine CA Menu Timer Adjust Parental Control Update via satcoDX Sort Channels USALS Setup Del Satellite Channels... -
Page 30: Glossary
5.3 Glossary Antenna A device that collects and radiates electromagnetic waves. Includes a satellite dish and abroadband antenna. DiSEqC DiSEqC(Digital Satellite Equipment Control)system, it is a communication bus between satellite receivers and peripheral equipment using only the existing coaxial cable. The Digital Video Broadcast group was created to establish a technical framework for the introduction of digital video broadcasting systems. - Page 31 Polarisation Polarisation allows several programmes to be fit into the same frequency band. The signals from a satellite are transmitted either with linear (vertical or horizontal) polarisation or circular (right or left) polarisation. QPSK(Quaternary Phase Shift Keying) Phase-shift keying in which four different phase angles are used. Transponder An automatic device that receives, amplifies and retransmits a signal on a different frequency.
Need help?
Do you have a question about the T6 and is the answer not in the manual?
Questions and answers