Advertisement
Quick Links
Rion GH40 Greenhouse Assembly Instructions
Modular greenhouses, garden sheds, outdoor garden elements and accessories
Designed and manufactured by Rion
A Member of the Plasson Group
International Headquarters
North American Distributor
Rion Ltd.
Systems Trading Corporation
Cabri 25120
Israel
450 Seventh Ave. Suite 2803
New York, NY 10123
Tel: +972-4-995-2666, Fax: +972-4-995-2677
For Customer Service (Toll-Free) 877-407-9100 Ext. 1
To E-Mail: customerservice@stcaustin.com
email: rion@rion.com
homepage: http:\\www.rion.com
To Send a Fax: 512-407-9242
Advertisement

Subscribe to Our Youtube Channel
Related Manuals for Rion GH40


Summary of Contents for Rion GH40
- Page 1 Rion GH40 Greenhouse Assembly Instructions Modular greenhouses, garden sheds, outdoor garden elements and accessories Designed and manufactured by Rion A Member of the Plasson Group International Headquarters North American Distributor Rion Ltd. Systems Trading Corporation Cabri 25120 Israel 450 Seventh Ave. Suite 2803...
- Page 2 © 2006 Rion Ltd.
-
Page 3: Safety First
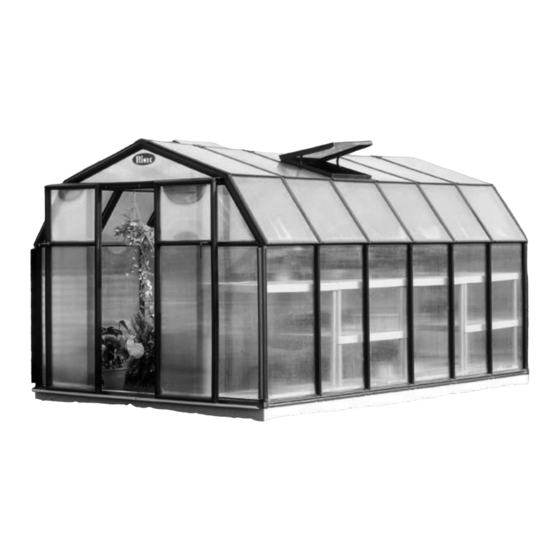
• We recommend that you use gloves during assembly. • Rion is not responsible for the misuse of tools or parts. • If local building codes require permits or licenses make sure that they are acquired before beginning. - Page 4 Introduction Congratulations on purchasing a Rion Greenhouse. We are certain that it will give you many happy years of pleasure in your garden. The drawings in this manual are designed for the greenhouse owner who has purchased a GH44, which consists of one front unit (GH40A), and one back unit (GH40B).
- Page 5 Prepare a Foundation for Your Greenhouse Before assembling your new Greenhouse a proper foundation must be prepared. A number of anchoring options are possible, based on wind and ground conditions in your area. Make sure that you have checked with your local authorities regarding any required building permits.
- Page 6 Identify Greenhouse Parts Because of the Greenhouse modularity, you may purchase additional GH40M modules to fit your needs. GH40 Greenhouse Assembly Instructions...
- Page 7 Take a minute to make sure you have everything you need. Note: Do not proceed with assembly if any parts are missing. The part code is stamped on each connector. Profiles are listed in order by size, largest to smallest. Panels are identified with stickers.
- Page 8 PN18 Door Panel (bottom) - (57.1 × 118.7 cm) (1' 10A" × 3' 10C") WIN33 Roof Vent WINH31 Roof Vent Handles (packages of 2) GSC10 Back Pediment Strengthening Bar GSC12 Front Pediment Strengthening Bar (inside E12) GH40 Greenhouse Assembly Instructions...
- Page 9 Part Code GH44 GH46 GH48 Description Door Sealer (roll) Flexible Glazing Seal (roll) RA Glazing Element (57.3 cm, 1' 10L") RB Glazing Element (84.8 cm, 2' 9E") RB Glazing Element (80 cm, 2' 7A") RB Glazing Element (52 cm, 1' 8A") RC Glazing Element (95.5 cm, 3' 1F") RC Glazing Element (66.6 cm, 2' 2B") RC Glazing Element (58 cm, 1' 10N")
- Page 10 Make sure that the frame is perfectly rectilinear by measuring the diagonals and verifying that they are the same. Use a spirit level to make sure that the frame is level. GH40 Greenhouse Assembly Instructions...
- Page 11 Secure the Frame to the Foundation Make sure you have the proper hardware before beginning this step. (See page 3.) Note: If you are using a modular base and filler you may assemble the greenhouse on a hard surface and move it to its final position when you have finished.
- Page 12 Lock the panel with pins. Assemble the lower left pediment in the same way. Note the “UP” sticker on the E4R profile. Remove the ID strips from the panels. GH40 Greenhouse Assembly Instructions...
- Page 13 Back Pediment Put ST7 couplers on the PN8R and PN8L pediment panel halves with the ID plastic strip facing outside. The tops of each coupler are trimmed to match the angle of the panel. Slide the two pediment panel halves together.
- Page 14 completed ribs according to the number of modules you have purchased and lock them into place with pins. Complete the roof by attaching the back pediment. Lock it into place with pins. GH40 Greenhouse Assembly Instructions...
- Page 15 Cover the Greenhouse Roof Step in the framework of the lower window to reach the top of the roof conveniently. Place RA1 glazing elements on the top of the roof by placing one end in the top channel and pushing it down along the length of ...
- Page 16 Remove the cut portion. Note: Additional Roof Vents are available as an option. Caution: Close windows in high winds. Automatic window openers are available as an option. GH40 Greenhouse Assembly Instructions...
Need help?
Do you have a question about the GH40 and is the answer not in the manual?
Questions and answers