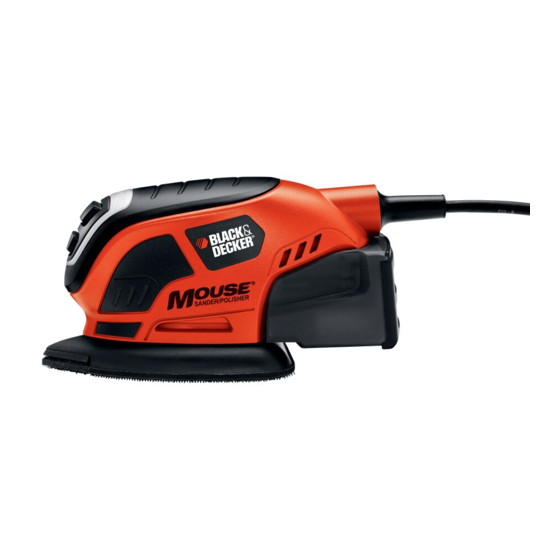
Black & Decker MOUSE MS800 Instruction Manual
Detail sander polisher
Hide thumbs
Also See for MOUSE MS800:
- Instruction manual (8 pages) ,
- Instruction manual (29 pages) ,
- Instruction manual (29 pages)
Advertisement
Table of Contents
- 1 Instruction Manual
- 2 Safety Guidelines - Definitions
- 3 General Power Tool Safety Warnings
- 4 Specific Safety Rules
- 5 Functional Description
- 6 Personal Safety
- 7 Operating Instructions
- 8 Troubleshooting
- 9 Maintenance
- 10 Service Information
- 11 Full Two-Year Home Use Warranty
- Download this manual
See also:
Instruction Manual
®
MOUSE
INSTRUCTION MANUAL
Thank you for choosing Black & Decker! Go to
www.BlackandDecker.com/NewOwner
to register your new product.
PLEASE READ BEFORE RETURNING
THIS PRODUCT FOR ANY REASON:
If you have a question or experience a problem with your
WWW.BLACKANDDECKER.COM/INSTANTANSWERS
If you can t find the answer or do not have access to the internet,
call 1-800-544-6986 from 8 a.m. to 5 p.m. EST Mon. - Fri
Please have the catalog number available when you call.
KEY INFORMATION YOU SHOULD KNOW:
• Do not push down—let the sander do the work.
• Extended drywall sanding is not recommended for this product.
SAVE THIS MANUAL FOR FUTURE REFERENCE.
VEA EL ESPAÑOL EN LA CONTRAPORTADA.
POUR LE FRANÇAIS, VOIR LA COUVERTURE ARRIÈRE.
INSTRUCTIVO DE OPERACIÓN, CENTROS DE SERVICIO Y PÓLIZA DE GARANTÍA.
ADVERTENCIA: LÉASE ESTE INSTRUCTIVO ANTES DE USAR EL PRODUCTO.
SAVE THIS INSTRUCTION MANUAL FOR FUTURE REFERENCE.
DETAIL SANDER POLISHER
Catalog Number MS800
Black & Decker purchase, go to
for instant answers 24 hours a day.
to speak with an agent.
Advertisement
Table of Contents

Subscribe to Our Youtube Channel
Summary of Contents for Black & Decker MOUSE MS800
-
Page 1: Instruction Manual
® MOUSE DETAIL SANDER POLISHER INSTRUCTION MANUAL Catalog Number MS800 Thank you for choosing Black & Decker! Go to www.BlackandDecker.com/NewOwner to register your new product. PLEASE READ BEFORE RETURNING THIS PRODUCT FOR ANY REASON: If you have a question or experience a problem with your Black &... -
Page 2: Safety Guidelines - Definitions
SAFETY GUIDELINES - DEFINITIONS It is important for you to read and understand this manual. The information it contains relates to protecting YOUR SAFETY and PREVENTING PROBLEMS. The symbols below are used to help you recognize this information. DANGER: Indicates an imminently hazardous situation which, if not avoided, will result in death or serious injury. -
Page 3: Specific Safety Rules
d) Remove any adjusting key or wrench before turning the power tool on. A wrench or a key left attached to a rotating part of the power tool may result in personal injury. e) Do not overreach. Keep proper footing and balance at all times. This enables better control of the power tool in unexpected situations. - Page 4 • ANSI Z87.1 eye protection (CAN/CSA Z94.3) • ANSI S12.6 (S3.19) hearing protection • NIOSH/OSHA/MSHA respiratory protection • Sanding of lead-based paint is not recommended. See Sanding Lead Based Paint for additional information before sanding paint. • Clean your tool out periodically. Extension Cords When using an extension cord, be sure to use one heavy enough to carry the current your product will draw.
-
Page 5: Functional Description
Functional Description A. Switch “ON” B. Switch “OFF” C. Dust Canister D. Removable Pad Tip E. Hook and Loop Sanding On Off Switch Extra Tips Interrupteur Pointes supplémentaires Interruptor de Encendido Puntas adicionales Y Apagado Rotate 180° Hook and Loop Pad Faire Tourner sur 180°... -
Page 6: Personal Safety
Other Important Safety Warnings and Instructions Sanding Lead Based Paint Sanding of lead based paint is NOT RECOMMENDED due to the difficulty of controlling the contaminated dust. The greatest danger of lead poisoning is to children and pregnant women. Since it is difficult to identify whether or not a paint contains lead without a chemical analysis, we recommend the following precautions when sanding any paint: Personal Safety •... -
Page 7: Operating Instructions
Motor Be sure your power supply agrees with nameplate marking. 120 Volts AC only means your tool will operate on standard 60 Hz household power. Do not operate AC tools on DC. A rating of 120 volts AC/DC means that you tool will operate on standard 60 Hz AC or DC power. -
Page 8: Troubleshooting
• Push the other end of the contour sanding piece until it clicks into place. • To remove the contour sanding piece, push it forward then pull the rear end out of the contour holder (fig. 7). Fitting a Sanding Sheet Onto a Contour Sanding Piece (Fig. 8) •... -
Page 9: Service Information
sander. Sandpaper without holes will not allow dust to enter the canister. The hook and loop pad and individual bases are replaceable parts. If they become worn, contact your local service center. For more information call: 1-800-544-6986. WARNING: The use of any accessory not recommended for use with this tool could be hazardous.


Need help?
Do you have a question about the MOUSE MS800 and is the answer not in the manual?
Questions and answers