Table of Contents
Advertisement
Quick Links
Advertisement
Table of Contents

Subscribe to Our Youtube Channel
Related Manuals for Samsung EK-GC200


Summary of Contents for Samsung EK-GC200
- Page 1 EK-GC200 User Manual www.samsung.com...
-
Page 2: About This Manual
• I mages and screenshots may differ in appearance from the actual product. • C ontent may differ from your device depending on the software version and is subject to change without prior notice. For the latest version of the manual, refer to the Samsung website, www.samsung.com . - Page 3 No part of this guide may be reproduced, distributed, translated, or transmitted in any form or by any means, electronic or mechanical, including photocopying, recording, or storing in any information storage and retrieval system, without the prior written permission of Samsung Electronics.
- Page 4 About this manual Trademarks • S AMSUNG and the SAMSUNG logo are registered trademarks of Samsung Electronics. ® • B luetooth is a registered trademark of Bluetooth SIG, Inc. worldwide. • A dobe, the Adobe logo, and Photoshop are either registered trademarks or trademarks of Adobe Systems Incorporated in the United States and/or other countries.
-
Page 5: Health And Safety Information
About this manual Health and safety information Always comply with the following precautions and usage tips to avoid dangerous situations and ensure peak performance of your device. Some content may be not applicable to your device. Warning: situations that could cause injury to yourself or others Do not disassemble or attempt to repair your device. - Page 6 If liquid or foreign objects enter your device, immediately disconnect all power sources, such as the battery or charger, and then contact a Samsung service centre. Comply with any regulations that restrict the use of a device in a certain area.
- Page 7 About this manual Do not use or store your device in areas with high concentrations of dust or airborne materials. • D ust or foreign materials can cause your device to malfunction and may result in fire or electric shock. Prevent the multipurpose jack and the small end of the charger from contact with conductive materials, such as liquids, dust, metal powders, and pencil leads.
- Page 8 They may also cause a fire or cause the battery to explode. • U se only Samsung-approved battery and charger specifically designed for your device. Incompatible battery and charger can cause serious injuries or damage to your device.
- Page 9 Do not use the device if the screen is damaged. • I f the glass or acrylic parts are broken, visit a Samsung service centre to have the device repaired. Check that the device is operating properly before use.
- Page 10 Consult the manufacturers of your electronic devices to solve any interference problems you experience. To prevent unwanted interference, use only Samsung-approved devices or accessories. Use your device in the normal position.
- Page 11 If you notice strange smells or sounds coming from your device or the battery, or if you see smoke or liquids leaking from the device or battery, stop using the device immediately and take it to a Samsung Service Centre. • F ailure to do so may result in fire or explosion.
- Page 12 About this manual Do not use your device with the flap open. • T he battery may fall out of the device, which may result in damage or malfunction. Use caution when exposed to flashing lights. • W hile using your device, leave some lights on in the room and do not hold the screen too close to your eyes.
- Page 13 About this manual Use caution when using the device while walking or moving. • A lways be aware of your surroundings to avoid injury to yourself or others. • M ake sure the headset cable does not become entangled in your arms or on nearby objects.
- Page 14 Data transference and your responsibilities Protect your personal data and prevent leakage or misuse of sensitive information. • W hile using your device, be sure to back up important data. Samsung is not responsible for the loss of any data.
-
Page 15: Table Of Contents
Table of Contents Getting started Using the NFC Feature (Tag & Go) Transferring files Device layout Securing the device Buttons Upgrading the device Package contents Installing the battery Charging the battery Camera: Basic functions Checking the battery charge status Launching Camera Inserting a memory card Taking photos Attaching a hand strap... -
Page 16: Table Of Contents
Web & network AF area 113 Internet One touch shot 114 Chrome Face detection 115 Bluetooth AE Bracket set 116 Samsung Link OIS (anti-shake) 118 Group Play Video recording options Sharing options Camera settings Application & media stores 120 Play Store... -
Page 17: Table Of Contents
Table of Contents Utilities Appendix 123 S Memo 150 Troubleshooting 126 S Planner 157 Using or storing the device 128 Dropbox 161 About the battery 128 Cloud 164 Malware and viruses 129 Drive 130 Clock Cleaning the device 132 Calculator 132 S Voice 133 Google 133 Voice Search... -
Page 18: Device Layout
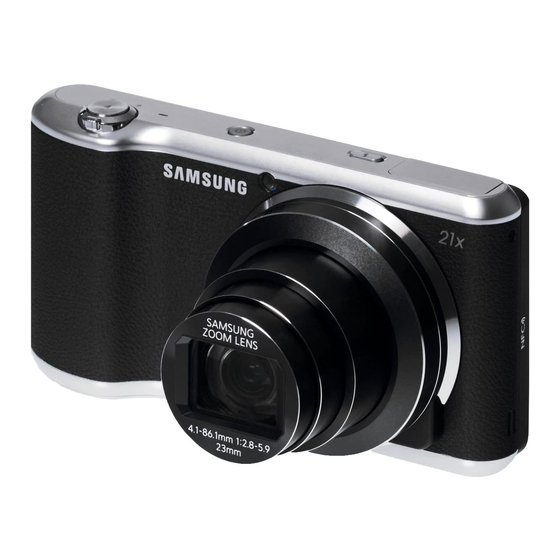
Getting started Device layout Power button AF-assist light Microphone Flash release button Flash Zoom button NFC tag Internal antenna Speaker Lens HDMI port Latch Tripod mount Flap Shutter button Headset jack Touch screen Multipurpose jack Eyelet for strap... -
Page 19: Buttons
Getting started Do not use the device if it is cracked or broken. Broken glass or acrylic could cause injury to your hands and face. Take the device to a Samsung Service Centre to have it repaired. • D o not cover the antenna area with your hands or other objects, except when you are taking photos or videos. -
Page 20: Package Contents
Battery, battery charger, flip cover, case, hand strap, screen protector, and HDMI cable • F or more information about available accessories, refer to the Samsung website. • M ake sure they are compatible with the device before purchase. -
Page 21: Installing The Battery
Getting started Installing the battery Insert the included battery. Slide the latch and open the flap. Do not bend or twist the battery cover excessively. Doing so may damage the cover. Insert the battery. Make sure to properly align the battery’s gold-coloured contacts when inserting the battery. -
Page 22: Removing The Battery
Getting started Replace the flap and slide the latch. Removing the battery Turn off the device before removing the battery. If you remove the battery when the device is turned on, the device may malfunction. Slide the battery lock to release the battery, and then pull it out. -
Page 23: Charging The Battery
Before using the device for the first time or when the battery has been unused for an extended period, you must charge the battery. Use only Samsung-approved chargers, batteries, and cables. Unapproved chargers or cables can cause the battery to explode or damage the device. -
Page 24: Checking The Battery Charge Status
• I f the device is not charging properly, take the device and the charger to a Samsung Service Centre. • O vercharging or over-discharging batteries may shorten their lifespans. After fully charging, disconnect the device from the charger. First unplug the charger from the device, and then unplug it from the electric socket. -
Page 25: Inserting A Memory Card
Getting started Reducing the battery consumption Your device provides options that help you save battery power. By customising these options and deactivating features in the background, you can use the device longer between charges: • W hen you are not using the device, switch to sleep mode by pressing the Power button. •... -
Page 26: Removing The Memory Card
Do not remove the memory card while the device is transferring or accessing information. Doing so can cause data to be lost or corrupted or damage to the memory card or device. Samsung is not responsible for losses that result from the misuse of damaged memory cards, including the loss of data. -
Page 27: Attaching A Hand Strap
Getting started Formatting the memory card A memory card formatted on a computer may not be compatible with the device. Format the memory card on the device. On the Home screen, tap Apps → Settings → More → Storage → Format SD card → Format SD card →... -
Page 28: Turning The Device On And Off
Getting started Turning the device on and off When turning on the device for the first time, follow the on-screen instructions to set up your device. Press and hold the Power button for a few seconds to turn the device on. •... -
Page 29: Switching To Silent Mode
Getting started Switching to silent mode Use one of the following methods: • R otate the Zoom button anti-clockwise until it switches to silent mode. • P ress and hold the Power button, and then tap Mute or Vibrate. •... -
Page 30: Indicator Icons
Basics Indicator icons The icons displayed at the top of the screen provide information about the status of the device. The icons listed in the table below are most common. Icon Meaning Wi-Fi connected Bluetooth feature activated GPS activated Connected to computer Alarm activated Mute mode activated Vibration mode activated... -
Page 31: Using The Touch Screen
Basics Using the touch screen Use only fingers to use the touch screen. • D o not allow the touch screen to come into contact with other electrical devices. Electrostatic discharges can cause the touch screen to malfunction. • T o avoid damaging the touch screen, do not tap it with anything sharp or apply excessive pressure to it with your fingertips. - Page 32 Basics Tapping and holding Tap and hold an item for more than 2 seconds to access available options. Dragging To move an icon, thumbnail, or preview to a new location, tap and hold it and drag it to the target position. Double-tapping Double-tap on a webpage or image to zoom in a part.
-
Page 33: Control Motions
Basics Flicking Flick left or right on the Home screen or the Applications screen to see another panel. Flick up or down to scroll through a webpage or a list, such as contacts. Pinching Spread two fingers apart on a webpage, map, or image to zoom in a part. Pinch to zoom out. Control motions Simple motions allow easy control of the device. - Page 34 Basics Rotating the screen Many applications allow display in either portrait or landscape orientation. Rotating the device causes the display to automatically adjust to fit the new screen orientation. To prevent the display from rotating automatically, open the notifications panel and deselect Screen rotation.
- Page 35 Basics Panning to move Tap and hold an item, and then move the device to the left or right to move the item to another panel on the Home screen or the Applications screen. Panning to browse When an image is zoomed in, tap and hold a point on the screen, and then move the device in any direction to browse the image.
- Page 36 Basics Sweeping Sweep your hand across the screen to capture a screenshot. The image is saved in Gallery → Screenshots. Covering Cover the screen with a palm to pause media playback.
-
Page 37: Notifications
Basics Notifications Notification icons appear on the status bar at the top of the screen to report calendar events, device status, and more. Drag down from the status bar to open the notifications panel. Scroll the list to see additional alerts. To close the notifications panel, drag up the bar that is at the bottom of the screen. -
Page 38: Home Screen
Basics Home screen The Home screen is the starting point to access all of the device’s features. It displays indicator icons, widgets, folders, and others. The Home screen can have multiple panels. To view other panels, scroll left or right. Rearranging items Adding an application icon On the Home screen, tap Apps, tap and hold an application icon, and then drag it into a panel... -
Page 39: Setting Wallpaper
Basics Rearranging panels Adding a new panel → Edit page → Moving a panel → Edit page, tap and hold a panel preview, and then drag it to a new location. Removing a panel → Edit page, tap and hold a panel preview, and then drag it to the rubbish bin. Setting wallpaper Set an image or photo stored in the device as wallpaper for the Home screen. -
Page 40: Using Applications
Basics Using widgets Widgets are small applications that provide convenient functions and information on your Home screen. To use them, add widgets from the widgets panel to the Home screen. The widgets available may vary depending on the region. Adding widgets to the Home screen On the Home screen, tap Apps →... -
Page 41: Applications Screen
Pinch on the screen, tap and hold a panel preview, and then drag it to a new location. Installing applications Use application stores, such as Samsung Apps, to download and install applications. Uninstalling applications → Uninstall, and then select an application to uninstall it. -
Page 42: Help
Tap Help on the Applications screen. Tap , and then select an item. Entering text Use the Samsung keyboard or the voice input feature to enter text. • T ext entry is not supported in some languages. To enter text, you must change the input language to one of the supported languages. - Page 43 On the 3x4 keyboard, a key has three or four characters. To enter a character, tap repeatedly the key corresponding to the character. Set options for the Delete a preceding Samsung keyboard. character. Enter uppercase. Break to the next line.
-
Page 44: Connecting To A Wi-Fi Network
Basics Connecting to a Wi-Fi network Connect the device to a Wi-Fi network to use the Internet or share media files with other devices. (p. 137) Turning Wi-Fi on and off Open the notifications panel, and then tap Wi-Fi to turn it on or off. •... -
Page 45: Setting Up Accounts
Basics Setting up accounts Google applications, such as Play Store, require a Google account, and Samsung Apps requires a Samsung account. Create Google and Samsung accounts to have the best experience with the device. Adding accounts Follow the instructions that appear when opening a Google application without signing in to set up a Google account. -
Page 46: Transferring Files
This feature is not available for iOS devices. • Y ou should install Samsung SMART CAMERA App on your phone or device before using this feature. You can download the application from Samsung Apps or the Google Play Store. - Page 47 Connect the device to the computer using the USB cable. Samsung Kies launches on the computer automatically. If Samsung Kies does not launch, double-click the Samsung Kies icon on the computer. Transfer files between your device and the computer.
-
Page 48: Securing The Device
Basics Securing the device Prevent others from using or accessing personal data and information stored in the device by using the security features. The device requires an unlock code whenever unlocking it. Setting a pattern On the Applications screen, tap Settings → My device → Lock screen → Screen lock → Pattern. -
Page 49: Upgrading The Device
Unlocking the device Turn on the screen by pressing the Power button, and enter the unlock code. If the unlock code is forgotten, take the device to a Samsung Service Centre to reset it. Upgrading the device The device can be upgraded to the latest software. -
Page 50: Launching Camera
Camera: Basic functions Launching Camera Use this application to take photos or videos. Tap Camera on the Applications screen. Alternatively, press the Shutter button. Use Gallery to view photos and videos taken with the device. (p. 89) • T he camera automatically shuts off when unused. •... -
Page 51: Learning Icons
Camera: Basic functions Learning icons The icons displayed on the preview screen provide information about current shooting options and settings. The icons listed in the table below are the most common. Icon Meaning Shutter speed Aperture value Exposure value ISO sensitivity Timer Flash Voice recognition... -
Page 52: Taking Photos
Camera: Basic functions Taking photos Half-press the Shutter button to focus on the subject. When the subject is in focus, the focus frame turns green. Press the Shutter button to take the photo. Or, tap the image on the preview screen where the camera should focus. When the subject is in focus, the focus frame turns green. -
Page 53: Viewing Photos And Videos
Camera: Basic functions Viewing photos and videos To view taken photos or videos, tap the gallery icon. Scroll left or right to view the next or previous image. (p. 89) Auto focus and auto exposure You can adjust camera focus and exposure automatically by touching the screen. In Shooting mode, tap the desired area to focus on. -
Page 54: Taking Photos Or Videos With Voice
Camera: Basic functions • T he zoom in/out effect is available when using the zoom feature while shooting video. • W hen using the zoom function, the lens moves back and forth to adjust the focus before it sets the precise zoom ratio that you intend to use. •... -
Page 55: Reducing Camera Shake
Camera: Basic functions • M oody: This effect applies a mono cartoon painting effect. • R ugged: This effect applies a rugged effect. • O il pastel: This effect applies a pastel painting effect. • F isheye: This effect blackens the edges of the frame and distorts objects to imitate the visual effect of a fisheye lens. -
Page 56: Using Face Detection
Camera: Basic functions Using face detection Taking a smile shot The camera automatically detects a smiling face, and releases the shutter. Tap MODE → Expert → P, A, S, or M to access one of the expert modes. → → Face detection → Smile shot. Or, in beauty face mode, tap In expert mode, tap →... -
Page 57: Tips For Taking Clearer Photos
Camera: Basic functions Tips for taking clearer photos Holding the camera correctly Make sure not to block the screen, lens, flash, or microphone. Make sure not to expose the lens to direct sunlight. This may discolour the image sensor, or cause it to malfunction. Half-pressing the Shutter button Press the Shutter button halfway down to adjust the focus. - Page 58 Camera: Basic functions Reducing camera shake Set the Optical Image Stabiliser (OIS) option to reduce camera shake optically. (p. 55) Keeping the subject in focus Focusing on the subject may be difficult in the following conditions: • W hen the contrast between the subject and background is low. For example, the subject is wearing clothing that is similar in colour to the background.
-
Page 59: Using The Focus Lock
Camera: Basic functions Using the focus lock Half-press the Shutter button to focus. When the subject is focused, you can change the composition. When you are ready, press the Shutter button to take the photo. When taking photos in low-light conditions •... - Page 60 Camera: Basic functions When subjects are moving rapidly Use the continuous shooting option to take photos of moving subjects. (p. 63) To take several photos continuously, use memory cards with faster writing speeds (micro SDHC Class10 or higher).
-
Page 61: Auto
Camera: Shooting modes Auto Use this to take photos with scene modes selected automatically by the camera. In this mode, the camera recognises surrounding conditions and automatically adjusts factors that contribute to exposure, including the shutter speed, aperture value, metering, and white balance. - Page 62 Camera: Shooting modes Smart mode suggest Use this to take photos with one of the smart modes that the camera automatically suggests. Tap MODE → Smart → Smart mode suggest. Half-press the Shutter button, select a mode from the suggested list, and then press the Shutter button to take a photo.
-
Page 63: Continuous Shot
Camera: Shooting modes Continuous shot Use this to take a series of photos of moving subjects. Tap MODE → Smart → Continuous shot. While holding the camera steady, press and hold the Shutter button to take several photos continuously. To take several photos continuously, use memory cards with faster writing speeds (micro SDHC Class10 or higher). -
Page 64: Colour Bracket
Camera: Shooting modes Colour bracket Use this to take 3 photos with different colour effects continuously. Tap MODE → Smart → Colour bracket. Kids shot Use this to play a funny sound to get a kid’s attention when shooting. Tap MODE → Smart → Kids shot. Half-press the Shutter button. - Page 65 Camera: Shooting modes Macro Use this to take photos of very close subjects. Tap MODE → Smart → Macro. Hold the camera steady to prevent blurry photos. Food Use this to take photos of food in more colourful tones. Tap MODE → Smart → Food. Party/Indoor Use this to take crisp indoor photos.
- Page 66 Camera: Shooting modes Action freeze Use this to take photos of subjects moving at high speed. Tap MODE → Smart → Action freeze. Use in bright daylight is recommended. Rich tone(HDR) Use this to take photos without losing details in bright and dark areas. The camera automatically takes several photos with various exposure values, and then merges them into one photo.
- Page 67 Camera: Shooting modes • T his feature may be affected by camera shake, lighting, movement of the subject, and shooting environment. • T he flash is disabled in this feature. • W hen taking a photo of moving subjects, an afterimage may appear. •...
- Page 68 Camera: Shooting modes • A void the following for best results: – Moving the camera too quickly or too slowly. – Moving the camera too little to take the next photo. – Moving the camera at irregular speeds. – Shaking the camera. –...
- Page 69 Camera: Shooting modes Animated photo Use this to create a photo in which selected objects move by freezing or animating moving objects automatically detected by the camera. Tap MODE → Smart → Animated photo. Press the Shutter button to take a photo. Tap Animate or Freeze, and then rub the screen to animate or freeze the detected moving objects.
- Page 70 Camera: Shooting modes Eraser Use this to erase moving objects in the background. Tap MODE → Smart → Eraser. Press the Shutter button to take a series of photos. The camera erases traces of movement from a moving object. To restore the original photo, tap Show moving objects, and then tap the highlighted area.
- Page 71 Camera: Shooting modes Silhouette Use this to take photos of dark shapes against a light background. Tap MODE → Smart → Silhouette. To maximise the silhouette effect, take photos at a location that is bright. Sunset Use this to take photos of the sunset. Tap MODE →...
- Page 72 Camera: Shooting modes Fireworks Use this to take photos of fireworks. Tap MODE → Smart → Fireworks. The image may appear blurry due to the slow shutter speed when the camera takes photos. Make sure to use a tripod. Light trace Use this to take photos of the light trailing in low-light conditions.
-
Page 73: Expert
Camera: Shooting modes Expert Use this to take photos and videos with manual adjustment of various shooting options, including the shutter speed, aperture value, exposure value, and ISO sensitivity. Rotate to change the Rotate to select a value for the shooting option. -
Page 74: Aperture Priority Mode
Camera: Shooting modes Aperture priority mode In this mode, the camera automatically calculates shutter speed according to the aperture value you choose. You can adjust the depth of field (DOF) by changing the aperture value. This mode is useful for taking portraits and landscape shots. Tap MODE →... -
Page 75: Shutter Priority Mode
Camera: Shooting modes Shutter priority mode In this mode, the camera automatically adjusts the aperture value according to the shutter speed you choose. This mode is useful for taking photos of fast-moving subjects or for creating tracer effects in a photo. Tap MODE →... -
Page 76: My Modes
Camera: Shooting modes User mode Use this to create and save your own shooting mode by adjusting settings. Tap MODE → Expert → P / A / S / M, and set the desired shooting options. Then, tap → → Save as User mode to save the current settings. To access user mode, tap MODE →... -
Page 77: Customising Shooting Options
Camera: Shooting options and settings Customising shooting options Various shooting options are provided with your camera. With them, you can take more customised photos and videos. to access shooting options. Depending on the mode selected, you may tap → Select an option, and then save it. •... -
Page 78: Iso (Sensitivity
Camera: Shooting options and settings • I f the appropriate exposure value cannot be decided, use the AE BKT option to take multiple photos with different exposure values. • T aking photos with higher exposure value may result in blurry photos due to the slower shutter speed. -
Page 79: Wb (Light Source
Camera: Shooting options and settings WB (light source) White balance represents the light source that influences on the colour of a photo. The colour of a photo depends on the type and quality of the light source. If you want the colour of your photo to be realistic, select an appropriate lighting condition to calibrate the white balance, such as Auto WB, Daylight, Cloudy, Tungsten, or adjust colour temperature manually. - Page 80 Camera: Shooting options and settings Customising preset white Balance options You can also customise preset white Balance options. next to a white balance option. Tap the arrows or tap an area on the screen to adjust the value on the coordinates. •...
-
Page 81: Metering
Camera: Shooting options and settings Metering The metering mode refers to the method the camera measures the quantity of light. The camera measures the amount of light in a scene, and in many of its modes, uses the measurement to adjust various settings. For example, if a subject looks darker than its actual colour, the camera takes an overexposed photo of it. -
Page 82: Save As User Mode
Camera: Shooting options and settings Save as User mode Use this to save the current settings as your own shooting mode. Tap MODE → Expert → P, A, S, or M to access one of the expert modes. → → Save as User mode. In expert mode, tap Photo size As you increase the resolution, your photo will include more pixels, so it can be printed on... -
Page 83: Flash
Camera: Shooting options and settings Flash To take a realistic photo of a subject, the amount of light should be constant. When the light source varies, you can use a flash and supply a constant amount of light. (or → ) →... -
Page 84: Focus
Camera: Shooting options and settings Focus Use this option to select a focus mode appropriate to the subject. Tap MODE → Expert → P, A, S, or M to access one of the expert modes. → → Focus, and select an option. In expert mode, tap •... -
Page 85: Face Detection
Camera: Shooting options and settings Face detection Use this option to select a face detection mode. Tap MODE → Expert → P, A, S, or M to access one of the expert modes. → → Face detection, and select an option. Or, in beauty face In expert mode, tap mode, tap →... -
Page 86: Ois (Anti-Shake
Camera: Shooting options and settings OIS (anti-shake) Use the Optical Image Stabiliser (OIS) option to reduce or eliminate blurriness from camera shake. Tap MODE → Expert → P, A, S, or M to access one of the expert modes. → →... -
Page 87: Sharing Options
Camera: Shooting options and settings Sharing options (or → ) → Share photos as they are taken by setting sharing options. Tap , and select an option. • S hare shot: Send a photo directly to another device via Wi-Fi Direct. You cannot use this feature when the Signature setting is activated. - Page 88 Camera: Shooting options and settings • D ate/time Imprint: Use this to imprint the time and date on photos. You cannot use this feature when the Signature setting is activated. • V oice control: Activate or deactivate the voice recognition to take photos or videos. •...
-
Page 89: Gallery
Media Gallery Use this application to view images and videos. Tap Gallery on the Applications screen. • S ome file formats are not supported depending on the software installed on the device. • S ome files may not play properly depending on the encoding method used. •... -
Page 90: Playing Videos
Media Playing videos Video files show the icon on the preview. Select a video to watch it and tap Trimming segments of a video → Trim. Move the start bracket to the desired starting point, move Select a video and tap the end bracket to the desired ending point, and then save the video. -
Page 91: Modifying Images
Media Modifying images → Edit → Photo Wizard and use the following functions: When viewing an image, tap • R otate: Rotate the image. • C rop: Crop the image. • C olour: Adjust the brightness, contrast, or saturation of the image. •... - Page 92 Media Setting as wallpaper → Set as to set the image as wallpaper or to assign it to a When viewing an image, tap contact. Tagging faces → Settings, and then tick Face tag. A yellow frame appears When viewing an image, tap around the recognised face on an image.
-
Page 93: Paper Artist
Media Paper Artist Use this application to make images look like illustrations with fun effects or frames. Tap Paper Artist on the Applications screen. This application may not be available depending on the region. Use artistic tools to edit an image. The edited image is saved in the Gallery → Paper Pictures folder. -
Page 94: Video
Media Video Use this application to play video files. Tap Video on the Applications screen. • S ome file formats are not supported depending on the device's software. • S ome files may not play properly depending on the encoding method used. •... -
Page 95: Video Editor
Media Using Popup Video player Use this feature to use other applications without closing the video player. While watching videos, tap to use the pop-up player. Spread two fingers apart on the screen to enlarge the player or pinch to reduce it. To move the player, drag the player to another location. -
Page 96: Story Album
Media Inserting text in a video Select a frame to edit, enter text by using text insertion options at the right pane, tap Done, and then save the video. Trimming segments of a video Select a frame to split, move the start bracket to the desired starting point, move the end bracket to the desired ending point, tap Done, and then save the video. - Page 97 Media Creating story albums Create story albums by selecting images from Gallery or images sorted by tag information. , and then select an option. Select images from Gallery. Select images by tag information. Creating albums from Gallery Tap From Gallery, select a folder, select images, and then tap .
- Page 98 Media Viewing story albums Select a story album. The cover image appears on the first page. Scroll left or right to view images in the story album. On a page of the album, tap and use the following functions. The available options vary depending on the page.
- Page 99 Media , and then use the following functions: • S lideshow: Start a slideshow or change the slideshow settings. • S et as cover: Set the image as an album cover image. • R otate left: Rotate the image anticlockwise. •...
-
Page 100: Xtremera
Media Xtremera Use this application to capture star trails or moving lights. Tap Xtremera on the Application screen. This application may not be available depending on the region. In Shooting mode, use the following functions: • : Access the Home screen. •... -
Page 101: Music
Media Highlighting subjects or capturing moving lights Highlight subjects or capture moving lights by setting a long exposure. Highlighting subjects Tap Light Art → Highlighting → Shoot. Mount your camera on a tripod and press the Shutter button to start taking a photo. Illuminate the subject that you want to highlight with a light source, such as a flashlight. -
Page 102: Playing Music
Media Playing music Select a music category, and then select a song to play. Search for other Adjust the volume. devices to play the file. Set the file as your favourite song. Turn on shuffle. Change the repeat mode. Hide the music player Open the playlist. -
Page 103: Youtube
Media YouTube Use this application to watch videos from the YouTube website. Tap YouTube on the Applications screen. This application may not be available depending on the region. Watching videos , and then enter a keyword. Select one of the returned search results to watch a video. Add the video to the playlist. -
Page 104: Contacts
Communication Contacts Use this application to manage contacts, including phone numbers, email addresses, and others. Tap Contacts on the Applications screen. This application may not be available depending on the region. Managing contacts Tap Contacts. Creating a contact and enter contact information. •... -
Page 105: Displaying Contacts
→ Merge accounts → Merge with Google. Contacts moved to Google Contacts appear with in the contacts list. Moving contacts to Samsung → Merge accounts → Merge with Samsung. Contacts moved to Samsung Contacts appear with in the contacts list. - Page 106 Communication Importing and exporting contacts Tap Contacts. Importing contacts → Import/Export, and then select an import option. Exporting contacts → Import/Export, and then select an export option. Sharing contacts → Share namecard via, select contacts, tap Done, and then select a sharing method. Favourite contacts Tap Favourites.
- Page 107 Communication Contact groups Tap Groups. Adding contacts to a group Select a group, and then tap . Select contacts to add, and then tap Done. Managing groups , and then take one of the following actions: • C reate: Make a new group. •...
-
Page 108: Email
Communication Email Use this application to send or view email messages. Tap Email on the Applications screen. This application may not be available depending on the region. Setting up email accounts Set up an email account when opening Email for the first time. Enter the email address and password. -
Page 109: Google Mail
Communication Reading messages Select an email account to use, and new messages are retrieved. To manually retrieve new messages, tap Tap a message to read. Forward the message. Reply to the message. Delete the message. Add this email address to the Mark the message as contacts list. - Page 110 Communication → Save draft to save the message for later delivery. → Discard to start over. → Settings to change the Google Mail settings. → Send feedback to report your opinions for application development. → Help to access help information for the Google Mail. Reading messages Tap a message to read.
-
Page 111: Hangouts
Communication Hangouts Use this application to chat with others. Tap Hangouts on the Applications screen. This application may not be available depending on the region. Select a friend from the friends list or enter data to search and select a friend from the results to start chatting. -
Page 112: Chaton
Tap ChatON on the Applications screen. This application may not be available depending on the region. Create a buddies list by entering phone numbers or Samsung account email addresses, or by selecting buddies from the list of suggestions. → Start chat and select a buddy to start chatting. -
Page 113: Internet
Web & network Internet Use this application to browse the Internet. Tap Internet on the Applications screen. This application may not be available depending on the region. Viewing webpages Tap the address field, enter the web address, and then tap Go. to share, save, or print the current webpage while viewing a webpage. -
Page 114: Chrome
Web & network History → History to open a webpage from the list of recently-visited webpages. To clear the → Clear history. history, tap Links Tap and hold a link on the webpage to open it in a new page, save, or copy. To view saved links, use Downloads. -
Page 115: Bluetooth
SIG, may be incompatible with your device. • D o not use the Bluetooth feature for illegal purposes (for example, pirating copies of files or illegally tapping communications for commercial purposes). Samsung is not responsible for the repercussion of illegal use of the Bluetooth feature. -
Page 116: Samsung Link
Internet. You can play and send multimedia files on your device to another device or web storage service. To use this application, you must sign in to your Samsung account and register two or more devices. The registration methods may vary depending on the device type. - Page 117 Web & network Sending files Send files to other devices or upload them to web storage services. Tap to select a device or web storage and scroll left or right to select a media category. Then, tap , select files, and then tap Sharing files Tap to select a device or web storage and scroll left or right to select a media category.
-
Page 118: Group Play
Web & network Group Play Use this application to enjoy moments with your friends by sharing and playing content. Create or join a Group Play session, and then share content, such as images or documents. Tap Group Play on the Applications screen. •... - Page 119 Web & network Joining Group Play Join a Group Play session created by another device. Tap Join group, select a Group Play session to join, and then enter the password for the group if necessary. Using additional features in a Group Play session While sharing content with other devices, use the following features: and write a note or draw on the screen.
-
Page 120: Play Store
Application & media stores Play Store Use this application to purchase and download applications and games that are able to run on the device. Tap Play Store on the Applications screen. This application may not be available depending on the region. Installing applications Browse applications by category, or tap to search with a keyword. -
Page 121: Samsung Apps
Application & media stores Samsung Apps Use this application to purchase and download dedicated Samsung applications. For more information, visit apps.samsung.com . Tap Samsung Apps on the Applications screen. This application may not be available depending on the region. Installing applications Browse applications by category. -
Page 122: Play Movies
Application & media stores Play Movies Use this application to watch, download, and rent movies or TV shows. Tap Play Movies on the Applications screen. This application may not be available depending on the region. Play Music Use this application to listen to music from the device or stream music from the Google cloud service. -
Page 123: S Memo
Utilities S Memo Use this application to create a memo using images and voice recordings. Tap S Memo on the Applications screen. This application may not be available depending on the region. Composing memos Create memos with enriched content by drawing sketches with your finger or adding images or voice memos. - Page 124 Utilities When jotting down a memo, tap once more to change the pen type, line thickness, or pen colour. When erasing the handwritten memo, tap once more to change the eraser size or tap Clear all to clear the memo. Save the current Change the pen setting as a pen...
- Page 125 Utilities → Create folder. To create a folder, tap → Change order. To change the order of memos, tap → Move. To move memos to another folder, tap → Copy. To copy memos, tap → Settings. To change the S Memo settings, tap →...
-
Page 126: S Planner
Utilities S Planner Use this application to manage events and tasks. Tap S Planner on the Applications screen. This application may not be available depending on the region. Creating events or tasks Tap New, and then use one of the following methods: •... - Page 127 Utilities Syncing with Google Calendar On the Applications screen, tap Settings → Accounts → Google under My accounts → a Google account → Sync Calendar. To manually sync for updating, on the Applications screen, tap S Planner → → Sync. →...
-
Page 128: Dropbox
To open files in the favourites list, tap Cloud Use this feature to sync files or back up settings and application data with your Samsung account or Dropbox. On the Applications screen, tap Settings → Accounts → Cloud. -
Page 129: Drive
Utilities Syncing with Dropbox Tap Link Dropbox account, and then enter the Dropbox account. Follow the on-screen instructions to complete the setup. Once you sign in, tap Allow and the device automatically syncs files with Dropbox whenever you make some changes. Drive Use this application to save and share files with others via the Google Drive service by selecting files from the device, or creating or scanning documents. -
Page 130: Clock
Utilities Clock Use this application to set alarms, check the time of many major cities in the world, measure the duration of an event, set a timer, or use as the desk clock. Tap Clock on the Applications screen. This application may not be available depending on the region. Turn this alarm on or off. -
Page 131: World Clock
Utilities Stopping alarms Drag outside the large circle to stop an alarm. Drag outside the large circle to repeat the alarm after a specified length of time. Deleting alarms Tap and hold the alarm, and then tap Delete. World clock Creating clocks Tap Add city, and then enter a city name or select a city from the cities list. -
Page 132: Calculator
Utilities Calculator Use this application for simple or complex calculations. Tap Calculator on the Applications screen. This application may not be available depending on the region. To see the calculation history, tap to hide the keypad. → Clear history. To clear the history, tap S Voice Use this application to command the device by voice to perform various features. -
Page 133: Google
Utilities Google Use this application to search not only the Internet, but also applications and their contents on the device as well. Tap Google on the Applications screen. This application may not be available depending on the region. Searching the device Tap the search field, and then enter a keyword. -
Page 134: My Files
Utilities My Files Use this application to access all kinds of files stored in the device, including images, videos, songs, and sound clips. Tap My Files on the Applications screen. This application may not be available depending on the region. Managing files Select a folder to open it. -
Page 135: Downloads
Utilities Downloads Use this application to see what files are downloaded through the applications. Tap Downloads on the Applications screen. This application may not be available depending on the region. Select a file to open it with an appropriate application. To sort the files by size, tap Sort by size. -
Page 136: Maps
Travel & local Maps Use this application to pinpoint the location of the device, search for places, or get directions. Tap Maps on the Applications screen. This application may not be available depending on the region. Searching for locations Search for locations by entering an address or a keyword. Once the location is found, select a location to view the detailed information. -
Page 137: About Settings
Settings About Settings Use this application to configure the device, set application options, and add accounts. Tap Settings on the Applications screen. Some options may not be available depending on the region. Connections Wi-Fi Activate the Wi-Fi feature to connect to a Wi-Fi network and access the Internet or other network devices. -
Page 138: Data Usage
Settings Setting Network notification The device can detect open Wi-Fi networks and display an icon on the status bar to notify when available. On the Settings screen, tap Connections → Wi-Fi → → Advanced and tick Network notification to activate this feature. Wi-Fi Direct Wi-Fi Direct connects two devices directly via a Wi-Fi network without requiring an access point. - Page 139 Settings More networks Customise settings to control networks. Flight mode This disables all wireless functions on your device. You can use only non-network services. Smart network This disables all data network functions on your device when the screen is turned off, and disconnects applications, such as SNS applications or Email.
-
Page 140: My Device
Settings My device Lock screen Change settings for the locked screen. Display Change the settings for the display. • W allpaper: – Home screen: Select a background image for the Home screen. – Lock screen: Select a background image for the locked screen. –... -
Page 141: Blocking Mode
Settings Sound Change settings for various sounds on the device. • V olume: Adjust the volume level for music and videos, system sounds, and notifications. • D efault notification sound: Select a ringtone for events, such as incoming emails. •... - Page 142 Settings Accessibility Accessibility services are special features for those with certain physical disabilities. Access and alert the following settings to improve accessibility to the device. • A uto rotate screen: Set the interface to rotate automatically when you rotate the device. •...
-
Page 143: Language And Input
• S ound: Set the device to sound when a key is touched. • C haracter preview: Set the device to display a large image of each character tapped. • T utorial: Access help information for using the Samsung keyboard. • R eset settings: Reset Samsung keyboard settings. - Page 144 This feature appears once you use a voice recognition application. Voice search For Samsung voice recognition, use the following options: • L anguage: Select a language for the voice recognition. • O pen via the home key: Set the device to launch S Voice by tapping twice.
- Page 145 Settings For Google voice recognition, use the following options: • L anguage: Select a language for the voice recognition. • S peech output: Set the device to provide voice feedback to alert you to the current action. • B lock offensive words: Hide offensive words from voice search results. •...
-
Page 146: Accounts
Accounts Add account Add email or SNS accounts. Cloud Change settings for syncing data or files with your Samsung account or Dropbox cloud storage. Backup and reset Change the settings for managing settings and data. • B ack up my data: Set the device to back up settings and application data to the Google server. -
Page 147: More
Settings More Location services Change settings for location information permissions. • A ccess to my location: Set the device to allow applications to use your current location information. • U se GPS satellites: Set the device to use the GPS satellite for finding the current location. •... -
Page 148: Application Manager
Settings • D evice administrators: View device administrators installed on the device. You can allow device administrators to apply new policies to the device. • U nknown sources: Choose to install applications from any source. If not chosen, download applications only from Play Store. -
Page 149: Google Settings
Settings Storage View memory information for your device and memory card, or format a memory card. Formatting a memory card permanently deletes all data from it. The actual available capacity of the internal memory is less than the specified capacity because the operating system and default applications occupy part of the memory. -
Page 150: Troubleshooting
Appendix Troubleshooting Before contacting a Samsung Service Centre, please attempt the following solutions. Some situations may not apply to your device. The subject’s eyes appear red Red eyes occur when the subject’s eyes reflect light from the camera flash. Set the flash option to Auto & red-eye or Red-eye fix. (p. 83) - Page 151 Appendix Photos are blurred when shooting at night As the camera tries to let in more light, the shutter speed slows. This can make it difficult to hold the camera steady long enough to take a clear picture and may result in device shake. •...
- Page 152 If this happens, do not force the lens barrel into the body. Take the device to your local Samsung Service Centre. When you turn on your device or while you are using the device, it prompts you to enter the password When the device lock feature is enabled, you must enter the password you set for the device.
- Page 153 • R estart your device to clear any temporary software bugs. • E nsure that your device software is upgraded to the latest version. • I f the touch screen is scratched or damaged, visit a Samsung Service Centre. Your device freezes or has fatal errors If your device freezes or hangs, you may need to close applications or reinsert the battery and turn on the device to regain functionality.
- Page 154 Appendix The battery does not charge properly (For Samsung-approved chargers) • E nsure that the charger is connected properly. • I f the battery terminals are dirty, the battery may not charge properly or the device may turn off. Wipe both gold-coloured contacts and try charging the battery again.
- Page 155 • E nsure that the Bluetooth wireless feature is activated on the device you wish to connect • E nsure that your device and the other Bluetooth device are within the maximum Bluetooth range (10 m). If the tips above do not solve the problem, contact a Samsung Service Centre.
- Page 156 • I f you are a Windows XP user, ensure that you have Windows XP Service Pack 3 or higher installed on your computer. • E nsure that you have Samsung Kies or Windows Media Player 10 or higher installed on your computer.
-
Page 157: Using Or Storing The Device
Appendix Using or storing the device Inappropriate places to use or store the device • A void exposing the device to very cold or very hot temperatures. • A void using your device in areas with extremely high humidity, or where the humidity changes drastically. -
Page 158: Other Cautions
• D o not use the device if the screen is cracked or broken. Broken glass or acrylic could cause injury to your hands and face. Take the device to a Samsung service centre to have it repaired. -
Page 159: Cautions When Using Memory Cards
Appendix • W hile you use the device, it may heat up. This is normal and should not affect your device’s lifespan or performance. • W hen you use the device in low temperatures, it may take some time to turn on, the colour of the display may be changed temporarily, or after- images may appear. - Page 160 Appendix • D o not remove a card while the device is transferring or accessing information, as this could result in loss of data and/or damage to the card or device. • W hen the lifespan of a memory card has expired, you cannot store any more photos on the card.
-
Page 161: About The Battery
Appendix About the battery Use only Samsung-approved batteries. Personal injury or death can occur if the battery is handled carelessly or improperly. For your safety, follow these instructions for proper battery handling: • T he battery can ignite or explode if not handled properly. If you notice any deformities, cracks, or other abnormalities in the battery, immediately discontinue use of the battery and contact your manufacturer. -
Page 162: Notes About Using The Battery
Appendix Disposal guidelines • D ispose of the battery with care. • D o not dispose of the battery in a fire. • D isposal regulations may differ by country or region. Dispose of the battery in accordance with all local and federal regulations. -
Page 163: Cautions About Using The Battery
Appendix Cautions about using the battery Protect batteries, chargers, and memory cards from damage. Prevent batteries from making contact with metal objects, as this can create a connection between the + and – terminals of your battery and lead to temporary or permanent battery damage and may cause a fire or electric shock. -
Page 164: Malware And Viruses
Appendix Handle and dispose of batteries and chargers with care • N ever dispose of batteries in a fire. Follow all local regulations when you dispose of used batteries. • N ever place batteries or devices on or in heating devices, such as microwave ovens, stoves, or radiators. -
Page 165: Cleaning The Device
Cleaning the device Use an optional blower brush to remove dust, and then wipe the lens gently with a soft cloth. If any dust remains, apply lens cleaning liquid to a lens cleaning paper, and wipe gently. Do not press on the lens cover, or use a blower brush on the lens cover. Never use benzene, thinners, or alcohol to clean the device. - Page 166 Some content may differ from your device depending on the region or software version, and is subject to change without prior notice. www.samsung.com...
Need help?
Do you have a question about the EK-GC200 and is the answer not in the manual?
Questions and answers