Table of Contents
Advertisement
www.ma163.com
u5[ P b€ g /• D e™ • Q
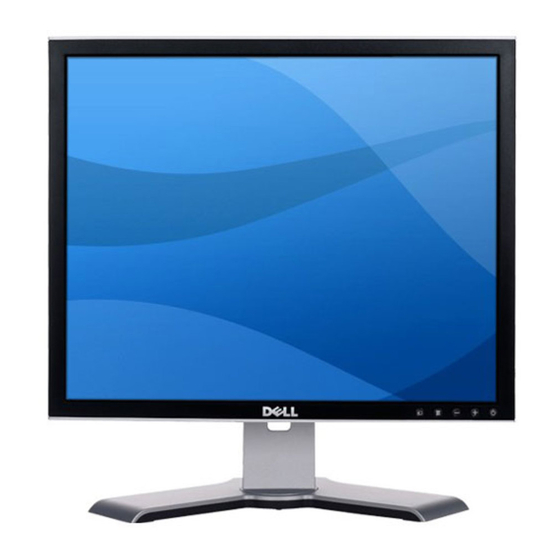
Dell 1907FPc
Service Manual
19" LCD MONITOR
DELL 1907FPc
THESE DOCUMENTS ARE FOR REPAIR SERVICE INFORMATION ONLY.EVERY REASONABLE EFFORT
HAS BEEN MADE TO ENSURE THE ACCURACY OF THIS MANUAL; WE CANNOT GUARANTEE THE
ACCURACY OFTHIS INFORMATION AFTER THE DATE OF PUBLICATION AND DISCLAIMS RELIABILITY FOR
CHANGES, ERRORS OR OMISSIONS.
1
Advertisement
Table of Contents

Related Manuals for Dell 1907FPc


Summary of Contents for Dell 1907FPc
-
Page 1: Service Manual
P b€ g /• D e™ • Q Dell 1907FPc Service Manual 19” LCD MONITOR DELL 1907FPc THESE DOCUMENTS ARE FOR REPAIR SERVICE INFORMATION ONLY.EVERY REASONABLE EFFORT HAS BEEN MADE TO ENSURE THE ACCURACY OF THIS MANUAL; WE CANNOT GUARANTEE THE ACCURACY OFTHIS INFORMATION AFTER THE DATE OF PUBLICATION AND DISCLAIMS RELIABILITY FOR CHANGES, ERRORS OR OMISSIONS. -
Page 2: Table Of Contents
/• D e™ • Q Dell 1907FPc Table of contents Table of contents------------------------------------------------------------------------------------------------------------------------- 02 Revision List -------------------------------------------------------------------------------------------------------------------------------03 ECN History-------------------------------------------------------------------------------------------------------------------------------- 04 Important Safety Notice --------------------------------------------------------------------------------------------------------------- 05 1. Monitor Specifications -----------------------------------------------------------------------------------------------------------06 2. LCD Monitor Description ------------------------------------------------------------------------------------------------------- 07 3. Operation instructions --------------------------------------------------------------------------------------------------------------08 3.1 General Instructions ----------------------------------------------------------------------------------------------------08... -
Page 3: Revision List
/• D e™ • Q Dell 1907FPc Revision List Revision Release Date Revise history TPV model Remark T980KSCDKRDFUP T980KSCDKRDMUP Nov.-28-2005 Initial Release T980KGCHKRDGUP T980KGCHKRDEUP ROHS BOM Sold area in EU and attach the T980KSCHBRDGQP Dec.22-2005 corresponding BOM Mar.-28-2006... -
Page 4: Ecn History
/• D e™ • Q Dell 1907FPc ECN History ECN No. Change Description Service Deposition Cut-in date Rework on VFF and customer complain power button defect; Enhance the button Purge service center parts ECN-D-EE105 Dec-24-2006 structure inventory. -
Page 5: Important Safety Notice
REFER TO BACK COVER FOR IMPORTANT SAFETY GUIDELINGS Proper service and repair is important to the safe, reliable operation of all Dell Company** Equipment. The service procedures recommended by Dell and described in this service manual are effective methods of performing service operations. -
Page 6: Monitor Specifications
165MHz (Max) Optimal preset resolution 1280 x 1024 at 60 Hz Highest preset resolution 1280 x 1024 at 75 Hz Plug & Play VESA DDC ON Mode (with Dell Sound bar and USB <65W EPA ENERGY active) ® STAR OFF Mode <3W... -
Page 7: Lcd Monitor Description
/• D e™ • Q Dell 1907FPc 2. LCD Monitor Description The LCD monitor will contain a main board, Power board, key board, and USB board which house the flat panel control logic, brightness control logic and DDC. -
Page 8: Operation Instructions
/• D e™ • Q Dell 1907FPc 3. Operation instructions 3.1 General Instructions Press the power button to turn the monitor on or off. The other control buttons are located at front panel of the monitor. By changing these settings, the picture can be adjusted to your personal preferences. - Page 9 Use the Input Select button to select between two different video signals that may be connected to your monitor. NOTE: The floating 'Dell Self-test Feature Check' dialog appears on a black background If the monitor cannot sense a video signal. Depending upon the selected input, one of the dialogs shown below will scroll continually.
- Page 10 Use to mount the monitor. (Behind attached base plate) Barcode serial number label Refer to this label if you need to contact Dell for technical support. Security lock slot Use a security lock with the slot to help secure your monitor.
- Page 11 /• D e™ • Q Dell 1907FPc Power connector Insert the power cable. Dell Soundbar power connector Connect the power cord for the Soundbar (optional). DVI connector Connect your computer DVI cable. VGA connector Connect your computer VGA cable.
-
Page 12: Adjusting The Picture
/• D e™ • Q Dell 1907FPc 3.3 Adjusting the Picture NOTE: If you change the settings and then either proceed to another menu, or exit the OSD menu, the monitor automatically saves those changes. The changes are also saved if you change the settings and then wait for the OSD menu to disappear. - Page 13 /• D e™ • Q Dell 1907FPc Menu and Icon Description Submenus Exit Select to exit the Main menu Brightness/ Brightness adjusts the luminance of the backlight. Contrast Adjust Brightness first, then adjust Contrast only if further adjustment is necessary.
- Page 14 /• D e™ • Q Dell 1907FPc NOTE: When using DVI source, the Positioning option is not available. Auto Adjust Even though your computer recognizes your monitor on startup, the Auto Adjustment function optimizes the display settings for use with your particular setup.
- Page 15 /• D e™ • Q Dell 1907FPc Blue Preset The color hue is most noticeable in areas of white. • Red Preset Blue Preset is selected to obtain a bluish tint. This color setting is typically used for text based applications (spreadsheets, programming, Normal text editors, etc.).
- Page 16 /• D e™ • Q Dell 1907FPc NOTE: When the OSD is locked, pressing the menu button takes the user directly to the OSD settings menu, with OSD Lock selected. Select No (-) to unlock and allow user access to all applicable settings.
- Page 17 /• D e™ • Q Dell 1907FPc NOTE: When the Dell Soundbar is not properly connected to the monitor, the audio menu is not available. Reset the OSD menu options to the factory-preset values. Factory Reset: Exit — Select to exit out of Reset to Factory Settings menu without resetting any OSD options.
- Page 18 P b€ g /• D e™ • Q Dell 1907FPc NOTE: The floating Dell Self-test Feature Check dialog appears on-screen if the monitor cannot sense a video signal. Occasionally, no warning message appears, but the screen is blank. This could also indicate that the monitor is not synchronizing with the computer.
-
Page 19: Connect Your Monitor
/• D e™ • Q Dell 1907FPc 1. Turn off your computer and disconnect the power cable. 2. Connect either the white DVI or blue VGA cables to the connectors on the computer and the monitor. Connect the USB cable that was included with your monitor to the computer and the upstream USB connector on the monitor. -
Page 20: Input/Output Specification
/• D e™ • Q Dell 1907FPc 4. Input/Output Specification 4.1 Input Signal Connector 4.1.1 D-Sub Connector Signal Assignment Pin. Signal Assignment Red Video DDC +5V Green Video GND-Sync Blue Video DDC Data Self Test H-Sync R-Ground... -
Page 21: Factory Preset Display Modes
/• D e™ • Q Dell 1907FPc 4.2 Factory Preset Display Modes Horizontal Vertical Pixel Clock Sync Polarity Display Mode Frequency (kHz) Frequency (Hz) (MHz) (Horizontal/Vertical) VESA, 720 x 400 31.5 70.0 28.3 VESA, 640 x 480 31.5... -
Page 22: Panel Specification
/• D e™ • Q Dell 1907FPc 4.4 Panel Specification 4.4.1 Display Characteristics For LTM190EX- L01 panel For LM190E03-TLB4 panel... - Page 23 P b€ g /• D e™ • Q Dell 1907FPc 4.4.2 Optical Characteristics For LTM190EX- L01 panel...
- Page 24 /• D e™ • Q Dell 1907FPc For LM190E03-TLB4 panel...
-
Page 25: Block Diagram
P b€ g /• D e™ • Q Dell 1907FPc 5. Block Diagram 5.1 Monitor Exploded View... - Page 26 P b€ g /• D e™ • Q Dell 1907FPc...
-
Page 27: Software Flow Chart
/• D e™ • Q Dell 1907FPc 5.2 Software Flow Chart... - Page 28 P b€ g /• D e™ • Q Dell 1907FPc 1) MCU Initializes. 2) Is the EEprom blank? 3) Program the EEprom by default values. 4) Get the PWM value of brightness from EEprom. 5) Is the power key pressed? 6) Clear all global flags.
-
Page 29: Electrical Block Diagram
. m a 1 6 3 . c o m u 5 [ P b € g / • D e ™ • Q Dell 1907FPc 5.3 Electrical Block Diagram 5.3.1 Main Board X301 LCD Interface CRYSTAL 14.318MHzHC-49U... - Page 30 P b€ g /• D e™ • Q Dell 1907FPc 5.3.2 Inverter/Power Board...
-
Page 31: Schematic Diagram
. m a 1 6 3 . c o m u 5 [ P b € g / • D e ™ • Q Dell 1907FPc 6. Schematic Diagram Main Board CN201 RX2-IN R202 1/16W A_GND RX2-... - Page 32 /• D e™ • Q Dell 1907FPc 3.3V_PVDD +3.3V_VDD +1.8V_VDD 1.8V_AVDD 3.3V_DVDD 3.3V_DDC 3.3V_AVDD 3.3V_LAVDD 3.3V_DVDD 1.8V_DVDD 1.8V_AVDD R301 1/16W L302 C310 C311 C312 C313 C314 3.3V_DVDD L301 C302 C303 C304 C305 C306 C307 C308 120 OHM...
- Page 33 . m a 1 6 3 . c o m u 5 [ P b € g / • D e ™ • Q Dell 1907FPc +12V R428 6/10 Added 1/16W R426 CN401 Audio cut+ R425 R402...
-
Page 34: Panel Interface
/• D e™ • Q Dell 1907FPc CN501 LVDS_O0 RXO0- RXO0+ LVDS_O1 LVDS_O2 RXO1- RXO1+ LVDS_O3 LVDS_O[0..9] LVDS_O4 RXO2- RXO2+ LVDS_O5 LVDS_O6 RXOC- RXOC+ LVDS_O7 LVDS_O0 LVDS_O8 RXO3- RXO3+ LVDS_O9 LVDS_O1 LVDS_E0 RXE0- RXE0+ LVDS_E1 LVDS_O2 LVDS_E2... - Page 35 . m a 1 6 3 . c o m u 5 [ P b € g / • D e ™ • Q Dell 1907FPc +12V 8/16 Modified R616 CN601 +3.3V_VDD ON_OFF R601 U601 PBIAS 4.7K...
-
Page 36: Power Board
P b€ g /• D e™ • Q Dell 1907FPc 6.2 Power Board R920 C920 1/2W 0.001uF/500V D920 FME-220B D3SBA60 L921 T901 F902 +12V C922 C924 C925 1/8W R903 R906 R909 1000uF/25V 1000uF/25V 470uF/25V L902 430K 1/8W 510K... - Page 37 /• D e™ • Q Dell 1907FPc PT801 CN801 80GL19T-8-DN R836 /0805 +12V C816 R801 12pF/3KV 33G8021-2D-U 1206 CN802 R802 R804 R805 300K / 0805 10K / 0805 470 /0805 C811 Q802 C817 ON/OFF PMBS3904 Q803 470uF/25V...
-
Page 38: Usb Board
/• D e™ • Q Dell 1907FPc 6.3 USB Board USB5V F701 VBUS1 5V 0.75A FB701 +12V USB Switch VBUS0 VBUS1A FB707 U702 To scalar GPO-2 #57 120 OHM AP1510 R710 R701 U701 1/16W C705 120 OHM... - Page 39 . m a 1 6 3 . c o m u 5 [ P b € g / • D e ™ • Q Dell 1907FPc CN705 CONNNECTOR C732 0.1uF/16V CN707 C733 CONN CN706 0.1uF/16V CONNNECTOR Title <Title>...
-
Page 40: Layout
P b€ g /• D e™ • Q Dell 1907FPc 7. PCB Layout 7.1 Main Board... -
Page 41: Power Board
P b€ g /• D e™ • Q Dell 1907FPc 7.2 Inverter/Power Board... - Page 42 P b€ g /• D e™ • Q Dell 1907FPc...
-
Page 43: Usb Board
P b€ g /• D e™ • Q Dell 1907FPc 7.3 USB Board 715G1666 E 715G1665 A 2 7.4 Key Board... -
Page 44: Mechanical Instruction
/• D e™ • Q Dell 1907FPc 8. Mechanical Instruction Tools: 2 Power screwdrivers (φ=5mm,L=60mm); 1 small cross screwdriver; turnbuckle driver; Setting: Power screwdriver torque A=11 kgF. Cm; torque B=6 kgF. Cm Note: Firstly, put the monitor on a soft, flat and clean surface, wear gloves. - Page 45 /• D e™ • Q Dell 1907FPc 3. Take off the bezel Remove rear cover : Turn over the monitor as the Fig, hold the rear cover, and then slightly remove it. Remove the shield : 1. Remove the 4 screws by...
- Page 46 /• D e™ • Q Dell 1907FPc 2. Remove the USB2 board cover by Torque B or by manual 3. Remove the 5 screws by Torque B or by manual 4. Disconnect the wire harness between USB1 and USB2...
- Page 47 /• D e™ • Q Dell 1907FPc 5. Push the main shield as the arrowhead direction Disconnect the connector pin: Disconnect the connector pin between key and main boards Install: Lay the KEPC cable as the figure...
- Page 48 /• D e™ • Q Dell 1907FPc Remove USB and main board : 1. Remove the 7 screws by Torque B 2. Disconnect the connector wire...
- Page 49 P b€ g /• D e™ • Q Dell 1907FPc 3. Disconnect the wire harness between main board and panel Note: Make LVDS connector’s metal side adown for SAMSUNG panel and upturned for other panel. EVA washers Magnetism ring...
- Page 50 /• D e™ • Q Dell 1907FPc 4. Disconnect the wire holder Install: Lay the cables as the line direction Remove the power board : Remove the 5 screws by Torque...
- Page 51 /• D e™ • Q Dell 1907FPc Disconnect wire harness : Disconnect the wire harness between power board and lamps Fix the CCFL connector by black tapes as the figure Remove USB board : Remove the 2 screws by...
- Page 52 /• D e™ • Q Dell 1907FPc Remove the main frame : Remove the 4 screws (left and right) by manual or torque = 3kgF.Cm Cable hook Cable hook Samsung panel: The CCFL line can’t overtop dashed...
-
Page 53: Maintainability
P b€ g /• D e™ • Q Dell 1907FPc 9. Maintainability 9.1 Equipments and Tools Requirement 1. Voltage meter 2. Oscilloscope 3. Pattern Generator 4. LCD Color Analyzer 5. Service Manual 6. User Manual... -
Page 54: Trouble Shooting
/• D e™ • Q Dell 1907FPc 9.2 Trouble shooting 9.2.1 Main Board Note: 1. If replace “Main-Board”, Please re-do “DDC-content” programmed & “White-Balance”. 2. If replace “Power Board” only, Please re-do “ White-Balance”. No power No power... - Page 55 /• D e™ • Q Dell 1907FPc No picture (LED is orange) No picture Measure U601 PIN2=3.3V U602 PIN2=1.8V Replace U601, U602 X301 oscillate waveforms are normal Replace X301 Check if the sync signal from computer is output and video cable...
- Page 56 /• D e™ • Q Dell 1907FPc White screen White screen Measure Q603 base X301 oscillate waveform is normal is high level? Replace X301 Check Q602, Q603 is broken Check reset circuit of or CN501 solder? U401 is normal...
- Page 57 /• D e™ • Q Dell 1907FPc 9.2.2 Inverter/Power Board No Power No power Check AC line volt 110V or 220V Check AC line Check the voltage of C903(+) Check F901, bridge rectified circuit Check start voltage for the pin3 of IC901...
- Page 58 /• D e™ • Q Dell 1907FPc No Backlight Check C811=12V Check adapter Check ON/OFF signal Check Interface board Check IC801 PIN2=5V+-0.25V Check Q801,Q802,Q813,ZD801 circuit Check IC801 PIN10=5V Check Q801,Q802,Q813,ZD801 circuit Check IC801 PIN13 triangular wave is normal...
- Page 59 /• D e™ • Q Dell 1907FPc 9.2.3 Key Board OSD is unstable or not working Is Keypad board connecting normally? Connect Keypad Board Is Button Switch normally? Replace Button Switch Is Keypad board normally? Replace Keypad Board...
-
Page 60: White Balance, Luminance Adjustment
/• D e™ • Q Dell 1907FPc 10. White balance, Luminance adjustment Approximately 30 minutes should be allowed for warm up before proceeding White-Balance adjustment. Before started adjust white balance, please setting the Chroma-7120 MEM. Channel 3 to 6500 K colors, MEM. - Page 61 . m a 1 6 3 . c o m u 5 [ P b € g / • D e ™ • Q Dell 1907FPc 18. Adjust the RED on OSD window until chroma 7120 indicator reached the value R=100 19.
-
Page 62: Edid Content
/• D e™ • Q Dell 1907FPc 11. EDID Content Analog EDID 112: Digital EDID 112:... -
Page 63: Isp Instruction
/• D e™ • Q Dell 1907FPc 12. ISP Instruction 12.1 Software requirement and connection Operating system requirement (1) Microsoft windows OS. (2) 100M free hard-drive space. (3) 1 free parallel port for DDC2BI communication. The hardware Connection... - Page 64 /• D e™ • Q Dell 1907FPc 12.2 Install the software (Gprobe 5.0) for ISP Writer A. Double-click the Install software Select the folder where you would like Genesis Gprobe 5 to be installed Completing the Genesis Gprobe 5 setup wizard...
- Page 65 /• D e™ • Q Dell 1907FPc B. Next, install the Update software Completing the update 1 for Genesis Gprobe 5.0 setup wizard C. Copy the to C: program files → GProbe5.0.0.15 → Genesis Microchip → GProbe 5...
- Page 66 /• D e™ • Q Dell 1907FPc 12.3 Run program After the installation, a short-cut icon will appear on your desktop, double click it will run the program. (1). Select the IC type (NOTE: If there is not this selection, please check the “ChipDB”): Note: Firstly, you can check the I²C normal or not by inputting the “test”...
- Page 67 /• D e™ • Q Dell 1907FPc Set the Connection Settings → Connection → Device to Parallel, click OK! (3). Select Commands → Batch:...
- Page 68 19TLB4 (.txt) Click open. (4). Unplug the Dell AC power, until the LED indicator is off, press Enter or Execute button, when the .txt of MCU is in gray, for example , re-plug Dell AC power, Writer is in progress.
-
Page 69: Check List
. m a 1 6 3 . c o m u 5 [ P b € g / • D e ™ • Q Dell 1907FPc 13. Check List 1) After replacing LCD Main board and panel, Check if white-balance is within the specs, then re-writing DDC is necessary. - Page 70 /• D e™ • Q Dell 1907FPc 7. Select Exit to the upper menu after completing the adjustment. Then press POWER OFF to exit and save it. 3) Steps for writing DDC 1. Employ PC, and connect the DDC-writing instrument and the instrument that is ready for writing into DDC to the power of 12V.
- Page 71 /• D e™ • Q Dell 1907FPc Notes: 1. Make sure the system time of PC is in accordance with the real time before writing. 2. The schematic picture is just as an example for description; the exact content of the DDC is dependent on the serial number of the BARCORD of this model.
-
Page 72: Bom List
/• D e™ • Q Dell 1907FPc 14. BOM List Different key Parts List Part NO Description Quantity Unit Remark 750GLG90E3T21Z D 19" TLB2 ZBD PANEL T980KGCHKRDEUP 750GLG90E3T41Z D LPL 19" TLB4 ZBD PANEL T980KGCHKRDGUP 750GLS90EX1 Z SEC 19"... - Page 73 /• D e™ • Q Dell 1907FPc 40G 19N700 4A RATING LABEL 40G 581700 3A6813 CARTON LABEL 41G780070039A 41G780070043A 44G3231 12 A EVA WASHER 44G3947 1 EPS(L) 44G3947 2 EPS(R) 44G3947 3 EPS(M) 44G3947700 2A CARTON 45G 88609 26...
- Page 74 /• D e™ • Q Dell 1907FPc C501 67G215Y2207RV RUBYCON 50V 22UF C609 67G215Y2207RV RUBYCON 50V 22UF C610 67G215Y2207RV RUBYCON 50V 22UF C615 67G215Y2207RV RUBYCON 50V 22UF AIC980KSCDRP MAIN BOARD CN403 33G8019 8C FPC/FFC CONN CN601 33G8027 12 WAFER 2*6P 2.0MM R/A...
- Page 75 /• D e™ • Q Dell 1907FPc R203 61L0603100 CHIP 10 OHM 1/10W R204 61L0603100 CHIP 10 OHM 1/10W R205 61L0603100 CHIP 10 OHM 1/10W R206 61L0603100 CHIP 10 OHM 1/10W R207 61L0603100 CHIP 10 OHM 1/10W...
- Page 76 /• D e™ • Q Dell 1907FPc R240 61L0603222 RST SM 0603 RC0603 2K2 R241 61L0603222 RST SM 0603 RC0603 2K2 R217 61L0603223 CHIPR 22K OHM +-5% 1/10 R420 61L0603223 CHIPR 22K OHM +-5% 1/10 R421 61L0603223...
- Page 77 /• D e™ • Q Dell 1907FPc R235 61L0603750 9F 75OHM 1% 1/10W C201 65G0603102 32 1000PF +-10% 50V X7R C404 65G0603102 32 1000PF +-10% 50V X7R C405 65G0603102 32 1000PF +-10% 50V X7R C406 65G0603102 32...
- Page 78 /• D e™ • Q Dell 1907FPc C332 65G0603104 12 CER2 0603 X7R 16V 100N C333 65G0603104 12 CER2 0603 X7R 16V 100N C401 65G0603104 12 CER2 0603 X7R 16V 100N C408 65G0603104 12 CER2 0603 X7R 16V 100N...
- Page 79 /• D e™ • Q Dell 1907FPc D209 93G 64 42 P BAV70 SOT-23 D210 93G 64 42 P BAV70 SOT-23 ZD201 93G 39S 34 T UDZS5.6B ZD202 93G 39S 34 T UDZS5.6B ZD203 93G 39S 34 T UDZS5.6B...
- Page 80 /• D e™ • Q Dell 1907FPc NR901 61G 58080 WT 8 OHM NCT C816 65G 3J1206ET 12PF 5% SL 3KV TDK C825 65G 3J1206ET 12PF 5% SL 3KV TDK C817 65G 3J5096ET 5PF 5% SL 3KV...
- Page 81 /• D e™ • Q Dell 1907FPc Q805 57G 763 14 AM9945N Q806 57G 763 14 AM9945N RJ807 61L0805000 CHIP O OHM 1/8W R837 61L0805100 CHIPR 10 OHM+-5% 1/8W R842 61L0805100 CHIPR 10 OHM+-5% 1/8W R917 61L0805101...
- Page 82 /• D e™ • Q Dell 1907FPc R834 61L0805562 CHIP 5.6K OHM 1/8W R814 61L0805563 CHIP 56K OHM 1/8W R823 61L0805753 75K 1/8W R833 61L0805753 75K 1/8W R918 61L0805753 75K 1/8W F902 61L1206000 RST SM 1206 JUMP MAX 0R...
- Page 83 /• D e™ • Q Dell 1907FPc C813 65G0805152 22 CHIP 0.005UF 25V X7R 08 C822 65G0805152 22 CHIP 0.005UF 25V X7R 08 C823 65G0805152 22 CHIP 0.005UF 25V X7R 08 C907 65G0805221 32 CHIP 220PF 50V X7R 0805...
- Page 84 /• D e™ • Q Dell 1907FPc R920 61G175L47052T 47OHM +-5% 1/2W R921 61G175L47052T 47OHM +-5% 1/2W R822 61G212Y625 KT MGFR 6.2MOHM +-5% 1/2W R832 61G212Y625 KT MGFR 6.2MOHM +-5% 1/2W C904 65G 1K152 1T 1.5NF/1KV Z5F+-10%...
- Page 85 /• D e™ • Q Dell 1907FPc C706 67G215L101 4N KY25VB100M-L 6.3*11 C707 67G215L101 4N KY25VB100M-L 6.3*11 C708 67G215L101 4N KY25VB100M-L 6.3*11 C725 67G215L221 4N KY25VB220-M-L8*11.5MM C742 67G215L221 4N KY25VB220-M-L8*11.5MM C734 67G215L470 4N KY25VB47M-L 5*11 C728 67G215Y100 7N...
- Page 86 /• D e™ • Q Dell 1907FPc R713 61L0603153 CHIPR 15KOHM+-5% 1/10W R715 61L0603153 CHIPR 15KOHM+-5% 1/10W R717 61L0603153 CHIPR 15KOHM+-5% 1/10W R746 61L0603221 RST SM 0603 RC0603 220R R754 61L0603222 RST SM 0603 RC0603 2K2 R750 61L0603362 CHIP 3.6K OHM 1/10W...
- Page 87 /• D e™ • Q Dell 1907FPc L702 73G253S 1 B CHOKE COIL L703 73G253S 1 B CHOKE COIL L704 73G253S 1 B CHOKE COIL L705 73G253S 1 B CHOKE COIL L706 73G253S 1 B CHOKE COIL...
- Page 88 /• D e™ • Q Dell 1907FPc 34G1759 SN B RISER-FRONT-COVER 34G1760 SN B RISER BACK COVER 37G 551 2 HINGE ASSY(19") 52G6025 11900 MYLAR FOR STAND HOLDER 85G 724 1 SHIELD COVER M1G 130 5120 SCREW...
- Page 89 /• D e™ • Q Dell 1907FPc T980KSCHBRDGQP Location Part No. Description Quantity Unit CONVERSION BOARD CBPC980KSCDLP VER:A00,V4C09 KEPC980KB9P KEY BOARD PWPC1942SED3P POWER BOARD VER:A00 USB780A2P USB BOARD USB980A1P USB BOARD 11G6070 1 TIE MOUNTS 11G6092 1...
- Page 90 /• D e™ • Q Dell 1907FPc 70G1900700 3C CD MANUAL 85G 725 1 SHIELD USB 89G 175 9 USB CABLE E089B 89G 728GAA 2D SIGNAL CABLE E089D 89G174ELAA 1 DVI CABLE E095 95G8018 30 99 PANEL HARNESS...
- Page 91 /• D e™ • Q Dell 1907FPc U401 56G 562 97 GM 5621-LF-AA U601 56G 563 21 AP1084K33LA U602 56G 563 31 AI1117D-1.8-EI U302 56G 643 13 G691L400T73UF SOT-23 GM U201 56G1133 34 M24C02-WMN6TP U202 56G1133 34...
- Page 92 /• D e™ • Q Dell 1907FPc R407 61L0603101 RST SM 0603 RC0603 100R R408 61L0603101 RST SM 0603 RC0603 100R R602 61L0603102 RST SM 0603 RC0603 1K P R603 61L0603102 RST SM 0603 RC0603 1K P...
- Page 93 /• D e™ • Q Dell 1907FPc R315 61L0603472 RST SM 0603 RC0603 4K7 R316 61L0603472 RST SM 0603 RC0603 4K7 R317 61L0603472 RST SM 0603 RC0603 4K7 R318 61L0603472 RST SM 0603 RC0603 4K7 R323 61L0603472...
- Page 94 /• D e™ • Q Dell 1907FPc C302 65G0603104 12 CER2 0603 X7R 16V 100N C303 65G0603104 12 CER2 0603 X7R 16V 100N C304 65G0603104 12 CER2 0603 X7R 16V 100N C305 65G0603104 12 CER2 0603 X7R 16V 100N...
- Page 95 /• D e™ • Q Dell 1907FPc L302 71G 56K121 CHIP BEAD L303 71G 56K121 CHIP BEAD L304 71G 56K121 CHIP BEAD L305 71G 56K121 CHIP BEAD L306 71G 56K121 CHIP BEAD L307 71G 56K121 CHIP BEAD...
- Page 96 /• D e™ • Q Dell 1907FPc SW02 77G 605 1 AL GP SMD SWITCH SW03 77G 605 1 AL GP SMD SWITCH SW04 77G 605 1 AL GP SMD SWITCH SW05 77G 605 1 AL GP...
- Page 97 /• D e™ • Q Dell 1907FPc L902 73G 174 77 L LINE FILTER L921 73G 253 91 LS CHOKE BY LI SHIN L922 73G 253 91 LS CHOKE BY LI SHIN T901 80GL17T 32 L ADAPTOR BY LITAI...
- Page 98 /• D e™ • Q Dell 1907FPc R915 61L0805103 CHIPR 10K OHM +-5% 1/8W R810 61L0805104 CHIPR 100K OHM+-5% 1/8W R815 61L0805104 CHIPR 100K OHM+-5% 1/8W R821 61L0805104 CHIPR 100K OHM+-5% 1/8W R831 61L0805104 CHIPR 100K OHM+-5% 1/8W...
- Page 99 /• D e™ • Q Dell 1907FPc R819 61L1206150 CHIP 15 OHM 5% 1206 1/4 R910 61L1206229 CHIP 2.2OHM 5% 1/8W R900 61L1206334 330K 1/4W R901 61L1206334 330K 1/4W R902 61L1206334 330K 1/4W R903 61L1206434 430K 1206 1/4W 5%...
- Page 100 /• D e™ • Q Dell 1907FPc D804 93G 64 33 DIO SIG SM BAV99 (PHSE) D801 93G 64 42 PP BAV70 SOT-23 D803 93G 64 42 PP BAV70 SOT-23 D922 93G 6432S IN4148W D923 93G 6432S...
- Page 101 /• D e™ • Q Dell 1907FPc 96G 29 6 SHRINK TUBE UL/CSA R916 61G152M30858F 0.3 OHM 5% 2W 96G 29 6 SHRINK TUBE UL/CSA IC922 56G 563 37 KA278R12CTU TO-220F-4L 90G6263 1 HEAT SINK D921 93G1506 2...
- Page 102 /• D e™ • Q Dell 1907FPc F704 61G 56075 WT PTC KMC 5S075R001-0.75M R740 61L0603000 RST SM 0603 JUMP MAX 0R R741 61L0603000 RST SM 0603 JUMP MAX 0R R704 61L0603103 RST SM 0603 RC0603 10K...
- Page 103 /• D e™ • Q Dell 1907FPc C702 65G0603104 12 CER2 0603 X7R 16V 100N C721 65G0603104 12 CER2 0603 X7R 16V 100N C722 65G0603104 12 CER2 0603 X7R 16V 100N C723 65G0603104 12 CER2 0603 X7R 16V 100N...
- Page 104 /• D e™ • Q Dell 1907FPc C733 65G601M104 7T 0.1UF +-20% 50V Y5V CN705 88G 352 2 CL USB COW CN706 88G 352 2 CL USB COW CN707 95G8014 10 30 WAFER 10P RIGHT ANGLE P...
-
Page 105: Definition Of Pixel Defects
P b€ g /• D e™ • Q Dell 1907FPc 15. Definition Of Pixel Defects Type 1. 750GLG90E3T21Z D LM190E03-TLB2 Dot Defect Bright Dot Dark Dot... - Page 106 /• D e™ • Q Dell 1907FPc Total amount of Dot Defects -------------------------5 Max(Combination) Polarizer Defects Foreign Material Line Defect Bezel Appearance Others...
- Page 107 /• D e™ • Q Dell 1907FPc Type 2. 750GLG90E3T41Z D LM190E03-TLB4 Dot Defect Bright Dot Dark Dot Total amount of Dot Defects -------------------------5 Max(Combination) Polarizer Defects...
- Page 108 /• D e™ • Q Dell 1907FPc Foreign Material Line Defect Bezel Appearance Others Type 3. 750GLS90EX1 Z LTM190EX-L01...
- Page 109 /• D e™ • Q Dell 1907FPc...
- Page 110 /• D e™ • Q Dell 1907FPc...
- Page 111 /• D e™ • Q Dell 1907FPc Type 4. 750GLS90X2111Z LTM190EX-L21...
- Page 112 /• D e™ • Q Dell 1907FPc...
- Page 113 /• D e™ • Q Dell 1907FPc...
Need help?
Do you have a question about the 1907FPc and is the answer not in the manual?
Questions and answers