Table of Contents
Advertisement
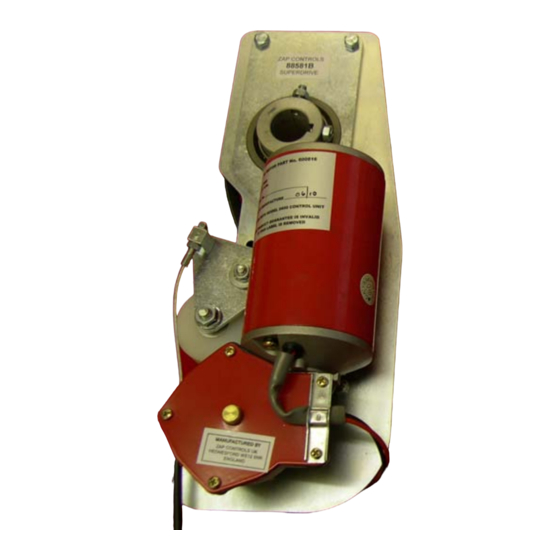
ZAP Controls
Series 3 Technician's Installation and Service Training Manual
ZAP Series 3
Defy All Other Logic
ZAP Controls
100 Waterloo Blvd. Anglesey Business Park, Littleworth Road, Cannock, Staffordshire, England
UK Contact
011-44-154-387-9444
USA Contact
931-510-4432
USA Tech Support
931-510-4432
Online
www.zap-uk.com
sales@zap-uk.com
sales@zap-america.com
via telephone or text
DT
Advertisement
Table of Contents
Troubleshooting

Related Manuals for Zap Series 3


Summary of Contents for Zap Series 3
- Page 1 ZAP Controls Series 3 Technician’s Installation and Service Training Manual ZAP Series 3 Defy All Other Logic ZAP Controls 100 Waterloo Blvd. Anglesey Business Park, Littleworth Road, Cannock, Staffordshire, England UK Contact 011-44-154-387-9444 sales@zap-uk.com USA Contact 931-510-4432 sales@zap-america.com USA Tech Support...
-
Page 2: Table Of Contents
Series 3 Technician’s Installation and Service Training Manual Table of Contents Understanding How ZAP Commercial Operators Work Commercial Operator Standard Mounting on a solid torsion shaft Commercial Operator Standard Mounting on a hollow torsion shaft Commercial Operator Inverted Mounting Commercial Operator Rear Mount Torsion Mounting... - Page 3 Series 3 Technician’s Installation and Service Training Manual Table of Contents 872 Adapter Module Installation Photo Cell Installation for Constant Pressure Close / Photo Cell to Stop Upon Obstruction Dock Light Wiring Auto-Close Timer Programming Auto-Close Timer Temporary Defeat Delay Close Programming...
-
Page 4: Understanding How Zap Commercial Operators Work
Series 3 Technician’s Installation and Service Training Manual Understanding How ZAP Commercial Operators Work Unlike traditional operators, ZAP During the second calibration run, the run times operators do not have limit are verified against the first set of run times. If assemblies. - Page 5 Series 3 Technician’s Installation and Service Training Manual Understanding How ZAP Commercial Operators Work If the resistance on If you increase the the door is significant sensitivity on the enough to cause the sensitivity current demand to potentiometer it spike to the setting of...
-
Page 6: Commercial Operator Standard Mounting On A Solid Torsion Shaft
Series 3 Technician’s Installation and Service Training Manual Commercial Operator Standard Mounting on a solid torsion shaft Materials Needed Appropriate operator for door size. (See Brochure) Tools required 3mm Allen Key, 10mm Wrench, drill, 1/4” Drill bit, Appropriate mounting fasteners. -
Page 7: Commercial Operator Standard Mounting On A Hollow Torsion Shaft
Series 3 Technician’s Installation and Service Training Manual Commercial Operator Standard Mounting on a hollow torsion shaft Materials Needed Appropriate operator for door size. (See Brochure) Tools required 3mm Allen Key, 10mm Wrench, drill, 1/4” Drill bit, Appropriate mounting fasteners. -
Page 8: Commercial Operator Inverted Mounting
Series 3 Technician’s Installation and Service Training Manual Commercial Operator Inverted Mounting Materials Needed Mounting outboard of the cable drum. Appropriate operator for door size. (See Brochure) Position the inverted operator in the direction for the Tools required side of the door that best suits mounting of the 3mm Allen Key, 10mm Wrench, drill, 1/4”... -
Page 9: Commercial Operator Rear Mount Torsion Mounting
Series 3 Technician’s Installation and Service Training Manual Commercial Operator Rear Mount Torsion Mounting Materials Needed Appropriate operator for door size. (See Brochure) Tools required 3mm Allen Key, 10mm Wrench, drill, 1/4” Drill bit, Appropriate mounting fasteners. Appropriate Bowden Cable for height of door (See Bowden Cable section Below) Part# 900005 Additional Large offset torque arm. -
Page 10: Commercial Operator Offset Mounting
Series 3 Technician’s Installation and Service Training Manual Commercial Operator Offset Mounting Offset mounting may be achieved in extreme close quarters mounting situations An independently supported solid torsion shaft must be utilized. Normal installations would utilize two separate toothed sprockets and appropriate roller chain to bridge the drive components. -
Page 11: Commercial Operator Front Mount Low Head Room Torsion Mounting
Series 3 Technician’s Installation and Service Training Manual Commercial Operator Front Mount Low Head Room Torsion Mounting Mounting: Front mount low head room mounting is feasible with the ZAP operator. Depending upon the cable drum width and or diameter, it may require either a larger or additional... -
Page 12: Commercial Dead Axle Sheet Door Operator Mounting
Series 3 Technician’s Installation and Service Training Manual Commercial Dead Axle Sheet Door Operator Mounting Materials Needed Hold the operator 90 degrees to the wall and slide Appropriate operator for door size. (See Brochure) the operator over the shaft and into position. -
Page 13: Commercial Live Axle Sheet Door Operator Mounting
Series 3 Technician’s Installation and Service Training Manual Commercial Live Axle Sheet Door Operator Mounting ZAP 825 SS Live axle sheet door operators are the same as the standard 825 commercial sectional door operator with the exception of a shorter Bowden cable. -
Page 14: Commercial Compact Dead Axle Sheet Door Operator Mounting
Series 3 Technician’s Installation and Service Training Manual Commercial Compact Dead Axle Sheet Door Operator Mounting Installation The 827 operator is designed to take the place of the door spacer that exists between the door and the axle mounting bearing plate. Currently the operator is verified as suitable for installation on the US Door Model 502 and Janus 1”... -
Page 15: Bowden Cable And Over-Ride Lever Mounting
Series 3 Technician’s Installation and Service Training Manual Bowden Cable and Over-Ride Lever Mounting Tools required Insert the hook of the over-ride lever into the end Drill, 1/4” Drill bit, Appropriate mounting fasteners, link of the extension chain. Pull down on the lever to Appropriate wrenches and screwdrivers. -
Page 16: Setting Belt Tension With The Over-Ride Lever
Series 3 Technician’s Installation and Service Training Manual Setting Belt Tension with the Over-Ride Lever Tools required Appropriate wrench Connect the over-ride lever hook to the chain attached to the D shackle on the end of the Bowden cable. (Figure A) Press down on the over-ride lever until the belt feels fully tensioned without locking the lever down. -
Page 17: Controller Case Mounting Instruction
Series 3 Technician’s Installation and Service Training Manual Controller Case Mounting Instruction Warning Electrical Shock Hazard To prevent serious injury or death always ensure power is disconnected when wiring anything into the ZAP Controller. Tools required Slotted screwdriver, Drill, 6” long Phillips driver bit, Phillips screwdriver, Appropriate mounting fasteners. -
Page 18: 115V 1 Phase Wiring Instruction
Series 3 Technician’s Installation and Service Training Manual 115V 1 Phase Wiring Instruction Warning Electrical Shock Hazard To prevent serious injury or death always ensure power is disconnected when wiring anything into the ZAP Controller. Tools Required Small technicians slotted screwdriver... -
Page 19: 208-230V 1 Phase Wiring Instruction
Series 3 Technician’s Installation and Service Training Manual 208-230V 1 Phase Wiring Instruction Warning Electrical Shock Hazard To prevent serious injury or death always ensure power is disconnected when wiring anything into the ZAP Controller. Tools required Small technicians slotted screwdriver... -
Page 20: 480 3 Phase Wiring Instruction
Series 3 Technician’s Installation and Service Training Manual 480 3 Phase Wiring Instruction Warning Electrical Shock Hazard To prevent serious injury or death always ensure power is disconnected when wiring anything into the ZAP Controller. Tools Required Small technicians slotted screwdriver... -
Page 21: Low Voltage Motor Wiring Instruction
Series 3 Technician’s Installation and Service Training Manual Low Voltage Motor Wiring Instruction Warning Electrical Shock Hazard To prevent serious injury or death always ensure power is disconnected when wiring anything into the ZAP Controller. Tools required Small technicians slotted screwdriver, Hammer, screw driver, appropriate fasteners. -
Page 22: 401002 Photo Cell Mounting Instruction
Series 3 Technician’s Installation and Service Training Manual 401002 Photo Cell Mounting Instruction Materials Needed 401002 Photo Cell Tools required Appropriate wrenches and screwdrivers, Appropriate mounting fasteners Insert photo beams into the mounting brackets s shown in (Figure A). Mount each bracket on opposing sides of the door 5-6”... -
Page 23: 401002 Photo Cell Wiring Instruction
Series 3 Technician’s Installation and Service Training Manual 401002 Photo Cell Wiring Instruction Warning Electrical Shock Hazard To prevent serious injury or death always ensure power is disconnected when wiring anything into the ZAP Controller. Materials Needed 401002 Photo Cell... -
Page 24: Initial Operator Set Up
Series 3 Technician’s Installation and Service Training Manual Initial Operator Set Up Once the door operator is fully installed, release the over-ride lever and lift the door to a position approximately 2 feet off the ground. Re-engage the over-ride lever. -
Page 25: 840 Internal Receiver Installation
Series 3 Technician’s Installation and Service Training Manual 840 Internal Receiver Installation Warning Electrical Shock Hazard To prevent serious injury or death always ensure power is disconnected when wiring anything into the ZAP Controller. Materials Needed 840 Receiver (Figure A) -
Page 26: Zap Radio Transmitter Programming
Series 3 Technician’s Installation and Service Training Manual ZAP Radio Transmitter Programming Materials Needed 840 Receiver (Figure A) Either the 2416 (Internal) or the 2414 (External) antenna Tools required Small Technicians screwdriver Remove the antenna from the 840 receiver. (Figure A) Figure A Press and hold the required transmitter button. -
Page 27: Linear Mega-Code / Delta 3 Receiver Installation/Wiring Instruction
ZAP Controller. It is feasible to mount the Linear receiver inside the Figure F case lid of the ZAP Controller. Ensure it is positioned as shown in (Figure A). You may secure the receiver in place using double sided tape. -
Page 28: Chamberlain 355Lm Receiver Installation And Wiring Instruction
Figure B All wiring for the radio receiver onto the ZAP control board is connected to the radio wiring connections as indicated in (Figure B) and highlight ted in red. -
Page 29: Chamberlain 312Hm Receiver Installation And Wiring Instruction
It will need to be mounted outside the enclosure of the ZAP controller case. Figure B All wiring for the radio receiver onto the ZAP control board is connected to the radio wiring connections as indicated in (Figure A) and highlight ted in red. -
Page 30: Chamberlain 365Lm Receiver Installation And Wiring Instruction
Isolate the power supply before wiring any device Figure A into a ZAP Controller. All wiring for the radio receiver onto the ZAP control board is connected to the radio wiring connections as indicated in (Figure A) and highlight ted in red. -
Page 31: Marantec External Receiver Installation And Wiring Instruction
Isolate the power supply before wiring any device into a ZAP Controller. Figure A All wiring for the radio receiver onto the ZAP control board is connected to the radio wiring connections as indicated in (Figure A) and highlight ted in red. -
Page 32: Blue Guard Vk/Fe Wiring
Figure B mounting the device to the bottom of the ZAP controller or on an interior or exterior wall, Figure F Wire the power wire to the 24V connector on TB9. -
Page 33: 850 Beeper Module Installation
Series 3 Technician’s Installation and Service Training Manual 850 Beeper Module Installation Warning Electrical Shock Hazard To prevent serious injury or death always ensure power is disconnected when wiring anything into the ZAP Controller. Materials required 850 Beeper Module (Figure A) Locate the terminals labeled buzzer inside the con- troller. -
Page 34: 8070 Auto-Lock Installation
Series 3 Technician’s Installation and Service Training Manual 8070 Auto-Lock Installation Warning Electrical With wiring of the Auto-Lock completed and the power supply isolated so there is no power to the Shock Hazard controller, plug the 8067 Auto-Lock Module onto the... -
Page 35: 8830 Battery Backup Installation
Series 3 Technician’s Installation and Service Training Manual 8830 Battery Backup Installation Warning Electrical Shock Hazard To prevent serious injury or death always ensure power is disconnected when wiring anything into the ZAP Controller. Materials Required 8830 Battery Backup System (Figure A), 14-18 awg... -
Page 36: Truck Restraint Wiring Instruction
Series 3 Technician’s Installation and Service Training Manual Truck Restraint Wiring Instruction Warning Electrical Shock Hazard To prevent serious injury or death always ensure power is disconnected when wiring anything into the ZAP Controller. Materials required 82-DTLM , 16-20 awg 2 conductor cable Tools required Small technicians screwdriver. -
Page 37: Dock Leveler Interlock Installation
Series 3 Technician’s Installation and Service Training Manual Dock Leveler Interlock Installation Warning Electrical Shock Hazard Interlock To prevent serious injury or death always ensure power is disconnected when wiring anything into the ZAP Controller. Materials required 82-DTLM , 16-20 awg 2 conductor cable Tools required Small technicians screwdriver. -
Page 38: Driver Communication Light Control Installation
Series 3 Technician’s Installation and Service Training Manual Driver Communication Light Control Installation Warning Electrical Shock Hazard Interlock To prevent serious injury or death always ensure power is disconnected when wiring anything into the ZAP Controller. Materials Needed Appropriate operator for door size. (See Brochure) -
Page 39: Slave Relay For 115V Dock Leveler Control Circuit Interlock
Series 3 Technician’s Installation and Service Training Manual Slave Relay for 115V Dock leveler control circuit interlock Warning Electrical Shock Hazard Interlock To prevent serious injury or death always ensure power is disconnected when wiring anything into the ZAP Controller. -
Page 40: 822 With Advance Warning Of Door Closure
Series 3 Technician’s Installation and Service Training Manual 822 with Advance Warning of Door Closure Warning Electrical Shock Hazard To prevent serious injury or death always ensure power is disconnected when wiring anything into the ZAP Controller. Materials Needed Appropriate operator for door size. (See Brochure) -
Page 41: Interlocking 2 Zap Controllers In The Door Open Position
ZAP Controller. operator will function closed. This wiring requires 2 ZAP operators to be in use on Restore the power supply to the operator and test. two individual doors sharing the same track system. -
Page 42: 82Dtlm To Control Accessory On/Off Wiring Instruction
Series 3 Technician’s Installation and Service Training Manual 82DTLM to Control Accessory ON/OFF Wiring Instruction Warning Electrical Interlock Shock Hazard To prevent serious injury or death always ensure power is disconnected when wiring anything into the ZAP Controller. Isolate the power supply before wiring any device into a ZAP Controller. -
Page 43: Door Closed Interlock
Series 3 Technician’s Installation and Service Training Manual Door Closed Interlock Warning Electrical Shock Hazard Interlock To prevent serious injury or death always ensure power is disconnected when wiring anything into the ZAP Controller. Materials required 82-TLM , 16-20 awg 2 conductor cable Tools required Small technicians screwdriver. -
Page 44: Interlocking 2 Zap Controllers In A Sally Port Configuration
ZAP Controller. operator will function closed. This wiring requires 2 ZAP operators to be in use on Restore the power supply to the operator and test. two individual doors sharing the same track system. -
Page 45: Through Traffic Light Control Wiring
Series 3 Technician’s Installation and Service Training Manual Through Traffic Light Control Wiring Warning Electrical Ensure the socket connector is fully seated (Figure F) Shock Hazard Restore the power supply to the operator and test. To prevent serious injury or death... -
Page 46: 821 Through Traffic Light Control With Advance Warning Of Door Closure
Series 3 Technician’s Installation and Service Training Manual 821 Through Traffic Light Control with Advance Warning of Door Closure Warning Electrical Shock Hazard To prevent serious injury or death always ensure power is disconnected when wiring anything into the ZAP Controller. -
Page 47: Additional 3 Button Wall Station
3 button Open controller, thereby creating a loop through both the external 3 button station stop button and the ZAP Case lid stop button circuit. (red wire diagram) Close Wire in parallel from the open connection on the case lid Stop plug to the open button connection on the 3 button station. -
Page 48: Single Contact Device To Cause Cyclic Operation
Series 3 Technician’s Installation and Service Training Manual Single Contact Device to Cause Cyclic Operation Warning Electrical Controller Case Controller Case Lid Shock Hazard To prevent serious injury or death always ensure power is disconnected when wiring anything into the ZAP Open Controller. -
Page 49: Wiring A Single Contact Device To Cause An Open Function
Series 3 Technician’s Installation and Service Training Manual Wiring a single contact device to cause an open function Warning Electrical Controller Case Controller Case Lid Shock Hazard To prevent serious injury or death always ensure power is disconnected when wiring anything into the ZAP Open Controller. -
Page 50: Wiring A Single Contact Device To Cause A Close Function
Series 3 Technician’s Installation and Service Training Manual Wiring a single contact device to cause a close function Warning Electrical Controller Case Controller Case Lid Shock Hazard To prevent serious injury or death always ensure power is disconnected when wiring anything into the ZAP Open Controller. -
Page 51: 871 Interface Expansion Module Installation
Series 3 Technician’s Installation and Service Training Manual 871 Interface Expansion Module Installation Warning Electrical Shock Hazard To prevent serious injury or death always ensure power is disconnected when wiring anything into the ZAP Controller. Materials Needed 16-20 awg 2 conductor cable, Single contact device... -
Page 52: 871 Fire Station Module Installation
Series 3 Technician’s Installation and Service Training Manual 871 Fire Station Module Installation Warning Electrical Unplug the terminal block from TB3. Remove the close wire from the terminal block (Figure B) and Shock Hazard wire to the close terminal on the 871-FS (Figure C) -
Page 53: 872 Adapter Module Installation
Series 3 Technician’s Installation and Service Training Manual 872 Adapter Module Installation Warning Electrical Shock Hazard 8067 Card To prevent serious injury or death always ensure power is disconnected when wiring anything into the ZAP Controller. The 872 Adapter module is designed for use when either the 8070 Auto Lock is to be used with the 871 Expansion Module or the 871 Fire Station Module. -
Page 54: Photo Cell Installation For Constant Pressure Close / Photo Cell To Stop Upon Obstruction
(Figure A) I-Lock Terminate the power Common wire of the photo eye to the 0V connector on TB7 of the ZAP Control Board. (Figure A) If using the 401000 Retro-reflective photo eye, terminate the N/C safety wire (Black) into the I-Lock terminal on TB4 of the ZAP Control Board. -
Page 55: Dock Light Wiring
ZAP Series 3 Technical Manual Dock Light Wiring Warning Electrical Shock Hazard To prevent serious injury or death always ensure power is disconnected when wiring anything into the ZAP Controller. Materials Needed 120V Dock Light Isolate the power supply before wiring any device into a ZAP Controller. -
Page 56: Auto-Close Timer Programming
ZAP Series 3 Technical Manual Auto-Close Timer Programming Warning Electrical Shock Hazard DIP SW 4 To prevent serious injury or death always ensure power is disconnected when wiring anything into the ZAP Controller. Note that the door will not auto close unless the 401002 photo eye system is employed. -
Page 57: Auto-Close Timer Temporary Defeat
ZAP Series 3 Technical Manual Auto-Close Timer Temporary Defeat Warning Electrical Shock Hazard To prevent serious injury or death always ensure power is disconnected when wiring anything into the ZAP Controller. To achieve the simplest method of defeating the auto-close timer it is best to install an 850 Beeper module. -
Page 58: Delay Close Programming
Series 3 Technician’s Installation and Service Training Manual Delay Close Programming Warning Electrical Shock Hazard To prevent serious injury or death always ensure power is disconnected when wiring anything into the ZAP Controller. This programming function is required for use of modules 822 and 821, when requiring an advance warning of pending door closure. -
Page 59: Part Open Programming
Series 3 Technician’s Installation and Service Training Manual Part Open Programming Warning Electrical Shock Hazard To prevent serious injury or death always ensure power is disconnected when wiring anything into the ZAP Controller. To program this function it is necessary to open the... -
Page 60: Close Slow/ Close Fast Programming
Series 3 Technician’s Installation and Service Training Manual Close Slow/ Close Fast Programming Warning Electrical Shock Hazard To prevent serious injury or death always ensure power is disconnected when wiring anything into the ZAP Controller. To program this function it is necessary to open the... -
Page 61: Service Due Reminder
Series 3 Technician’s Installation and Service Training Manual Service Due Reminder A service due reminder is incorporated in the control If it is required to disable the service due reminder: unit. It is not enabled during manufacture. Press and hold the STOP button. -
Page 62: Operations Counter
Series 3 Technician’s Installation and Service Training Manual Operations Counter A door operations counter is a standard feature on all ZAP Series 3 operators. Every door operation is stored into memory for interrogation at any point by a service technician. It IS always enabled and counts... -
Page 63: Basic Troubleshooting Symptom Diagnosis
Series 3 Technician’s Installation and Service Training Manual Basic Troubleshooting Symptom Diagnosis 1. Door does not fully open before turning off. Verify proper operator is installed. Verify operator is properly installed. Check to see if door binding at that position. - Page 64 Series 3 Technician’s Installation and Service Training Manual Basic Troubleshooting Symptom Diagnosis 5. Operator does not turn off when fully cycled Verify proper operator is installed. Up or Down Verify operator is properly installed. Verify Bowden cable is installed properly.
-
Page 65: Basic Troubleshooting Commercial Operator (Motor Head)
Series 3 Technician’s Installation and Service Training Manual Basic Troubleshooting Commercial Operator (Motor Head) Inspect the operator to verify proper Raise and lower the door manually to verify installation. that the door functions properly with no restrictions and is well balanced. Inspect all... -
Page 66: Basic Troubleshooting Commercial Operator (Controller)
Series 3 Technician’s Installation and Service Training Manual Basic Troubleshooting Commercial Operator (Controller) Complete motor head troubleshooting Press the open button and Plug the motor wires back first. Open controller case Lid. Observe observe if the open LED onto TB12. Disengage that the power LED is illuminated. -
Page 67: Advanced Troubleshooting Commercial Operator (Controller)
Series 3 Technician’s Installation and Service Training Manual Advanced Troubleshooting Commercial Operator (Controller) Warning Electrical If it is bad, replace fuse with 3A 5X20mm 250V Shock Hazard fuse. Reinstall fuse, Restore power. If fuse blows, replace board. If not, verify the power indicator LED is illuminated. - Page 68 Series 3 Technician’s Installation and Service Training Manual Advanced Troubleshooting Commercial Operator (Controller) Warning Electrical Voltage reading should read approximately Shock Hazard 54VDC. If it reads excessively high or low more than 5VDC either way, replace the board. Next verify the voltage output on the terminal...
- Page 69 Series 3 Technician’s Installation and Service Training Manual Advanced Troubleshooting Commercial Operator (Controller) Warning Electrical Once the operator is fully calibrated, you may Shock Hazard begin the process of verifying and installing accessories per the respective pages of instruction. Next verify the voltage output on TB12. Set your voltmeter to VDC 200.
-
Page 70: Adjusting Potentiometers
Series 3 Technician’s Installation and Service Training Manual Adjusting Potentiometers Adjusting potentiometers Close Sensitivity There are two adjustable potentiometers on the control board that allow you to adjust the power to the motor and closing sensitivity of the close cycle. (Figure A) -
Page 71: Performing A Master Reset
Series 3 Technician’s Installation and Service Training Manual Performing a Master Reset To perform a Master reset PROGRAM BUTTON Locate the program button. (Figure A) Locate the reset button. (Figure A) ACKNOWLEDGE LED Press and hold down the reset button. -
Page 72: Performing A Factory Reset
Series 3 Technician’s Installation and Service Training Manual Performing a Factory Reset To perform a Factory reset PROGRAM BUTTON Disconnect the power supply for 5 minutes. Restore power supply. ACKNOWLEDGE LED Locate the program button. (Figure A) RESET BUTTON Locate the reset button. (Figure A) Press and hold down the reset button. -
Page 73: 24V Troubleshooting
Series 3 Technician’s Installation and Service Training Manual 24V Troubleshooting Warning Electrical Shock Hazard Ensure Power led is illuminated (Figure A) ACKNOWLEDGE LED Set voltmeter to VDC 200. Locate TB9. (Figure B) Insert black lead into 0V terminal of TB9. -
Page 74: Single Contact Control Device Trouble Shooting
Series 3 Technician’s Installation and Service Training Manual Single Contact Control Device Trouble Shooting Warning Electrical Shock Hazard Cyclic Operation Device Locate Radio Control accessory terminal (Figure A) Check to see if wiring and plug on TB9 is securely connected to TB9 and test. If no... -
Page 75: Additional 3 Button Station Control Device Trouble Shooting
Series 3 Technician’s Installation and Service Training Manual Additional 3 Button Station Control Device Trouble Shooting Warning Electrical Shock Hazard Ensure plug on TB3 is connected securely. (Figure A) Inspect all wiring for control station and verify there are no loose connections. -
Page 76: Zap Motor Assembly Service (Belt And Bearing Replacement)
Series 3 Technician’s Installation and Service Training Manual ZAP Motor Assembly Service (Belt and Bearing Replacement) Belts and bearings are designed for replacement every 20-30k cycles. After removing the operator from the torsion shaft locate the three nuts on the back plate of the operator. -
Page 77: Zap Motor Assembly Service (Bowden Cable Replacement)
Series 3 Technician’s Installation and Service Training Manual ZAP Motor Assembly Service (Bowden Cable Replacement) Release the belt tension from the operator by lifting the over-ride lever. Disconnect the adjusting chain from the D shackle. On the bracket connecting the override lever to... -
Page 78: Zap Motor Assembly Service (Motor Replacement)
Series 3 Technician’s Installation and Service Training Manual ZAP Motor Assembly Service (Motor Replacement) Remove the back plate, driven pulley and belt per the belt and bearing replacement instructions. On 8825 Models, a snap ring must be removed to remove the drive pulley on the motor. Using a pair of snap ring pliers, remove the snap ring and put in a place where it will not be lost. - Page 79 Series 3 Technician’s Installation and Service Training Manual Notes: ZAP Series 3 Defy All Other Logic ZAP Controls 100 Waterloo Blvd. Anglesey Business Park, Littleworth Road, Cannock, Staffordshire, England UK Contact 011-44-154-387-9444 sales@zap-uk.com USA Contact 931-510-4432 sales@zap-america.com USA Tech Support...
- Page 80 Series 3 Technician’s Installation and Service Training Manual ZAP Series 3 Defy All Other Logic ZAP Controls 100 Waterloo Blvd. Anglesey Business Park, Littleworth Road, Cannock, Staffordshire, England UK Contact 011-44-154-387-9444 sales@zap-uk.com USA Contact 931-510-4432 sales@zap-america.com USA Tech Support 931-510-4432...
Need help?
Do you have a question about the Series 3 and is the answer not in the manual?
Questions and answers
Can you mount opener horizontal