Table of Contents
Advertisement
Quick Links
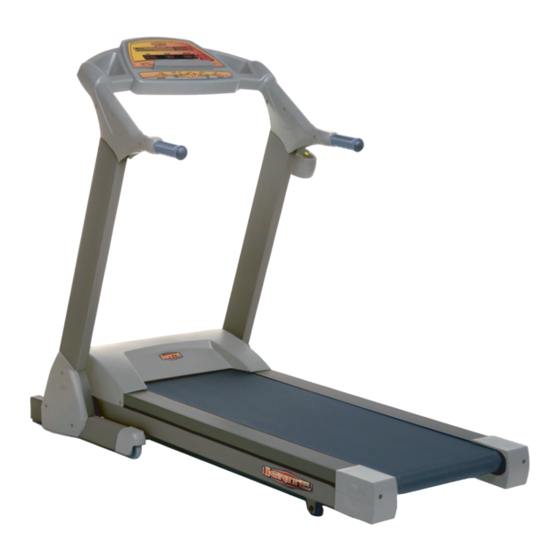
I905 Ignite Treadmill
PLEASE READ ALL INSTRUCTIONS CAREFULLY BEFORE USING THIS PRODUCT. REVIEW AND FOLLOW ALL
REFERENCED SAFETY GUIDELINES. RETAIN ALL PRODUCT LITERATURE FOR FUTURE REFERENCE.
SAFETY CAUTION: PROPERLY WARM UP & STRETCH BEFORE EXERCISING. IF YOU FEEL PAIN OR DIZZINESS AT
ANY TIME WHILE EXERCISING, STOP IMMEDIATELY AND CONSULT YOUR PHYSICIAN.
Part No.
06061
Revision: A
Date: 11/05
OWNER'S MANUAL
IMPORTANT:
Advertisement
Table of Contents

Related Manuals for Ignite I905

Summary of Contents for Ignite I905
- Page 1 I905 Ignite Treadmill OWNER'S MANUAL IMPORTANT: PLEASE READ ALL INSTRUCTIONS CAREFULLY BEFORE USING THIS PRODUCT. REVIEW AND FOLLOW ALL REFERENCED SAFETY GUIDELINES. RETAIN ALL PRODUCT LITERATURE FOR FUTURE REFERENCE. SAFETY CAUTION: PROPERLY WARM UP & STRETCH BEFORE EXERCISING. IF YOU FEEL PAIN OR DIZZINESS AT ANY TIME WHILE EXERCISING, STOP IMMEDIATELY AND CONSULT YOUR PHYSICIAN.
-
Page 2: Table Of Contents
ASSEMBLY INSTRUCTIONS STEP 1 Take the whole treadmill out of the box, and lay all parts flat on floor as shown in Figure 1. Locate the hardware bag and parts that are listed in the chart below. Figure 1 Part # Description Main frame &... -
Page 3: Step
ASSEMBLY INSTRUCTIONS STEP 2 Lift the upright and carefully thread the Allen Bolts (C) and washers (D) inside holes at the bottom of the upright. Use the Allen Key (F) to tighten them down. Figure 2... -
Page 4: Allen Bolt
ASSEMBLY INSTRUCTIONS STEP 3 Put the console to the correct position by holding and pushing both handlebars down. Use the handgrips to pivot the console into position. (Caution: be careful not to pinch the computer wire) Use the Allen Key (F) to securely tighten the Allen Bolts (C) with Washers (D). Figure 3... - Page 5 ASSEMBLY INSTRUCTIONS STEP 4 Place the upright side caps (B) to the correct position. Use the screwdriver to tighten the Phillips Head Screws as shown in Figure 4. Figure 4...
- Page 6 FOLDING AND LOWERING THE TREADMILL TO FOLD THE TREADMILL Figure 5 After assembly is complete, you may fold the machine into the upright position for storage. To fold the machine, raise the deck and make sure the latch is in place by turning the knob as shown.
- Page 7 MOVING THE TREADMILL TO MOVE THE TREADMILL Fold the treadmill to the upright position and make sure to engage the safety latch as shown in Figure 5. Use the handgrips to maneuver your treadmill on its transport wheels. Caution: treadmills are heavy pieces of equipment and require extreme care during transportation.
- Page 8 CAUTION The machine will shut off when the electricity load is above the machine's capacity. To restart the machine, please follow the procedure below: A. Unplug the power cord from the machine's socket. B. Push in the safety switch. C. Replug the power cord into the machine's socket. ** DO NOT PUSH IN THE SAFETY SWITCH BEFORE UNPLUGGING THE MACHINE'S POWER CORD.
-
Page 9: Safety Key
IMPORTANT PRECAUTIONS Caution Do Not attempt to plug in or operate your treadmill before reading the Important Precautions. Important Precautions Power Source Plug the treadmill power cord into a dedicated (not shared) 110 volt, alternating current (AC), 15 amp grounded outlet circuit. Do not use an extension cord or an ungrounded outlet. Do not modify the plug to fit an existing outlet. - Page 10 IMPORTANT SAFEGUARDS Never power up the computer or start the treadmill while standing on the walking belt. You should straddle the walking deck by standing on the side rails until the belt starts moving. Don’t wait for the treadmill to ramp up to full speed before stepping onto the walking belt.
- Page 11 905 COMPUTER OPERATION Computer Display Panel Computer Control Bar Before Starting Note: Never stand on the walking belt while starting or stopping the treadmill. Straddle the walking belt by standing on the side rails. If you are a new user, start at a slow speed and hold the handles until you become comfortable. Key Functions: There are total 13 keys including 1 Safety key, 8 Major Function Keys, 2 Speed Quick-Access Keys, and 2 Incline Quick-Access Keys.
- Page 12 9. KM/MILE SWITCH: During the power off, press the STOP key and SPEED + key and SPEED – key and hold 2 seconds then the LED display will change the KM/MILE automatically. C. Speed Quick-Access Keys: 1. +: Same as Speed +. 2.
- Page 13 OPERATION 1. Put the Safety key to the ON position. Monitor will go to Manual function. 2. Press the INCLINE + – or SPEED+ – buttons to choose your desired program Manual, P1, P2, and U1 (user setting 1). IN the Manual a.
- Page 14 PROGRAM PROFILES MANUAL HRC WEIGHT LOSS - Varies based on Users Input BEGINNING WALKER Segment 1 1 1 2 1 5 1 6 1 7 1 8 15,16 Incline Level 13,14 11,12 9,10 Speed 2 . 0 2 . 5 3 . 0 2 . 6 3 . 1 2 . 7 3 . 2 2 . 8 3 . 3 3 . 0 3 . 5 2 . 5 3 . 0 2 . 6 3 . 1 2 . 7 3 . 2 2 . 8 2 . 5 2 . 0 USER SETTING 1 - Varies based on Users Input...
- Page 15 USING YOUR TREADMILL HOW TO START: First of all, start out slow and easy. Just walk for 10 minutes. Do this every day for a week. If this was easy for you, add five minutes to your exercise for week 2. Keep adding 5 minutes until you are running as long as desired.
- Page 16 STRETCHING Stretching is one of the most important elements of a good fitness regimen. Many users don't stretch enough, or stretch incorrectly. Stretching can be time consuming, but it is important for good exercise form and injury prevention. Important rules for stretching: 1.
-
Page 17: Figure
YOUR TARGET HEART RATE You should know your Maximum Heart Rate and your correct training zone to know if you are training at the right pace. Here are a few ways to figure your target heart rate. You can easily find your Target Heart Rate with this simple method. Subtract your age from 220 (226 for women) to calculate your Maximum Heart Rate. -
Page 19: Belt Adjustment
BELT ADJUSTMENT NOTICE: The treadmill should be placed on a level surface. If the treadmill is not level, the belt will continuously track to the low side of the treadmill. WALKING BELT TENSION As walking belts tend to stretch slightly with use, the belt may occasionally need to be tightened. If belt is too loose, you may find the belt stops while running or walking, while the motor continues to run. - Page 20 WALKING BELT CENTERING The walking belt may occasionally need to be centered. First be certain that belt is tensioned properly. Start the treadmill and run it at about 4km/h, place the allen key through the hole in the rear end cap and into the socket of the adjustment screw. 1.
- Page 21 MAINTENANCE WARNING : ALWAYS UNPLUG THE TREADMILL FROM THE ELECTRICAL OUTLET BEFORE CLEANING, LUBRICATING OR SERVICING THE UNIT. CLEANING General cleaning of the treadmill will prolong the life of the treadmill and improve performance. Keep the unit clean by dusting regularly. Be sure to dust the exposed part of the deck on either side of the walking belt and also the side rails.
- Page 23 EXPLODED VIEW...
- Page 24 PARTS LIST Item Description Part # Item Description Part # A01 C ONS OLE B AS E 23022 B 36 WIR E 12049 A02 LE FT UPR IGHT HANDLE B AR 23159 B 37 S PR ING 05124 A03 R IGHT UPR IGHT HANDLE B AR 23160 B 38 FIXE R 27063...
- Page 26 IMITED ARRANTY General Terms & Conditions Exclusive Remedies All LAMAR Health, Fitness & Sports, LLC exercise products are For any product that fails to conform under the terms of applied warranted to be free from defects in materials and workmanship warranty, LAMAR Health, Fitness &...
-
Page 27: Step
RODUCT EGISTRATION Thank you for purchasing a LAMAR Health, Fitness & Sports, LLC product. Our products are designed and manufactured to the highest quality standards. We are committed to our customers satisfaction and we will do everything we can under the conditions of your product warranty to keep you secure in your product purchase. - Page 28 STAMP LAMAR Health, Fitness, & Sports, LLC 4699 Nautilus Court South #205 Boulder, Co. 80301 FOLD LINE & T LOSED OR EGISTRATION IN A EPARATE NVELOPE www. lamarhfs. com...
Need help?
Do you have a question about the I905 and is the answer not in the manual?
Questions and answers