
Summary of Contents for Diamir Eagle Experience Freeride Pro
- Page 1 SERVICE MANUAL For specialist dealers from 2010 Eagle Experience Freeride Pro Art. Nr. 002695 / 05.10 / B...
-
Page 3: Table Of Contents
DIAMIr Service Manual for specialist dealers table of contents Seite 1 Introduction 2 Diamir Bindings 2.1 Models 2.2 Binding parts 2.3 Choice of the binding 3 Mounting binding 3.1 Drilling 3.2 Mounting 4 Mounting accessories 4.1 Compatibility of accessories 4.2 Mounting the ski brake 4.3 Crampons... -
Page 4: Introduction
Diamir touring and freeride bindings are certified by tÜV according DIN ISO standards and produced within very strict quality parameters. Each binding has to pass a series of checks on the complete system. -
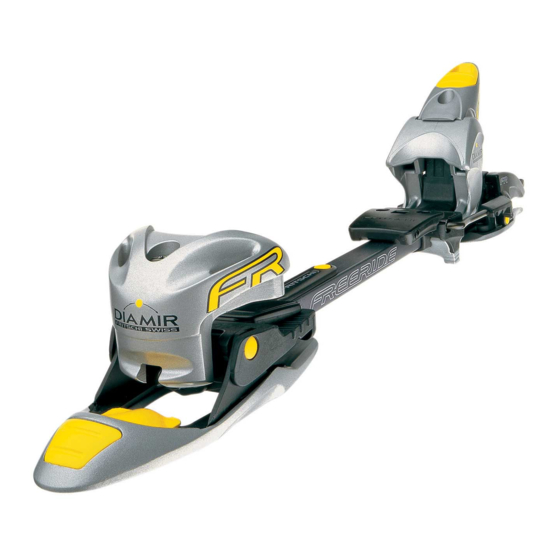
Page 5: Diamir Bindings
• Segment: Alpine touring • DIN value: 3–10 • Sizes: S / M / XL 2.1.3 Diamir Freeride Pro 10/11 (white-red) • Freeride binding with walking function and ski brake 90 or 100 • Segment: Alpine tour – Freeride / Freeride •... -
Page 6: Mounting Binding
4 DIAMIr Service Manual for specialist dealers Mounting binding Drilling 3-point support Fix the ski according to DIN ISO standards on a preventing the ski from moving when drilled and mounted. In case such equipment is not available the ski can be mounted on a table (Picture 3.1 A). -
Page 7: Mounting
Compatibility of accessories Only use original Diamir ski brakes and crampons which correspond to the model and to the width of the ski. the crampons are only for use in hard snow conditions and never on rock or on other hard ground. -
Page 8: Mounting The Ski Brake
6 DIAMIr Service Manual for specialist dealers Mounting the ski brake Before mounting the ski brake make sure that the U-frame and the support plate are correctly positioned (Pictures 4.2 A/B). Start mounting the ski brake by positioning it on the heel support and tighten the screws of the ski brake with a screwdriver by hand (Pictures 4.2 C/D). -
Page 9: Mounting The Safety Leash
DIAMIr Service Manual for specialist dealers Picture 4.3 D Picture 4.3 E Picture 4.3 F Picture 4.3 G Picture 4.3 H Picture 4.3 i Picture 4.3 J Mounting the safety leash A safety leash can be used in place of a ski brake. Pictures 4.4 A–D show how to fix the safety leash on the toe piece (1) and on the leg. -
Page 10: Adjustment And Setting
Adjustment and setting Compatibility and condition of the boot the Diamir alpine touring bindings Eagle and Experience as well as Diamir Freeride Pro binding are tÜV-tested and meet DIN ISO 13992 and 9462. they are designed for the following standard boot soles: •... -
Page 11: Adjustment Of The Binding To The Boot
2. turn the height adjustment screw (19) 2–3 turns upwards when using an alpine touring ski boot (Picture 5.2 B). 3. Put the Diamir adjustment toe piece card or a sheet of paper on the AFD (gliding) plate (10/11). Centre the boot tip in the toe piece and push the heel into the automatic heel release system until it audibly snaps in. -
Page 12: Adjustment Of The Binding To The Person
10 DIAMIr Service Manual for specialist dealers Adjustment of the binding to the person 5.3.1 Determine the DIN value (according to ISO 11088:2006) the DIN value has to be set according to the personal data of the skier in order to get the correct lateral and forward release, therefore body weight, height, age, boot sole length and type of skier (classification see below) has to be used correctly. -
Page 13: Check Function
Additional points to be aware: • Any alterations to the binding, improper mounting and adjustment or use with non Diamir accessories, increase the risk of non- release or defective release. • Boots that do not conform to DIN ISO standard, and worn or damaged boots can have a negative influence on the release. Get your equipment annually checked by a specialist dealer. -
Page 14: Locking The Central Rail
12 DIAMIr Service Manual for specialist dealers Locking the central rail 1. Set the central rail with the end piece (4) fully into the heel elevator. 2. Check if the heel elevator (5) can be locked easily. 3. By pulling the release lever upwards (3) check if the system is locked correctly. -
Page 15: Service Of The Binding
DIAMIr Service Manual for specialist dealers Service of the binding Annual binding check the binding must be checked and if necessary readjusted before each new season by a qualified specialist dealer: • Adjustment to the boot and DIN value setting to the body see chapter 5 •... -
Page 16: Instruction To The Customer
3. Centre the heel of the boot in the automatic heel release system (18) and push it down until it audibly snaps in (Picture 8 A). the crampons Diamir Axion are shaped asymmetrically; therefore you have a right and a left one. When stepping in with the boot the according marks need to be taken into consideration. -
Page 17: Function And Handling Of The Accessories
DIAMIr Service Manual for specialist dealers Picture 8 a Picture 8 B Picture 8 c Picture 8 D Picture 8 E Picture 8 F Picture 8 G Function and handling of the accessories 8.3.1 Mounting crampon Axion and Standard See chapter 4.3. 8.3.2 Activating / deactivating crampon Axion the crampon can be activated or deactivated with the tip or the knob of the ski pole with a gentle tap according to the Pictures 8.3 A/B. -
Page 18: Care And Service
Diamir binding settings are consistent with the ISO 11088 standard which applies to the mounting, adjusting and testing of the ski binding-ski boot unit. the settings provided by the specialist dealer APPLY ONLY tO tHOSE BOOtS FOr WHICH ADJUStMENtS WErE MADE and may not translate to different pairs of boots than tested by the specialist dealer. - Page 20 Fritschi AG Swiss Bindings Hauptstrasse 9 CH-3713 Reichenbach Telefon +41 (0)33 672 14 15 www.diamir.com +41 (0)33 672 14 10 info@diamir.com...
Need help?
Do you have a question about the Eagle Experience Freeride Pro and is the answer not in the manual?
Questions and answers