Table of Contents
Advertisement
Advertisement
Table of Contents

Related Manuals for Paradigm T560


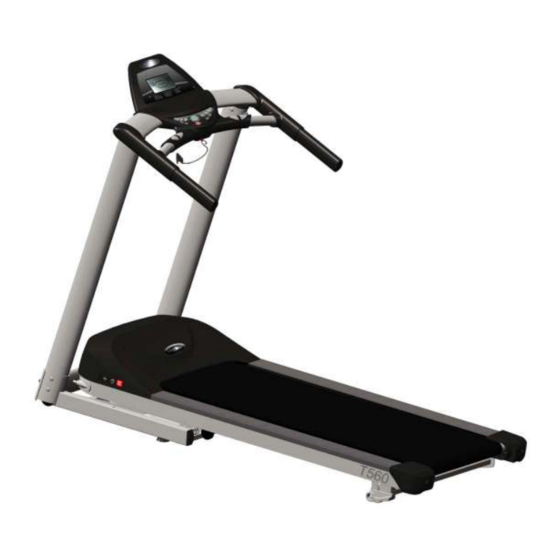
Summary of Contents for Paradigm T560
- Page 1 TREADMILL SERVICE MANUAL T560/T561 Customer Support Services SERVICE MANUAL...
- Page 2 HOW TO USE SERVICE MANUAL AND CONTACT CUSTOMER SUPPORT SERVICES This service manual is applicable to Treadmill T560,T561. Note: Information represents typical configuration and may differ slightly from actual equipment. The Service Manual provides recommendations of safe and efficient approaches to various situations.
-
Page 3: Table Of Contents
SECTION IV ELECTRONIC OVERVIEW AND WIRING DIAGRAMS T560 CONSOLE……………………………………………….………………………………….…………….. 2 T560 MOTOR CONTROLLER PCB……………………………………………….…………….…………… T560 BLOCK DIAGRAM….…………………………….………………………………………………………. 5 T560 WIRING DIAGRAM AND PART LIST (CE VERSION)………...………………………………...……. 6 T561 CONSOLE……………………………………………….………………………………….…………….. 8 T561 MOTOR CONTROLLER PCB……………………………………………….…………….…………… T561 BLOCK DIAGRAM….…………………………….………………………………………………………. 11 T561 WIRING DIAGRAM AND PART LIST (CE VERSION)………...………………………………...……. 12... - Page 4 HS Consumer Treadmill TABLE OF CONTENTS - Continued SECTION V PARTS IDENTIFICATION T560 LA/EXPLODED DRAWING.….………………………………………….………………………………. 2 T560/T561 LA/PART LIST…………………………………………………………………………..…….…… 3 NOTES……………………………………………………………………………………………………………. 6 SECTION VI MISCELLANEOUS INFORMATION PREVENTIVE MAINTENANCE………………………………………………………………………………... 2 UNPACKAGING INSTRUCTIONS…………………………………………………………………………….. 3 INSTALLATION INSTRUCTIONS……………………………………. ……………………………………… T560/INSTALLATION INSTRUCTIONS………………………………………………………………………. 5 LIFE FAX……….…………..…………………………………………………………………………………….. 8...
-
Page 5: Troubleshooting Guide
HS Consumer Treadmill SECTION I TROUBLESHOOTING GUIDE Section 1... - Page 6 HS Consumer Treadmill TROUBLESHOOTING GUIDE Error Error category When it happens. Follow up and send the information to Healthstream R&D center Code Safety key Check Safety key If it happens frequently. Check safety key cable and switch. - Open the plastic and check. Next check the signal cable between motor and console.
-
Page 7: Console
HS Consumer Treadmill TROUBLESHOOTING GUIDE Error Error category When it happens. Follow up and send the information to Healthstream R&D center Code Er 02 Over speed When treadmill runs faster Turn off and on the power. than target speed. - Check Start the treadmill and check if there are Error 41 or others. - Page 8 HS Consumer Treadmill TROUBLESHOOTING GUIDE Error Error category When it happens. Follow up and send the information to Healthstream R&D center Code Er 15 Under speed When treadmill runs Turn off and on the power. slower than target speed. Push Start key to test the treadmill. Motor is damaged.
- Page 9 HS Consumer Treadmill TROUBLESHOOTING GUIDE Error Error category When it happens. Follow up and send the information to Healthstream R&D center Code Er 40 Over Treadmill accelerates too Turn off and on the power. acceleration fast than normal. Er 41 Start the treadmill and check the Error message again.
- Page 10 HS Consumer Treadmill TROUBLESHOOTING GUIDE - Continued (2) TROUBLE SHOOTING GUIDE Problem Potential cause Corrections Treadmill Not plugged in Plug into grounded outlet. will Safety tether key not Insert safety tether key into console. start inserted Reset or replace fuse. House circuit breaker Lubricate treadmill deck and reset.
- Page 11 1.0 – 16.0 TIME XX:XX 00:01 – 99:00 00.01 CALORIES 1-999 FUNCTION KEYS T560 overlay Big Blue back-lit LCD display windows for real time feed back of all workout stats T561 overlay Big Blue back-lit LCD display windows for real time feed back of...
-
Page 12: T560 Console
HS Consumer Treadmill OPERATING T560 CONSOLE - Continued UP – elevation up DOWN – elevation FAST – increase speed SLOW – decrease START /ENTER speed STOP – press twice to stop SPEED ADJUSTMENTS There are two ways to adjust speed during workout. FAST and SLOW will adjust speed by increments of 0.1Km/H. Or you may hold these buttons to ramp up or down. - Page 13 HS Consumer Treadmill OPERATING T560 CONSOLE - Continued PAUSE FUNCTION When STOP button is pressed during workout, program is suspended. LCD will be in “PAUSE”. After the running belt has come to a complete stop, LCD display window will count down from 3:00. During pause mode, only START and STOP buttons will function.
-
Page 14: T561 Console
HS Consumer Treadmill OPERATING T561 CONSOLE – Continued PRESET PROGRAMS START QUICK START Once the power is on This is the fastest way to begin exercising, and it bypassed the steps involved in and the safety tether key selecting a specific workout program. Once the power is turned on and the safety key is secured in place, simply press the START/ENTER button . - Page 15 HS Consumer Treadmill OPERATING T561 CONSOLE – Continued ELEVATION PROGRAMS Once the power is turned on and the safety key is secured in place, you may press << >> to choose the pre-set elevation program, P1, P2 or P3. LCD window will prompt user to set up workout duration, and intensity level based on max elevation value.
- Page 16 HS Consumer Treadmill OPERATING T561 CONSOLE – Continued METs PROGRAM METs program is a motivational program designed to determine user’s physical fitness level. METs is indirect indicator of your fitness level. User may still be able to adjust intensity level using +/- button if the preset is not appropriate. The entire remaining program will scale up or down accordingly.
- Page 17 HS Consumer Treadmill OPERATING T561 CONSOLE – Continued METs Program Profiles Time LEVEL LEVEL LEVEL Section 2...
- Page 18 Level Speed Elevation VO2max METs 10.5 HS Consumer Treadmill 12.9 OPERATING T561 CONSOLE – Continued 14.7 17.1 19.3 21.5 23.9 26.4 29.2 31.1 33.4 TARGET TRAINING PROGRAMS 34.6 36.2 10.3 Users have the option to customize workout based 37.8 10.8 setting training targets for time, distance and 39.0 11.2...
- Page 19 HS Consumer Treadmill OPERATING T561 CONSOLE – Continued Press ENTER/START to confirm Press + / - buttons to input your age Press ENTER/START to confirm Press + / - buttons to input target heart rate 10. Press ENTER/START to confirm 11.
-
Page 20: Setup And Diagnostic Mode
HS Consumer Treadmill OPERATING T561 CONSOLE – Continued SETUP AND DIAGNOSTIC MODE T56X CONSOLE Remark: FAST = SPEED + / SLOW=SPEED - Initial State Stop+Slow U16(Km) U10(Mile) Stop Clear Add lubrication message Initial State Fast+Slow (for two sec) Incline calibration Initial State 12%+6%(for two sec) Lost munber40... - Page 21 HS Consumer Treadmill OPERATING T561 CONSOLE – Continued Program version Initial State Stop+Fast S-01 Testing Program Initial State Fast+Slow+Stop Show monitor Section 2...
- Page 22 HS Consumer Treadmill SECTION III HOW TO … SERVICE AND REPAIR GUIDE Section 3...
- Page 23 HS Consumer Treadmill How To… Replace The Running Belt and Deck Tools Required: Allen key set, Phillips screwdriver, tape measure, rubber hammer, and open end wrench set. (All fasteners are metric. Make sure that you have metric tools.) REMOVAL AND INSTALLATION At the power switch, turn off the unit, and then unplug the power cord at the wall outlet.
- Page 24 HS Consumer Treadmill How To… Replace The Running Belt and Deck - Continued Tools Required: Allen key set, Phillips screwdriver, tape measure, rubber hammer, and open end wrench set. (All fasteners are metric. Make sure that you have metric tools.) REMOVAL AND INSTALLATION –...
-
Page 25: Adjust Running Belt Tracking
HS Consumer Treadmill How To… Adjust Running Belt Tracking Tools Required: Allen key set. (All fasteners are metric. Make sure that you have metric tools.) After the treadmill has been installed and leveled, the belt must be checked for confirm proper tracking. -
Page 26: Adjust Running Belt Tension
HS Consumer Treadmill How To… Adjust Running Belt Tension Tools Required: Allen key set. (All fasteners are metric. Make sure that you have metric tools.) Locate the two belt tensioning bolts on each side of the rear roller mounting bracket. The tensioning bolts are accessible from the holes provided in the rear roller guards. -
Page 27: Motor Drive Belt
HS Consumer Treadmill How To…Replace The Motor Drive Belt Tools Required: Allen key set, Phillips screwdriver, and open end wrench set. (All fasteners are metric. Make sure that you have metric tools.) REMOVAL AND INSTALLATION At the power switch, turn off the unit and unplug the power cord at the wall outlet. -
Page 28: Drive Motor
HS Consumer Treadmill How To…Replace The Drive Motor Tools Required: Allen key set, Phillips screwdriver, and open end wrench set. (All fasteners are metric. Make sure that you have metric tools.) REMOVAL AND INSTALLATION At the power switch, turn off the unit, then unplug the power cord at the wall outlet. -
Page 29: Front Roller
HS Consumer Treadmill How To…Replace The Front Roller Tools Required: Allen key set, Phillips screwdriver, and open end wrench set. (All fasteners are metric. Make sure that you have metric tools.) REMOVAL AND INSTALLATION At the power switch, turn off the unit then unplug the power cord at the wall outlet. -
Page 30: Rear Roller
HS Consumer Treadmill How To…Replace The Rear Roller Tools Required: Allen key set, Phillips screwdriver, rubber hammer, and open end wrench set. (All fasteners are metric. Make sure that you have metric tools.) REMOVAL AND INSTALLATION At the power switch, turn off the unit, then unplug the power cord at the wall outlet. -
Page 31: Deck Cushion
HS Consumer Treadmill How To…Replace The Deck Cushion Tools Required: Allen key set, Phillips screwdriver, and rubber hammer. (All fasteners are metric. Make sure that you have metric tools.) …………………………………………………………………………………….. REMOVAL AND INSTALLATION At the power switch, turn off the unit, then unplug the power cord at the wall outlet. - Page 32 HS Consumer Treadmill How To…Replace The Deck Cushion - Continued Tools Required: Allen key set, Phillips screwdriver, and rubber hammer. (All fasteners are metric. Make sure that you have metric tools.) …………………………………………………………………………………….. REMOVAL AND INSTALLATION Slide each extrusion back. Remove the deck screws(6) and brackets(6), then lift the deck out of the running belt.
-
Page 33: Incline Motor
HS Consumer Treadmill How To…Replace The Incline Motor Tools Required: Phillips screwdriver, Sharp nose pliers, and open end wrench set. (All fasteners are metric. Make sure that you have metric tools.) REMOVAL AND INSTALLATION Turn power on. Check to see if treadmill is at 12% incline. - Page 34 HS Consumer Treadmill How To…Replace The Incline Motor - Continued Tools Required: Phillips screwdriver, Sharp nose pliers, and open end wrench set. (All fasteners are metric. Make sure that you have metric tools.) REMOVAL AND INSTALLATION Replace the new incline motor. a.
- Page 35 HS Consumer Treadmill How To…Replace The Incline Motor - Continued Tools Required: Phillips screwdriver, Sharp nose pliers, and open end wrench set. (All fasteners are metric. Make sure that you have metric tools.) When incline motor needs calibration: START / ENTER When controller changed.
-
Page 36: Motor Controller
HS Consumer Treadmill How To…Replace The Motor Controller Tools Required: Phillips Screwdriver (All fasteners are metric. Make sure that you have metric tools.) REMOVAL AND INSTALLATION At the power switch, turn off the unit, then unplug the power cord at the wall outlet. - Page 37 HS Consumer Treadmill How To…Replace The Moving Wheel Tools Required: Allen key set, and open end wrench set. (All fasteners are metric. Make sure that you have metric tools.) REMOVAL AND INSTALLATION At the power switch, turn off the unit, then unplug the power cord at the wall outlet.
-
Page 38: Wiring Block Diagram
HS Consumer Treadmill SECTION IV ELECTRONIC OVERVIEW WIRING BLOCK DIAGRAM Section 4... - Page 39 ELECTRONIC OVERVIEW – T560 CONSOLE PCB Function Description The T560 console is designed to act as an intelligent display and keypad interface. It is intended to work in conjunction with the Motor Control module to form the nucleus of the I/O and control system. The console board periodically reads the keypad input port to check for user inputs, updates and refreshes the status LCDs, data display, and communicates with the Motor Control module.
- Page 40 HS Consumer Treadmill ELECTRONIC OVERVIEW – T560 CONSOLE PCB J2 is used for safety key J5 is used for keypad J3 is used for earth J9 is a 6pin connector Safety key used for connection with Ground hand pulse. Ground...
-
Page 41: T560 Motor Controller Pcb
HS Consumer Treadmill ELECTRONIC OVERVIEW – T560 MOTOR CONTROLLER PCB Functional Description The Motor Controller PCBs are designed to act as an interface between the Drive motor, Display Console, and the Incline Motor. The desired belt speed and elevation is sent down to the motor controller and incline motor via the users selected input into the console. - Page 42 HS Consumer Treadmill ELECTRONIC OVERVIEW – T560 MOTOR CONTROLLER PCB J2 is used for safety key J10 is UP LIFE to the incline motor connect. J1 is a pin connector used for chock L. J2 is a pin connector used for filter N.
- Page 43 HS Consumer Treadmill ELECTRONIC OVERVIEW – T560(110V) BLOCK DIAGRAM Section 4...
- Page 44 HS Consumer Treadmill ELECTRONIC OVERVIEW – T560(230V) BLOCK DIAGRAM Section 4...
- Page 45 HS Consumer Treadmill ELECTRONIC OVERVIEW – T560 110V WIRING DIAGRAM Section 4...
- Page 46 HS Consumer Treadmill ELECTRONIC OVERVIEW – T560 110V PART LIST T560 ( ( ( ( 110V-Layout) ) ) ) -A- 070731 Item. PART NO. Color Length Remark WI221100 BLACK 100mm WI233080 YELLOW/GREEN 80mm WI222120 WHITE 120mm 64792 BLACK 1200mm 64790...
- Page 47 HS Consumer Treadmill ELECTRONIC OVERVIEW – T560 230V WIRING DIAGRAM Section 4...
- Page 48 HS Consumer Treadmill ELECTRONIC OVERVIEW – T560 230V PART LIST T560 ( ( ( ( 230V-Layout) ) ) ) -A- 070731 Item. PART NO. Color Length Remark WI221100 BLACK 100mm WI233080 YELLOW/GREEN 80mm WI222120 WHITE 120mm 64792 BLACK 1200mm 64790...
- Page 49 HS Consumer Treadmill ELECTRONIC OVERVIEW – T561 CONSOLE PCB Function Description The T561 console is designed to act as an intelligent display and keypad interface. It is intended to work in conjunction with the Motor Control module to form the nucleus of the I/O and control system. The console board periodically reads the keypad input port to check for user inputs, updates and refreshes the status LCDs, data display, and communicates with the Motor Control module.
- Page 50 HS Consumer Treadmill ELECTRONIC OVERVIEW – T561 CONSOLE PCB J2 is used for safety key J5 is used for keypad J3 is used for earth J9 is a 6pin connector Safety key used for connection with Ground hand pulse. Ground VCC(12V) Receive Send...
-
Page 51: T561 Motor Controller Pcb
HS Consumer Treadmill ELECTRONIC OVERVIEW –T561 MOTOR CONTROLLER PCB - Continued Functional Description The Motor Controller PCBs are designed to act as an interface between the Drive motor, Display Console, and the Incline Motor. The desired belt speed and elevation is sent down to the motor controller and incline motor via the users selected input into the console. - Page 52 HS Consumer Treadmill ELECTRONIC OVERVIEW –T561 MOTOR CONTROLLER PCB - Continued J2 is used for safety key J10 is UP LIFE to the incline motor connect. J1 is a pin connector used for chock L. J2 is a pin connector used for filter N.
- Page 53 HS Consumer Treadmill ELECTRONIC OVERVIEW – T561(110V) BLOCK DIAGRAM Section 4...
- Page 54 HS Consumer Treadmill ELECTRONIC OVERVIEW – T561(230V) BLOCK DIAGRAM Section 4...
- Page 55 HS Consumer Treadmill ELECTRONIC OVERVIEW – T561 110V WIRING DIAGRAM Section 4...
- Page 56 HS Consumer Treadmill ELECTRONIC OVERVIEW – T561 110V PART LIST T561 ( ( ( ( 110V-Layout) ) ) ) -A- 070731 Item. PART NO. Color Length Remark WI221100 BLACK 100mm WI233080 YELLOW/GREEN 80mm WI222120 WHITE 120mm 64792 BLACK 1200mm 64790 BLACK 450mm 64787...
- Page 57 HS Consumer Treadmill ELECTRONIC OVERVIEW – T561 230V WIRING DIAGRAM Section 4...
- Page 58 HS Consumer Treadmill ELECTRONIC OVERVIEW – T561 230V PART LIST T561 ( ( ( ( 230V-Layout) ) ) ) -A- 070731 Item. PART NO. Color Length Remark WI221100 BLACK 100mm WI233080 YELLOW/GREEN 80mm WI222120 WHITE 120mm 64792 BLACK 1200mm 64790 BLACK 450mm 64787...
-
Page 59: Notes
HS Consumer Treadmill NOTE: Section 4... -
Page 60: Parts Identification
HS Consumer Treadmill SECTION V PARTS IDENTIFICATION Section 5... - Page 61 HS Consumer Treadmill EXPLODED DRAWING T560(110V) T560(110V) Update:2007.08.08 Section 5...
- Page 62 HS Consumer Treadmill EXPLODED DRAWING T560(110V) Section 5...
- Page 63 HS Consumer Treadmill EXPLODED DRAWING T560(110V) Section 5...
- Page 64 HS Consumer Treadmill EXPLODED DRAWING T560(110V) Section 5...
- Page 65 HS Consumer Treadmill EXPLODED DRAWING T560(110V) Section 5...
- Page 66 HS Consumer Treadmill EXPLODED DRAWING T560(110V) T560 (110V) Update: 2007.08.08 ITEM No. PARTS DESCRIPTION QTY. Coating, frame, base Cap, end, frame, base Foot, front, frame, base Coating, support, L Coating, support, R Stop, lock Wheel, incline Washer, star Nut, nylon...
- Page 67 HS Consumer Treadmill EXPLODED DRAWING T560(110V) T560 (110V) Update: 2007.08.08 ITEM No. PARTS DESCRIPTION QTY. Belt, running Assy, roller, rear Deck Cover, motor Bracket, stopper, R Landing, side Cap, frame, main, rear, L Cap, frame, main, rear, R Overlay, console...
- Page 68 HS Consumer Treadmill EXPLODED DRAWING T560(110V) T560 (110V) Update: 2007.08.08 ITEM No. PARTS DESCRIPTION QTY. Spring steel, cam, safety key Coating, upright, R Bushing, wheel, rear Screw, dome Screw, dome Screw, flange Screw, hex WASHER,SPRING Screw, dome Washer, flat Screw, hex...
- Page 69 HS Consumer Treadmill EXPLODED DRAWING T560(110V) T560 (110V) Update: 2007.08.08 Washer, star Screw, dome Screw, dome Inlet, AC Breaker, circuit, 110V Switch, power Explode drawing & part list 070808 Section 5...
- Page 70 HS Consumer Treadmill EXPLODED DRAWING T560(230V) T560(230V) Update:2007.08.08 Section 5...
- Page 71 HS Consumer Treadmill EXPLODED DRAWING T560(230V) Section 5...
- Page 72 HS Consumer Treadmill EXPLODED DRAWING T560(230V) Section 5...
- Page 73 HS Consumer Treadmill EXPLODED DRAWING T560(230V) Section 5...
- Page 74 HS Consumer Treadmill EXPLODED DRAWING T560(230V) Section 5...
- Page 75 HS Consumer Treadmill EXPLODED DRAWING T560(230V) T560 (230V) Update: 2007.08.08 ITEM No. PARTS DESCRIPTION QTY. Coating, frame, base Cap, end, frame, base Foot, front, frame, base Bracket, support, L Bracket, support, R Stop, lock Wheel, incline Washer, star Nut, nylon...
- Page 76 HS Consumer Treadmill EXPLODED DRAWING T560(230V) T560 (230V) Update: 2007.08.08 ITEM No. PARTS DESCRIPTION QTY. Belt, running Assy, roller, rear Deck Cover, motor Bracket, stopper, R Landing, side Cap, frame, main, rear, L Cap, frame, main, rear, R Overlay, console...
- Page 77 HS Consumer Treadmill EXPLODED DRAWING T560(230V) T560 (230V) Update: 2007.08.08 ITEM No. PARTS DESCRIPTION QTY. Spring steel, cam, safety key Coating, upright, R Bushing, wheel, rear Screw, dome Screw, dome Screw, flange Screw, hex WASHER,SPRING Screw, dome Washer, flat Screw, hex...
- Page 78 HS Consumer Treadmill EXPLODED DRAWING T560(230V) T560 (230V) Update: 2007.08.08 Washer, curve Washer, star Screw, dome Screw, dome Inlet, AC Breaker, circuit, 110V Switch, power Sleeve, screw Filter Screw, phillips Choke Explode drawing & part list 070808 Section 5...
- Page 79 HS Consumer Treadmill EXPLODED DRAWING T561(110V) T561(110V) Update:2007.08.08 Section 5...
- Page 80 HS Consumer Treadmill EXPLODED DRAWING T561(110V) Section 5...
- Page 81 HS Consumer Treadmill EXPLODED DRAWING T561(110V) Section 5...
- Page 82 HS Consumer Treadmill EXPLODED DRAWING T561(110V) Section 5...
- Page 83 HS Consumer Treadmill EXPLODED DRAWING T561(110V) Section 5...
- Page 84 HS Consumer Treadmill EXPLODED DRAWING T561(110V) T561 (110V) Update: 2007.08.08 ITEM No. PARTS DESCRIPTION QTY. Coating, frame, base Cap, end, frame, base Foot, front, frame, base Coating, support, L Coating, support, R Stop, lock Wheel, incline Washer, star Nut, nylon Wheel, moving Wheel, moving Washer, roller...
- Page 85 HS Consumer Treadmill EXPLODED DRAWING T561(110V) T561 (110V) Update: 2007.08.08 ITEM No. PARTS DESCRIPTION QTY. Belt, running Assy, roller, rear Deck Cover, motor Bracket, stopper, R Landing, side Cap, frame, main, rear, L Cap, frame, main, rear, R Overlay, console Overlay, membrane Cover, base, console, top Cylinder, hybrid...
- Page 86 HS Consumer Treadmill EXPLODED DRAWING T561(110V) T561 (110V) Update: 2007.08.08 ITEM No. PARTS DESCRIPTION QTY. Spring steel, cam, safety key Coating, upright, R Bushing, wheel, rear Screw, dome Screw, dome Screw, flange Screw, hex WASHER,SPRING Screw, dome Washer, flat Screw, hex Screw, dome Nut, nylon Screw, hex...
- Page 87 HS Consumer Treadmill EXPLODED DRAWING T561(110V) T561 (110V) Update: 2007.08.08 Washer, curve Washer, star Screw, dome Screw, dome Inlet, AC Breaker, circuit, 110V Switch, power Speaker Board, receiver, wireless Cable, MP3/CD,console Explode drawing & part list 070808 Section 5...
- Page 88 HS Consumer Treadmill EXPLODED DRAWING T561(230V) T561(230V) Update:2007.08.08 Section 5...
- Page 89 HS Consumer Treadmill EXPLODED DRAWING T561(230V) Section 5...
- Page 90 HS Consumer Treadmill EXPLODED DRAWING T561(230V) Section 5...
- Page 91 HS Consumer Treadmill EXPLODED DRAWING T561(230V) Section 5...
- Page 92 HS Consumer Treadmill EXPLODED DRAWING T561(230V) Section 5...
- Page 93 HS Consumer Treadmill EXPLODED DRAWING T561(230V) T561 (230V) Update: 2007.08.08 ITEM No. PARTS DESCRIPTION QTY. Coating, frame, base Cap, end, frame, base Foot, front, frame, base Bracket, support, L Bracket, support, R Stop, lock Wheel, incline Washer, star Nut, nylon Wheel, moving Wheel, moving Washer, roller...
- Page 94 HS Consumer Treadmill EXPLODED DRAWING T561(230V) T561 (230V) Update: 2007.08.08 ITEM No. PARTS DESCRIPTION QTY. Belt, running Assy, roller, rear Deck Cover, motor Bracket, stopper, R Landing, side Cap, frame, main, rear, L Cap, frame, main, rear, R Overlay, console Overlay, membrane Cover, base, console, top Cylinder, hybrid...
- Page 95 HS Consumer Treadmill EXPLODED DRAWING T561(230V) T561 (230V) Update: 2007.08.08 ITEM No. PARTS DESCRIPTION QTY. Spring steel, cam, safety key Coating, upright, R Bushing, wheel, rear Screw, dome Screw, dome Screw, flange Screw, hex WASHER,SPRING Screw, dome Washer, flat Screw, hex Screw, dome Nut, nylon Screw, hex...
- Page 96 HS Consumer Treadmill EXPLODED DRAWING T561(230V) T561 (230V) Update: 2007.08.08 Washer, curve Washer, star Screw, dome Screw, dome Inlet, AC Breaker, circuit, 110V Switch, power Speaker Board, receiver, wireless Cable, MP3/CD,console Sleeve, screw Filter Screw, phillips Choke Explode drawing & part list 070808 Section 5...
- Page 97 HS Consumer Treadmill NOTES: Section 5...
- Page 98 HS Consumer Treadmill SECTION VI MISCELLANEOUS INFORMATION Section 6...
- Page 99 HS Consumer Treadmill Preventive Maintenance Schedule ITEM WEEKLY MONTHLY QUARTERLY BI-ANNUAL ANNUAL DISPLAY CONSOLE ASSEMBLEY Hardware Inspect Overlay Clean Inspect Emergency Clean Inspect Switch/Key HANDLEBAR ASSEMBLY Hardware Inspect Handlebar Inspect Side Hand Rails Inspect FRAME ASSEMBLY Hardware Inspect Motor Cover Clean Drive Belt Inspect...
- Page 100 HS Consumer Treadmill UNPACKGING INSTRUCTIONS CAUTION: For your own safety, be sure to fold up the deck before removing the treadmill from the carton. 1. Remove the computer console box and uprights set carefully. 2. Remove all the packaging materials. 3.
- Page 101 HS Consumer Treadmill INSALLATION INSTRUCTIONS MPORTANT AFETY NSTRUCTIONS DO NOT position the rear of the treadmill within 6 feet (2 meter) of the nearest obstruction. The ⇒ sides of the treadmill should maintain a minimum clearance of 8 inches (20 cm) from the nearest treadmill or other obstruction.
- Page 102 OOLS EQUIRED FOR SSEMBLEY… 6mm Allen Key (provided) T560 / T561 P ARTS ESCRIPTION CONSOLE Qty: 1 LEFT UPRIGHT POST Qty: 1 RIGHT UPRIGHT POST Qty: 1 SCREW DOME HEAD Qty: 8 M8x15mm WASHER, CURVE Qty: 6 OD17xID8.5x1.5T SCREW DOME HEAD...
- Page 103 HS Consumer Treadmill PREVENTIVE MAITENANCE TIPS Section 6...
- Page 104 IMPORTANT! DO NOT DISCARD THE SHIP KIT LOCATED ON TOP OF THE DECK AND BELT. ALL NECESSARY COMPONENTS NEEDED TO COMPLETE THE INSTALLATION ARE LOCATED IN THE SHIP KIT. Only one tool is required to assemble the treadmill. This tool is provided along with the bolt pack. Keep the tool to tension the running belt in the future.
- Page 105 HS Consumer Treadmill COMMUNICATING BY FAX If you would like to submit a part order, or if you need help troubleshooting a problem, we have included, for your convenience, a FAX form on the following page. Simply make a copy (or copies) of the FAX sheet and fill in the necessary information.
- Page 106 IMPORTANT! DO NOT DISCARD THE SHIP KIT LOCATED ON TOP OF THE DECK AND BELT. ALL NECESSARY COMPONENTS NEEDED TO COMPLETE THE INSTALLATION ARE LOCATED IN THE SHIP KIT. □ □ □ □ □ □ □ □ PARTS ORDER SALE (IF BOTH PLEASE INDICATE) □...
- Page 107 HS Consumer Treadmill NOTES: Section 6...
Need help?
Do you have a question about the T560 and is the answer not in the manual?
Questions and answers