Table of Contents
Advertisement
Advertisement
Table of Contents
Troubleshooting

Related Manuals for Paradigm Platinum T1


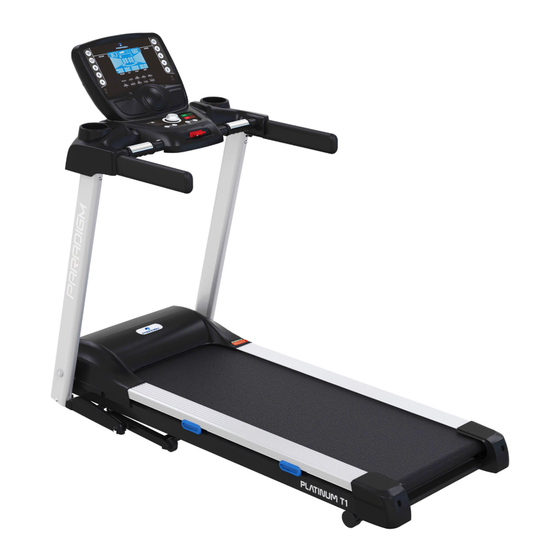
Summary of Contents for Paradigm Platinum T1
- Page 1 OWNER’S MANUAL PDG0038 Call for service 07 3272 7010...
-
Page 2: Table Of Contents
Table of Contents Page Features __________________________ Exploded View _______________________ 4 -5 Part List ________________ _____________ 6 - 7 Safety Information_____________________ Electrical Information _________________ __ Included Hardware_______________________ Assembly Instruction___________________ 11 - 14 Maintenance ___________________________ Fold & Transport _______ ____________ Operations__________________________ 17 - 23 24 - 25 Monitor Your Heart Rate _______________ Warm Up___________________________ 26... -
Page 3: Features
Features The treadmill has been designed and constructed to provide trouble free usage and enjoyable exercise. You can greatly improve your understanding and benefits of exercising by carefully reading the instructions given in this manual .Please familiarize yourself with the maintenance advice provided for you. -
Page 4: Exploded View
Exploded View Call for service 07 3272 7010... -
Page 5: Exploded View
Exploded View Call for service 07 3272 7010... -
Page 6: Part List
Part List Bubble Description Bubble Description t e l t e l Left upright tubing Console upper wire 70cm Right upright tubing Lower wire 180cm n i l c t i n i l a i l l l o n i l l l o c t i... - Page 7 Part List Bubble Description Bubble Description Stuff screw∮8x25L Right rail end cap Philip head self tapping screw End cap, incline bracket M4*16 p i l l l o p i l i r r t l o p i l Grounding wire 12cm Hex socket head bolt M8*55 t l o...
-
Page 8: Safety Information
Important Safety Information IMPORTANT: THIS UNIT IS INTENDED FOR HOUSEHOLD USE ONLY Your treadmill was designed and built for optimum safety. However, certain precautions apply whenever you use your treadmill. Be sure to read the manual before assembly and operation. Also, please note the following safety precautions: DANGER: To reduce the risk of electric shock, always unplug the treadmill from the electrical outlet immediately after using and before cleaning. -
Page 9: Electrical Information
Electrical Information WARNING! NEVER use a ground fault circuit interrupt (GFCI) wall outlet with this treadmill. Large switching currents of the drive motor will trip GFCI type outlets, as any appliance with a large motor. Route the power cord away from any moving part of the treadmill including the elevation mechanism and transport wheels. -
Page 10: Included Hardware
Included Hardware Collapse box bottom and lay sides down before assembly and do not attempt to move the treadmill out of its box until the unit is fully assembled. Locate the hardware bag and parts that are listed in the chart below. Call for service 07 3272 7010... -
Page 11: Assembly Instruction
Assembly Instruction Lift up the upright handlebar, align linkage bar with shaft, then fasten screw (I) tightly at the bottom linkage bar with Allen key (J). Call for service 07 3272 7010... - Page 12 Assembly Instruction Fold down the handlebars platform to the upright tubing. Place washers (D) and screws (C) on the handlebar. Fasten the screws with Allen key (J) tightly. Call for service 07 3272 7010...
- Page 13 Assembly Instruction Connect 2 wires with the same color respectively. Attach console (A) to the supporter. Make sure 3 bolts align with holes. Put nuts (F) and washer (H) on the center bolt. Put nuts (F) and washer (H) on the side bolts. Tighten with Carriage wrench (E). Call for service 07 3272 7010...
- Page 14 Assembly Instruction Attach and press down the upright side cap (L) at the bottom linkage bar. When finish assembly, please make sure all bolts are tightened properly! Call for service 07 3272 7010...
-
Page 15: Maintenance
Maintenance ADJUST THE BELT TENSION If the running belt feels as though it is “slipping” or hesitating when you plant your foot during a run, the tension on the running belt may have to be increased. To increase the tension of the running belt, turn both left and right adjustment bolts clockwise evenly. -
Page 16: Fold & Transport
Folding & Transport FOLDING After assembly is complete, you may fold the machine into the upright position for storage. To fold the machine, raise the deck until it locks into position. Make sure the treadmill’s elevation is at its lowest position (%) before folding the deck to avoid damage to your machine. -
Page 17: Operations
Operations KEY FUCTION Rotary knob key = Rotate to choose program or set number (clockwise to increase number, counterclockwise to decrease number). Press knob to confirm. Start = Press to start treadmill Stop = Press to stop the treadmill. ... -
Page 18: Safety Tether Key
Operations SAFETY TETHER KEY The treadmill cannot run if the tether key is not installed on the console correctly. The treadmill will immediately stop once the key is removed from its place. Insert the safety key onto the slot on the control panel. - Page 19 Operations DISPLAY READOUT Incline = Display the elevation of current treadmill level. Increment and decrement is 1 level. Speed = Display the moving speed of the treadmill belt. Increment and decrement is 0.1 KPH. Pulse = Display the pulse rate. Place both of your hands on the pulse grip bars. ...
- Page 20 Operations PROGRAM OPERATION Definition Gender: “1” for male. “0” for female Age: 10 – 99. Preset is 20. Height: 100 – 240cm with preset 160cm. 40 – 95 inches with preset 63 inches. Weight: 10 – 250 kgs with preset 60 kgs. 10 – 550 lbs with preset 132 lbs. To start attach the safety key to the monitor.
- Page 21 Operations 1. Choose program by turning <rotary knob>, press it to confirm. Set exercise time. Preset time is 10:00 minutes. 2. Press <START>. Treadmill begins after 3 seconds count down. 3. It will have 3 beeps at the end of program. You may press <STOP>...
- Page 22 Operations during program. 4. After warm up 3 minutes. Incline changes by +/- 1% every 30 seconds till reaches range THR +/- 5 bpm. Treadmill will shut down if there is no HR signal for 30 seconds. 5. It will have 3 beeps and auto stop once achieve target hear rate. You may press <STOP>...
- Page 23 Operations 4. Press <START>. Treadmill begins after 3 seconds count down. Speed and incline can be adjusted during program. After exercise, Automatically store program. 5. It will have 3 beeps and auto stop once achieve target time. You may press <STOP> to end program and exit any time during exercise. P19 Bodayfat PROGRAM Input weight by turning <rotary knob>, press knob to confirm.
-
Page 24: Monitor Your Heart Rate
Monitoring Your Heart Rate To obtain the greatest cardiovascular benefits from your exercise workout, it is important to work within your target heart rate zone. The American Heart Association (AHA) defines this target as 60%-75% percent of your maximum heart rate. Your maximum heart rate may be roughly calculated by subtracting your age from 220. - Page 25 Monitoring Your Heart Rate Call for service 07 3272 7010...
-
Page 26: Warm Up
Warm Up Quadriceps Stretch With one hand against a wall for balance, reach behind you and pull your right foot up. Bring your heel as close to your buttocks as possible. Hold for 15 counts and repeat with left foot up. Inner Thigh Stretch Sit with the soles of your feet together with your knees pointing outward. -
Page 27: Fitness Guide
Fitness Guide STARTING YOUR WORKOUT ALWAYS CONSULT YOUR DOCTOR BEFORE UNDERTAKING A NEW EXERCISE REGIME. IF YOU EXPERIENCE NAUSEA, DIZZINESS OR OTHER ABNORMAL SYMPTOMS DURING EXERCISE, STOP AT ONCE AND CONSULT YOUR DOCTOR. Begin each workout with a warm up session - a few minutes of stretching to help prevent strains, pulls and cramps: 1. -
Page 28: Trouble Shooting
Trouble Shooting Treadmill belt slipping Walking belt too loose. Check belt tension. Deck needs lubrication. Check belt lubrication. Treadmill noisy Loose hardware. Tighten visible screws and nuts. Motor straining. Belt tension is too high. Clicking sound -roller knocking. Adjust rear rollers -check the belt tension. ... -
Page 29: Trouble Shooting
Trouble Shooting The Treadmill will shut off when the electric current overload. Pull out the plug from the electrical socket on the front of the treadmill. Push in the safety switch. C. Insert the plug back into the electrical socket. Do not push in the safety switch before you pull out the plug from the treadmill. -
Page 30: Warranty / Service
Warranty / Service BFE Warranty Policy – November 1st 2013 1. When purchased from an authorised BFE distributor the BFE warranty shall guarantee that all framework and components of your product are free from faulty manufacture. All faulty framework and components will be repaired or replaced as set out in this policy. All warranties in this policy apply to INDOOR HOME/DOMESTIC USE ONLY. - Page 31 Warranty / Service You can purchase from your retailer or call us direct on 02 4648 0800. (c) Power Surges. The computers, control boards and motors are very sensitive to power uctuations. You must use a surge protector on all items that plug into your mains power otherwise your electronics will not be covered by this warranty.
-
Page 32: Warranty / Service
Warranty / Service Service Department hours: Monday to Friday between 8am and 4pm Service Phone Number: 07 3272 7010 Email spares@boyles tness.com.au PLEASE NOTE: that Authorised service technicians do not reside in all areas of this vast country. If you live beyond the reasonable service area of a metropolitan area, BFE may not be able to support the labour portion of the product warranty.
Need help?
Do you have a question about the Platinum T1 and is the answer not in the manual?
Questions and answers