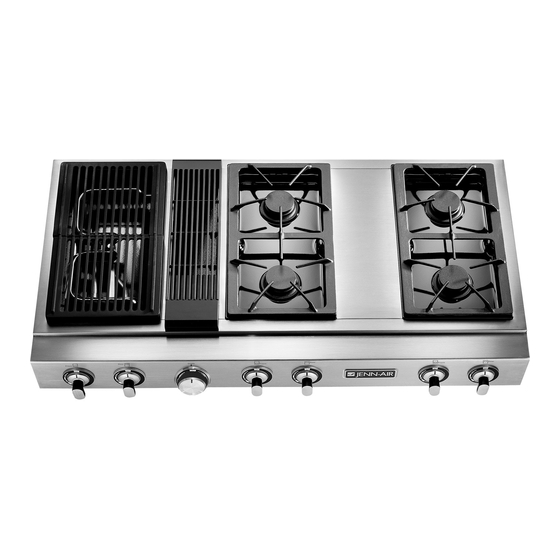
Jenn-Air PRO-STYLE CVG4380P Use And Care Manual
Gas grill range cooktop
Hide thumbs
Also See for PRO-STYLE CVG4380P:
- Installation instructions manual (12 pages) ,
- Service manual (84 pages)

Related Manuals for Jenn-Air PRO-STYLE CVG4380P


Summary of Contents for Jenn-Air PRO-STYLE CVG4380P
- Page 1 JENN-AIR Use and Care Manual Pro-Style °Gas Grill Range Cookto_ Model JGD8348, CVG4380P Printedin U.S.A. Cat. No. CA4380UE ©1996 Jenn-Air Part No. 8111P197-60 6/96...
- Page 2 WARNING: If the information in this manual is not followed exactly, a fire or explosion may re- sult causing property damage, personal injury or death. - Do not store or use gasoline or other flam- mable vapors and liquids in the vicinity of this or any other appliance.
- Page 3 Ifpanhandles twist and cannot be tightened, discard the pan. 12. HANDLES - Alwaysturn pan handlesto the side or back of the cooktop - not out into the room where they are easily hit. COOKWARE HANDLES...
- Page 4 24. A faint gas odor may indicatea gas leak. If a gas odor is detected, shut off the gas supply to the cooktop. Call your installer or local gas company to have the possible leak checked. Never use a match or other flame to locate a gas leak.
-
Page 5: Important Safety Notice And Warning
Before you begin cooking with your new cooktop, please take a few minutes to read and become familiar with the instructions in this book. Should you have any questions about using your Jenn-Air gas cooktop, write to us. Be sure to provide the model number. - Page 6 Clean in sink with warm water and liquid dishwashing detergent or in the dishwasher. Important: DO NOT OPERATE SYSTEM WITH- OUT FILTER. FILTER should always be placed at an angle. As you face the front of the cooktop, the It may be If filter...
-
Page 7: Size Of Cookware
l Size of Cookware 1 To achieve optimumcockingperformance usecookpotswith flat bottomsand tightfitting covers. Flame size should be adjusted so it does not extend beyond the edge of the cookware. This instructionis based on safety considerations. Adjustingthe size of the flame to fitthe size of the ccokware also helpsto save fuel. Important: Leave a minimumof 11/2"... -
Page 8: Surface Burners
Yournewcooktopburnershave beenpresetfor an"average"set of conditions.Regional variancesin gas pressure and atmosphericconditionssuch as height abovesea level may affect your initialflame performance. Whenthe controlknob isturned ON, gas entersthe mixertube and mixes with air. This airand gas mixtureflowsto the burnerhead and is lightedby a sparkfromthe solid state igniter. -
Page 9: Lo Flame Adjustment
To adjust grill burner air shutters and surface burner air shutters (Some models): The left hand air shutter controls the rear half of the grill burner or the rear surface burner. The right hand shutter controls the front half of the grill burner or the front sur- face burner. - Page 10 The size and type of cookware and the amount and type of food being cooked will influence the setting needed for best results. The setting indicated should serve as a guide while you become familiar with your cooktop. Use the Hi flame setting to quickly bring foods to a boil or to begin a cooking operation.
- Page 11 Remove the aeration tray by lifting up the front end on the right side (back end on the left side) until the top clears the opening of the cooktop by about 5 inches. Hold aeration tray by the sides and slide away to remove the prong from the opening and clear the surface burners.
- Page 12 The grill consists of two black grill grates and a grill burner. Only installthe grill on the left side of your cooktop. 1, Before installing grill components, b e certain controlknobs are in the OFF position. 2. Position thegrillburner withmixertubeopenings towardthe orifices.Slidethe burner towardsthe orificesuntilthe igniteris in betweenfront and rear grill sections.
- Page 13 I Using the Grill J • Before the first use, wash your new grill gratesin hot soapy water, rinse and dry. Then "season"the surface by wiping on a thin coating of cooking oil. Remove excess oil by wiping again with another paper towel. This procedure should be repeatedwhen: a) cleaning in the dishwasher since the detergent may remove seasoning,or b) anytimea sugar-basedmarinade(for example,barbecuesauce)is goingto be used.
- Page 14 IGrill Guide Preheat grillon Hi, 5 minutes,for best flavor Type ; _; r "-- :__ :e Setting Steak(1/2 :_/4") ° = _" _:!Rare • ; _ i: _;;: H i _ "t •:. Well _-:,--_-..- _--_---_, ,,-,._:Bl :... _"_ .we, - '_ __ :'_- _;::/i _:_!_ _%___'...
- Page 15 IGri!ling TiPs l With your Jenn-Air, grill literally any food you've considered "at its best" when prepared outdoors can now be prepared indoors with less fuss and great flavor. The following suggestions are good rules to follow and will increase your enjoyment of the equipment.
- Page 16 The knobs on the control panel can be removed with the contro]s in the OFF position. Pull each knob straight from the shaft. Wash knobs in warm soapy water or dishwasher; do not use abrasive cJeansersor materials. To replace each knob, match flat part of knob opening with the flat of the shaft, returning in OFF position.
- Page 17 • To clean moderate soil or discoloration of the surface (excessive heat will cause a golden discoloration), clean with Zud, Bar Keepers Friend, or Luneta (Jenn-Air Model A912, Part No. 712191). With a sponge or cloth, rub cleanser with the grain to avoid streaking the surface.
-
Page 18: Serial Plate
J Igniters I • Itisimportanttokeepigniterportopeningsonburnersclearandfreeofobstructions to avoid ignitionfailure and possiblegas buildup. If the port openingsare blocked, use a toothpickto remove food particles. • The igniter cap and stem can be cleaned with warm soapy water and a plastic scrubber. The wire electrode inside the cap can be cleaned with a small brush. Rinse and dry. - Page 19 Jenn-Air's ventilation system is designed to capture both cooking fumes and smoke while grilling. If the system does not, these are some ducting installation situations to check: • 6" diameter round or 31/4 ' x 10" rectangular ducting should be used for duct lengths 10'-60'.
- Page 20 _to verify warr...a_.ty informatio n ofowner'srespohs_ilities for warranty_:service.!_:: • if the dealeror servicecompanycannotresolve, t heptoblern,wdteto Jenn-Air .Customer Assistance, c/oMaytagCustomer S ervice._P,OiBox2370,,Cleveland, TN 37320-2370, 1-800-688-1100(U.S.-andontado) or.-423_47.2-3333. • useand care manuals,servicemanuals,and partscatalogs are availablefrom Jenn-AirCustomerAssistance, c/o MaytagCustomerService, All specifications s ubjectto changeby manufacturer w ithoutnotice.
- Page 21 Model Number Serial Number Date JENN-AIR DEALER FROM WHOM PURCHASED Address City Phone AUTHORIZED JENN-AIR SERVICE CONTRACTOR Address City Phone Important: Retain proof of purchase documents for warranty service.
- Page 23 Griddle - Model AG302 Self-draining g riddle makesmanyfavorite foodseasierto fix. Family-sized surface lets you cook several pancakes, ham- burgers, o rgrilled sandwiches atthesame time. Wok - Model AO142 Ideal for stir-frying, s teaming,braising, and stewing. Wok has nonstickfinish, woodhandles, c over,steaming rack, rice paddlesand cooking tips.
Need help?
Do you have a question about the PRO-STYLE CVG4380P and is the answer not in the manual?
Questions and answers