Advertisement
Available languages
Available languages
Quick Links
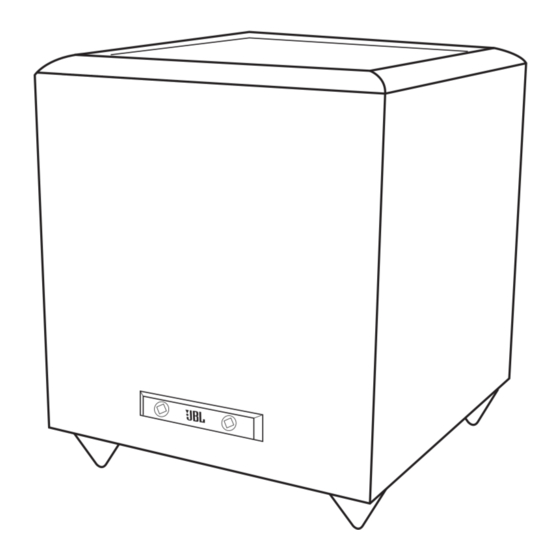
POWERED SUBWOOFER
PB8
INSTRUCTIONAL MANUAL
Congratulations...
...for purchasing a JBL Powered Subwoofer.
When used with your current Audio/Home-Theatre system, the JBL subwoofer will deliver all the realism
and excitement present in today's music and film digital soundtracks.
This subwoofer has been designed to give you many years of trouble-free listening enjoyment. Though easy
to install, we recommend that you read carefully through this instruction manual, and to save your bill
of sale in the unlikely event that your subwoofer requires servicing.
Safety Instructions
• In the event of a malfunction, do not attempt
• We recommend that the subwoofer be
to service the product yourself. Please contact
unplugged from the wall during lightning
your JBL dealer.
storms, and when not used for an extended
period of time.
• Before making connections to your receiver or
• Do not use wherever there is a risk that the
processor, please make sure the subwoofer is
subwoofer may come into contact with water
unplugged from the wall and that your the
or excessive moisture such as near pools,
audio/video receiver or surround processor is
bathtubs and wet basements.
in off position.
Step 1
B) Speaker Level Connection
(also knows as "High-Level").
Subwoofer Placement
Connect the audio/video receiver's Left/Right main channel outputs to
the JBL PB8 L/R Speaker Level Inputs. Make sure to connect "+" (Red)
Low frequency sound is generally non-directional. This allows for great
to "+" ( Red), and "-" ( Black) to "-" (Black). (Optionally, you may
flexibility in the placing of a subwoofer, as it is difficult for the human
connect your Left/Right speakers as shown below.
ear to discern where the low frequency sound originates. Ideally,
however, the subwoofer will be placed on the same plane as the main
left/right speakers.
Do not block the tuned
port: Allow a few inches
of space behind the
subwoofer.
OFF
Placement Tip:
Bass output varies with position. For more bass output, place the
subwoofer near a wall boundary. Placing the subwoofer closer to
a corner of the room will increase the bass output considerably.
Step 2
High-Level connection Tip:
Connecting The Subwoofer
When using small satellite speakers, connecting the JBL subwoofer
with the Speaker Level inputs and then connecting L/R satellites to
A) Line Level Connection
the "Speaker out" will automatically limit the low frequency sent to
(also knows as "Low-Level").
the small speakers with the high-pass filter built into the JBL
Connect the audio/video receiver or processor's subwoofer output,
subwoofer. This is helpful to small speakers, in that they will then
to the JBL Subwoofer's L/R Line Level input. (Optionally, you may
not be required to reproduce frequencies that may be beyond their
connect your Left/Right speakers as shown below.
operating range.
You may now plug your subwoofer's power cord to the A/C wall outlet.
You are now ready to use your new JBL subwoofer.
LINE IN
LFE
POWER
AUTO
VOLUME
CROSSOVER
L
Step 3
OFF
ON
PHASE
R
0º
180º
Powering Up
MIN
MAX
60Hz
180Hz
HIGH LEVEL OUT
HIGH LEVEL IN
A) On/Off Switch
AUTO
R
TO SPEAKERS
L
R
FROM AMPLIFIER
L
OFF
amplifier will turn itself off to stand-by mode if it does not sense a
signal after approximately 10 seconds. When listening at very low
levels, the amplifier's signal may be too low to turn the amplifier on
automatically. In such cases please select the "On" position on the
amplifier. When in the "Off" position the Subwoofer will remain in
stand-by mode and not be triggered by an incoming signal.
B) Phase
PHASE
Line-Level connection Tip:
0º
Some receivers and processors have a single subwoofer output. In
whichever way produces more perceived bass. You may experiment by
such cases it is recommended to use a "Y" adapter.
switching between 0º and 180º, and determining which position
sounds best. In most cases, however, leaving the switch in the 0º
position will produce the best results.
C) Setting the Volume and Crossover Frequency:
CROSSOVER
60Hz
180Hz
nicely blended with the sound of your main speakers.
Crossover setting tip:
LINE IN
LFE
POWER
When using small speakers (speakers with a 6" or less main woofer)
AUTO
VOLUME
CROSSOVER
L
set this control toward the "180" position. When using larger
ON
PHASE
R
speakers (speakers with an 8" or more main woofer) set the control
0º
180º
closer to the "60" position.
MIN
MAX
60Hz
180Hz
HIGH LEVEL OUT
HIGH LEVEL IN
Specifications
R
TO SPEAKERS
L
R
FROM AMPLIFIER
L
Your may choose to have your Subwoofer turn
on automatically once it senses an incoming
signal. In that case please select the "Auto"
ON
position on the back of the amplifier. The
The Phase switch allows your subwoofer to
match the output of the bass driver in relation
to the other speakers in the listening room.
180º
The correct position for this switch is
Volume
The
Crossover
Frequency
control
When setting the volume control at the
VOLUME
determines the frequency below which the
subwoofer, begin with your main speakers
subwoofer will play. This frequency is
playing at a normal listening level and the
manually controlled and is continuously
volume control at the subwoofer completely
variable between 60-180Hz. You can
in the off position (counterclockwise
experiment with which position works best
position). Then, begin to turn up the
with your main speakers by turning
volume at the subwoofer slowly (clockwise)
this control until the sound of the low
until the desired bass response is achieved.
MIN
MAX
frequency coming from the subwoofer is
Bass output will then be regulated by your
A/V receiver's volume control.
Volume setting tip:
Have one person sit at the regular listening position, and a second
person turn up the volume at the subwoofer until the desired bass
output is achieved at the listening position. Remember most natural
sounding bass results when bass reproduction is balanced with the
main speakers.
PB8
Amplifier Power:
100 Watts peak power
Driver:
8" Reinforced Paper Cone
Inputs:
High-Level & Low-Level @ 120Hz
Outputs:
High-Level w/ High Pass @ 120Hz
Low-Level Full Range
Crossover Frequency:
60Hz-180Hz - Continuously variable
Frequency Response:
34Hz-180Hz
Dimensions (HWD):
15
3/4
" x 10
3/4
" x 15
3/8
"
Weight:
26 lbs
21000 TransCanada
Baie D'Urfé, QC, Canada • H9X 4B7
tel: (514) 457-2555 • fax: (514) 457-0055
www.eriksonconsumer.com
© 2003 Jam Industries Ltd.
Advertisement

Related Manuals for JBL PB8


Summary of Contents for JBL PB8
-
Page 1: Specifications
Congratulations… …for purchasing a JBL Powered Subwoofer. When used with your current Audio/Home-Theatre system, the JBL subwoofer will deliver all the realism and excitement present in today’s music and film digital soundtracks. This subwoofer has been designed to give you many years of trouble-free listening enjoyment. Though easy to install, we recommend that you read carefully through this instruction manual, and to save your bill of sale in the unlikely event that your subwoofer requires servicing. - Page 2 …pour avoir choisi le caisson sous-graves amplifié de JBL. Quand utilisé avec votre système audio stéréo ou cinéma-maison, le caisson sous-graves amplifié de JBL vous livrera tout le réalisme et la passion présente dans la musique et les bandes sonores numériques des films et disques compacts d’aujourd’hui.
Need help?
Do you have a question about the PB8 and is the answer not in the manual?
Questions and answers