JBL Northridge E-Series E150P Service Manual
E-series, performance series
Hide thumbs
Also See for Northridge E-Series E150P:
- Service manual (28 pages) ,
- Owner's manual (9 pages) ,
- Owner's manual (8 pages)
Table of Contents
Advertisement
Models:
Northridge
Performance Series P10SW
Powered Subwoofers
Service Manual
Woodbury, New York 11797
™
E-Series E150P
JBL Consumer Products
250 Crossways Park Dr.
Rev4
4/2006
Advertisement
Table of Contents
Troubleshooting

Related Manuals for JBL Northridge E-Series E150P


Summary of Contents for JBL Northridge E-Series E150P
- Page 1 Models: ™ Northridge E-Series E150P Performance Series P10SW Powered Subwoofers Service Manual JBL Consumer Products 250 Crossways Park Dr. Woodbury, New York 11797 Rev4 4/2006...
-
Page 2: Table Of Contents
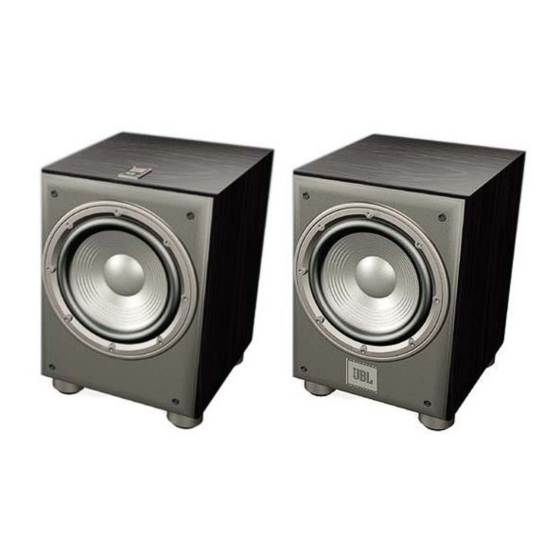
Weight: 33.5 lb/15.2kg JBL continually strives to update and improve existing products, as well as create new ones. The specifications and details in this and related JBL publications are therefore subject to change without notice. * The Peak Dynamic Power is measured by recording the highest center-to-peak voltage measured across the output of... -
Page 3: Safety Information
E150P/P10SW subwoofers SAFETY INFORMATION Warning List of Safety Components Requiring Exact Replacements Any person performing service of this unit will be exposed to hazardous voltages and the risk of electric shock. It is Part Number/ Description assumed that any person who removes the amplifier from Designator this cabinet has been properly trained in protecting against avoidable injury and shock. - Page 4 E150P Packaging Ref# Part Number Description 350883-001 MANUAL, OWNER-E150P/E250P 350884-002 CARTON,MASTER-E150P (BEECH MODEL) 350884-001 CARTON,MASTER-E150P (BLACK MODEL) 350884-003 CARTON,MASTER-E150P (CHERRY MODEL) 350885-001 PAD,END,TOP-E150P 350885-002 PAD,END,BOT-E150P 338381-001 WARRANTY CARD,1/5YR,JBL 351219-001 ASY, GRILLE, BLK, FRNT...
- Page 5 P10SW Packaging Ref# Part Number Description 361803-001 P10SW Owner’s Manual 361804-001 P10SW Outer Carton 350885-001 Packing Foam (Top) 350885-002 Packing Foam (Bottom) 338381-001 Warranty Card 351219-004 Front Grille...
- Page 6 E150P/P10SW subwoofers JBL E150P/P10SW Powered Sub/ Plate Amp LINE VOLTAGE Yes/No Hi/Lo Line Nom. Unit Notes US 120vac/60Hz 108-132 Vrms Normal Operation EU 230vac/50-60Hz 207-264 Vrms Normal operation, MOMS required QA Test Parameter Specification Unit Limits Conditions Notes Amp Section Type (Class AB, D, other) Class D Preferred...Sink required for Class AB...
-
Page 7: Connections
JBL or other equipment due to improper connections will not be covered by your JBL warranty. Consult with your JBL dealer or an audio installation expert if you have any questions about how to connect your subwoofer using... - Page 8 E150P/P10SW subwoofers Analog Receiver/Processor – Speaker-Level Connections Use this installation method left front (+) terminal on your and (–) connections for the only with an analog receiver/ receiver/amplifier. Connect right front speaker and right processor that does not have the free end of the (+) lead for high-level inputs on the sub- digital processing or bass the left front speaker to the (+)
- Page 9 E150P/P10SW subwoofers Analog Receiver/Processor – Line-Level Connections Use this installation method may connect the subwoofer with an analog receiver/ output on your receiver/pre- processor that does not have amplifier to either the left or digital processing or bass right line-level input on the management, and that is subwoofer.
-
Page 10: Operation
LED on the amplifier panel will signal to the subwoofer is woofer can be turned off, turn red. When a signal is removed. Due to JBL’s unique whenever desired, if you do present, the LED will turn high-output, high-efficiency not wish to leave it in auto green. -
Page 11: Troubleshooting
E150P/P10SW subwoofers Phase Control The Phase Control determines bass output at the listening If at some time in the future whether the subwoofer’s pis- position. you happen to rearrange your ton-like action moves in and listening room and move your Remember, every system, out in phase with the main speakers, you should experi-... -
Page 12: Exploded View
CARTON,MASTER-E150P (BEECH MODEL) 350884-001 CARTON,MASTER-E150P (BLACK MODEL) 350884-003 CARTON,MASTER-E150P (CHERRY MODEL) 350885-001 PAD,END,TOP-E150P 350885-002 PAD,END,BOT-E150P 338381-001 WARRANTY CARD,1/5YR,JBL 351348-001 PLATE,LED/LOGO-E150P/E250P 338125-002 ASY,LED-E150P/E250P 336486-001 ASY,FOOT,PLSTC- E150P 763-31110-40 SCREW, 8 X 2 1/2,TR,PH,PB,BLK ZINC,LCS (FOOT) 908302-012 SCREW, PB,HXS,#6x.75,ZINC (LOGO PLATE) 903802-016 SCREW, PB,HXS,#8x1",ZINC... - Page 13 SCREW, 8 X 2 1/2,TR,PH,PB,BLK ZINC,LCS (FOOT) 903802-016 SCREW, PB,HXS,#8x1",ZINC (WOOFER) DCR 5.8 Ω 338127-002 ASY, WOOFER,10" 336804-001 ASY, PORT TUBE 351219-004 ASY, GRILLE, BLK, FRNT 333249-001 CUP,GRILLE 351242-001 RING,TRIM,10" 882-41110-12 SCREW, 6 X 3/4,PAN,PH,PB,BLK ZINC,LCS (AMPLIFIER) 361872-001 JBL LOGO...
-
Page 14: Test Set-Up And Procedure
E150P/P10SW subwoofers TEST SET-UP AND PROCEDURE SYSTEM AURAL SWEEP TEST Equipment needed: • Function/signal generator/sweep generator • Integrated Amplifier • Multimeter • Speaker cables 1) Connect a pair of level input cables (RCA) from signal generator to either Right or Left Level input on UUT. LEVEL control should be full counterclockwise (MIN). - Page 15 E150P/P10SW subwoofers & P10SW & P12SW...
- Page 16 Synopsis: Change C65 PE capacitor from 470µf to 47µf. 1) Remove the amplifer from the enclosure. 2) Remove the cover. 3) Change C65 Electrolytic capacitor from 470µf,16V to 47µf,16V, JBL part# 034-470515-200. Observe polarity. 4) Replace cover, replace amplifier in enclosure, test subwoofer.
-
Page 17: Tech Tips
In the event you need to replace MOSFET transistors Q18 or Q22 as part of a repair, it is important to use ONLY: • JBL part# 051-640001-000 • Or JBL part# FE106401110 • Or only the brands: International Rectifier, or Fairchild. Replace both Q18 and Q22 MOSFET’s in the circuit, even if only one seems to be damaged. -
Page 18: Detailed Troubleshooting
E150P/P10SW subwoofers DETAILED TROUBLESHOOTING A. Power Amp Section Resistance from S+ (SPK O/P) to GND should be >1M Ω (NO LOAD) Resistance Check Resistance from V+ (C6 P+) to V- (C8 P-) gradually Fully CHARGED should read >10k Ω Resistance from V+ (C6 P+) to S+ (SPK O/P) should read >1MΩ Resistance from V- (C8 P-) to S+ (SPK O/P) should read >1M Ω... - Page 19 E150P/P10SW subwoofers DETAILED TROUBLESHOOTING (CONT'D) - Voltage measurements OP AMP SPEAKER U2(1) U2(14) U2(8) U3(7) U3(1) U3(14) U3(8) U5(7) U5(1) 133.6mV 200.2mV 245.9mV 314.8mV 314.9mV 350mV 1.67V 1.452V 2.098V 15.3V 2. High Level Input Sensitivity -Set up Turn level, X’OVER FREQ POT Fully CW and LFE switch off Set Generator at 1.15V@50Hz Signal to High level input -Voltage measurements 15.3V at speaker output...
- Page 20 E150P/P10SW subwoofers DETAILED TROUBLESHOOTING (CONT'D) FLOW CHART CAUTION : SPEAKER OUTPUT IS FLOATING AND IS NOT PROTECTED AGAINST A SHORT TO GROUND. ALL TEST INSTRUMENTS CONNECTED TO THE OUTPUT MUST BE FLOATING. ATTACH THE SCOPE PROBE TIP TO S - and REFERENCE LEAD TO S+.
- Page 21 E150P/P10SW subwoofers...
- Page 22 E150P/P10SW subwoofers...
- Page 23 E150P/P10SW subwoofers...
- Page 24 E150P/P10SW subwoofers...
-
Page 25: Electrical Parts List
E150P/P10SW subwoofers E150P/P10SW 120v Electrical Parts List Part Number Description Reference Designator Resistors 020-000498-120 Carbon Film 0R 1/4W J R10,11 021-100401-120 MOF Resistor 1K 1W J R103 021-820303-020 MOF Resistor 820R 3WS J 8x20 R6,9 022-500003-020 KNP Resistor 0R05 3WS J FK TYPE R104 024-100298-120 SMD Resistor... - Page 26 E150P/P10SW subwoofers Part Number Description Reference Designator 024-470798-120 SMD Resistor 4M7 1/8W J 0805 024-560498-120 SMD Resistor 5K6 1/8W J 0805 R40,41 024-604598-100 SMD Resistor 60K4 1/8W F 0805 024-620398-120 SMD Resistor 620R 1/8W J 0805 R16,18,57 024-680498-120 SMD Resistor 6K8 1/8W J 0805 R46,91 024-680598-120...
- Page 27 E150P/P10SW subwoofers Part Number Description Reference Designator 051-005600-100 PNP Transistor PN:MPSW56RLRA TO-92 051-222200-100 NPN Transistor PN:MPS2222ARLRA TO-92 051-290700-100 PNP Transistor PN:MPS2907A RLRA TO-92 Q19,23 051-540101-000 PNP Transistor PN:2N5401 TO-92 051-555100-000 NPN Transistor PN:2N5551 TO-92 051-640001-000 MOSFET N-Channel PN:IRF640N TO-220 (IR) Q18,22 052-400080-000 Bridge Regulator...
- Page 28 E150P/P10SW subwoofers Part Number Description Reference Designator 072-040064-000 Terminal PC250(t=0.8),T250MA 072-040096-000 Terminal (t=0.8mm) PC187(0.8) 072-040169-000 Connector 2 PIN JS-1001-2 P:2.5mm 072-060170-000 B.P. W / Accessory parts 073-032316-601 Black anodized 70x42x20mm 073-050001-000 Fuse Clip P/N:CFFH1206 074-020018-000 Rocker SW PN:RF1003-BB4-0 074-030002-000 Toggle SW PHASE PN:L101-T2B4QE 074-300018-000 Relay...
- Page 29 E150P/P10SW subwoofers Semiconductor Pinout Diagrams 2N5401 MOSFET IRF640 OPAMP, QUAD Q18, 22 TL074CDR U2, 3 3 Collector 1. G Base 2. D 3. S 1 Emitter MPSW06RLRA, MPSW56RLRAMPQ, MPS2222ARLRA, OPAMP, DUAL 2N2907A, 2N5551, TIP31C TL072CDR SO-8, Q2, 16, 3, 21, 19, 23, 17 NJM4558M-TE3 U5, 6, 4 3 Collector...
- Page 30 E150P/P10SW subwoofers NOTE: THIS VOLTAGE IS REFERENCED TO -V, NOT CIRCUIT GROUND P10SW Value of C65 = 47uf See service bulletin for E150P NOTE: THIS VOLTAGE IS REFERENCED TO -V, NOT CIRCUIT GROUND...
- Page 31 NOTE: THIS VOLTAGE IS REFERENCED TO -V, NOT CIRCUIT GROUND E150P/P10SW subwoofers...
Need help?
Do you have a question about the Northridge E-Series E150P and is the answer not in the manual?
Questions and answers