Table of Contents
Advertisement
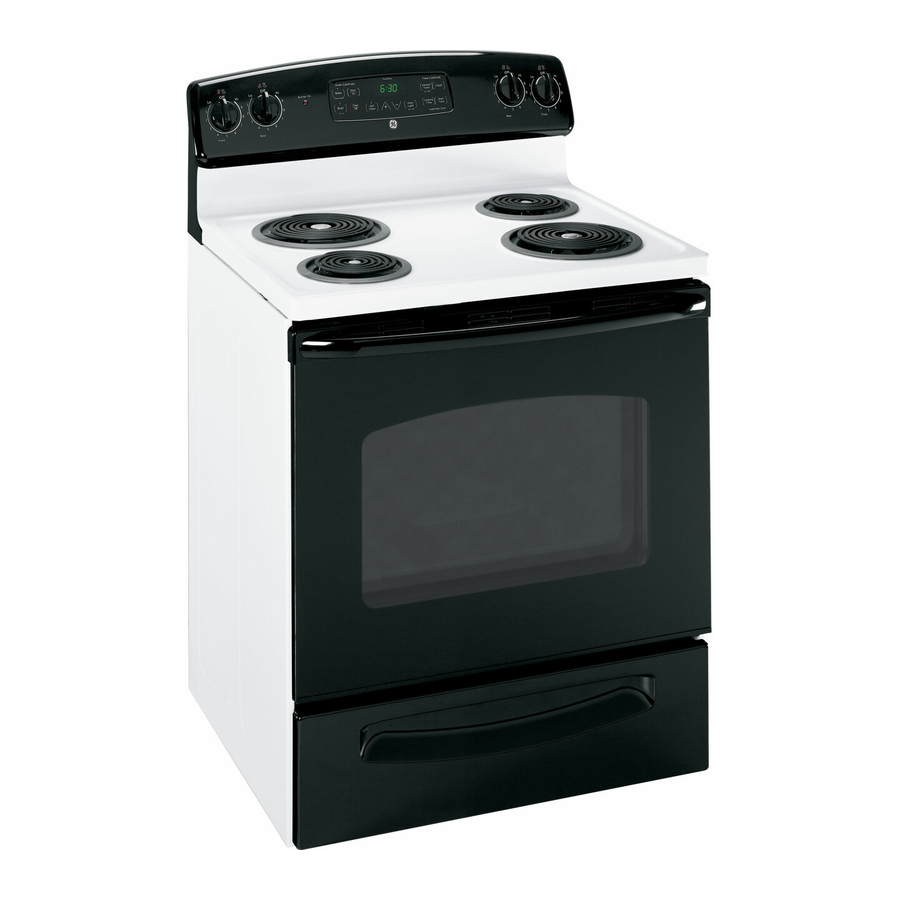
UseandCare& Installation Guide
Safety Instructions
Anti-Tip Device ................................ 3, 26, 30
Operating Instructions, Tips
Aluminum Foil.......................... 5, 14, 18–20
Clock and Timer ................................... 10, 11
Features....................................................... 6, 7
Oven ........................................................12–25
Auto Oven Shut Off................................. 12
Baking ................................................. 13, 14
Broiling................................................ 20, 21
Control Panel..................................... 10, 11
Control Settings.......................................... 8
Roasting ............................................. 18, 19
Self-Cleaning Instructions ............. 22–25
Timed Baking .................................... 15, 16
Power Outage.............................................. 11
Surface Cooking..................................... 8–10
Canning Tips................................................ 9
Control Settings.......................................... 8
Cooktop Comparison ................................ 8
Cookware Tips ............................................ 9
Care and Cleaning
Anti-Tip Device ............................................ 26
Cooktop.................................................. 27, 29
Lift-Off Oven Door ....................................... 28
Oven Light..................................................... 28
Self-Cleaning Instructions ................. 22–25
Surface Units................................................ 26
GE Appliances
Self-Cleaning Electric Range
................... 3–5
................... 26–29
Problem Solver
...................... 35, 36
Thermostat Adjustment–
Do It Yourself............................................ 17
More questions ?...call
GE Answer Center® 800.626.2000
Installation
................................. 30–34
Anti-Tip Device ..................................... 30, 34
Flooring Under the Range......................... 31
Leveling ......................................................... 34
Consumer Services
Appliance Registration................................. 2
Important Phone Numbers....................... 39
Model and Serial Number Location .......... 2
Warranty ....................................... Back Cover
Models:
JBP19
JBP21
JBP24
JBP25
164D2966P232
49-8721
10-95
CG
.................. 39
JBP26
JBP45
JBP46
JBP47
JBP48
3
Advertisement
Table of Contents

Related Manuals for GE Self-Cleaning Electric Range


Summary of Contents for GE Self-Cleaning Electric Range
- Page 1 UseandCare& Installation Guide Self-Cleaning Electric Range Problem Solver Safety Instructions ...... 35, 36 ....3–5 Thermostat Adjustment– Anti-Tip Device ........ 3, 26, 30 Do It Yourself..........17 More questions ?…call GE Answer Center® 800.626.2000 Operating Instructions, Tips Aluminum Foil......5, 14, 18–20 Clock and Timer ........
-
Page 2: Help Us Help You
We’re proud of our service and want you to be Manager, Consumer Relations GE Appliances pleased. If for some reason you are not happy with the Appliance Park service you receive, here are 3 steps to follow for Louisville, KY 40225 further help. -
Page 3: Safety Instructions
IMPORTANT SAFETY INSTRUCTIONS Read all instructions before using this appliance. IMPORTANT SAFETY NOTICE WARNING— • The California Safe Drinking Water and Toxic All ranges can tip and injury could Enforcement Act requires the Governor of result. To prevent accidental tipping California to publish a list of substances known to of the range, attach it to the wall and the state to cause birth defects or other reproductive... -
Page 4: Safety Instructions
IMPORTANT SAFETY INSTRUCTIONS (continued) • For your safety, never use your appliance for Oven warming or heating the room. • Stand away from the range when opening the • DO NOT STORE OR USE COMBUSTIBLE oven door. Hot air or steam which escapes can MATERIALS, GASOLINE OR OTHER cause burns to hands, face and/or eyes. -
Page 5: Surface Cooking Units
Surface Cooking Units • Keep an eye on foods being fried at high or medium high heat settings. • Use proper pan size— Select • Foods for frying should be as dry as possible. cookware having flat bottoms large Frost on frozen foods or moisture on fresh foods enough to cover the surface unit can cause hot fat to bubble up and over the sides heating element. -
Page 6: Features
FEATURES OF YOUR RANGE Not all features are on all models. Support Rods Some models have lift-up Drip Wells cooktops for easier cleaning. JBP24 JBP25 JBP26 JBP45 JBP46 JBP47 JBP48 Broiler Pan and Grid (appearance may vary) (not included on all models) -
Page 7: Features
12 13 JBP19 JBP21 Explained Explained Feature Index on page Feature Index on page Not all models have all features. Not all models have all features. 1 Storage Drawer (on some models) 3, 29 14 Surface Unit “On” Indicator Light 2 Anti-Tip Device 3, 26, 30 15 Cooktop/Lift-Up Cooktop... -
Page 8: Surface Controls
HOW DOES THIS COOKTOP COMPARE TO YOUR OLD ONE? Your new cooktop has electric coil surface units. The best types of cookware to use, plus heat-up and If you are used to cooking with gas burners or other cool-down times, depend upon the type of burner or types of electric cooktops, you will notice some surface unit you have. -
Page 9: Canning Tips
SURFACE COOKWARE TIPS Cookware Wok Cooking Use medium- or heavy-weight cookware. Aluminum We recommend that cookware conducts heat faster than other metals. you use only a flat- Cast-iron and coated cast-iron cookware are slow to bottomed wok. They absorb heat, but generally cook evenly at low to are available at your medium heat settings. - Page 10 FEATURES OF YOUR OVEN CONTROL Not all features are on all models. Appearance may vary. OVEN ON BROIL AUTOMATIC OVEN COOK TIMER TIME ON/OFF AUTO ON/OFF LATCH SELF DOOR HOUR MIN. CLEAN – – START CLOCK TIME PREHEATED ON/OFF 6. PREHEATED Indicator Light. Glows when 1.
-
Page 11: Power Outage
OVEN CONTROL, CLOCK AND TIMER Not all features are on all models The oven controls serve several purposes. Follow the directions for the controls that apply to your model. Automatic Clock To Set the Clock The clock must be set for the automatic oven timing 1. -
Page 12: Using Your Oven
USING YOUR OVEN Before Using Your Oven 1. Look at the controls. Be sure you understand how to 3. Read over the information and tips that follow. set them properly. 4. Keep this guide handy so you can refer to it, 2. -
Page 13: Baking
BAKING Do not lock the oven door with the latch during If you think an adjustment is necessary, see the Adjust baking. The latch is used for self-cleaning only. the Oven Thermostat section. It gives easy Do It Yourself instructions on how to adjust the thermostat. Your oven temperature is controlled very accurately using an oven control system. -
Page 14: Baking
BAKING (continued) Pan Placement For even cooking and proper browning, there must be Pans should not touch each other or the walls of enough room for air circulation in the oven. Baking the oven. Allow 1- to 1 ⁄ -inch space between pans results will be better if baking pans are centered as as well as from the back of the oven, the door and much as possible rather than being placed to the front... -
Page 15: Timed Baking
TIMED BAKING (on some models) How to Time Bake Do not lock the oven door with the latch during NOTE: Before beginning, make sure the oven clock timed baking. The latch is used for self-cleaning only. shows the correct time of day. The oven control allows you to turn the oven on or To set the clock, first press the CLOCK off automatically at specific times that you set. - Page 16 TIMED BAKING (continued) How to Set Delay Start and Automatic Stop 4. Press the HOUR pad until “4:00” appears in the display. The timer is now set to start baking in Quick Reminder 2 hours, at 4:00. 1. Press the COOK TIME ON/OFF pad. 5.
-
Page 17: Do It Yourself
ADJUST THE OVEN THERMOSTAT— DO IT YOURSELF! You may find that your new oven cooks differently We do not recommend the use of inexpensive than the one it replaced. We recommend that you thermometers, such as those found in grocery stores, use your new oven for a few weeks to become more to check the temperature setting of your new oven. -
Page 18: Use Of Aluminum Foil
ROASTING Do not lock the oven door with the latch during Most meats continue to cook slightly while standing, roasting. The latch is used for self-cleaning only. after being removed from the oven. Standing time recommended for roasts is 10 to 20 minutes. This Roasting is cooking by dry heat. -
Page 19: Roasting Guide
Questions and Answers Q. Do I need to preheat my oven each time I cook a Q. Is it necessary to check for doneness with a meat thermometer? roast or poultry? A. Checking the finished internal temperature at A. It is not necessary to preheat your oven. the completion of cooking time is recommended. - Page 20 BROILING Do not lock the oven door with the latch while Turn the food only once during broiling. Time the broiling. The latch is used for self-cleaning only. foods for the first side according to the Broiling Guide. Broiling is cooking food by intense radiant heat from the Turn the food, then use the times given for the second upper broil element in the oven.
-
Page 21: Broiling Guide
BROILING GUIDE • Always use a broiler pan and grid. They are • If desired, marinate meats or chicken before designed to minimize smoking and spattering by broiling, or brush with barbecue sauce last 5 to trapping juices in the shielded lower part of the pan. 10 minutes only. - Page 22 OPERATING THE SELF-CLEANING OVEN Total Cleaning Cycle Time: 4 hours and 20 minutes 3. Clean spatters or spills on the oven front frame, Quick Reminder: and the oven door outside the gasket with a dampened cloth. The oven front frame and the 1.
- Page 23 How to Set the Oven for Cleaning Clean cycle time is normally 4 hours and 20 Quick Reminder: minutes. On models with a COOK TIME ON/OFF pad, you can change the clean time to anywhere 1. Latch the door. between 3 hours and 5 hours and 59 minutes, 2.
- Page 24 OPERATING THE SELF-CLEANING OVEN (continued) How to Set Delay Start of Cleaning (on some models) 5. Press the HOUR pad until 9:00 appears Quick Reminder: in the display. The timer is now set to start cleaning in 2 hours, at 9:00. 1.
- Page 25 Questions and Answers Q. Why do I have ash left in my oven after Q. Can I use commercial oven cleaners on any part of my self-cleaning oven? cleaning? A. No cleaners or coatings should be used around A. Some types of soil will leave a deposit which any part of this oven.
-
Page 26: Anti-Tip Device
CARE AND CLEANING Proper care and cleaning are important so your range will give you efficient and satisfactory service. Follow these directions carefully in caring for it to help assure safe and proper maintenance. BE SURE ELECTRIC POWER IS OFF BEFORE CLEANING ANY PART OF THE RANGE. -
Page 27: Cooktop
Lift-Up Cooktop (on some models) Some models have a cooktop that can be lifted up for easier cleaning. To make cleaning easier, the entire cooktop may be lifted up and supported in the up position. Be sure all surface units are turned off before raising the cooktop. -
Page 28: Lift-Off Oven Door
CARE AND CLEANING (continued) Lift-Off Oven Door The oven door is removable, • Do not rub or clean the door gasket—the but it is heavy. You may need fiberglass material of the gasket has an extremely help removing and replacing the low resistance to abrasion. -
Page 29: Cooktop
Oven Shelves Clean the shelves with The oven shelves may be cleaned in self-cleaning an abrasive cleanser oven. However, they will darken, lose their luster and or steel wool. After become hard to slide. Wipe the shelf supports with cleaning, rinse the shelves with clean water and dry with cooking oil after self-cleaning to make shelves slide a clean cloth. -
Page 30: Installation Instructions
INSTALLATION INSTRUCTIONS BEFORE YOU BEGIN STEP 1 Read these instructions completely PREPARE THE OPENING and carefully. ″ spacing is recommended from the range to ⁄ IMPORTANT: Save these instructions for adjacent vertical walls above cooktop surface. the local electrical inspector’s use. Allow 30″... - Page 31 Flooring Under the Range BEFORE Your range, like many other household KNOCKOUT items, is heavy and can settle into soft RING floor coverings such as cushioned vinyl or BRACKET carpeting. When moving the range on this type of flooring, use care and follow these simple and inexpensive instructions.
- Page 32 INSTALLATION INSTRUCTIONS (continued) STEP 4 STEP 5 3 WIRE POWER CORD INSTALLATION 4 WIRE POWER CORD INSTALLATION Remove the 3 wire terminal screws from A. Remove the 3 screws from the connector the connector block. Insert screws through block. each power cord terminal ring and into the B.
- Page 33 STEP 6 STEP 7 3 WIRE CONDUIT INSTALLATION 4 WIRE CONDUIT INSTALLATION Remove the 3 screws from the connector Remove the 3 screws from the connector block. block. Insert bare wires between the connector Remove the grounding strap from the connector block terminals and movable nuts.
-
Page 34: Leveling
INSTALLATION INSTRUCTIONS (continued) STEP 8 STEP 9 ANTI-TIP BRACKET INSTALLATION LEVELING THE RANGE AN ANTI-TIP bracket is supplied with instructions The range must be level. Leveling feet are located for installation in a variety of locations. The at each corner of the base of the range. Remove instructions include a template, a parts list and a the storage drawer or kick panel (depending on list of tools necessary to complete the installation. - Page 35 QUESTIONS? USE THIS PROBLEM SOLVER PROBLEM POSSIBLE CAUSE “F—AND A NUMBER” • If the time display flashes “F—and a number” , you have a function error code. FLASH IN THE DISPLAY If a function error code appears during the self-cleaning cycle, check the oven door latch.
- Page 36 • Because the oven door is removable, it sometimes gets out of position during IS CROOKED installation. To straighten the door, push down on the high corner. If you need more help…call, toll free: ® GE Answer Center 800.626.2000 consumer information service...
- Page 37 NOTES...
- Page 38 NOTES...
-
Page 39: Consumer Services
We’ll Be There With the purchase of your new GE appliance, receive the assurance that if you ever need information or assistance from GE, we’ll be there. All you have to do is call—toll-free! GE Answer Center® 800.626.2000 ® Whatever your question about any GE major appliance, GE Answer Center information service is available to help. -
Page 40: What Is Not Covered
To know what your legal rights are in your state, consult your local or state consumer affairs office or your state’s Attorney General. Warrantor: General Electric Company If further help is needed concerning this warranty, write: Manager—Consumer Affairs, GE Appliances, Louisville, KY 40225 This book is printed on recycled paper. JBP19...
Need help?
Do you have a question about the Self-Cleaning Electric Range and is the answer not in the manual?
Questions and answers