Table of Contents
Advertisement
Quick Links
Advertisement
Chapters
Table of Contents

Subscribe to Our Youtube Channel
Summary of Contents for easyRAID NAS easyRAID FN-420GT
- Page 1 the easy-to-use NAS-Solution NAS Series—Network Hard Disk Drive Array...
-
Page 2: About This Manual
This product has passed FCC Class B inspection. Appropriate certifications have also been approved, e.g. CE, UL, CB, C-Tick and BSMI. Copyright reserved. Do not duplicate. © 2005 Product Name: easyRAID 420GT NAS Network Hard Disk Drive Array Manual Revision: 1.1 Release Date: Mai., 2005 easyRAID NAS FN-420GT Operation Manual... -
Page 3: Table Of Contents
Date, Time, and Region 2-12 Network Settings 2-13 Adding Storage Volume 2-14 Enabling Windows Network Service Chapter 3 Using Administrative Tools For Administrator Login Administrator Login Instant Configuration System Setups Network Settings Storage Volume Settings User Privilege Settings easyRAID NAS FN-420GT Operation Manual... - Page 4 Miscellaneous Menu Chapter 5 System Operation Normal Operation Data Synchronization Hard Disk Drive Damage Hard Disk Drive Replacement Automatic Data Recovery Appendix A WAN User Connection Appendix B How to use client FTP OCX Component easyRAID NAS FN-420GT Operation Manual...
-
Page 5: Easyraid 420Gt Family Features
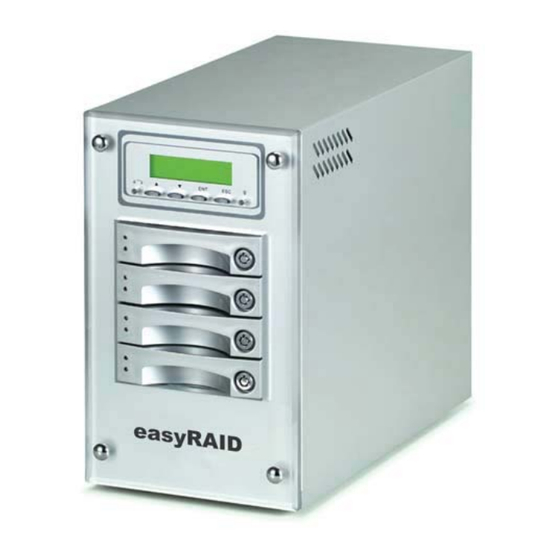
Chapter 1 Introduction to easyRAID 420GT NAS FAMILY easyRAID NAS 420GT is a RAID enabled NAS (Network Attached Storage). The ability of the unit to conduct continual self tests, beyond unsymmetrical fault tolerance, data validation functions provided by RAID Level 0,1,3 and 5, the availability of cooling fans and hot-swap function make the easyRAID family of network attached storage with hard disk drive array even more reliable and easy to use. -
Page 6: Using This Manual
Please ensure that the package housing the unit is not damaged before opening your easyRAID 420GT. Items in the package include: easyRAID 420GT NAS System Power Cord 2 * 2Meter RJ45 Cable Accessory Bag Operation Manual on CD If there is any question, please contact your local dealer. easyRAID NAS FN-420GT Operation Manual... -
Page 7: Getting Started And Quick Configuration
HDD array and LAN related knowledge. 2-1 System Hardware Installation and Configuration The basic hardware setup includes: the system itself, 4 hot-swappable caddies, a power cord, 2 network cables, and a set of key. easyRAID NAS FN-420GT Operation Manual... -
Page 8: Hard Disk Drive Installation
Install a hard disk drive (HDD) in the HDD caddy by connecting the HDD to the connector at the rear of the HDD caddy. Since your easyRAID NAS System supports hot swap, it is not necessary to shutdown the system upon HDD removal or replacement of “One”... -
Page 9: Network Connection
2-3 Network Connection easyRAID NAS System supports two Ethernet ports (one Gigabit and one 10/100 Mb). Under normal circumstances, simply connect a network cable from NAS Ethernet to the switch and it will work. LAN (Channel 0) WAN (Channel 1) -
Page 10: System Bootup-Self Configuration Test
2-4 System Bootup—Self Configuration Test After the power is turned on, easyRAID NAS System performs Self Configuration Test automatically. These self tests include CPU Type, CPU Fan, System Memory Size, Network Control Chip, and IDE Control Chip data, to ensure normal system operation. - Page 11 “Enter” key to check “Channel 0 Status” again. Make sure the connection to network is successful. Ethernet status won’t be updated automatically! Press “Enter” key to check “Channel 0 Status” again and make sure the connection to network is successful. -10- easyRAID NAS FN-420GT Operation Manual...
-
Page 12: Connecting To A Network
When all system configurations are set and connected to the network, type the IP Address via an internet browser (e.g. Internet Explorer) to access the system administrative web page and complete all administrative tasks. -11- easyRAID NAS FN-420GT Operation Manual... -
Page 13: Administrator Login
2-7 Administrator Login Figure 2-3 shows the login screen of easyRAID NAS System network HDD array after the IP address has been entered on the Web browser address line. The table below shows the initial factory default for the administrator gain access to the system. -
Page 14: System Information Screen
System Info Menu Area Figure 2-4 Display after Logged in as Administrator 2-9 Quick Configuration Figure 2-5 shows the Quick Configuration screen. Initial configurations may be set through this screen. Figure 2-5 Quick Configuration Screen -13- easyRAID NAS FN-420GT Operation Manual... -
Page 15: Server Name
Type in the server name and click “Update and Next.” System stores new settings and returns the updated status. Confirm that the system prompts “Changed Successfully” is showing and then click “Next” button. Figure 2-7 shows the system prompt information. Figure 2-7 System Prompt Information -14- easyRAID NAS FN-420GT Operation Manual... -
Page 16: Date, Time, And Region
If your location is not in the list, please select a city that is the nearest and within the same time zone. Figure 2-8 Settings of Date, Time, and Region When settings are done, click “Update and Next” to proceed to the next screen. -15- easyRAID NAS FN-420GT Operation Manual... -
Page 17: Network Settings
NAS system using the changes. Clicking “OK” button saves the changes and exit this screen allowing the administrator to continue making other changes. Only when the system is rebooted will any changes be activated. Figure 2-10 Network Device Setup Successfully -16- easyRAID NAS FN-420GT Operation Manual... -
Page 18: Adding Storage Volume
HDD for all options. Storage Volume Type Minimum HDD Number Required Single HDD (No array) RAID-0 (Disk Striping) RAID-1 (Disk Mirroring) RAID-3 (Disk Striping with parity) RAID-5 (Disk Striping with parity) -17- easyRAID NAS FN-420GT Operation Manual... - Page 19 If you change your mind, click the “” left arrow button to put it back to the unused HDD list. When settings are done, click the “OK” button. To cancel the single HDD storage volume settings, click “Cancel” or “Back.” -18- easyRAID NAS FN-420GT Operation Manual...
- Page 20 4. When settings are done, click “OK” button. A single HDD can not support RAID-0. It requires at least 2 HDD. RAID-0 does not have any safety features, such as “Data Synchronization” and “Automatic Data Recovery.” -19- easyRAID NAS FN-420GT Operation Manual...
- Page 21 ” right arrow button to add it into the RAID-1 storage volume. 3. Backup HDD: Shows the designated replacement HDD in the storage volume. (The backup HDD for any damaged HDD) RAID-1 supports 2 or 4 HDD. -20- easyRAID NAS FN-420GT Operation Manual...
- Page 22 (The backup HDD for a damaged HDD) When settings are done, click the “OK” button. If you change your mind, click the “” left arrow button to put it back to the unused HDD list. -21- easyRAID NAS FN-420GT Operation Manual...
- Page 23 When settings are done, click the “OK” button. If you change your mind, click the “” left arrow button to put it back to the unused HDD list. -22- easyRAID NAS FN-420GT Operation Manual...
- Page 24 Figure 2-17 Storage Volume Building Up Prompt System is setting up file system and building up storage volume. Please wait until it reaches 100%, as shown in figure 2-17. This screen is different from the RAID synchronization screen. -23- easyRAID NAS FN-420GT Operation Manual...
- Page 25 HDD. If 2 HDD are disconnected, HDD array will be damaged. After the system has initiated the RAID build process, you may set the initialization speed to increase RAID Synchronization to save time, as shown in figure 2-19. -24- easyRAID NAS FN-420GT Operation Manual...
- Page 26 Click on the Modify Button and you may change rebuilding speed or backup HDD of the system, as shown in figure 2-19. This feature is only available in the initial or rebuilding process. Figure 2-19 Modifying Storage Volume -25- easyRAID NAS FN-420GT Operation Manual...
-
Page 27: Enabling Windows Network Service
Figure 2-21 shows the pop-up screen after selecting “Update” button. Figure 2-21 Windows Network Settings Updated Successfully If Windows Network Service is not being used in the system, select disable for this option. Then select a desired network type from ”Network Setup”. -26- easyRAID NAS FN-420GT Operation Manual... -
Page 28: Security Level
“Domain Level” and clicking the “Update” button. Figure 2-22 Domain Level Settings 3. Workgroup Input a workgroup name in this field. The workgroup is the one in which you would like to add the system in the Windows network environment. -27- easyRAID NAS FN-420GT Operation Manual... - Page 29 Refer section 3-5-3 for Unix Clients, section 3-5-4 for Apple Clients, section 3-5-5 for FTP clients. The system configuration is done now and is ready to serve online as a network attached storage device with redundant HDD array. -28- easyRAID NAS FN-420GT Operation Manual...
-
Page 30: Using Administrative Tools For Administrator
Chapter 3 Using Administrative Tools for Administrator easyRAID NAS System administrative tools for administrator can be accessed completely via web browser. Its powerful menu allows the administrator to complete system configuration settings and manage the system easily. Using “System Menu” to set and control the system is covered in this chapter. -
Page 31: Administrator Login
3-2 Administrator Login After a user is logged into easyRAID NAS System as the administrator, he/she will have full privilege over the network HDD array. Figure 3-1 shows the system option menus that are configurable by the administrator Figure 3-1 Administrator System Option Menus... -
Page 32: System Setups
This menu is used to change related parameter settings. Figure 3-2 is the overview of System Configuration. Figure 3-2 System Settings Overview The system settings menu is as shown in figure 3-3. Figure 3-3 Options of System Settings Menu -31- easyRAID NAS FN-420GT Operation Manual... - Page 33 Password Length: Should not exceed 14 characters, and may include English alphabet. Password is case-sensitive. The entered password must be identical to the original setting, or you will not be able to login to the system. -32- easyRAID NAS FN-420GT Operation Manual...
- Page 34 Figure 3-7 shows event reports option. The administrator may set up to 3 e-mail addresses here by using this option. When any system event occurs, it will automatically send a warning e-mail message to all 3 e-mail addresses. -33- easyRAID NAS FN-420GT Operation Manual...
- Page 35 1. BEEP Status: By default, “Enable” option is selected. When event occurs, the system sends a “beep” to notify the administrator. 2. SMTP Status: To enable automatic message delivery, select “Enable” option. Figure 3-8 SMTP Status Settings -34- easyRAID NAS FN-420GT Operation Manual...
- Page 36 Figure 3-9 Send a Testing E-Mail After select “Yes” for “Send a Test E-Mail”, click “Update”. A test e-mail will be sent to the configured e-mail addresses owner. Figure 3-10 Testing E-Mail Sent Screen -35- easyRAID NAS FN-420GT Operation Manual...
-
Page 37: Snmp Settings
6. System Administrator name: Enter a SNMP system administrator name of the system. The name does not have to be the same as the system administrator. 7. NAS location: Enter an easily identifiable NAS location. -36- easyRAID NAS FN-420GT Operation Manual... - Page 38 When “OK” is clicked (figure 3-12), the system prompts a dialog box, as shown in figure 3-13, and asks for the administrator password. -37- easyRAID NAS FN-420GT Operation Manual...
-
Page 39: Restore Default Settings
Figure 3-14 shows the menu to restore default settings. Figure 3-14 Restore Default Settings This option reverts to the factory default settings of the system. Before proceeding with this option, please be sure to perform backup of the configuration file. Otherwise, -38- easyRAID NAS FN-420GT Operation Manual... - Page 40 Once this option is confirmed and executed, there is no way to retrieve any previous data except from a saved backup file 3-4-9 Using UPS for System The UPS setting screen of the system is shown in figure 3-15. Figure 3-15 UPS settings -39- easyRAID NAS FN-420GT Operation Manual...
-
Page 41: System Firmware Upgrade
The file will be in a form that looks like “1.01k-NAS System.bin”. Locate the file using the Browse button and click “OK”. It will update the firmware automatically and when completed, the unit will ask you to reboot. -40- easyRAID NAS FN-420GT Operation Manual... -
Page 42: Network Settings
Display settings of sub network mask. 5. DNS server In general, no need to set. (Optional) 6. MAC address Display the address of MAC layer. 7. Current speed Normally is 100~1,000 Mb/s, differentiated by Switch. -41- easyRAID NAS FN-420GT Operation Manual... -
Page 43: Basic Settings
This can be changed at any time but rebooting is required to activate changes. This can also be changed via the LCD panel on the unit itself. Selecting “Cancel” button will not save any changes made. -42- easyRAID NAS FN-420GT Operation Manual... - Page 44 The system provides NIS Client Service to allow itself to be added into the NIS domain. Check the “Enable NIS domain” box to enable it and enter NIS function parameter name. When completed, select “Update” button to save the changes. Select “Cancel” to disregard any changes made. -43- easyRAID NAS FN-420GT Operation Manual...
- Page 45 Next, select “Privilege” in “User Privilege” to choose the share folder to be made for Unix/Linux clients, and enable the “Unix” client to add NFS client privileges, see figure 3-22 and 3-23. Figure 3-22 Select the folder made for Unix/Linux clients -44- easyRAID NAS FN-420GT Operation Manual...
- Page 46 Figure 3-23 Enable the “Unix” box to add NFS privilege Set up the “Host name”, “Privilege” and “Root access” and the setup is shown in figure 3-24. Figure 3-24 Settings of NFS Clients Privilege -45- easyRAID NAS FN-420GT Operation Manual...
- Page 47 Use “mount” command from NFS clients to mount the easyRAID NAS, as shown in figure 3-25. Figure 3-25 Mount the NAS file system from NFS clients mount: command to mount file system -t nfs: indicate the file system type to NFS 192.168.1.102: the IP address of NAS...
- Page 48 When Apple Talk network service is enabled, the administrator must provide a zone name. When completed, select “Update” button to save the changes. Select “Cancel” to disregard any changes made. Figure 3-28 Enable Apple Network Service -47- easyRAID NAS FN-420GT Operation Manual...
- Page 49 2. If there is a DHCP server, turn on the DHCP and make sure the setup of IP section and Subnet mask is the same as the NAS system, as shown in figure 3-30 Figure 3-30 -48- easyRAID NAS FN-420GT Operation Manual...
- Page 50 “Active” for AppleTalk which is located at the bottom right-hand side. Otherwise, you won't be able to see the computer server name in the right side as shown in figure 3-32 Figure 3-32 Enable active of AppleTalk network services -49- easyRAID NAS FN-420GT Operation Manual...
- Page 51 6. Please select how you would like to login, that is as a “Guest” or as a “Registered User”. If "GUEST" is selected as the preferred login in the NAS, then you can use "GUEST" as your login name as shown in figure 3-34 Figure 3-34 -50- easyRAID NAS FN-420GT Operation Manual...
- Page 52 7. Entering the NAS as a GUEST, the status will elect the share table of contents as shown in figure 3-35 Figure 3-35 8. After selecting the items required, you will see the shared folder as a server icon on your desktop as shown in figure 3-36。 Figure 3-36 -51- easyRAID NAS FN-420GT Operation Manual...
- Page 53 (figure 3-37). You can see it is using TCP/IP mode as red zone's connecting method, and at the ICON, it will show an earth icon at the bottom of the disk drive Figure 3-37 -52- easyRAID NAS FN-420GT Operation Manual...
- Page 54 3-5-4-2 OS X 1. Set up the Network settings from the “System Preferences”. As shown in figure 3-38. Figure 3-38 Network Settings of System Preferences -53- easyRAID NAS FN-420GT Operation Manual...
- Page 55 2. Make sure that the IP section is the same as the NAS system. Otherwise, the performance will be impacted. See figure 3-39. Figure 3-39 Status of DHCP -54- easyRAID NAS FN-420GT Operation Manual...
- Page 56 3. Enable the “Make AppleTalk Active” box by checking it with a ‘tick”, as shown in figure 3-40. Figure 3-40 Settings of AppleTalk -55- easyRAID NAS FN-420GT Operation Manual...
- Page 57 If “Make AppleTalk Active” is unchecked as shown in figure 3-42, the screen of “Connect to Server” will look like figure 3-43; The Server icon and name will not appear to enable AppleTalk connection. -56- easyRAID NAS FN-420GT Operation Manual...
- Page 58 Figure 3-42 Default of OS X Figure 3-43 Connect to Server without AppleTalk -57- easyRAID NAS FN-420GT Operation Manual...
- Page 59 SMB. A higher performance of network transmission is possible with AppleTalk than using SMB. Click “*” on the “Connect to Server” screen and you will see the server name on right side of the window, as shown on figure 3-45. Figure 3-44 Figure 3-45 -58- easyRAID NAS FN-420GT Operation Manual...
- Page 60 Figure 3-46 Connect to NAS system by AppleTalk 6. Click on the “Connect” button and the log on screen will appear, as shown in figure 3-47. Log-in as your user name and password assigned by the Administrator. Figure 3-47 -59- easyRAID NAS FN-420GT Operation Manual...
- Page 61 7. Then the volume of NAS system will be shown as figure 3-48. a. Figure 3-48 Volume of NAS system Choose the appropriate volume and click “OK”, the volume will be shown on desktop as shown in figure 3-49. Figure 3-49 -60- easyRAID NAS FN-420GT Operation Manual...
- Page 62 9. Select the name of NAS system by highlighting it, the Samba connection mode will be shown in the “address” space at the bottom of the screen, (see figure 3-51). Figure 3-51 Connect to NAS system by Samba -61- easyRAID NAS FN-420GT Operation Manual...
- Page 63 11. Click “OK” and the Authentication screen will be displayed, as shown in figure 3-53. Figure 3-53 SMB/CIFS Authentication Screen 12. After entering the Username and Password, the shared folder will be displayed on the desktop (figure 3-54). Figure 3-54 -62- easyRAID NAS FN-420GT Operation Manual...
- Page 64 No Rename : If this option is set, users can not rename files. • Passive IP : Passive IP address in PASV/EPSV/SPSV replies. - for NAT • Passive Port : Port range for passive connections replies (Passive ports larger • -63- easyRAID NAS FN-420GT Operation Manual...
-
Page 65: Storage Volume Settings
Storage Volume information includes the used HDD name, type, capacity, and related information. The content of a storage volume may be: (1) a single HDD, or (2) a RAID system which is made up with multiple HDDs. -64- easyRAID NAS FN-420GT Operation Manual... - Page 66 The basic concept is equivalent to data synchronization. But if Data another storage volume is performing data synchronization, Synchronization actions of the storage volume will be delayed until the operation Delayed of former storage volume is completed. -65- easyRAID NAS FN-420GT Operation Manual...
- Page 67 To see more details related to storage volume, double click on the “Storage Volume Name”. Figure 3-57 displays detailed information of a storage volume. Figure 3-57 Detailed Information of A Storage Volume -66- easyRAID NAS FN-420GT Operation Manual...
- Page 68 Figure 3-58 Options of Storage Volume Settings Menu Figure 3-59 Storage Information Double click on installed disk and the disk information screen appear below as Figure 3-60. -67- easyRAID NAS FN-420GT Operation Manual...
- Page 69 Both of the number of CRC and ECC will be reset to zero after system reboot. The easyRAID NAS has supporting bad sector remapping feature with the bad block up to 384, system will warning by buzzer for attention. With bad sector counting up to 512 then the hard disk will be kick out by system automatically.
- Page 70 (2) Delete: Select a storage volume and click “Delete” to delete the storage volume. (3) Modify: Select a storage volume and click “Modify” to modify required fields. This mode allows only rebuilding speed to be changed. (4) Format: Formats a selected storage volume. -69- easyRAID NAS FN-420GT Operation Manual...
- Page 71 This menu applies to folders in a storage volume and stores them in a cross-platform network to allow access of clients using SMB, NFS, or Apple Talk. Figure 3-63 shows the full view of folder contents. Figure 3-63 Full View of Folder Contents -70- easyRAID NAS FN-420GT Operation Manual...
- Page 72 (3) Path: The actual path, where the folder is stored in a storage volume. (4) Comment: Comments for the created folder, its contents will be displayed in the network environment. (5) Default Access Privilege: Set the default access mode as “Write” or “Read-Only.” -71- easyRAID NAS FN-420GT Operation Manual...
-
Page 73: User Privilege Settings
This menu is used to set system groups and user privileges. Figure 3-65 shows related information of user profiles. Figure 3-65 User Profiles Screen Figure 3-66 shows configuration options of user privilege settings menu. Figure 3-66 Configuration Menu of User Privilege Settings -72- easyRAID NAS FN-420GT Operation Manual... -
Page 74: User Groups
Detail contents of the user group option include: (1) Group Name. (2) Group ID: Group ID Number. (3) Members: Members that belong to the group. (4) Domain: Display the domain in which a member belongs. -73- easyRAID NAS FN-420GT Operation Manual... - Page 75 (2) Group ID: When a new group is created, the system assigns it a unique ID. In general, there is no need for the system administrator to change that. -74- easyRAID NAS FN-420GT Operation Manual...
- Page 76 Updating save the changes. Selecting the “Cancel” button reverts back to the original membership of the group. Selecting the “Back” button take the user out of this screen without affecting the original membership. Figure 3-70 Group Modify page -75- easyRAID NAS FN-420GT Operation Manual...
-
Page 77: User Accounts
The full name of the user. (4) Groups: Groups that the user belongs to. (5) Domain: Displays the network domain to which the user belongs. (6) Disable: The check box should be checked, if this user has been disabled. -76- easyRAID NAS FN-420GT Operation Manual... - Page 78 Use the group list to select groups to which the user belongs. In the system, a Guest account is provided for users that do not have system authentication to access shared storage volume. -77- easyRAID NAS FN-420GT Operation Manual...
- Page 79 It is best to deny access to the user in the Privilege Screen before deleting. 3. Modify User To modify a user, highlight the user and click “Modify.” Figure 3-74 shows the Modify User page. Figure 3-74 Modify the Contents of a User -78- easyRAID NAS FN-420GT Operation Manual...
- Page 80 Here, it displays a list of all groups that the user belongs to. (6) Unjoined Groups: Lists all groups that the user does not belong to. If a user is in an NT domain, user information cannot be changed except at the Server itself. -79- easyRAID NAS FN-420GT Operation Manual...
-
Page 81: User Quota
(1) Use “dragging point” to drag and set the quota limit of the user. (2) Use “keyboard” to enter and change the quota limit of the user. The quota is limited to the number of users and the capacity of the drive volume. -80- easyRAID NAS FN-420GT Operation Manual... - Page 82 And then distribute it to every user according to the planned quota. Use the two above-mentioned methods to change the user’s quota limit. (Dragging Point or Keyboard Entering) -81- easyRAID NAS FN-420GT Operation Manual...
- Page 83 All parameters in privilege settings are described in the following manner: (1) Share a Folder: Use the drop-down menu to select the folder to change privilege settings. (2) Group/User: A vertical display that shows the contents of system groups. -82- easyRAID NAS FN-420GT Operation Manual...
-
Page 84: File Manager
Double clicking on a file will download the file to the local hard drive of the computer. Only the administrator can view or delete the contents. To return to the next higher level, click on the Parent directory. Figure 3-78 File Management -83- easyRAID NAS FN-420GT Operation Manual... - Page 85 : The “KEY” icon is the entry of ACL setting. (2) Owner : The owner of the file. (3) Size : The size of the file. (4) Date : The date on which the file was created or last modified. -84- easyRAID NAS FN-420GT Operation Manual...
- Page 86 Groups/Users: This selection field list all users and groups. The initial "@" of an entry represents group. ACL: This field list ACL of the object. CREATOR OWNER: This term represents the owner user of the object. CREATOR GROUP: This term represents the owner group of the object. -85- easyRAID NAS FN-420GT Operation Manual...
-
Page 87: System Status
The ACL permission granted in easyRAID NAS as following 4 rules in order. Whenever it comes first and it won’t go any further. The object permission right is granted accordingly if 1. UID is matched Creator Owner. 2. UID is matched any listed ACE. -
Page 88: System Information
Updating the version can be completed in the Firmware Update under the System Setup area. (6) Software version: This display version of software currently used. (7) Running Time: Elapsed time since system power on. -87- easyRAID NAS FN-420GT Operation Manual... - Page 89 Figure 3-83 shows the status of CPU Activity and Utilization. This display will refresh every 2 seconds. Figure 3-83 CPU Status 3-8-3 Memory Figure 3-84 displays the memory type and the size of the memory (between 128MB to 512MB (max)). Figure 3-84 Memory Information -88- easyRAID NAS FN-420GT Operation Manual...
- Page 90 The network port settings of the system are displayed here. (Gigabit) Figure 3-85 Network Information 3-8-5 Storage All relevant information pertaining to the type, model, capacity and utilization of the drives and volume is displayed. Figure 3-86 Storage Volume Information -89- easyRAID NAS FN-420GT Operation Manual...
- Page 91 (1) Share: This is(are) the “Shared” folder(s) used after the user has logged on. (2) User: User name of the Active Client. (3) Host: Name or IP. (4) Time Logged in: Login time. (5) Protocol: The type of protocol used -90- easyRAID NAS FN-420GT Operation Manual...
-
Page 92: System Log
3-8-7 System Log This screen shows the usage of the system, including system messages, warning messages, and error messages. Figure 3-88 System Log Overview Figure 3-89 Warning Log Overview -91- easyRAID NAS FN-420GT Operation Manual... - Page 93 Selecting the Clear Log will display a warning message to confirm action. Clicking OK will erase all messages in the log. This action is irrecoverable. Select Cancel to cancel action. -92- easyRAID NAS FN-420GT Operation Manual...
- Page 94 Please set E-Mail Notice in the system. When the system generates any error message, it will send the message to the configured e-mail address, to alert the administrator of the system status and allow him to take appropriate corrective actions. -93- easyRAID NAS FN-420GT Operation Manual...
-
Page 95: Wan Settings
Current speed : Display current speed in Mbits per second and Full/Half Duplex • attribute of this NIC. Link test : Fill the text field with a IP address you want to ping, then click the • -94- easyRAID NAS FN-420GT Operation Manual... - Page 96 "DHCP/BOOTP" is selected in [Setting], the text field will be disabled and gateway is assigned automatically/dynamically depends on your network environment. Update : The system saves all modifications if this button is pressed. • Cancel : The system skips • -95- easyRAID NAS FN-420GT Operation Manual...
- Page 97 Name : Login name of an user. • User ID : User ID of an user. • Real Name : The real name of an user. • Home volume : The home volume of this user. • -96- easyRAID NAS FN-420GT Operation Manual...
- Page 98 On the top left corner of Figure 3-92 there are three radio buttons to select which type of FTP logs will be displayed. All: The system displays all types of FTP logs. • Upload: The system displays upload logs. • Download: The system displays download logs • -97- easyRAID NAS FN-420GT Operation Manual...
-
Page 99: Logout
5 minutes. Figure 3-96 Logout The administration page allows only one user to login at a time. If any other user is trying to login at the same time, the system prompts an error message. -98- easyRAID NAS FN-420GT Operation Manual... -
Page 100: Shutdown
“Shutdown” or “Reboot” option on the administration page. If the system is physically shutdown directly when it is still operating, hardware damage or data loss may occur. A UPS is highly recommended to avoid inadvertent power failure or power surges. -99- easyRAID NAS FN-420GT Operation Manual... -
Page 101: User-Level Access
Figure 3-99 shows the screen for changing a user password. Enter the original password and choose a desired new password. After confirmation, the system will update the password for the user. Figure 3-99 User login—changing password -100- easyRAID NAS FN-420GT Operation Manual... -
Page 102: Front Control Panel Functions Introduction
4-1 Front Control Panel Functions Introduction The easyRAID NAS System front control panel is shown in figure 4-1. It consists of a LCD display panel that displays two rows of characters, each row with 16 characters, four buttons, and two LED status indicators. - Page 103 The following table describes the meanings of LED indicators on the front LCD Control Panel: Location Description Power Right Green Shows easyRAID NAS System is powered-on and is in normal operation. Network Left Orange Shows easyRAID NAS System is connected to the Status network.
-
Page 104: Basic Menu Options On The Lcd Control Panel
The default settings will be restored. When entering the administrator password, enter a “()” to fill in any blank. Otherwise, after entering the administrator password, press the “ESC” key to jump through empty characters. -103- easyRAID NAS FN-420GT Operation Manual... -
Page 105: System Memory Size
This shows the model and speed of the system CPU. 4-6 Advanced Menu Options When the easyRAID NAS System front control panel is in an idle state, press the “Enter” key to get into the options of the Advanced Menu. -
Page 106: System Menu
(2) 22 Shutdown 221 Reboot System: Restart system 222 Halt System: Shutdown system 4-9 Miscellaneous Menu This is used to set miscellaneous option of system. Its options are as followings: 31 Setup Password: Change root password -105- easyRAID NAS FN-420GT Operation Manual... -
Page 107: System Operation
Chapter 5 System Operation The concept behind the design of the easyRAID NAS System is to make it as convenient and easy to operate as possible for users. However, under certain unusual circumstances and improper operations, data damage might occur. -
Page 108: Hard Disk Drive Damage
If any HDD is damaged, it is possible to acquire this information from Storage Volume Overview in the administrative page, or the indicator light on the HDD caddy/tray. easyRAID NAS System supports HDD hot-swap, thus there is no need to shutdown the system to replace the failed HDD. See Figure 5-1... -
Page 109: Automatic Data Recovery
HDD, all data in the RAID storage volume WILL BE LOST. 5-5 Automatic Data Recovery If a RAID-1 function is enabled, easyRAID NAS System will automatically recover the data onto the new HDD. -108-... -
Page 110: Wan User Connection
Remote connection to easyRAID NAS via WAN port Apple For MAC users to remote connect with easyRAID NAS via WAN port, it is exactly same way while you connect in local LAN. The only thing need to remind here that AppleTalk must be active. - Page 111 Connect with WAN IP Address System Default "HOME" Directory Appear -110- easyRAID NAS FN-420GT Operation Manual...
- Page 112 Linux / UNIX For Linux / UNIX clients to connect easyRAID NAS system through WAN port, by using the FTP command and PUT / GET for file upload and download. If there is double-byte file name or folder name included for upload or download please make sure the passive mode is ON and code page in server and client sides are the same.
- Page 113 Connect with WAN IP Passive Mode is ON Codepage setting in client side -112- easyRAID NAS FN-420GT Operation Manual...
- Page 114 Appendix B: How to use FTP client OCX Component Abstract This document will provide instructions for users to use easyRAID NAS 420GT bundled FTP client OCX Contents Introduction Installation Logon Operations Logout -113- easyRAID NAS FN-420GT Operation Manual...
-
Page 115: Introduction
Please refer the following figure for its screen. Attention! The FTPNetwork-Status must be enabled in the Admin-Modus, to support this Feature. -114- easyRAID NAS FN-420GT Operation Manual... - Page 116 Use Internet-Explorer, because of the “ActiveX” Type in the WAN Port IP Connecting with WAN Port IP Input with valid WAN user's account and password -115- easyRAID NAS FN-420GT Operation Manual...
-
Page 117: Installation
When you for the first time visit this page, you may see this error message as following. You’ll need first set the IP address of remote NAS 420GT as "Trusted Site". First, open an Internet Explorer and open the "Internet options" -116- easyRAID NAS FN-420GT Operation Manual... - Page 118 2. Second, follow the steps 1,2,3,4 as the picture shown below to open the option windows. -117- easyRAID NAS FN-420GT Operation Manual...
- Page 119 Now, use the format as *://97.98.99.100 to enter NAS' IP address into the trusted site list, press [Add] button, as figure below. -118- easyRAID NAS FN-420GT Operation Manual...
- Page 120 Note: use your NAS 420GT IP address to replace the above IP address 97.98.99.100 Finally, you can close those option windows by pressing [OK] button and go back to NAS 420GT operation. -119- easyRAID NAS FN-420GT Operation Manual...
- Page 121 After you have added NAS 420GT as a secure site, you can re-open Client, a message will be shown in the picture below, press [YES] to automatically install Active control to run it. -120- easyRAID NAS FN-420GT Operation Manual...
-
Page 122: Logon
: Your login ID, same as the WEB console's login ID. For security reason, you need retype your password again to connect Password to server. However, this is the only one field you need to fill to logon. -121- easyRAID NAS FN-420GT Operation Manual... -
Page 123: Operations
4. Operations 1. Generally, the screen is divided into 4 parts, say Local For local files operations. Remote For remote files operations. Status :For display operation messages. Queue For listing/operating current running ftp jobs. -122- easyRAID NAS FN-420GT Operation Manual... - Page 124 2. Use mouse right button to show related action menu. As figure below: -123- easyRAID NAS FN-420GT Operation Manual...
- Page 125 Or you can also double-click or drag/drop file/dir item in the file list to the other side for upload/download, -124- easyRAID NAS FN-420GT Operation Manual...
- Page 126 When a job has started, you will see the job in the queue list. At the same time, you will also see job's total size, progress and remaining time to complete and transfer rate. And in the status window, you will see the job is marked as started. -125- easyRAID NAS FN-420GT Operation Manual...
- Page 127 A large file/directory may take a long time to transfer; you may terminate the job by also using mouse right button while job is running. -126- easyRAID NAS FN-420GT Operation Manual...
-
Page 128: Logout
That is, all transmission will be stopped without further confirmation. However, although the transmission has been stopped, you may still resume the upload/download next time when you connect to NAS 420GT. -127- easyRAID NAS FN-420GT Operation Manual...
Need help?
Do you have a question about the easyRAID FN-420GT and is the answer not in the manual?
Questions and answers