Table of Contents
Advertisement
Quick Links
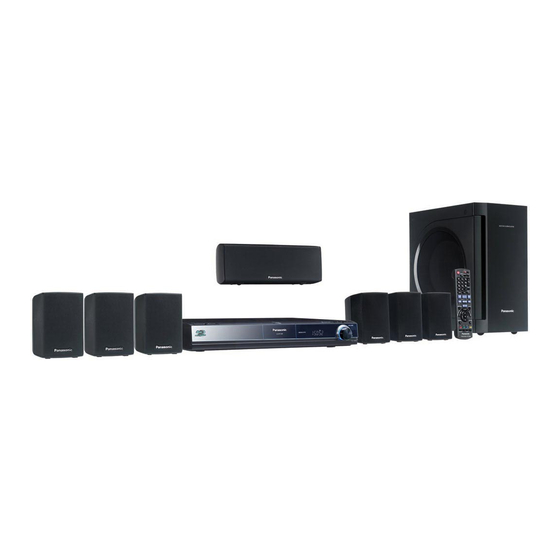
Blu-ray Disc Home Theater Sound System
Dear customer
Thank you for purchasing this product.
For optimum performance and safety, please read these instructions carefully.
Before connecting, operating or adjusting this product, please read the instructions completely. Please keep this manual for
future reference.
To update the firmware of this unit, refer to page 33.
Region management information
BD-Video
This unit plays BD-Video marked with labels containing the region code B.
DVD-Video
This unit plays DVD-Video marked with labels containing the region number "4" or "ALL".
GN
Operating Instructions
Model No.
Example:
Example:
4
SC-BT207
1
2
ALL
4
RQT9483-2L
Advertisement
Table of Contents

Related Manuals for Panasonic SC-BT207


Summary of Contents for Panasonic SC-BT207
-
Page 1: Operating Instructions
Operating Instructions Blu-ray Disc Home Theater Sound System SC-BT207 Model No. Dear customer Thank you for purchasing this product. For optimum performance and safety, please read these instructions carefully. Before connecting, operating or adjusting this product, please read the instructions completely. Please keep this manual for future reference. -
Page 2: Accessories
System SC-BT207 ≥Please note that the actual controls and components, menu items, etc. of your Blu-ray Disc Home Theater Sound System Main unit SA-BT207 may look somewhat different from those shown in the Front speakers SB-HF770 illustrations in these Operating Instructions. -
Page 3: Safety Precautions
Safety precautions Unit and media care Disc and card handling Placement Clean discs Set the unit up on an even surface away from direct sunlight, high temperatures, high humidity, and excessive vibration. These DO NOT conditions can damage the cabinet and other components, thereby shortening the unit’s service life. -
Page 4: Table Of Contents
Table of contents Getting started Accessories............2 Enjoying TV, etc. with this unit’s speakers ... 28 Safety precautions..........3 Enjoying TV and other devices sound from this unit’s speakers..........28 Unit and media care...........3 Adjusting the sound ..........28 Using the remote control ........5 Making settings for digital audio input .... -
Page 5: Using The Remote Control
Using the remote control ≥Do not take apart or short circuit. Batteries ≥Do not attempt to recharge alkaline or manganese batteries. ≥Do not use batteries if the covering has been peeled off. Mishandling of batteries can cause electrolyte leakage which can Insert so the poles (... -
Page 6: Control Reference Guide (Main Unit)
Control reference guide (main unit) Front panel Dock for iPod SMART SETUP OPEN CLOSE VOLUME SURROUND OUTPUT Dock for iPod Pull open. SD CARD SETUP MIC SELECTOR TUNE 1 Standby/on switch (Í/I) ( = Select the source Press to switch the unit from on to standby mode or vice versa. In BD/DVD )SD )IPOD )FM )AM )USB )AUX )D-IN 1 )D-IN 2 standby mode, the unit is still consuming a small amount of power. -
Page 7: Assembling The Speakers
Assembling the speakers Front speakers and Surround speakers Preparation ≥To prevent damage or scratches, lay down a soft cloth and perform ≥For assembly, use a Phillips-head screwdriver (not included). assembly on it. ≥For wall mount, refer to page 43. Make sure you have all the indicated components before starting assembly, setup, and connection. Keep the screws out of reach of children to prevent swallowing. -
Page 8: Positioning
Positioning How you set up your speakers can affect the bass and the sound field. ≥This system is a 5.1ch sound system. ≥Place speakers on flat secure bases. ≥Placing speakers too close to floors, walls, and corners can result in excessive bass. Cover walls and windows with thick curtains. NOTE ≥For optional wall mount, refer to page 43. -
Page 9: Speaker Connections
Speaker connections Turn off all equipment before connection and read the appropriate operating instructions. Do not connect the AC mains lead until all other connections are complete. AUX(TV) SPEAKERS OPTICAL DIGITAL TRANSMITTER 2(STB) 1(TV) AC IN VIDEO COMPONENT 75Ω LOOP VIDEO OUT AV OUT DIGITAL IN... -
Page 10: Tv Connections
TV connections AUX(TV) SPEAKERS OPTICAL OPTICAL DIGITAL TRANSMITTER 2(STB) 2(STB) 1(TV) 1(TV) AC IN VIDEO VIDEO VIDEO COMPONENT COMPONENT COMPONENT 75Ω LOOP AV OUT AV OUT VIDEO OUT VIDEO OUT VIDEO OUT DIGITAL IN DIGITAL IN 3 Ω SUB- FM ANT 3 Ω... -
Page 11: Connections With A Component Video Cable
≥Please use High Speed HDMI Cables that have the HDMI logo (as shown on the cover). It is recommended that you use NOTE Panasonic’s HDMI cable. Recommended part number: RP-CDHG10 (1.0 m), RP-CDHG15 (1.5 m), RP-CDHG20 (2.0 m), RP-CDHG30 (3.0 m), RP-CDHG50 (5.0 m), etc. -
Page 12: Connections To A Set Top Box, Etc
Connections to a Set Top Box, etc. Use the following connections when you want to output the original surround audio from your Set Top Box, cable TV, VCR, DVD recorder, etc. through this unit’s speakers. ≥Do not connect through the video cassette recorder. Due to copy guard protection, the picture may not be displayed properly. -
Page 13: Network Connection
Using an FM/AM outdoor antenna (optional) Use outdoor antenna if FM/AM radio reception is poor. ≥Disconnect the antenna when the unit is not in use. ≥Do not use the outdoor antenna during an electrical storm. FM outdoor antenna AM outdoor antenna [Using a TV antenna (not included)] [Using a vinyl wire (not included)] The antenna should be installed by a... -
Page 14: Ac Mains Lead Connection
AC mains lead connection ≥Before turning the power on for the first time, be sure to read the preparations for SMART SETUP. ( AC mains lead AC mains lead (for the main unit) (for the wireless system) Wireless system Main unit AUX(TV) SPEAKERS AC IN... -
Page 15: Smart Setup
SMART SETUP The SMART SETUP screen assists you to make necessary Basic setting for the system settings. When the system is switched on for the first time, the SMART SETUP (SMART SETUP) screen for the basic settings is displayed automatically. Follow the on-screen prompts to make basic settings for the system. -
Page 16: Showing Start Menu
Showing START menu Some functions of this unit can be operated from the START menu. e.g., [BD-V] 1 Press [Í] to turn on the unit. 2 Press [START]. Home Cinema START ≥Items displayed vary according to the chosen selector and BD-Video media. -
Page 17: Selecting The Playback Source
Selecting the playback source Selecting the source from the START menu You can select sound modes, desired source, or access playback/menus by using the START menu. 1 Press [Í] to turn on the unit. 2 Press [START] to show the START menu. 3 Press [3, 4] to select the item and then Home Cinema START... -
Page 18: Enjoying Sound From All Speakers And Various Sound Effects
Enjoying sound from all speakers and various sound effects ≥The following sound effects/modes may not be available or have no effect with some sources, or when headphones are used ( 19). ≥You may experience a reduction in sound quality when these sound effects/modes are used with some sources. If this occurs, turn the sound effects/modes off. -
Page 19: Basic Operation
Basic operation Instructions for operations are generally described using the remote control in these operating instructions. Preparation Turn on the television and select the appropriate video input on the television. Inserting or removing an SD card Inserting or removing a disc 1 Pull to flip down the front panel. -
Page 20: Other Operations During Play
Basic operation Other operations during play (These functions may not work depending on the media.) Direct Play MUTE During playback, you can access specific recordings or scenes through direct entry of the numbered buttons. Play starts from the selected title or chapter. SEARCH SEARCH [BD-V] [AVCHD]... -
Page 21: Playing Video Recorded On A Video Camera Or Video Recorder
It is possible to playback the High Definition (AVCHD format) video Type of disc Play status e.g. [BD-V] recorded on a Panasonic High definition Video Camera on a DVD-RAM/R/RW/R DL/+R/+RW/+R DL, or SD card and Standard BD-Video Definition (MPEG2 format) Video recorded on the Panasonic SD Video PLAY Camera on a SD card. -
Page 22: Enjoying Bd-Live Or Bonusview In Bd-Video
Enjoying BD-LIVE or BONUSVIEW in BD-Video [BD-V] What is BONUSVIEW? BONUSVIEW allows you to enjoy functions such as picture-in-picture or secondary audio etc., with BD-Video supporting BD-ROM Profile 1 version 1.1/ Final Standard Profile. What is BD-Live? In addition to the BONUSVIEW function, BD-Video supporting BD-ROM Profile 2 that has a network extension function allows you to enjoy more functions such as subtitles, exclusive images and online games by connecting this unit to the Internet. -
Page 23: Playing Divx ® Videos
Playing DivX videos ® [DivX] ABOUT DIVX VIDEO: DivX is a digital video format created by DivX, Inc. This is an official DivX Certified device that plays DivX video. ® You can play DVD-R/R DL, CD-R/RW discs and USB device which contain DivX video contents that have been recorded on a personal computer. -
Page 24: Playing Still Pictures
Playback of the BD-RE, DVD-RAM/R/R DL or CD-R/RW with still pictures recorded. This unit can also play still pictures recorded on the SD card or USB memory. In addition, you can also connect Panasonic digital camera by USB connection. (About structure of folders 47, “Structure of folders that can play back on this unit”) -
Page 25: Useful Functions During Still Picture Play
Useful functions during still picture play Start Slide Show Rotate You can display still pictures one by one at a constant interval. 1 While playing (except for Slide Show) Press [OPTION]. BD-RE, DVD-RAM 2 Press [3, 4] to select “Rotate RIGHT” or “Rotate LEFT” and 1 While the “Album View”... -
Page 26: Playing Music
Playing music continuously even after turning off power to the television ≥Sound may be discontinued for several When the unit is connected to a Panasonic TV (VIERA) that supports HDAVI Control 2 or seconds when the power to the television is later and other device supports VIERA Link, the unit is turned off if the power to the turned off. -
Page 27: Radio
Listening to the Radio Setting up the radio Listening/confirming the preset channels 1 Press [RADIO] to select “FM” or “AM”. 2 Press the numbered buttons to select the channel. To select a 1-digit number e.g., 1: [1] [OK]. Numbered To select a 2-digit number buttons e.g., 12: [1] Alternatively, press [W, X] or [2, 1]. -
Page 28: Enjoying Tv, Etc. With This Unit's Speakers
Enjoying TV, etc. with this unit’s speakers You can enjoy TV broadcasts with this unit’s speakers. Adjusting the sound You can adjust the mode depending on the source or situation. 1 Press [SOUND] several times to select the mode. ≥You can also press [SOUND] and then [3, 4] to select the mode. -
Page 29: Linked Operations With The Tv (Viera Link "Hdavi Control Tm ")
VIERA Link “HDAVI Control” is a convenient function that offers linked ≥VIERA Link “HDAVI Control”, based on the operations of this unit, and a Panasonic TV (VIERA) under “HDAVI Control”. control functions provided by HDMI which is an You can use this function by connecting the equipment with an HDMI cable. -
Page 30: Easy Control Only With Viera Remote Control
Linked operations with the TV Easy control only with VIERA remote Automatic input switching control When the following operations are performed, the television will automatically switch the input channel and display the If you connect this unit to a TV that has “HDAVI Control 2” or later with corresponding action. -
Page 31: Using The Ipod
≥Audio/video cannot be recorded or transmitted to iPods via this system. iPod nano 4th generation (video) 8 GB, 16 GB NOTE ≥Panasonic makes no warranty for iPod data iPod classic 120 GB management. iPod touch 1st generation 8 GB, 16 GB, 32 GB ≥For more information, refer to the... -
Page 32: Ipod Playback
Using the iPod iPod Playback This system features two different iPod playback modes. The first of these is EXTENDED mode, for playback of music and video contents. With this mode, you can operate the iPod from the main unit. The second mode is SIMPLE mode, which can be used for playback of three types of contents – music, photos, and videos. With this mode, simple operations such as play, stop, and search can be performed on the display of your iPod. -
Page 33: Enjoying Viera Cast Tm
Network Service is subject to change without notice. The Service through Network Service is operated by their respective service providers, and service may be discontinued either temporarily or permanently without notice. Therefore, Panasonic will make no warranty for the content or the ≥Set the “Network Lock” to “On” to restrict continuity of the services. -
Page 34: Network Settings
Network settings These settings are used if you will connect this unit to the Internet. ≥The connection to the Internet may take time or the Internet may not be connected depending on the connection environment. ( It is required that you use a broadband connection. Preparation ≥Connect to a broadband network. - Page 35 Setting the connection speed Setting the proxy server When the connection test results in “Fail” after the IP and DNS-IP In most cases, default settings can normally be used without addresses are assigned, perform the following settings. making any changes. Please use this setting when instructed to by your Internet After performing steps 1 –...
-
Page 36: Changing Settings With The On-Screen Menu
Changing settings with the on-screen menu On-screen menu operations 1 Press [BD/SD] to select e.g., [BD-V] ≥Depending on the condition of the “BD/DVD”. unit (playing, stopped, etc.) and Disc Signal Type media contents, there may be 2 Press [DISPLAY]. Play NOTE Subtitle Main... -
Page 37: Hdmi Av Out Terminal
To select these settings, perform steps 1 – 5 ( Menus Items Settings and details Play Repeat Play (Only when the elapsed time is being displayed on the unit’s display.) Selects the item which you want to repeat. The items displayed differ depending on the type of media. ≥All tracks All tracks Chapter... -
Page 38: Changing The Unit's Settings
Changing the unit’s settings Change the unit’s settings if necessary. The settings remain intact even if you switch the unit to standby. Setup menu operations While stopped Setup ≥There may be differences in Press [BD/SD] to select “BD/DVD”. Disc operation methods. If this happens, Picture follow the on-screen instructions 2 Press [SETUP]. - Page 39 “Sound” Dynamic Range Compression [BD-V] [AVCHD] [DVD-V] [DivX] ≥On ≥Off ≥Auto: Effective only when Dolby TrueHD is played. (Dolby Digital, Dolby Digital Plus and Dolby TrueHD only) Change the dynamic range ( 55) for late night viewing. Digital Audio Output ≥Press [OK] to show the following settings.
- Page 40 Changing the unit’s settings To select these settings, perform steps 1 – 5 ( “TV/Device Connection” TV Aspect When connected to a 16:9 widescreen television: Set to match the type of television connected. Video recorded for 4:3 aspect screen is displayed as a 4:3 ≥16:9: ratio image in the center of the screen.
- Page 41 “Network Settings” IP Address / DNS Settings ( ≥Press [OK] to show the following settings. Connection Test — — — — IP Address Auto-Assignment ≥On ≥Off IP Address — — —. — — —. — — —. — — — Subnet Mask —...
-
Page 42: Speaker Settings
Changing the unit’s settings Speaker settings Adjusting the sound lag between speakers Delay time ( Center (C) For optimum listening with 5.1-channel sound, all the speakers, except for the subwoofer, should be the same distance from the seating position. If you have to place the center, surround speakers closer to the seating position, adjust the delay time to make up for the difference. -
Page 43: Speaker Installation Option
Speaker installation option Attaching to a wall You can attach all of the speakers (except subwoofer) to a wall. ≥The wall or pillar on which the speakers are to be attached should be capable of supporting 10 kg per screw. Consult a qualified building contractor when attaching the speakers to a wall. -
Page 44: Media (Disc, Card And Usb Device) Information
Media (Disc, card and USB device) information Packaged discs This chart shows the different type of retail/commercial discs you can use, and also includes the industry-standard logos that should appear on the discs and/or packaging. Type of media/ Type of media/ Features Indicated as Features... -
Page 45: Sd Cards
SD Card Specifications FAT12 and FAT16 formats, as well as SDHC Memory Cards in FAT32 format. USB device This unit can playback pictures by connecting the USB memory recorded with a PC or similar in following formats, and Panasonic digital cameras connected via USB cable. File system... -
Page 46: About Mp3/Jpeg/Divx Files
About MP3/JPEG/DivX files File format JPEG Playable media CD-R* , CD-RW* , DVD-R* , DVD-R DL* , USB CD-R* , CD-RW* , DVD-RAM* , DVD-R* , DVD-R DL* device BD-RE* , SD card, USB device Extension Files must have the extension “.mp3” or “.MP3”. Files must have the extension “.jpg”... - Page 47 ∫ Structure of folders that can play back on this unit Structures of still picture (JPEG) folders You can play files on this unit by structure of folders as shown below. However depending on the method of writing data (writing in DVD-R/DVD-R DL/CD-R/CD-RW software), play may not be in the order you numbered the folders.
-
Page 48: Troubleshooting Guide
Troubleshooting guide Before requesting service, make the following checks. If you are in doubt about some of the check points, or if the solutions indicated in the chart do not solve the problem, consult your dealer for instructions. The following do not indicate a problem with this unit: ≥Regular disc rotating sounds. - Page 49 Displays Page The display is dim. ≥Change “FL Display” in the Setup menu. The elapsed time displayed is ≥The displayed play time is converted from the number of frames at 29.97 frames (equal to — 0.999 seconds) to one second. There will be a slight difference between the time displayed actually less than the play time.
-
Page 50: Ipod Operation
Troubleshooting guide Sound Page No sound. ≥Turn the volume up. Low volume. ≥Turn the muting off. ≥Check connections to speakers and other equipment. 9 – 12 Distorted sound. ≥Select the corresponding source. Cannot hear the desired audio ≥Press [AUDIO] to select the audio. type. - Page 51 ≥[BD-V]: On BD-Video discs including BD-J, the resume play function does not work. — When other Panasonic products respond to this remote control Change the remote control code on the main unit and the remote control (the two must match) if you place other Panasonic products close together. When the following indicator 1 Press [BD/SD] to select “BD/DVD”.
-
Page 52: Messages
Messages The following messages or service numbers appear on the television or unit’s display when something unusual is detected during startup and use. On the television Page Authorisation Error. ≥[DivX] You are trying to play the DivX VOD content that was purchased with a different registration code. -
Page 53: Frequently Asked Questions
≥The following operations are available. – Play back JPEG data recorded with a digital camera etc. — available on the SD card slot on this – Play back AVCHD motion pictures recorded with Panasonic High Definition Video — unit? Camera. -
Page 54: Language Code List
LLC. See http://www.mpegla.com. HDAVI Control™ is a trademark of Panasonic Corporation. “AVCHD” and the “AVCHD” logo are trademarks of Panasonic Corporation and Sony Corporation. SDHC Logo is a trademark. Portions of this product are protected under copyright law and are provided under license by ARIS/SOLANA/4C. -
Page 55: Glossary
Glossary AVCHD DTS-HD High Resolution Audio AVCHD is a new format (standard) for high definition video cameras This is a signal format achieved by improving the previous DTS, that can be used to record and play high-resolution HD images. DTS-ES and DTS 96/24 formats. It is compatible with sampling frequency 96 kHz/48 kHz. - Page 56 JPEG, or DivX recorded to a USB memory by PC or other equipment, high definition videos. or JPEG in the Panasonic digital camera or similar connected via USB connection cable is possible with this unit. MP3 (MPEG Audio Layer 3)
-
Page 57: Specifications
Specifications SPEAKER SECTION AMPLIFIER SECTION ∫ Front speakers SB-HF770 RMS TTL Power Output 1000 W Front Ch 125 W per channel (3 ≠), 1 kHz, 10 % THD Type 1 way, 1 speaker system (Bass reflex) Surround Ch 125 W per channel (3 ≠), 1 kHz, 10 % THD Full range 6.5 cm Cone type (Bamboo Cone) Center Ch... -
Page 58: Video Section
Specifications DISC SECTION VIDEO SECTION Playable disc: Signal system: PAL/NTSC BD-Video:BD-ROM Version 2 Video output: BD-RE: Version 3 (Single Layer, Dual Layer), JPEG* Output level: 1.0 Vp-p (75 ≠) BD-R Version 2 (Single Layer, Dual Layer) Output connector: Pin jack (1 system) Component video output (1080i/720p/480p/480i): DVD-RAM:... - Page 59 RQT9483...
-
Page 60: Index
P4HD ......56 Panasonic Corporation Web Site: http://panasonic.net C Panasonic Corporation 2009 RQT9483-2L F0409SB2059...
Need help?
Do you have a question about the SC-BT207 and is the answer not in the manual?
Questions and answers