Table of Contents
Advertisement
Advertisement
Table of Contents

Related Manuals for ASTRO AstroJet 1000

Summary of Contents for ASTRO AstroJet 1000
- Page 1 ASTRO AstroJet 1000 Inkjet Printer Installation, and Operating Manual...
-
Page 2: Safety Precautions
In addition, follow any specific occupational safety and health standards for your workplace or area. This manual is intended solely for the use and information of Astro Machine Corporation, its designated agents, customers, and their employees. The information in this guide was obtained from several different sources that are deemed reliable by all industry standards. -
Page 3: Table Of Contents
TABLE OF CONTENT Section 1 – Getting Acquainted The AstroJet 1000 The Control Panel Section 2 – Installing the AstroJet 1000 Choose a Location Connecting the AstroJet 1000 Installing the Inkjet Cartridges Setting up the Feed Installing the Software on the Computer Section 3 –... - Page 4 Notes...
-
Page 5: Section 1 - Getting Acquainted
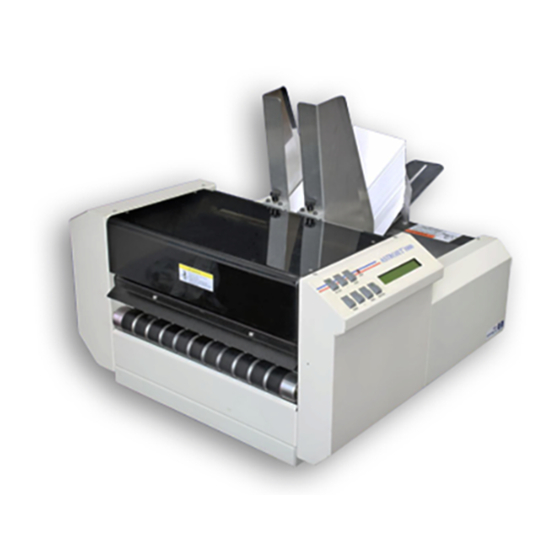
Section 1 – Getting Acquainted ASTROJET 1000 The AstroJet 1000 is a high-speed printing and addressing systems that can print addresses, bar code, return addresses, bitmapped graphics, and special messages using TrueType scaleable fonts simultaneously on up to 20,000 postcard (3.5 X 5.5 inch) mail pieces per hour. - Page 6 MEDIA TRANSPORT BELTS – The media is transported under the printheads on these belts. PRINTHEAD CARRIAGE – The AstroJet 1000 has four printheads. Head 1, 2, and 3 are banked together on the rail. Head 4 shares the same rail, but is opposite and independent of the other heads.
-
Page 7: The Control Panel
RESET – This key does not function. NEXT – When the AstroJet 1000 is in the menu mode this key will scroll to the next selection. When the selection is unlocked with the select key, this key will scroll through the selections available in the selected menu. - Page 8 Notes...
-
Page 9: Section 2 - Installing The Astrojet 1000
• Create a job to be printed (refer to Section 4 – Software Tutorial) Choose a Location The AstroJet 1000 should be placed on a sturdy worktable or cabinet at least 12 inches from any walls. Protect the AstroJet 1000 from excessive heat, dust, and moisture – avoid placing it in direct sunlight. -
Page 10: Installing The Inkjet Cartridges
Install the Inkjet Cartridges The AstroJet 1000 can be configured with 4 inkjet cartridges. The cartridges are installed as follows: • Remove the inkjet cartridge from its packaging, taking care not to touch the copper contacts, the metal plate, or the gold printhead. -
Page 11: Installing The Software On The Computer
Maintenance for instructions on how to change them. Installing the Software on the Computer The AstroJet 1000 is not supplied with a computer. The computer that you use with your AstroJet 1000 System should meet the following minimum requirements: An IBM or Compatible Pentium 100 Megahertz PC or better. - Page 12 4. Open the program CD again and select “Install Printer Software”, then “Windows 95”. 5. Select “AstroJet” and follow the directions in the windows. At the end of the installation you will be asked to identify the model of your printer. Select the AstroJet 1000 and then restart your computer.
-
Page 13: Using The Astrojet 1000 System Software
The AstroJet Layout Editor is used to create the job that is to be run. The AstroJet Control Panel is used to send the job you created to the AstroJet 1000 Printer. All jobs are designed in the AstroJet Layout Editor. - Page 14 The “Layout Editor – Untitled” screen will appear. Click on the icon or File, then New and the “Layout Editor – Select Database” window will appear. Leave the box “Does this template require a database?” checked and click The “Select Database” screen will now appear.
- Page 15 NOTE: The 1 1 Databases folder in the AstroJet 1000 software is the default. You must store your databases in this folder. Click Next>> and the “Layout Wizard – Stock Properties” window will appear. For the purpose of this...
- Page 16 Before continuing, spend a little time exploring the “Layout Editor – Untitled” screen. The white lines in the display represent the print cartridges and how they are positioned in the printer. The AstroJet 1000 has four print cartridges. The print cartridges are arranged on one set of rails in the following manner: Printheads 1, 2, and 3 are connected together and printhead 4 is separate and facing printhead 3.
-
Page 17: Setting Up The Job
To the left of the media image are numbers. These correspond to the printheads and are marked with the same numbers on the AstroJet 1000 Printer. When the numbers are in RED the print direction is Forward and when the numbers are in BLUE the print direction is Reverse. To the right of the media image is a line. - Page 18 When you click on this icon the Envelope Properties window will open. You may choose any of the standard envelope sizes listed under Standard or you may select Custom and create your own envelope size. To do this highlight the Width and type in the actual width of the media, and then highlight the Length and type in the length of the media.
- Page 19 Once you have done this, place the cursor on the field that will contain the variable address from your database and double click on the left mouse button. The following window will appear on the screen. This window allows you to layout the variable address fields in their proper order.
- Page 20 Address Text Field Editor window. When you have completed the entry below click OK. The AstroJet 1000 Software has the flexibility to allow you to add additional information to your layout in any position. For the purpose of this tutorial, we will add the following text at the bottom of the layout.
- Page 21 Enable buttons and then browse for the desired file in the Logo folder using the Browse button. The AstroJet 1000 is a 600-dpi printer. When creating graphics 1- inch is equal to 600 pixels. A logo or graphics that is 300 pixels tall will print the width of a single printhead or 1/2”...
- Page 22 If the database contains more than one field for the barcode, or you wish to use a barcode other than the USPS barcode use the text editor to combine fields to get the proper barcode do the following: Click on the “Text Field Properties” button and the “Layout Editor – Text Field Properties” window will open.
-
Page 23: Saving The Template
Click on File and select either Save or Save As… and the “Save As” window will appear. Give the template file a unique name then click Save. The Template will be saved in the AstroJet 1000 Data 1Projects folder with the proper extension “. AJPJT”. - Page 24 Notes...
-
Page 25: The Computer Control Panel
THE COMPUTER CONTROL PANEL There are two ways that the Control Panel can be selected for running a job. One is from the AstroJet 1000 Control Panel button in the “Layout Editor”. The other is from the “AstroJet 1000 Control Panel” icon on the desktop of the computer. - Page 26 Name of the Job file. Current Database Record. For more information on Databases see page 29. Use this button to select the Job you wish to run. Pressing this button while a job is running will stop the printer. Pressing this button after a job is loaded will start the printing process. These buttons permit you to search through the database for a record.
-
Page 27: Running A Job
Starting Up the AstroJet 1000 If the AstroJet 1000 has been sitting idle for a period of time, It is a good idea to Purge the printheads before beginning to run a job. This can be done from the AstroJet 1000 LCD Display Panel. -
Page 28: Printer Settings
Depending on the complexity of the page this process may take up to a few minutes. Once a font or logo is rendered, the AstroJet 1000 can call it up from this folder for reuse the next time a job that uses that particular font style or logo is run. -
Page 29: Setting Print Speed
Setting Print Speed The speed of the AstroJet 1000 may be changed to run at a slower speed than the maximum one for the print resolution. The Standard quality mode speed may be set to low speed to allow more drying time and the Draft quality mode speed may be set to low or medium speed. -
Page 30: Types Of Media
1. With the AstroJet 1000 power switch ON, press the STAND BY key to put the printer On-line, then press the ON LINE key to enter the Settings Menu. 2. Use the PREVIOUS or NEXT button to bring “PRINT SPEED” to the top line in the display. -
Page 31: Databases
Databases The AstroJet 1000 System is capable of handling many types of databases including .TXT, .CSV, Microsoft Access. MDB, and dBase III, IV, V, FoxPro (*.DBF). TXT and CSV files are handled as they are. The rest of the database files are converted automatically by the AstroJet Software to CSV files. -
Page 32: Advanced Features
Advanced Features Clicking on the Properties… button permits you to enter the “Control Panel – Properties” window. With this window you can control functions such a updating the printer BIOS, align the printheads, set a time delay in the feeding to increase stock drying time, and enable the bag and bundle break feature. - Page 33 The Bundle and Bag Break control windows can be found under the Properties… button on the Control Panel. When you click on this button the “Control Panel – Properties” window will appear. At the top of the window there are two tabs, Bag Breaks and Bundle Breaks.
- Page 34 There is an optional feature on the Control Panel of the Printer that permits you to disable the break function. See the section on “Printer Settings” for more information. Feeder Settings In order to permit enough time or space between pieces to assist in drying the ink or to help the operator to handle the piece more efficiently.
- Page 35 2. The printheads are initially locked with the others in the same Band. They should be unlocked using the Unlock button. 3. Each index mark on the Alignment Controls represents 4 thousandths of and inch. You can adjust the print heads to half that value, to within 2 thousandth for a total of 20 thousandths of an inch to either side of the factory setting.
- Page 36 If you open the control panel while the printer is turned off the Control Panel software will ask you if you want to disable the printer for this session. This is the same as checking the box.
-
Page 37: Section 5 - Maintenance
Printer. The Inkjet Cartridge The AstroJet 1000 inkjet cartridges must be replaced when out of ink, when print quality is poor, or when purging and cleaning have not helped the image quality. The Approximate life of the HP 51645A Inkjet cartridges based on three lines of 20 characters at 10-... -
Page 38: Cleaning The Printhead
Short-term Storage Leave the cartridge in the AstroJet 1000 for short periods of time, 1 day or less. The next time that the AstroJet 1000 is used, the printhead may have to be cleaned and purged Long-term Storage Keep the printhead in an area that is relatively free of dust and paper particles that is not too Place the cartridges in a Tupperware container with a damp sponge or towel to maintain humidity and prevent the printhead from drying out. -
Page 39: Jams In The Astrojet 1000 Printer
A Purge routine is built into the AstroJet 1000 Printer. It can be accessed from the LCD panel on the AstroJet 1000 Printer. Refer to Section 4 – Operating the AstroJet 1000, under "Running a Job; Purge the Printheads". -
Page 40: The Astrojet 1000
PERFORMING ANY MAINTENANCE DISCONNECT THE MACHINE FROM ITS POWER SOURCE! The AstroJet 1000 must be cleaned regularly of accumulated paper dust and ink. Depending on the types of media that are run, paper dust may accumulate within the printer and on the transport. To properly clean the AstroJet 1000, unplug it from the power receptacle and remove the covers. -
Page 41: Section 6 - Trouble Shooting Guide
The following trouble shooting guides are provided to assist you in solving any problems that might occur with the AstroJet 1000 Printer or its software. We have tried to make them as complete as possible. The best advice we can offer is to make sure that the system is setup properly, plugged in, that it has an adequate supply of ink before attempting to trouble shoot any problem. -
Page 42: Astrojet 1000 Printer
Media must be less than 1/4” thick Media less than 1/4” Jog contents of piece to feed end Fails to feed Side guides too tight WARNING DO NOT REMOVE THE SIDE COVERS OF THE ASTROJET 1000 PRINTER THERE ARE HIGH VOLTAGES PRESENT BEHIND THE COVERS! -
Page 43: Astrojet 1000 Software
Editor and attempt to open the ajpjt file. file. Re-save the file and attempt to open the AstroJet 1000 Control Panel again. If the file still will not open in the AstroJet 1000 Layout editor, restart the computer and try again. - Page 44 Software continued… ERROR MESSAGE PROBLEM SOLUTION New Fields missing from layout Fields not visible in blotter area Right click on one of the fields screen. Continued… on Layout Screen. that has already been positioned and click OK on the field property sheet an they should re-appear Right click on one of the fields that has already been positioned and...
-
Page 45: Appendices
Appendices APPENDIX A – ASTROJET 1000 Specifications The information (electrical and physical dimensions, etc.) on the AstroJet 1000 is presented here for your reference. Specifications are subject to change without notice. PRINT QUALITY High Quality 600 x 600 dpi (Dots Per Inch) -
Page 46: Computer Requirements
Computer Requirements 1. An IBM or Compatible Pentium 100 Megahertz PC or better. 2. Windows 95, 98, 2000 or NT installed. 3. A minimum of 10 Megabytes of free hard disk space. 4. At least 16 Megabytes of RAM. (32 Megabytes for Windows 2000 and NT) 5. -
Page 47: Supplies And Optional Hardware
APPENDIX B - Supplies and Optional Hardware The following supply items and optional hardware are available from your Astro Machine Distributor: Supplies Black Inkjet Cartridge HP 51645A Fast Drying Black Inkjet Cartridge HP 6195A Yellow Inkjet Cartridge HPC6173A Red Inkjet Cartridge HPC6168A Green Inkjet Cartridge HPC6169A... -
Page 48: Software Options
Full 256 ASCII Character Set for AstroJet Printer The AstroJet 1000 software uses the basic 128-character set to print the addresses. This speeds up downloading of the fonts and is more efficient. In some cases it may be necessary to use the entire 256 ASCII character set to print the addresses. - Page 49 Sometimes it is necessary due to the media layout or to obtain the most efficient feeding of the material that the media be turned around. When this is done the address must be printed in reverse so that it appears right side up on the finished piece.
- Page 50 Printing without a Database It is possible to print return addresses on envelopes, logos, and other information on media without a database. One application would be to put the return address on the flap of an envelope. To do this select a the New Template icon or New…...
- Page 51 Notice that in the lower information line the Database says N/A meaning that no database is attached to this layout. Continue with the layout by clicking on the Text Field Properties icon and activating a font. Click OK and “Data line1” will appear in the blotter area. Click on this and drag it to the place that you wish the information to appear on the layout, just as you would with a database field.
- Page 52 When you have completed the layout it should look like the one below: Save the template and then create a job by clicking on File and then New Job… to save the job. Next turn on the printer and click on the Control Panel icon.
- Page 53 Special Insert Characters for Text Fields Built in to the “Text Field Editor” are several special characters that can be used to increase the information on your layout. The special characters and their functions are as follows: Date() When inserted into your layout returns the Date set on your computer as “month day, year”...
- Page 54 Adding Instructions to the Operator It is possible for an operator to change information on a mailing piece before it is printed without using the Layout Editor. A situation where the same basic mailing list and layout is used each month but some special message is changed would be one example.
- Page 57 © Copyright 2001 Astro Machine Corporation Elk Grove Village, Illinois 60007 06/30/2001...
Need help?
Do you have a question about the AstroJet 1000 and is the answer not in the manual?
Questions and answers