Table of Contents
Advertisement
Advertisement
Table of Contents

Related Manuals for Moog Musical Instrument


Summary of Contents for Moog Musical Instrument
-
Page 3: Table Of Contents
TABLE OF CONTENTS 5... THEREMINI OVERVIEW GETTING STARTED Unpacking Setting Up your Theremini Calibrating Your Theremini ... Setting The Note Range THEREMINI FEATURES & CONTROLS ... Exploring The Theremini ... Front Panel Controls ... Setup Mode ... Rear Panel Connections PLAYING THE THEREMINI ... -
Page 4: Important Safety Instructions
IMPORTANT SAFETY INSTRUCTIONS WARNING - WHEN USING ELECTRIC PRODUCTS, THESE BASIC PRECAUTIONS SHOULD ALWAYS BE FOLLOWED: 1. Read all the instructions before using the product. A. Keep these instructions. B. Heed all warnings. C. Follow all instructions. 2. WARNING: Do not use this product near water. To reduce risk of fire or electric shock, do not ex- pose this product to rain or moisture. -
Page 5: Theremini Overview
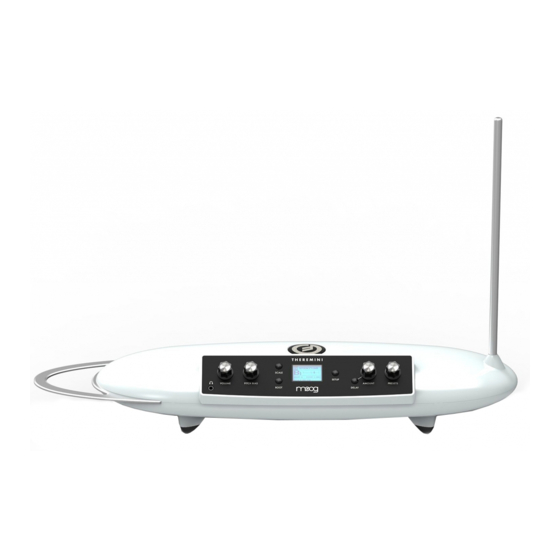
The Moog Theremini is an ideal first Theremin. Unlike traditional Theremins that play a continuous sweep of pitches, the Theremini’s Pitch Correction system allows the Theremini to play the distinct notes and steps of a musical scale; 22 Scales are available, beginning on any of 12 Root notes. -
Page 6: Getting Started
GETTING STARTED In order to get started, you will need to set up your new Theremini in a suitable environment and conduct the quick calibration procedure. For best results and the highest degree of satisfaction, please follow these simple steps before exploring your Theremini. - Page 7 If no stand is available, the Theremini can also be placed on a stool or table. Avoid using a metal surface, as this will interfere with the functioning of the Theremini’s antennae. The Theremini reacts to almost everything within its field of sensitivity, so keep it at least 4 feet away from any large metal objects or sources of movement.
- Page 8 Theremini’s rear panel. Next, plug the supplied IEC cable into the power adapter itself, and then plug the IEC into a wall receptacle. 4. Press the POWER button on the Back Panel to turn the Theremini ON. And that’s it! Now you’re ready to calibrate your Theremini.
-
Page 9: Calibrating Your Theremini
Theremini for the first time, and must be repeated each time your Theremini is moved to a new location, or when it has been sitting unused for a long time. Don’t worry about getting it perfect your first time. - Page 10 CALIBRATING THE PITCH ANTENNA HIGHEST NOTE POSITION Press the SETUP button and place your hand very close to the Pitch antenna, but without touching it. This will determine your hand position for playing the highest selected note. The display will count down, and then prompt you to proceed to the next step.
- Page 11 Theremini at the loudest volume. Wait for the LCD countdown to finish. Your Theremini is now calibrated. In order to make playing easier, the next steps will show how to set the Note Range.
-
Page 12: Setting The Note Range
Highest Note (High) that can be played by the Theremini. 6. Press SETUP to save these values and advance to the next screen. Congratulations! You’re done calibrating your Theremini and setting the note range. Now you’re ready to explore all of the controls and connections. - Page 13 STAND ADAPTOR Also on the bottom panel is a 3/8” stand-mount fixture. This allows the Theremini to be mounted directly on a microphone stand or camera tripod. While the 3/8” size is quite common, an inexpensive 5/8” female to 3/8”...
- Page 14 PITCH CORRECTION KNOB Unlike a guitar fingerboard marked with frets, or a piano that uses separate keys for each note, the Pitch antenna of the Theremini is an electromagnetic rod, capable of creating huge continuous changes in pitch. By introducing Pitch Correction, it is possible to create distinct steps that align perfectly with the notes in a scale.
- Page 15 SCALE BUTTON & ROOT BUTTON These two buttons work together with the PITCH CORRECTION knob, allowing the Theremini to play notes in a selected musical Scale and key (or Root) With Pitch Correction engaged, only the notes in your selected scale and key will be available on your Theremini.
- Page 16 (Short, Medium, Long, Off, Short, etc…) AMOUNT KNOB Here you can set the mix between the original Theremini sound, and the delayed EFFECT sound. At the minimum setting (knob fully counter clock- wise), only the original sound is heard; there is no delay added to the sound.
- Page 17 When Auto Mute is ON, the Theremini will stop playing, or mute itself. When Auto Mute is OFF, the Theremini will continue to drone at the lowest selected note. NOTE: Need to mute your Theremini quickly? Drape an attached audio cable over the volume antenna.
- Page 18 TUNING Normally, the tuning of the Theremini is set to A4 = 440Hz. However, this can be changed if you need to play in concert with another instrument that is not or cannot be tuned to A4 = 440Hz. Adjust the tuning using the PRESETS knob.
- Page 19 Calibration allows the Theremini to adapt to its environment and to adjust to your body movements and playing style. Calibration should be repeated when setting up in a new location, or whenever the Theremini has been left unused for a long time. Press the EFFECT button to begin the Calibration procedure.
- Page 20 ‘snappy’ staccato notes. A larger volume range makes it easier to perform expressive volume swells.) The display will count down, and then prompt you to proceed to the next step. When this step is complete, the Theremini is fully calibrated.
-
Page 21: Rear Panel Connections
REAR PANEL CONNECTIONS Although your Theremini is a complete instrument on its own, it can be easily connected to amplifiers, computers, tablets, recording equipment, or other analog instruments. Here is a detailed look at the rear panel connectors available on the Theremini. - Page 22 This push-button switch turns the Theremini power ON and OFF POWER JACK Connect the Theremini power supply to this jack. Use only the 12 Volt DC (center pin positive) power supply that came with your Theremini. The Theremini provides a screw terminal grounding lug for improved...
-
Page 23: Playing The Theremini
HIGH LOUD QUIET The Theremini is played by interacting with two electronic antennae using subtle hand gestures. The horizontal loop antenna is used to control the Volume. The vertical rod antenna is used to control the Pitch. Bringing your hand near the volume antenna will decrease volume, while bringing your hand near the pitch antenna will increase the pitch. -
Page 24: Learning To Play
The Pitch antenna controls the pitch or frequency that the Theremini is playing. Extend your right arm outward, bringing your hand closer to the Pitch antenna to raise the pitch of the Theremini. Pulling your hand back, or reducing its proximity to the antenna lowers the Theremini’s pitch frequency. -
Page 25: Playing Exercises & Techniques
Theremini a full octave. Clara Rockmore, widely regarded as the most skillful... - Page 26 3) Now slide back down to the first note. NOTE: You can use the Theremini’s built-in tuner as a visual aid to help guide you, but more importantly, listen to the change and distinct sound of each note. 4) Now hum a third note that is slightly higher than the second. Play the first note, slide to the second, pause, and then glide to the third.
- Page 27 VOLUME HAND EXERCISES Now that you’ve gotten your pitch hand in shape, let’s work on your volume hand. We will be keeping our pitch hand still and use only the volume antenna to articulate notes. Play any note and slowly raise your left hand to raise the volume.
- Page 28 EXPRESSIVE VOLUME There is a wide range of loudness that (VOLUME FAR POSITION) the Thereminist can employ to liven up his or her playing. Try playing with your volume hand about three-quarters of the way up. From here, just a casual raising of your hand or fingers makes the volume swell;...
-
Page 29: A Brief History Of The Theremin
A BRIEF HISTORY OF THE THEREMIN In 1919, electricity and radio waves were the cutting-edge technology of the time. Back then, a young Russian scientist named Leon Theremin was hard at work using radio waves to develop a device that could measure the density of different gasses in the air. - Page 30 Russia in 1993, at the age of 97. Nearly 100 years after its invention, Moog Music continues the legacy of the Theremin with the Etherwave family of analog Theremins, and the Theremini—an entirely new take on one of the world’s oldest electronic musical instruments.
-
Page 31: Faq Help
For best results, you must find a grounded outlet. There is a ground screw on the rear panel of the Theremini that you can use to ground your Theremini. Also, if other music equipment in your home / office / studio is earth grounded, you can plug the line output(s) of your Theremini into the other equipment to get grounded. -
Page 32: Specifications
Setup menu and keep pressing SETUP until you reach the Auto Mute page. If you do not want to use auto mute, you can simply drape the Theremini’s power or audio cable over the volume antenna when not in use. -
Page 33: Midi Data
MIDI DATA All implemented controller numbers 0 - 31 have corresponding LSB (fine) controls at locations 32 - 63. Certain controllers adjust parameters which can be negative or positive. For these controllers, sending 0 sets the pa- rameter to fully negative, 64 sets it to 0, and 127 sets it to fully positive. CC NO. - Page 34 SCALES ROOT NOTES VALUE SCALE VALUE NOTE Chromatic Ionian Dorian Phrygian Lydian Mixolydian Aeolian Locrian Major Blues Minor Blues Diminished Major Penta Minor Penta WAVEFORMS Spanish Gypsy VALUE WAVEFORM Arabian Sine Egyptian Triangle Ryukyu Super Saw Wholetone Animoog 1 Major 3rd Animoog 2 Minor 3rd Animoog 3...
-
Page 35: Recommended Resources
PRESET NAME CHANGE (SYSTEM EXCLUSIVE MESSAGE) F0 04 0B 06 07 00 00 00 00 00 00 00 00 00 00 00 01 nn nn nn nn nn nn nn nn nn nn nn nn nn 00 00 00 F7 nn are the 13 ASCII characters in the name. - Page 36 You must obtain prior approval and an RMA number from Moog Music before returning any product to us. Wrap your Theremini carefully and pack it with the power adapter in its original carton. The warranty will not be honored if the product is not properly packed.
Need help?
Do you have a question about the Musical Instrument and is the answer not in the manual?
Questions and answers