Table of Contents
Advertisement
Quick Links
Download this manual
See also:
Operator's Manual
Advertisement
Table of Contents

Related Manuals for Lincoln Electric POWER WAVE C300 CE


Summary of Contents for Lincoln Electric POWER WAVE C300 CE
- Page 1 IM2033 04/2010 Rev. 0 POWER WAVE C300 CE OPERATOR’S MANUAL ENGLISH THE LINCOLN ELECTRIC COMPANY 22801 St. Clair Ave., Cleveland Ohio 44117-1199 USA www.lincolnelectric.eu...
-
Page 2: The Lincoln Electric Company
Address: c/o Balmes, 89 - 80 2a 08008 Barcelona SPAIN Hereby declare that welding equipment: Power Wave C300 CE, including options and accessories Sales code: K2865, code may also contain prefixes and suffixes Is in conformity with Council Directives and amendments:... -
Page 3: Table Of Contents
12/05 THANKS! For having choosen the QUALITY of the Lincoln Electric products. • Please Examine Package and Equipment for Damage. Claims for material damaged in shipment must be notified immediately to the dealer. • For future reference record in the table below your equipment identification information. Model Name, Code &... -
Page 4: Safety
Failure to follow the instructions in this manual could cause serious personal injury, loss of life, or damage to this equipment. Read and understand the following explanations of the warning symbols. Lincoln Electric is not responsible for damages caused by improper installation, improper care or abnormal operation. -
Page 5: Installation And Operator Instructions
Even so, it is important that simple preventative measures are followed in order to assure ® The POWER WAVE C300 CE is rated at 250A - 26.5V long life and reliable operation. @ 100% duty cycle. It is further rated to provide 300A – •... -
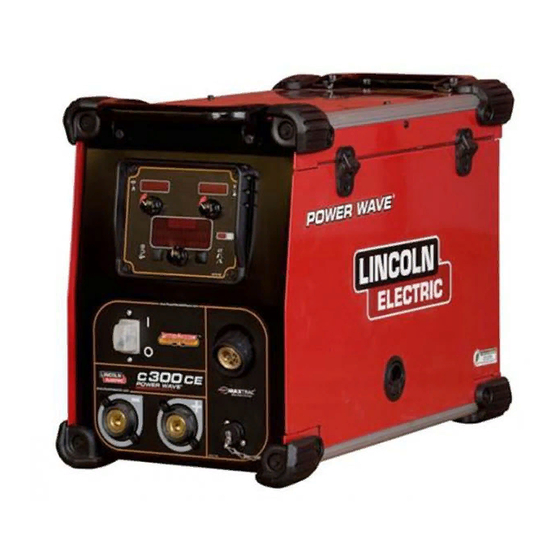
Page 6: Product Description
Industrial, Scientific and Medical (ISM) group 2, class ® the triangular lock. A. The POWER WAVE C300 CE is for industrial use Install the outer wire guide by aligning it with the only (see Electromagnetic Compatibility EMC Safety pins and tightening the knurled thumbscrews. -
Page 7: Case Back Controls
Watercooler CoolArc 50. 14. 12-pin Connector - Connection for cross switch WARNING gun, push pull guns, remotes. ® The POWER WAVE C300 CE is not recommended for pipe thawing. Case Back Controls Equipment Limitations • Maximum spool size is 305mm diameter. -
Page 8: Definition Of Welding Modes
UltimArc™ Control, adjusts the apparent inductance of ® welding and general repairs. The POWER WAVE the wave shape. The UltimArc™ Control adjustment is C300 CE controls Amperage, Output Control and Arc similar to the “pinch” function in that it is inversely English English... - Page 9 proportional to inductance. Therefore, increasing UltimArc™ Control UltimArc™ Control greater than 0.0 results in a crisper UltimArc™ Control adjusts the focus or shape of the arc. arc (more spatter) while decreasing the UltimArc™ UltimArc™ Control is adjustable from -10.0 to +10.0 with Control to less than 0.0 provides a softer arc (less a nominal setting of 0.0.
- Page 10 Press the Left Push Button until Memory ' M' LED is illuminated. GTAW (TIG) Welding ® The POWER WAVE C300 CE is excellent for (Touch Start TIG) welding, a torch with an integral gas valve. Basic Operation TIG MODE Process...
- Page 11 Rotate centre knob to cycle to desired memory To active Limits SetUp Menu: location. Press the Left Push Button until Memory ' M' LED is Press and hold centre knob for 1 second. The illuminated. selected memory is now active. Limits Limits allow the welder to adjust the welding procedure only within a defined range.
- Page 12 Weld Mode Search 4-Step Trigger 4-Step trigger operation gives the welder additional The Weld Mode search function allows for a particular control in the welding sequence. 4-Step trigger allows mode to be selected based on the process, wire type the welder to choose the arc start, weld and arc end and wire size.
- Page 13 List of Diagnostic Parameters Trigger Procedure Change • Quick Trigger = Allows switching between P.80 Sense From Studs Procedure A and procedure B while welding. The P.82 Voltage Sense Display optional dual procedure/memory panel is required. P.99 Show Test Modes? To operate: P.100 View Diagnostics...
- Page 14 The calibration range is -30 to +30, mix of Lincoln Electric equipment can have with 0 as the default value. consistent remote control behavior across all •...
- Page 15 Arc Voltage, Power or STT Background Current P.102 Fatal Logs based on the selected weld mode. For example, Press the right MSP4 button to view the Fatal Logs. when a non-synergic STT weld mode is selected, Rotate the encoder to select the module to read and the left and right joystick positions will adjust then press the right MSP4 button.
-
Page 16: Electromagnetic Compatibility (Emc)
Lincoln Electric. Before installing the machine, the operator must check the work area for any devices that may malfunction because of electromagnetic disturbances. -
Page 17: Technical Specifications
work piece to ground in order to reduce the electromagnetic emissions. The operator must check that connecting the work piece to ground does not cause problems or unsafe operating conditions for personnel and equipment. • Shielding of cables in the work area can reduce electromagnetic emissions. This may be necessary for special applications. -
Page 18: Spare Parts
12/05 Part List reading instructions • Do not use this part list for a machine if its code number is not listed. Contact the Lincoln Electric Service Department for any code number not listed. • Use the illustration of assembly page and the table below to determine where the part is located for your particular code machine. - Page 19 Fig. F : Rear Panel Assembly (P-635-H.1) ........................9 Fig.G : Roof, Top Extrusion & Door Assembly (P-635-J.1) ..................10 Electrical Schematic ..............................11 POWER WAVE ® C300 CE code 11624 ........................11 THE LINCOLN ELECTRIC COMPANY 22801 St. Clair Ave., Cleveland Ohio 44117-1199 USA www.lincolnelectric.eu...
-
Page 20: Power Wave ® C300 Ce
Spare Parts SP11624 Rev. 0 07/03 POWER WAVE ® C300 CE ASSEMBLY PAGE NAME CODE NO.: K NO.: FIGURE NO.: 11624 K2865-1 POWER WAVE ® C300 CE Spare Parts - Electrical Schematic Spare Parts - Electrical Schematic... -
Page 21: Fig.a : Case Front Assembly (P-635-C)
Figure A Fig.A : Case Front Assembly (P-635-C.1) Item Description Part Number Case Front Assembly (G6049-2) Case Front G5120-2 Gusset S27254 UI Trim G6529 User Interface G6554-1 Capacitor Assembly S27473 P.C. Board Mounting Bracket L13263-4 Bushing T12380-8 Noise Suppressor Assembly S25304-7 Output Stud M13896-3... -
Page 22: Fig.b : Base Assembly (P-635-D)
Figure B Fig.B : Base Assembly (P-635-D.1) Item Description Part Number Base Assembly (G6050-1) Base L13264-1 Bottom Power Board Bracket M21469-4 Connector Insulator S28286 Base Extrusion M21251-2 Wire Reel Support Bracket L13257-1 Bracket L15091 Mounting Foot S28070 Input Choke M21489 Choke Mounting Bracket M21468 Corner Cap... -
Page 23: Fig.c : Sub Assembly (P-635-E)
Figure C Figure D Fig.C : Sub Assembly (P-635-E.1) Item Description Part Number Sub Assembly (G6083-1) Center Panel G6722 Angle Cover M22330 Spindle Assembly, Includes: L15679 Spindle Mast G6727 Spindle Shaft M21542-1 Spindle L10560-2 Spring T11862-14 Retaining Collar Assembly S23811 Rear Floor Panel G6729 Front Floor Panel... -
Page 24: Fig.e : Wire Drive & Motor Assembly (P-635-G)
Figure E Fig.E : Wire Drive & Motor Assembly (P-635-G.1) Item Description Part Number Wire Drive & Motor Assembly M21491-1 Gearbox Mounting Panel M20086-3 Feedplate Assembly M19932-8 Feedplate Idle Arm Adjustment Arm Assembly M19179-1 Motor Gearbox Assembly L12085 Drive Motor Connector, Molex (Not Shown) S24018-8 Locking Post (Not Shown) -
Page 25: Fig. F : Rear Panel Assembly (P-635-H)
Figure F Fig. F : Rear Panel Assembly (P-635-H.1) Item Description Part Number Rear Panel Assembly, Includes: L13272-1 Rear Panel G5130-1 Fan Assembly M22149 Fan Bracket L13239-1 Bushing T12380-4 Cord Grip Connector S19999 Solenoid M17294-8 Ethernet Connector M19969-14 Plug Button T10397-6 Circuit Breaker T12287-8... -
Page 26: Fig.g : Roof, Top Extrusion & Door Assembly (P-635-J)
Figure G Fig.G : Roof, Top Extrusion & Door Assembly (P-635-J.1) Item Description Part Number Roof Assembly, Includes L15724 Roof L12763-2 Top Extrusion Assembly, Includes: M22382 Top Extrusion M21251-1 Inner Roof G6728 Bushing T12380-5 Handle Bracket L15070 Handle G6525-1 Control Board S28929-[ ] Wire Drive Board S28256-[ ]... - Page 27 Electrical Schematic POWER WAVE ® C300 CE code 11624 Spare Parts - Electrical Schematic Spare Parts - Electrical Schematic...