Table of Contents
Advertisement
Advertisement
Table of Contents

Related Manuals for DTVS DTVS-1B

Summary of Contents for DTVS DTVS-1B
- Page 1 DTVS-1B User Guide Digital Satellite Receiver...
-
Page 2: Safety Instructions
Digital Satellite Receiver DTVS-1B User Guide Safety Instructions - Always read the safety instructions carefully. - Keep this User's Manual for future reference. - Keep this equipment away from humidity. - Lay this equipment on a reliable flat surface before setting it up. -
Page 3: Table Of Contents
Contents Safety Instructions ................................2 Contents ....................................3 About the Set Top Box ..............................4 Front Panel and Rear Panel Illustration ......................... Remote Control ................................6 Installing the Batteries ..............................7 Connecting to Equipment ............................8 First Time Installation ..............................9 Basic Operations ................................ -
Page 4: About The Set Top Box
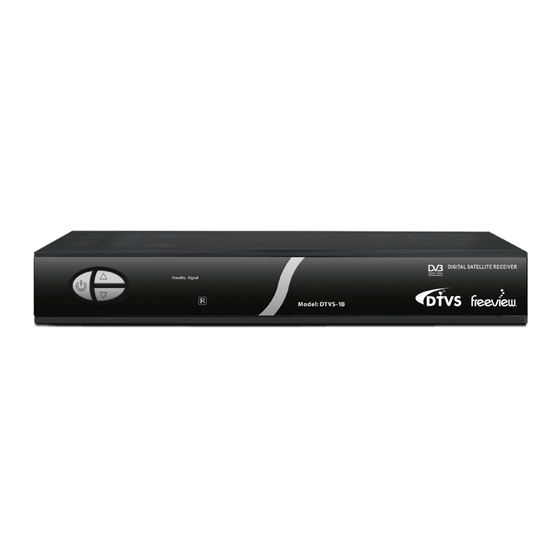
Digital Satellite Receiver DTVS-1B User Guide About the Set Top Box This DVB-S Satellite Receiver is a Free-To-Air digital satellite receiver, allowing you to access free- to-air digital Satellite TV channels and radio broadcasts on your TV set. Its digital reception covers VHF &... -
Page 5: Front Panel And Rear Panel Illustration
A C 170-240~ Z1082 50/60Hz 30W Max . L NB I NPUT TV A NT IN V IDEO Model No: DTVS-1B Digital Satellite Receiver Ser i al N o . L NB O UT TO TV A UDIO A UDIO... -
Page 6: Remote Control
Digital Satellite Receiver DTVS-1B User Guide Remote Control Remote key functions 1. POWER To turn the standby mode ON/OFF 2. MUTE To mute or recover the sound of the receiver 3. Numeric buttons (0-9) To control the numerical operation and to change programs directly 4. -
Page 7: Installing The Batteries
Installing the Batteries Remove the battery cover from the remote control and put two AAA size batteries inside the compartment. The diagram inside the battery compartment shows the correct way to install the batteries Caution: 1. Keep batteries out of childrens’ reach. 2. -
Page 8: Connecting To Equipment
Digital Satellite Receiver DTVS-1B User Guide Connecting to Equipment How to get good reception There are many ways to connect the satellite receiver to your home entertainment system, depending on the equipment and connection types you have. However, for the best video/audio quality, use the higher quality YCbCr and S/PDIF connections if available. -
Page 9: First Time Installation
First Time Installation Note: Be sure to turn on the main power at the rear of your receiver before using the receiver. Before you press power button, the receiver is on standby mode. After all the connections have been made properly switch on your TV. Make sure the receiver is connected to the mains and press the POWER button to switch the receiver on. -
Page 10: Basic Operations
Digital Satellite Receiver DTVS-1B User Guide Basic Operations Switch program 1. Press the numeric buttons (0~9) on the remote control to select the channel number you want. 2. Press the CH▲/▼key on the remote control or the front panel to change the available channels upward/downward. - Page 11 Basic Operations Teletext service 1. Press the TXT button to open a teletextpage (if the teletext is transmitted) 2. Press the TXT button again or press the EXIT button to close the teletext. EPG (Electric Program Guide) 1. Press the EPG button to view the EPG information that are provided by the content providers. 2.
-
Page 12: Main Menu
Digital Satellite Receiver DTVS-1B User Guide Main Menu This section guides you to walk through of all options on the Menu screen. Navigation in the main menu 1. Press the MENU button to bring up the main menu. 2. Press the ▲/▼ button to move upward/downward to the desired menu. press the ◄/► button to move to the sub menu and press ▲/▼... - Page 13 Main Menu Menu Tree Main Menu Channel Manager Channel Organiser New Channel Edit Channel Delete All Installation Satellite Setup Blind Scan Transponder Setup DisEqc Motor Setup Factory Default Reset Box Info System Setup Language Setup OSD Setup TV Setup Time Setup Password Setup Wakeup Timer Accessories...
-
Page 14: Channel Organiser
Digital Satellite Receiver DTVS-1B User Guide Channel Organiser Channel Organiser 1. Go to Main Menu > Channel Manager > Channel Organiser. 2. Press RED button to Skip, GREEN button to lock the channel, BLUE button to delete the channel; press▲/▼to select the channel; press INFO button to rename the channel name; press FAV button to set the favourite list;... - Page 15 Channel Organiser Edit Channel 1. Go to Main Menu > Channel Manager > Edit Channel 2. Press ▲/▼ and ◄/► to select the item and press numerical 0~9 to set as you want, then Press OK . 3. Press EXIT to exit the menu. Delete All 1.
-
Page 16: Installation
Digital Satellite Receiver DTVS-1B User Guide Installation Satellite Setup 1. Go to main menu > Installation > Satellite Setup 2. Press ▲/▼ to choose LNB No., LNB power, 22kHz, DisEqc, DisEqc Switch and press OK to select the satellite that you want to scan. There will be a window displayed to confirm with you if you want to scan. - Page 17 Installation Blind Scan 1. Go to main menu > Installation >Blind Scan 2. Press OK to start scanning. 3. Press EXIT to exit the menu. Transponder Setup 1. Go to main menu > Installation > Transponder Setup 2. You can perform the transponder scan [Add/Edit] based on the LNB frequency, LNB power, 22KHz and DiSEqc values stored in the satellite setup for that selected satellite.
- Page 18 Digital Satellite Receiver DTVS-1B User Guide Installation DisEqC Motor Setup There are two items you can choose: DisEqc1.2 Setup and USALS Setup. a) DisEqC1.2 setup 1. If you have only one Set Top box, but you like to watch all coverage of satellite signal then you need to go for motorized dish which is called DiSEqC1.2.
- Page 19 Installation LEFT/RIGHT key. 3. Goto X - GoTo X option is used to move the motor to specified Dish position. To perform this option - select Dish moving type as GoTo X and enter the Dish position by pressing numeric keys and now press OK key to move the dish to specified position.
- Page 20 Digital Satellite Receiver DTVS-1B User Guide Installation Factory Default 1. Go to main menu > Installation > Factory Default 2. Press OK, there will be a window to displayed to confirm with you if you want to default all of the settings.
-
Page 21: System Setup
System Setup Reset Box Info 1. Go to main menu > Installation > Reset Box Info 2. Press OK, there will be a window displayed to confirm with you if you want to set the box information. Press ▲/▼ to choose YES or NO, and then OK. If you choose YES, there will be a window asking you to enter the password, if you have not set a new password, press 0000;... - Page 22 Digital Satellite Receiver DTVS-1B User Guide System Setup System Setup Go to Main Menu > System Setup. There will be the following items, such as: Language Setup, OSD Setup, TV Setup, Time Setup, Password Setup, Wakeup Timer. Language Setup 1. Select Language Setup , and press OK to enter into it.
- Page 23 System Setup OSD Setup 1. Select OSD setup, and press OK to enter into it. 2. Press ▲/▼ to choose the item you want to set. Press ◄/► and to select what you would like. 3. Press EXIT to exit the menu. TV Setup 1.
- Page 24 Digital Satellite Receiver DTVS-1B User Guide System Setup Time Setup 1. Select Time setup, and press OK to enter into it. 2. Press ▲/▼ to choose the item, and press ◄/► to choose timer mode, if you select Manual, you can set the date and time with the numeric keys 0~9.
- Page 25 System Setup Wakeup Timer 1. Select Wakeup Timer, and press OK to enter into. 2. Press ▲/▼ to choose the item, and press ◄/► or numeric keys 0~9 to set Timer., Timer Mode, Service, Date, Start Time, Duration and press OK. 3.
-
Page 26: Accessories
Digital Satellite Receiver DTVS-1B User Guide Accessories In this menu, there are three submenus: S/W upgrade, Version and Signal Monitoring S/W Upgrade 1. Select S/W upgrade and and press OK to enter it. 2. There will be a window showed “search for S/W upgrade from air is in progress and you will wait for about 20 seconds. - Page 27 Accessories Version 1. Select Version, and press OK. 2. You can find the version information of your receiver. 3. Press OK or EXIT to exit. Signal Monitoring 1. Go to main menu > Accessories > Signal Monitoring 2. You can check the availability of signal, such as signal strength and signal quality by changing these parameters: Satellite name, LNB Low &...
-
Page 28: Country Setup/Epg
Digital Satellite Receiver DTVS-1B User Guide Country Setup/EPG Country Setup 1. Go to main menu > Country Setup 2. In this menu, there are twenty major areas to choose from: Southern Lakes, Canterbury, Westcoast, Wellington, Wairarapa, Manawatu, Wanganui, Taranaki, Hastings, Napier, Gisborne, Taupo, Bay of Plenty, Rotorua, Waikato, Auckland, Northland, All free channels, Southland and Otago. -
Page 29: Troubleshooting
Troubleshooting If you experience problems with this receiver or its installation, in the first instance please read carefully the relevant sections of this User Manual and this Troubleshooting section. Problem Possible cause What to do Main lead unplugged Check mains lead Display on front panel not lit Main fuse blown Check fuse... -
Page 30: Receiver Specifications
Digital Satellite Receiver DTVS-1B User Guide Receiver Specifications Item Specification LNB INPUT IF in, connects to your dish antenna LNB OUT IF out, provides a loop out for a second STB TV ANT IN IEC female connector To TV Anlog RF output... -
Page 31: Warranty
Warranty Please keep your receipt as proof of purchase. This product is warranted for any defect in materials or workmanship for one year after the original date of purchase. This product is for normal domestic and office use only. This warranty does not cover damage from misuse or neglect, accidental damage, vermin in festation, excessive voltages such us lightning or power surges or any alternation that affects the performance or reliability of product.
Need help?
Do you have a question about the DTVS-1B and is the answer not in the manual?
Questions and answers