Table of Contents
Advertisement
Quick Links
Advertisement
Table of Contents

Related Manuals for Maxon SL6000 Series


Summary of Contents for Maxon SL6000 Series
- Page 1 Operation Manual SL6000 Series...
-
Page 2: Table Of Contents
Operating Manual SL6000 Series Contents Introduction............5 Purpose of application notes ..............5 Product description ..................5 Operating frequencies .................5 Feature List ....................5 Warnings ......................5 Unpacking information ................6 Antenna installation ..................6 Battery pack installation ................7 Belt clip installation ..................7 Battery charging ..................8 Programming ....................8... - Page 3 Operating Manual SL6000 Series Channel lock key ................14 Menu/Scan key .....................14 Menu key ..................14 Scan key ...................14 TX/RX/busy LED ...................14 Basic radio operation......... 15 Channels .......................15 Channel labels .....................15 Channel spacing ..................15 Output power ....................15 Beep mode ....................15 Squelch options ...................15 CTCSS ....................16...
- Page 4 Operating Manual SL6000 Series Priority only TX ................21 Group scan edit mode .................21 Group priority scan channel edit ...............21 DTMF..............23 Receiving DTMF ...................23 Transmitting DTMF ..................23 Function display ..........24 PC programmer..........25 Computer ......................25 Operating System ..................25 Warning status messages ......... 26 Contact details...........
-
Page 5: Introduction
SL6000 Series Introduction Purpose of application notes The purpose of this document is to outline the functional features of the SL6000 Series Handheld radio(s). This document will be used to navigate and set-up all of the programmable features. Product description The SL6402/6102 is a fully featured handheld radio that has been developed for the European market. -
Page 6: Warnings
CAUTION - DO NOT press and hold the transmit button (PTT) when not actually wishing to transmit. WARNING – only use authorised Maxon accessories with this radio. Using other manufacturer’s accessories could damage the radio and invalidate the warranty. WARNING - Never modify a radio, or accessory, except as instructed in the Service Manual, Engineering Bulletins or formal communication as this may invalidate any warranty, guarantee or type approval. -
Page 7: Antenna Installation
Operating Manual SL6000 Series Antenna installation Fasten the antenna to the radio by turning the antenna clockwise into the receptacle on top of the radio making sure the antenna is tightly locked in place. Do not over tighten the antenna. -
Page 8: Battery Charging
1) input voltage: DC12V Normal 2) Input voltage range: DC10.5~15V 3) Input Current 1.0A max at Full load Programming Please refer to the SL6000 Series Programming manual for detailed programming information. The programming kit required is the PR- SL6000-01 Kit consists of... -
Page 9: Programming Set-Up
Operating Manual SL6000 Series Programming set-up PK-SL6000-01 SL6402/6102 (Fig. 1) Reading When serial read commands are sent though the interface leads from the PC Programmer to the radio, SL6402/6102 will transmit the data. During this sequence, the Red LED will stay solid red. -
Page 10: Cloning
Operating Manual SL6000 Series Cloning The SL6402 radio requires the cloning cable. The frequencies and functions can be programmed from radio to radio by using a cloning cable. Ensure that both radio’s power is in the switched “OFF” position. Place the master radio (the radio which already has desired program information in the EEPROM) in the data master mode by holding the radio’s monitor switch and then turning... -
Page 11: Sl6000 Orthographic View
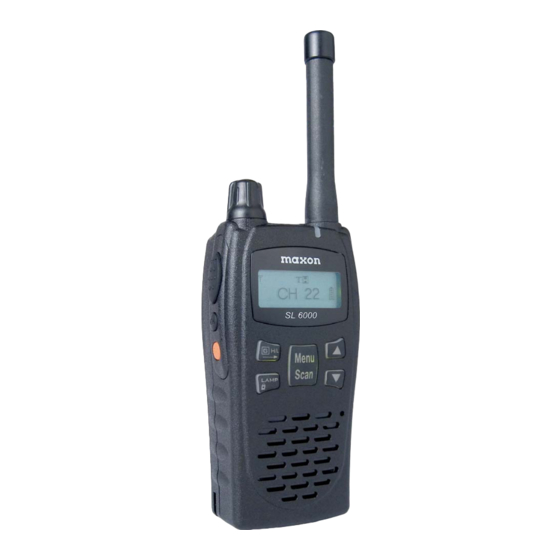
Operating Manual SL6000 Series SL6000 orthographic view (Fig.3) Description of radio mechanical component Accessory Connector Group / Power Button On/Off - Volume Control Lamp / Lock Button Tri-coloured LED Status Indicator Menu / Scan Button Antenna Receptacle Belt Clip Channel Selector Buttons... -
Page 12: Mechanical Radio Operation
Operating Manual SL6000 Series Mechanical radio operation On/off volume The On/Off volume is a potentiometer located on the top left-hand side of the radio. Rotating the knob clockwise past the détente turns the radio on and increases the audio volume up to the maximum volume level. Rotating the knob anti-clockwise decreases the audio volume. -
Page 13: Emergency Key
Operating Manual SL6000 Series Emergency key The Emergency function is initiated when the lower orange side button is pressed; a pre- programmed DTMF ANI sequence is sent. Three ANI calls followed by a string of eleven sets of audible tones will be heard. A 3 second press/hold is required to enable an emergency call. -
Page 14: Channel Lock Key
Operating Manual SL6000 Series Lock A long 3 sec. press on the Lamp/Lock Button will disable the ▲▼ keys. This feature also locks the H/L/group key and Menu/Scan Key. Please note the PTT, Monitor and Emergency keys are still operational. -
Page 15: Basic Radio Operation
Basic radio operation Channels The SL6000 Series radio(s) can store up to 208 channels within the same frequency band. These channels can be selected by using the▼▲ keys. The channels can all be programmed using the SL6402/6102 programmer. The SL6000 is capable of up to 13 programmed groups with up to 16 channels per group. -
Page 16: Squelch Options
The SL6000 Series radios are capable of generating all 47 standard CTCSS tones and can also generate the 83 standard DCS codes and 83 inverted DCS codes. -
Page 17: Squelch Level
Operating Manual SL6000 Series When using CTCSS or DCS controlled squelch, several user groups may use the same RF channel without overhearing the other groups. It is common practice to allow users to listen to a channel before placing a call. This allows the user to check they are not going to transmit over a conversation from another user group. -
Page 18: Emergency Feature
Operating Manual SL6000 Series Emergency feature The emergency function is initiated when the lower orange side button is pressed; a pre- programmed DTMF ANI sequence is sent. Three ANI calls are sent, followed by a five seconds of audible tones. A 3 sec hold/press is required to enable an emergency call. - Page 19 Operating Manual SL6000 Series How to enter the password To add the password, switch on the unit, briefly the word Password is displayed on the unit, then is replaced by 0000 (4 zero's). A symbol is positioned above the 1st zero (left hand zero);...
-
Page 20: Scanning
Priority channel scan This function operates only when priority channel is set via the SL6000 Series programmer. During programming of the radio, any one channel can be selected as the priority scan channel. The priority channel will be included on the list of channels that make up the scan list. -
Page 21: Scan Channel Delete
Operating Manual SL6000 Series Scan channel delete: To temporarily delete a channel from the scan list, simply press the G/H/L button while scanning and stopped on the channel to be deleted. This will temporarily remove that channel from the scan list until the channel is changed or the radio's power is reset. - Page 22 Operating Manual SL6000 Series To activate priority channel editing, press the Menu/Scan button until the radio enters ‘Priority channel Edit Mode’. Upon entering ‘the Priority channel Edit Mode’, the LCD displays “Pscn”. To exit the priority channel edit function, Press the PTT.
-
Page 23: Dtmf
Operating Manual SL6000 Series DTMF DTMF The DTMF feature is PC programmable and attached to the PTT (Press to Talk). Once the DTMF ANI (Automatic Number Identification) has been pre-programmed, ANI is encoded on every PTT. The DTMF call can be set up to be sent at the start or end of transmission. -
Page 24: Function Display
Operating Manual SL6000 Series Function display 1 2 3 4 5 6 7 8 Transmitting Icon * Hi power: Antenna bar is full. * Low power: Antenna bar is 3. Receiving Icon Change antenna bar 0~5 by receiving signal sense. -
Page 25: Pc Programmer
Operating Manual SL6000 Series Display when DTMF is set. Display when beep is on. Displayed when key lock option is Displays charge level of battery. PC programmer Computer Pentium II processor or later (recommended) Operating system Microsoft Windows 98, 2000, NT, XP... -
Page 26: Warning Status Messages
Operating Manual SL6000 Series Warning status messages Audible Status Description LED colour LCD indication tone Normal Power On - Ready Channel number Melody Call Received Orange Channel number Correct Call Green Channel number Busy Channel Orange Channel number Transmit Channel number... -
Page 27: Contact Details
Operating Manual SL6000 Series Contact details Should you have any queries regarding this manual, or the information in it, please contact: Maxon House, Cleveland Road, Hemel Hempstead, Hertfordshire, United Kingdom, HP2 7EY Tel: + 44 (0) 1442 267 777 Fax: + 44 (0) 1442 215 515 info@maxoncic.co.uk...
Need help?
Do you have a question about the SL6000 Series and is the answer not in the manual?
Questions and answers