Table of Contents
Advertisement
Advertisement
Table of Contents

Related Manuals for Dometic RF60


Summary of Contents for Dometic RF60
-
Page 1: Operating Instructions
Type: A30-100C Model: RF60 Operating instructions 207.5912.05 0402... -
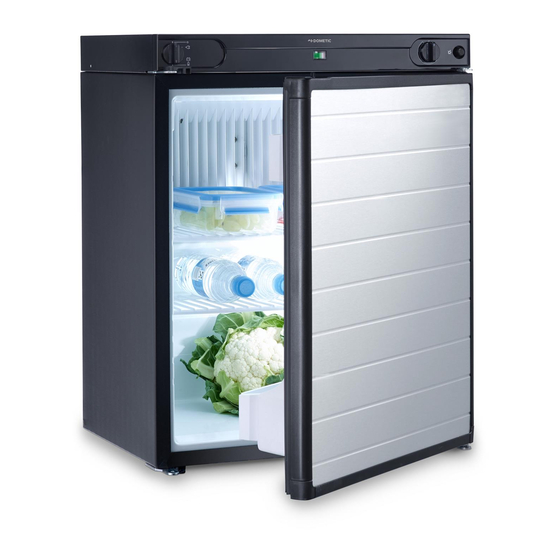
Page 2: Product View
Figure 1 A. Energy selector switch D. Manual ignition button B. Flame indicator (galvanometer) E. Door lock C. Thermostat (Gas/electric) Note: The refrigerator is equipped to operate mains power, DC or liquid gas. The desired power option is selected by means of energy selector switch (A). Energy selector switch (A) has four settings: AC mains power, DC (12V), Gas (liquid gas), O (Off). -
Page 3: Area Of Use
Dear customer, please read the instruction book and all additional information before using the appliance. It is most important that they should be retained with the appliance for future reference! 1. Warnings and directions These warnings are provided in the interest of safety. You must read them carefully before installing or using the appliance! This appliance is not intended for use by persons (including children) with reduced physical, sensory or mental capabilities, or lack of experience and... -
Page 4: Ac Operation
Operation using liquid gas is permitted only in well ventilated rooms - which have a capacity (length x width x height) of at least 20m3 and have a window (which can be opened) or a door to the outside - or out of doors. Outdoor use includes tents (awnings) which are well ventilated throughout unit operation and flat garden terraces. - Page 5 removed using a small screwdriver to lever it out. The old fuse should be replaced by a 3 amp ASTA approved BS 1362 fuse and the fuse cover/carrier must be refitted before the plug is used again. If the fuse cover/carrier is lost, a replacement can be obtained from the service shops.
-
Page 6: Dc Operation
To turn on (Fig. 3) Energy selector switch (A) should be in position “AC”. Turn electric/gas thermostat knob (C) clockwise to position MAX. Only after approximately 1 hour will the unit become noticably cool (frost on evaporator). The temperature can be regulated using the electric/gas thermostat knob: '0'=off, the symbol shows increasing degrees of coolness. -
Page 7: Liquid Gas Operation
It is necessary to consider the polarity when connecting the unit. Check that the battery voltage and line voltage data correspond to the type-plate on the inside of the unit. If no batteries are used independently of the vehicle, the mobile cooler should not be operational when the vehicle is in motion, since the battery can discharge to the extent that the vehicle engine cannot restart when the vehicle is at a standstill. -
Page 8: Connection Of Gas Supply
9. Connection of gas supply (The following instructions refer in the main to coolers manufactured for the United Kingdom. For other countries please refer to your supplier). Always connect in the following sequence: → → → → GAS BOTTLE PRESSURE-REGULATOR APPLIANCE. -
Page 9: Defrosting
position Figure 5 middle position 3. Turn thermostat knob (C) to the MAX position, press and hold down. 4. After approximately 10 seconds press knob (D) several times. (This could take longer than 10 seconds if the unit has been out of operation for a prolonged period or after replacing the gas cylinder. -
Page 10: Door Locking
cooler as soon as an approximately 5mm thick layer of ice has formed. This is done by turning off the unit and removing any food or drink therin. Never use heated appliances, heaters, etc. to speed up the defrosting process! If necessary, a cloth dipped in warm water can be placed on the unit to help the defrosting process. -
Page 11: Reversing The Door Hang
Warranty arrangements are in accordance with EC Directive 44/19999/CE and the normal conditions applicable in the country concerned. For warranty or other servicing, such as spare-parts, please contact our Dometic Service Network. The warranty does not cover any damage due to improper use. - Page 12 The warranty does not apply if the installing and operating instructions are not adhered to. When contacting Dometic Service Network, please state the model, product number and serial number. You will find this information on the data plate inside of the refrigerator.
-
Page 13: Technical Data
21. Technical Data Gas operation butane (propane): Rated thermal loading: 151 W (133 W) Min. thermal loading: 143 W (85 W) Connected load, gas: 11 g/h (9,5 g/h) Connection pressure: 28-30/37 mbar Categorie: Climat class: Electric operation: 220V-240V (mains) 50 Hz: 110W 12V (car battery): 110W... - Page 14 Seal Fig 6 Seals Fig 7...