Advertisement
Advertisement
Table of Contents

Related Manuals for Ryobi EMBS200


Summary of Contents for Ryobi EMBS200
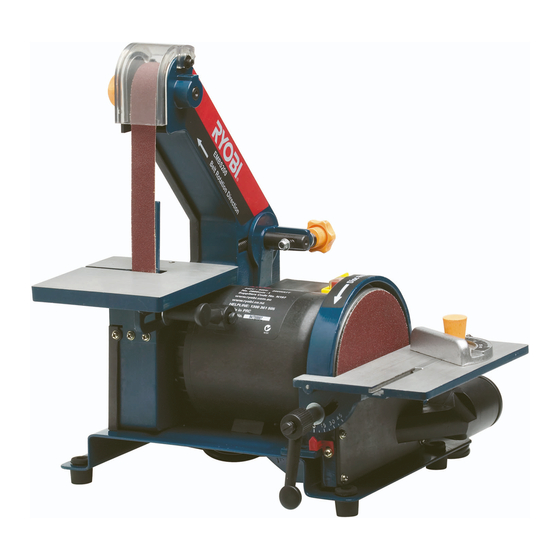
- Page 1 EMBS200 MINI BELT & DISC SANDER OWNER'S OPERATION MANUAL N197...
-
Page 2: Table Of Contents
Rules for Safe Operation Unpacking Loose Parts List Features Assembly 8-10 Operation Maintenance Trouble Shooting Notes PRODUCT SPECIFICATIONS Model Number EMBS200 Input 200 Watt Disc Speed 3600 rpm Belt Speed 970m/min Disc Diameter 125mm Belt Dimensions 25 x 762mm Disc Table Size... -
Page 3: Rules For Safe Operation
RULES FOR SAFE OPERATION S afe operation of this tool stand requires that you read and Wear hearing protection during PROTECT YOUR HEARING. understand this operator's manual and any labels affixed to extended periods of operation. the tool. Safety is a combination of common sense and Never carry tool by the cord or yank DON'T ABUSE CORD. - Page 4 WARNING: WARNING: When servicing use only identical Ryobi replacement Some dust created by power sanding, sawing, grinding, parts. Use of any other parts may create a hazard drilling, and other construction activities contains or cause product damage.
-
Page 5: Rules For Safe Operation
When servicing, AUTHORISED SERVICE CENTRE comply can result in accidents involving fire, electric use only identical Ryobi replacement parts. shock, or serious personal injury. Save this operator's manual and review frequently for continuing safe operation and instructing others who may use this tool. -
Page 6: Unpacking
Lift the bench belt & disc sander from the carton and place it on a level work surface. Contact your nearest Ryobi dealer for assistance if an parts are missing or damage. Do not discard the packing materials until you have carefully inspected the machine, identified all loose parts, and satifactorily operated your belt and disc sander. -
Page 7: Features
FEATURES Before using the tool, familiarise yourself with all the operating features and safety requirements. Use the tool and accessories only for the applications intended. 1. Base 10. Belt tracking adjustment knob 2. Rubber Feet 11. Belt cover 3. Disc guard 12. -
Page 8: Features
Powered by a precision built electronic induction motor, your Belt and Disc Sander has sufficient power to handle tough sanding tasks. SANDING DISC Your EMBS200 uses a 125mm diametre hook and loop fitting sanding disc. These are available in various ‘grits’ or grades of courseness from all good hardware stores. SANDING BELT Your EMBS200 uses a 762 x 25mm sanding belt. -
Page 9: Assembly
Assembly 1. Attach the rubber feet onto 9. Attach the handle on the 6. Fit the sanding disc table the base by fitting them opposite side of the sanding onto the unit by sliding the 2 though each of the 4 holes in table by following steps 7 &... - Page 10 Mounting to a workbench 3. Tighten the 2 handles to secure the table in position. It is recommended that the belt and disc sander is Adjusting the belt sander table secured to a work bench to gain maximum stability 1. For most belt sanding operations the table should and prevent noise and vibration.
-
Page 11: Changing The Sanding Disc
Changing the sanding disc 5. Remove the belt cover. 1. Loosen and remove the 2 handles securing the sanding disc table. 6. Using the 3mm hex key 2. Remove the sanding disc table. loosen but do not remove the hex screw securing the 3. -
Page 12: Operation
Adjusting the belt tracking Operation Using the mitre gauge The belt tracking adjustment knob helps to ensure that the 1. The mitre gauge is used to belt is aligned on the wheels. (Fig 9) help support the workpiece and can be adjusted when sanding an angle. -
Page 13: Maintenance
Regularly check that all the fixing screws are tight. They may vibrate loose over time. Repairs Only an authorised Ryobi service centre should replace the cordset or carry out other repairs. If the cordset is damaged or worn, have it repaired or replaced by it repaired or replaced by an authorised Ryobi service agent. -
Page 14: Trouble Shooting
Trouble shooting Warning! Turn the on/off switch to the off position and unplug the tool from the power supply before performing trouble shooting procedures. Trouble Problem Suggested remedy Belt & disc sander will Power cord not plugged in Ensure that the cord is connected to the power supply not start Power fault, fuse or circuit breaker Check the power supply... -
Page 15: Notes
NOTES... - Page 16 RYOBI NEW ZEALAND PTY. LTD. AUCKLAND: 27 Clemow Drive, Mt Wellington, N.Z. Tel: (09) 573 0230 - Free Call: 0800 279 624 - Fax: (09) 573 0231 - www.ryobi.co.nz Contact during normal business hours. This Guarantee Form Should Be Retained By The Customer At All Times For your record and to assist in establishing date of purchase (necessary for in-guarantee service) please keep your purchase docket and this form completed with the following particulars.
Need help?
Do you have a question about the EMBS200 and is the answer not in the manual?
Questions and answers