Table of Contents
Advertisement
Service Manual
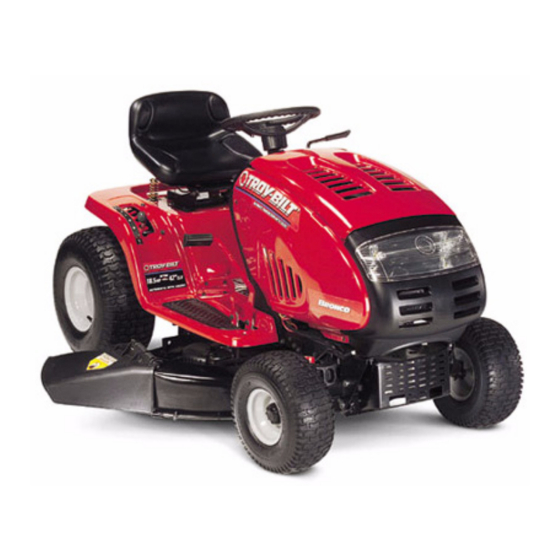
600 Series AutoDrive Lawn Tractor
NOTE: These materials are for use by trained technicians who are experienced in the service and repair of outdoor power
equipment of the kind described in this publication, and are not intended for use by untrained or inexperienced individuals.
These materials are intended to provide supplemental information to assist the trained technician. Untrained or inexperi-
enced individuals should seek the assistance of an experienced and trained professional. Read, understand, and follow
all instructions and use common sense when working on power equipment. This includes the contents of the product's
Operators Manual, supplied with the equipment. No liability can be accepted for any inaccuracies or omission in this pub-
lication, although care has been taken to make it as complete and accurate as possible at the time of publication. How-
ever, due to the variety of outdoor power equipment and continuing product changes that occur over time, updates will be
made to these instructions from time to time. Therefore, it may be necessary to obtain the latest materials before servicing
or repairing a product. The company reserves the right to make changes at any time to this publication without prior notice
and without incurring an obligation to make such changes to previously published versions. Instructions, photographs and
illustrations used in this publication are for reference use only and may not depict actual model and component parts.
MTD Products Inc - Product Training and Education Department
© Copyright 2005 MTD Products Inc. All Rights Reserved
FORM NUMBER - 769-01799
4/2005
Advertisement
Table of Contents

Related Manuals for Troy-Bilt 600 Series


Summary of Contents for Troy-Bilt 600 Series
-
Page 1: Service Manual
Service Manual 600 Series AutoDrive Lawn Tractor NOTE: These materials are for use by trained technicians who are experienced in the service and repair of outdoor power equipment of the kind described in this publication, and are not intended for use by untrained or inexperienced individuals. -
Page 3: Steering Adjustments
Step Through Rider Adjustments Steering Adjustments IMPORTANT: The front tires will have a "TOE- 7). From behind the axle, measure the distance hori- IN" between 1/16" and 5/16" to allow the unit to zontally from the inside of the left rim to the track properly. - Page 4 Variable Speed Drive 16). Secure the right hand ball joint to the right hand 18). Install the left hand ball joint using steps 15, 16, axle assembly with the lock washer and nut and 17. removed earlier, using a 1/2" wrench and a 9/16 NOTE: Make certain the same amount of rota- socket.
- Page 5 Variable Speed Drive Brake Adjustments IMPORTANT: Make certain the tractor comes to 4). Tighten the hex nut that secures the brake a complete stop when the brake pedal is assembly. depressed. Also, make certain the rear wheels 5). Remove the .011" feeler gauge from the brake do not roll when the parking brake has been assembly.
- Page 6 Variable Speed Drive 2). Measure the front blade tips to ground. 6). Locate both lock hex nuts on the front side of the deck stabilizer bracket. See figure 4. 3). Measure the rear blade tips to ground. 4). Make certain the front blade tips are 1/4" to 3/8" lower in the front than the rear blade tips.
- Page 7 Variable Speed Drive 2). Measure the outer blade tips to ground. Both 4). Rotate the 3/4" deck adjustment gear right or left measurements taken should be equal. See figure until the deck is level side to side and both blade tips to ground are equal in measurement.
-
Page 8: Cutting Deck Removal
Variable Speed Drive Deck Belt Removal and Installation 42" CUTTING DECK: 1). Lower the deck to the lowest position. 2). Pull the PTO idler pulley and bracket towards the discharge chute, relieving belt tension. See figure 1. Electric Clutch Pull Screws Idler FIGURE 2. - Page 9 Variable Speed Drive 3). Remove the deck belt from the lower pulley on the engine. NOTE: The 46" decks have an upper and a lower belt. The upper belt is removed for cutting deck removal. Front 4). Pull the rear deck support pins outward from the Stabilizer deck lift arms.
- Page 10 Variable Speed Drive 2). Remove the battery strap, battery, and the Upper Drive battery tray from the tractor. See figure 2. Belt FIGURE 4. VARIABLE-SPEED BELT REMOVAL AND REINSTALLATION: FIGURE 2. LOWER BELT: IMPORTANT: Prior to lower variable speed belt 3).
- Page 11 Variable Speed Drive 2). Raise the variable speed pulley and roll the lower NOTE: During reassembly, make certain the drive belt off. PTO clutch wires are routed inside the right hand drag link. 3). Remove the variable-speed pulley from the trac- tor through the battery box opening.
- Page 12 Variable Speed Drive Transmission Removal and Installation NOTE: Prior to performing transmission removal 8). Remove both of the self tapping screws that and installation, it is necessary to remove the secure the transmission to the front torque brack- upper drive belt. et using a 3/8 socket.
- Page 13 Variable Speed Drive 14). Loosen (DO NOT REMOVE) the hex washer 18). Slowly lower the transmission from the tractor. head self-tapping screw that secures the anti- See figure 6. rotation bracket to the brake assembly using 3/8 wrench. See figure 5. Anti-Rotation Bracket Screw...
Need help?
Do you have a question about the 600 Series and is the answer not in the manual?
Questions and answers