
Related Manuals for IOGear GUWH104KIT


Summary of Contents for IOGear GUWH104KIT
- Page 1 Installation Installation Installation Guide Wireless USB Hub and Adapter GUWH104KIT PART NO. M0427...
-
Page 3: Welcome
USB 2.0 without the need of wires between peripherals and the computer. To better serve you, IOGEAR offers an array of additional USB 2.0, USB 1.1, FireWire, KVM, and other peripheral products. For more information or to purchase additional IOGEAR products, visit us at www. -
Page 4: Table Of Contents
Table of Contents Welcome Introduction Features Requirements Package Contents Device Overview Installation Hardware Preparation Software Installation Driver Installation Advanced Settings Frequently Asked Questions Technical Support Limited Warranty Federal Communications Commission (FCC) Statement Contact... -
Page 5: Introduction
Introduction IOGEAR’s Wireless USB allows you to connect your USB peripherals and computer with all the ease and speed of USB 2.0 without the use of USB cables and extenders between the PC and your Wireless USB Hub. Gain all of the advantages of USB 2.0 without the hassle of wires cluttering up your workspace. Plug your USB devices into the Wireless USB Hub and within seconds you have wireless access and control over the devices with no delay, purely plug-and-play. -
Page 6: Features
Features • Wireless USB 2.0 speed through UWB medium • Simple hardware interface • Easy Installation has you connected in minutes • Solid 3-year limited warranty... -
Page 7: Requirements
Requirements • PC System requires Windows XP (with SP2 and .NET Framework 2.0) or Windows Vista • Available AC outlets in the room • Available USB ports • Software requires Windows and CD-ROM drive... -
Page 8: Package Contents
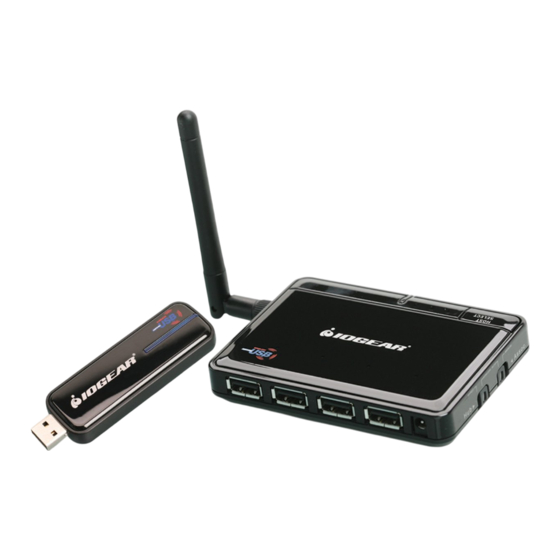
Package Contents 1 x Wireless USB Hub GUWH104 1 x Wireless USB Host Adapter GUWA100U 1 x Wireless USB Hub Antenna 1 x Wireless USB Hub Power Supply 1 x USB Type A to mini-B Cable 1 x Extension / Swivel Adapter 1 x Software CD (with Electronic Manual) 1 x Quick Start Guide... -
Page 9: Device Overview
Device Overview Host Selection button 4. Switch 1 (S1) Active Host LEDs 5. Switch 2 (S2) Power LED The default and recommended setting is to operate in Auto Association mode. In this mode, the Wireless USB Hub will automatically connect to the Wireless USB Host Adapter. -
Page 10: Installation
Installation Before we get started, please NOTE: Do not place Wireless USB devices under direct sunlight or near high heat emitting devices; Do not place Wireless USB devices near water or wet surfaces to avoid electric hazards; Do not place Wireless USB devices on any moving or unstable surfaces;... -
Page 11: Hardware Preparation
Hardware Preparation Do not connect the Wireless USB Host Adapter to your computer until you are instructed to do so later in the section titled “Driver Installation.” Remove the Wireless USB Host Adapter, Wireless USB Hub, USB 2.0 A to Mini B Cable, power adapter, antenna, extension/swivel adapter, and the installation CD from the package. -
Page 12: Software Installation
Software Installation Please always check www.iogear.com for the latest drivers. IMPORTANT NOTE: If your PC already has a version of this software installed, please be sure to un-install it before proceeding. Use Control Panel -> Add or Remove Programs. Scroll to “Ultrasuite with WiCenter Basic.”... - Page 13 Microsoft .NET Framework 2.0 is required by the UWB software. Once you begin the software installation, if .NET Framework 2.0 is not installed on your PC, the software will automatically prompt you to install before proceeding to the UWB software installation. If .NET Framework 2.0 is not installed, the following screen will appear.
- Page 14 The following window will display the status of the installation process. Depending on the particular system, this may take a few minutes to complete. Once .NET Framework 2.0 is installed, the UWB software will automatically begin the installation process. The fi rst window will explain that WiCenter software is going to be installed on your computer, this software will control the devices so select - Next.
- Page 15 The following window will request that you agree to the License Agreement before pro- ceeding with installation, select Yes. The window shown below allows you to select where the fi les for WiCenter are installed and stored. Once you have made your selections select - Next.
- Page 16 The following window confi rms that you are approving installation, select - Next. Once you have selected Next the WiCenter software will begin installation and show the status in a window similar to the one shown below.
- Page 17 Once all the software has been installed properly, you will see a window similar to the following stating installation has completed. Select “Finish” to fi nalize the software installation. After the software has fully installed, restart the PC.
-
Page 18: Driver Installation
Driver Installation Verify that WiCenter is running by double-clicking on the WiCenter icon created on the desktop during the installation process. The fi rst time that WiCenter is launched, the Wireless USB Connection Wizard will appear and will guide you through the Wireless USB connection process. - Page 19 STEP 1. Verify that the Wireless USB Host Adapter is con- nected to the extension/swivel adapter provided in the box. Plug the Wireless USB Host Adapter into an available USB port making sure that the extension/swivel adapter is adjusted to a 45 degree angle which will maximize range.
- Page 20 STEP 2. Verify that the Wireless USB Hub switches are set to Wireless and Automatic Association mode. Also, verify that the antenna is securely attached to the Wireless USB Hub and is pointed in a vertical position. Power on the Wireless USB Hub. Click Next to continue.
- Page 21 STEP 3. Plug the Wireless USB Hub into the PC with the USB 2.0 A to mini-B cable provided. Windows should state a new device has been detected and automatically install the necessary drivers for the Wireless USB Hub. Once the drivers have installed, click Next to continue.
- Page 22 The below window will pair the Wireless USB Hub to your PC. Select Automatic wireless reconnection (Recommended) and select Next. You should now see the wizard indicating that the association was successful. Once the association is successful and the Active HOST LED has stopped fl...
- Page 23 Wire- less USB Hub. Click Finish to exit the Wireless USB Connection Wizard and begin using your IOGEAR Wireless USB Host Adapter and Wireless USB Hub. Congratulations, you may now begin to use your...
- Page 24 Select the View Console option in WiCenter to view all available and connected Wireless USB devices in range. The Wireless USB Hub should now be visible and if you connect any devices to the Wireless USB Hub you will be able to view them through the dropdown menu shown to the right or through My Computer.
-
Page 25: Advanced Settings
Advanced Settings The advanced settings of WiCenter allow you to make changes related to the Channel that data is being transmitted on. The following shows the Advanced Settings tab which can be accessed by clicking on Settings My Wireless USB Radio Settings, and then selecting the Advanced tab on the window that appears. - Page 26 If the Channel needs to be changed manually, the following fi gure shows the available channels for selection.
- Page 27 Once a channel has been changed manually, the following window will appear indicating that the connection will be lost to the Wireless USB Hub while the channel is changed. Click Yes to change the channel. Once the channel is changed, the Wireless USB Hub will automatically re-connect.
-
Page 28: Frequently Asked Questions
Frequently Asked Questions Problem: WiCenter UWB Software reports errors when trying to use the Wireless USB Host Adapter and Wireless USB Hub on Windows XP operating system. Solution: Verify that Service Pack 2 (SP2) has been installed on your PC. Problem: No LEDs lighting up on the Wireless USB Hub. - Page 29 Wireless USB Hub and wait for the wireless connection. If still blinking, check the History window on WiCenter which will indicate if the IOGEAR Wireless USB Hub was associated. If not, associate the Wireless USB Host Adapter with the Wireless USB Hub using the mini-USB cable provided.
- Page 30 Problem: Wireless USB Hub will not associate with the Wireless USB Host Adapter. Solution: Verify that the WiCenter software is running by double-clicking on the WiCenter icon created on the desktop during the installation process. If the WiCenter icon is in the System Tray, this can be double-clicked in order to bring up the WiCenter user interface.
- Page 31 Problem: The IOGEAR Wireless USB Hub does not show up in the Console window when connected wirelessly to the Wireless USB Host Adapter.
-
Page 32: Technical Support
23 Hubble Irvine, CA 92681 You may also reach us online at www.iogear.com/support 24 hours a day. Please be ready to give a brief description of the problem, and what you were doing when the problem occurred, before calling Service Support. - Page 33 What is the purchase date and serial number of the product? Were any messages displayed on the screen when the error occurred? If so, what was the exact wording of the message? What type of Computer are you using? When does the problem occur? Can the problem be reproduced? If so, what are the steps necessary to reproduce the problem? What version of the OS are you using? What have you already tried to get the problem resolved?
-
Page 34: Limited Warranty
Limited Warranty IN NO EVENT SHALL THE DIRECT VENDOR’S LIABILITY FOR DIRECT, INDIRECT, SPECIAL, INCIDEN- TAL OR CONSEQUENTIAL DAMAGES RESULTING FROM THE USE OF THE PRODUCT, DISK, OR ITS DOCUMENTATION EXCEED THE PRICE PAID FOR THE PRODUCT. The direct vendor makes no warranty or representation, expressed, implied, or statutory with respect to the contents or use of this documentation, and especially disclaims its quality, performance, merchantabil- ity, or fi... -
Page 35: Fcc) Statement
Federal Communications Commission (FCC) Statement This device complies with part 15 of the FCC Rules. Operation is subject to the following two condi- tions: (1) this device may not cause harmful interference, and (2) this device must accept any interference received, including interference that may cause undesired operation. -
Page 36: Contact
All information furnished here is for informational purposes only and is subject to change without notice. IOGEAR, Inc. assumes no responsibility for any inaccuracies or errors that may appear in this... - Page 38 The use of our technology solutions helps reduce electronic waste. HEALTH IOGEAR supports healthy and fi t lifestyles. By integrating products with the latest scientifi c developments, IOGEAR’s solutions enhance the life of end-users. © 2007 IOGEAR, INC.
Need help?
Do you have a question about the GUWH104KIT and is the answer not in the manual?
Questions and answers