Operating Instructions 
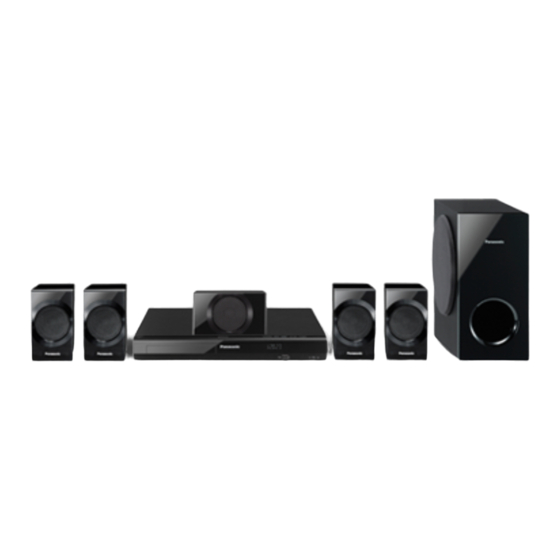
DVD Home Theater Sound System Model No. SC-XH160 SC-XH100 SC-XH60 This illustration shows SC-XH100. Thank you for purchasing this product. Please read these instructions carefully before using this product, and save this manual for future use. The illustrations shown may differ from your unit.
SB-HW20 SB-HW600 ≥ These operating instructions are applicable to models SC-XH160, SC-XH100 and SC-XH60 for a variety of regions. Unless otherwise indicated, illustrations in these operating instructions are of SC-XH100. ≥ Operations in these instructions are described mainly with the remote control, but you can perform the operations on the main unit if the controls are the same.
≥The main unit will automatically switch to standby mode < TV operations after 30 minutes of inactivity. Aim the remote control at the Panasonic TV and press the e.g. button. – There is no audio signal from an external device.
step 1 Preparing the speakers [XH160] Front speakers Preparation ≥ To prevent damage or scratches, lay down a soft cloth to assemble speakers. ≥ For assembly, use a Phillips-head screwdriver (not supplied). Make sure you have all the indicated components before starting assembly, setup, and connection. ≥...
step 2 Positioning step 3 Connections How you set up your speakers can affect the bass and the sound field. Turn off all equipment before connection and read the appropriate Note the following points: operating instructions. ≥ Place speakers on flat secure bases. Do not connect the AC mains lead until all other ≥...
∫ Connection without an ARC compatible TV This connection provides the best picture and audio quality. VIERA Link “HDAVI Control” If your Panasonic TV is VIERA Link compatible, you can operate your TV synchronising with home theater operations or vice versa AV IN 15, Linked operations with the TV).
step 4 AC mains lead connection step 6 Easy setup The Easy setup screen assists you in making necessary settings. To household mains socket Preparation Turn on your TV and select the appropriate video input mode AC mains lead (e.g. VIDEO 1, AV 1, HDMI, etc.) to suit the connection to this unit. (supplied) ≥...
Listening to the radio Using the START menu You can preset up to 30 channels. You can select desired source, change the settings, access playback/ The radio settings will be shown on the unit’s display. (Some settings are menus, etc., by using the START menu. also indicated on the TV screen.) Press [START]B to show the START menu.
When changing the surround sound effect, Whisper-mode Surround or the ≥ If your Panasonic TV is VIERA Link compatible, refer to “Linked sound modes, the setting is displayed on the TV screen if “DVD/CD” or “USB” is operations with the TV” ( 15) for other related functions.
Basic play Selecting sound mode Press [SOUND]: to select a sound mode. Preparation Each time you press the button: To display the picture, turn on your TV and change its video input mode Equaliser (e.g. VIDEO 1, AV 1, HDMI, etc.) to suit the connection to this unit. SUBW LVL: Subwoofer Level Press [Í]1 to turn on the unit.
Other modes of play [DVD-V] Show a disc top menu: [TOP MENU]7 [DVD-V] Show a disc menu: [MENU]C Return to previous screen: [RETURN]D Program and Random play [VCD] (with playback control) Show a disc menu: [RETURN]D [CD] [MP3] [JPEG] [Xvid] Turn PBC function on/off: [MENU]C Preparation Main unit display: [FL DISPLAY]E...
Repeat play Play Speed This works only when the elapsed play time can be displayed. It also works with all JPEG content. [DVD-V] To change play speed During play, press and hold [–REPEAT]9, to show the – from “k0.6” to “k1.4” (in 0.1-unit steps) repeat mode.
VIERA Link “HDAVI Control” is a convenient function that offers linked menu) operations of this unit, and a Panasonic TV (VIERA) under “HDAVI ≥ When you switch the TV input to TV tuner mode, this unit will Control”. You can use this function by connecting the equipment with automatically switch to “AUX”...
Changing the player settings Easy control only with VIERA remote control (For “HDAVI Control 2 or later”) You can control the playback menus of this unit with the TV’s remote Press [DVD]4 to select “DVD/CD”. control. When operating the TV’s remote control, refer to the below illustration for operation buttons.
Video menu Speaker Settings Select the delay time of the speakers. TV Aspect (Effective only when “Surround layout (Recommended)” mode is selected in “Speaker layout” ( 9, Easy setup).) Choose the setting to suit your TV. (Center and surround speakers only) ≥...
Media that can be played Others menu Slide Show Time Commercial discs Set the speed of the slideshow. Type of media/ ≥ 3 Seconds ≥ 5 Seconds ≥ 10 Seconds ≥ 15 Seconds Remarks Indicated as Logo Easy setup DVD-Video High quality movie and [DVD-V] music discs...
Video systems Speaker installation option This unit can play PAL and NTSC, but the “TV System” ( 17) of this unit must match the system of your TV. Attaching to a wall You can attach all of the speakers (except subwoofer) to a wall. Depending on the PAL video on the disc, the image may not be displayed correctly on an NTSC TV.
[XH160] Front speaker Troubleshooting guide Attach to a wall without the base and the stand. Before requesting service, make the following checks. If you are in doubt about some of the check points, or if the solutions indicated in the ...
Page 21
Disc operation Picture It takes time before play starts. The picture on the TV is not displayed correctly or disappears. ≥ Play may take time to begin when an MP3 track has still picture data. Even after the track starts, the correct play time will not be displayed. ≥...
United States and other countries. Unit displays HDAVI Control is a trademark of Panasonic Corporation. “NO PLAY” ≥ You inserted a disc the unit cannot play; insert one it can. ( “DVD Logo” is a trademark of DVD Format/Logo Licensing ≥...
SPEAKER SECTION Specifications [XH160] [Front\speakers\SB-HF75] Type 1 way, 1 speaker system (Bass reflex) GENERAL Speaker unit(s) Impedance 5 ≠ Power supply Full range 6.5 cm Cone type AC 220 V to 240 V, 50 Hz For India Output sound pressure 79 dB/W (1 m) AC 220 V to 240 V, 50/60 Hz Frequency range...
Safety precautions WARNING CAUTION Unit Unit ≥ To reduce the risk of fire, electric shock or product damage, ≥ This unit utilizes a laser. Use of controls or adjustments or performance – Do not expose this unit to rain, moisture, dripping or splashing. of procedures other than those specified herein may result in –...
Page 26
Panasonic Corporation Web Site: http://panasonic.net RQT9801-B C Panasonic Corporation 2012 F1212SN0...